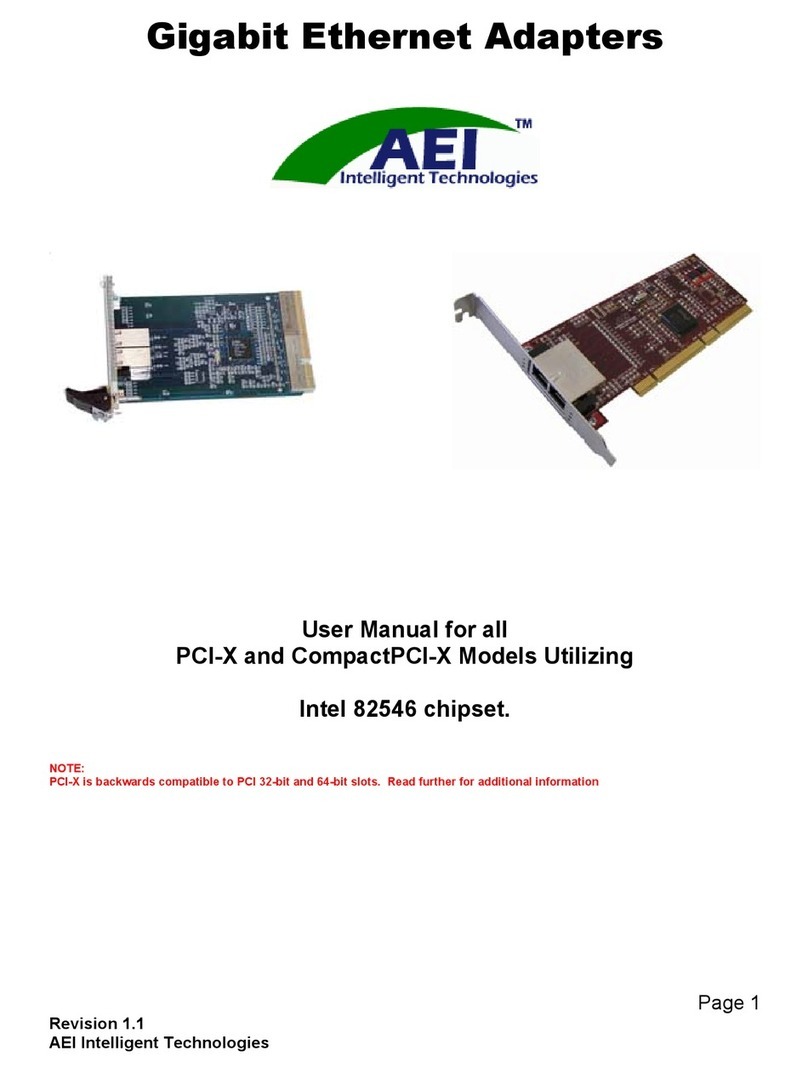
AEI Intelligent Technologies P100SC User manual

Rev. 2.2
3/11/03
FAST ETHERNET CARD (FX)
P100SC
PCI Fast Ethernet Adapter
100BaseFx Ethernet
User’s Guide
Please, read the “Warranty & Terms of Sale” Section for important information.
DEVICE DRIVERS:
In addition to AEI device drivers being embedded in most of the popular operating systems, AEI also
provides driver support for numerous platforms, architectures, and operating systems. We constantly
update these drivers as necessary, and offer complimentary PhobosLink Software. PhobosLink
provides for port aggregation, failover, and load balancing. Those using the PhobosLink Software must
load the appropriate AEI device driver.
Device drivers for AEI branded Fast Ethernet Cards are available at
•Download Drivers at www.aei-it.com

-i-
TABLE OF CONTENTS
DISCLOSURES & CERTIFICATIONS .................................................................................................1
WARRANTY & TERMS OF SALE.......................................................................................................2
ABOUT THIS GUIDE ..........................................................................................................................5
CHAPTER 1 -INTRODUCTION ..........................................................................................................6
CHAPTER 2 -INSTALLING NETWORK HARDWARE.........................................................................7
CHAPTER 3 -WINDOWS NT, 2000 & 2000 ADVANCED SERVER ......................................................9
CHAPTER 4 -WINDOWS 98 ............................................................................................................10
CHAPTER 5 -WINDOWS 95 ............................................................................................................11
CHAPTER 6 -NETWARE.................................................................................................................12
CHAPTER 7 -HP-UX .......................................................................................................................17
CHAPTER 8 -IRIX ...........................................................................................................................18
CHAPTER 9 -SOLARIS ...................................................................................................................19
CHAPTER 10 -MACINTOSH............................................................................................................20
CHAPTER 11 -LINUX ......................................................................................................................21

Disclosures & Certifications
-1-
Disclosures & Certifications
Copyright Statement
No part of this publication may reproduced in any form or by any means or used to make any derivative such as translation,
transformation, or adaptation without the express written permission of AEI, as stipulated by the United States Copyright Act of
1976.
Legal Disclosure
•AEI Intelligent Technologies, AEI, the AEI logo, and AEI products referenced herein are solely owned trademarks or
registered trademarks of Ace Electronics Inc.
•Phobos, PhobosLink, the Phobos Logo referenced herein are exclusively licensed trademarks or registered trademarks of
Ace Electronics Inc.
•Sun, Sun Microsystems, the Solaris logo, and Solaris are registered trademarks of Sun Microsystems, Inc.
•SPARC is a registered trademark of SPARC International, Inc. Products bearing SPARC trademarks are based on an
architecture developed by Sun Microsystems, Inc.
•Windows NT and Windows 95 are registered trademarks of Microsoft Corporation.
•AEI acknowledges other products/names mentioned herein are trademarks/registered of their respective holders.
•Any rights not expressly granted herein are reserved.
FCC Certifications
This equipment has been tested and found to comply with the regulations for a Class B digital device, pursuant to Part 15 of the
FCC Rules. These limits are designed to provide reasonable protection against harmful interference when the equipment is
operated in a commercial environment. This equipment generates, uses, and can radiate radio frequency energy and, if not installed
and used in accordance with this user’s guide, may cause harmful interference to radio communications. Operation of this
equipment in a residential area is likely to cause harmful interference, in which case the user will be required to correct the
interference at their expense.
If this equipment does cause harmful interference to radio or television reception, which can be determined by turning the equipment
off and on, the user is encouraged to try to correct the problem by one or more of the following measures:
•Reorient or relocate the receiving antenna.
•Increase the separation between the equipment and receiver
•Connect the equipment into an outlet on a circuit different from that to which the receiver is connected.
•Consult the dealer or an experienced radio/TV technician for help.
CE Mark Warning
This is a Class B product. In a domestic environment, this product may cause radio interference, in which case the user may be
required to take adequate measures.

Warranty & Terms of Sale
-2-
WARRANTY & TERMS OF SALE
PLEASE READ THE FOLLOWING TERMS AND CONDITIONS CAREFULLY BEFORE OPENING AND
INSTALLING THIS HARDWARE, SOFTWARE, FIRMWARE, ETC. (HEREIN COLLECTIVELY
“Product”). THIS IS A LEGAL AGREEMENT BETWEEN YOU AND AEI, ITS PARENT, AND OR
SUBSIDIARY DIVISIONS (HEREIN “AEI”). OPENING AND INSTALLING THIS PRODUCT YOU
HEREBY AGREE TO BE BOUND BY ALL TERMS AND CONDITIONS OF THIS WARRANTY & TERMS
OF SALE (HEREIN “AGREEMENT”). IF YOU DO NOT AGREE WITH THESE TERMS AND
CONDITIONS, YOU MAY RETURN THIS PRODUCT WITHIN THIRTY (30) DAYS OF AEI’s ORIGINAL
SHIPMENT FOR FULL REFUND (See “Hardware” Section 3 below for further details).
Hardware Warranty:
1. Not including the firmware, and software (see following SOFTWARE WARRANTY SECTION) AEI warrants to the original
END-USER purchaser of the AEI ETHERNET CARD (P130, P230, or P430) hardware (herein collectively “Hardware”) to
be free from defects in workmanship and materials, under normal use and service, for a period of three (3) years from the
date AEI ships said Hardware. In order for this warranty to be valid, this hardware product must remain in its original
system and be registered with AEI. If the Hardware proves to be defective within said warranty period, AEI shall at its
sole discretion either repair or replace product. Replacement product may be new or reconditioned, and shall be of
equivalent or better specifications relative to the defective product, but need not be identical. Any Hardware repaired by
AEI pursuant to this warranty shall have a warranty period of not less than thirty (30) days from date of such repair,
irrespective of original expiration of the warranty. All Hardware replaced or repaired under this warranty, become the sole
and exclusive property of AEI. Any service furnished by AEI that is beyond the scope of warranty service stated herein
will be invoiced to the customer on a time-and-materials basis (minimum charge of $150) in accordance with AEI’s then-
current standard rates.
2. RETURN REQUEST. All returns must be authorized by AEI. Warranty terms, conditions, and service requests may be
obtained by completing the RMA Request form available over the Internet www.aei-it.com. Warranty service will only be
provided to the original purchaser of this Hardware. If Hardware was procured through the distribution or resale channels,
please contact the firm who sold you the Hardware to request your RMA. AEI shall never be responsible for any software,
firmware, information, or memory data of customer contained in, stored on, or integrated with any Hardware returned to
AEI for warranty service. International customers are responsible for payment of incoming and outbound shipments.
3. AEI Limited 30-day Money Back Guaranty. The AEI Hardware may be returned for a full refund, not including the cost of
freight, insurance, and other miscellaneous shipping expenses. Customer is limited to 10 products per purchase order.
Program is available in the United States and Canada only.
Software Warranty:
1. DEFINITIONS. Let the term “Software” be defined as Drivers/Utilities, firmware, boot code, computer software,
associated media, any printed materials, any "on-line" or electronic documentation, PacketEngine Software, and/or the
PhobosLink™ software (collectively "Software") that is sold in conjunction with this documentation. The Software is
owned by AEI and protected by copyright laws and international copyright treaties, as well as other intellectual property
laws and treaties.
2. WARRANTY.
a. THE "SOFTWARE" IS PROVIDED "AS IS" WITHOUT WARRANTY OF ANY KIND, NEITHER EXPRESSED
NOR IMPLIED, INCLUDING BUT NOT LIMITED TO THE WARRANTIES OF MERCHANTABILITY, NON-
INFRINGEMENT OF THIRD PARTY RIGHTS, AND FITNESS FOR A PARTICULAR PURPOSE. AEI MAKES
NO REPRESENTATIONS THAT ANY SOFTWARE COMPLIES WITH THE APPLICABLE STATUTES, LAWS
OR REGULATIONS.
b. The entire risk as to the quality and performance of the Software is with you. Should the software prove
defective, you (and not AEI, its dealers, distributors, any licensor of AEI, nor the owner of the Software) assume
all costs of all necessary servicing, repair or correction. There is no warranty by AEI, or its parent or affiliates,
to any other party or person that the functions contained in the Software will meet your requirements or that the
operation of the Software will be uninterrupted or error free. You assume all responsibility for the selection of
the Software to achieve your intended results, and for the installation, use and results obtained from the
Software.

Warranty & Terms of Sale
-3-
3. SOFTWARE LICENSE.
a. The Software is licensed only to the END-USER, is not sold, and AEI retains all rights not expressly granted.
You acknowledge and agree the copyright, patent, trade secret, and all other intellectual property rights of
whatever kind in the Software and AEI Hardware and related specifications and documentation shall remain the
property of AEI. Nothing in this Agreement shall be construed as transferring any aspect of such rights to you,
or any accompanying the software, or any "on-line" or electronic documentation.
b. The Software contains or embodies proprietary intellectual property of AEI, Sun Microsystems, Intel, and others
or their licensors. No grant, conveyance, or license is made to you for any patents, copyrights, or any other
intellectual property except as specifically granted herein. You may not use the Software except in conjunction
with AEI Hardware. Software:You may install and use one copy of the Software on the computer that has
embedded AEI Hardware. Back-up: You may make a single back-up copy of the Software solely for archival
purposes. Limitation on Reverse Engineering, Decompilation, and Disassembly: You may not reverse
engineer, decompile, modify, adapt, translate, disassemble or otherwise attempt to discern the source code of
the Software. Cracks and Activation Codes: You many NOT crack the Software, or enter activation codes
obtained from any source other than AEI. Right to Audit End User: AEI reserves the right to audit the end
user to verify compliance with this Agreement. Network Services:If the Software includes functionality that
enables the computer to act as a network server, any number of computers may access or otherwise utilize the
basic network services of the server. However, you must acquire and dedicate a license for the Software for
each computer on which the Software is used or to which it is distributed. A license for the Software may not be
shared or used concurrently on different computers. Rental: You may not rent or lease the Software
individually. Software Transfer: You may permanently transfer all of your rights under this Agreement only as
part of a sale or transfer of the AEI Hardware provided you retain no copies, and you transfer Software
(including all component parts, the media, and printed materials), any upgrades, this Agreement, and the
recipient must agree to the terms of this Agreement. If the Software is an upgrade, any transfer must include all
prior versions of the Software.
4. U.S. GOVERNMENT RESTRICTED RIGHTS:
The Software and documentation are provided with RESTRICTED RIGHTS. Use, duplication, or disclosure by the
Government is subject to restrictions set forth in subparagraph (c)(1)(ii) of the Rights in Technical Data and Computer
Software clause DFARS 252.227-7013 or subparagraphs (c)(1) and (2) of the Commercial Computer Software -
Restricted Rights at 48 CFAR 52.227-19 as applicable. The Manufacturer is AEI, 41743 Enterprise Circle North, Suite
108, Temecula, CA 92590.
Limitation of Warranties:
1. IF THE AEI PRODUCT DOES NOT OPERATE AS WARRANTED AS DESCRIBED ABOVE, THE CUSTOMER’S SOLE
REMEDY SHALL BE, AT AEI’S OPTION, REPAIR OR REPLACEMENT OF SAID PRODUCT.
2. THE FOREGOING WARRANTIES AND REMEDIES ARE EXCLUSIVE AND ARE IN LIEU OF ALL OTHER
WARRANTIES, EXPRESSED OR IMPLIED, EITHER IN FACT OR BY OPERA TION OF LAW, STATUTORY OR
OTHERWISE.
3. EXCEPT AS EXPRESSLY SET FORTH HEREIN, AEI DISCLAIMS ALL WARRANTIES WITH REGARD TO THE
INFORMATION AND PRODUCTS PROVIDED, INCLUDING THE IMPLIED WARRANTIES OF MERCHANTABILITY,
FITNESS FOR A PARTICULAR PURPOSE, AND NON-INFRINGEMENT.
4. THIS WARRANTY DOES NOT EXTEND TO HARDWARE IF AEI’S TESTING AND EXAMINATION DISCLOSE THAT
THE ALLEGED DEFECT IN THE PRODUCT DOES NOT EXIST, OR REPAIR IS REQUIRED AS A RESULT OF (A)
ACCIDENT, NEGLECT, MISUSE, FAILURE OR SURGE OF ELECTRIC POWER, FAILURE OF CUSTOMER TO
PROVIDE APPROPRIATE ENVIRONMENTAL CONDITIONS, OR CAUSES OTHER THAN ORDINARY USE; (B)
FAILURE CAUSED BY A PRODUCT FOR WHICH AEI IS NOT RESPONSIBLE; (C) CUSTOMER'S CONNECTION OF
ANOTHER MACHINE OR DEVICE TO HARDWARE THAT MAKES SERVICE IMPRACTICAL OR THAT HAS CAUSED
DAMAGE TO SUCH HARDWARE; (D) REPAIR OR ALTERATION, OR ATTEMPTED REPAIR OR ALTERA TION, OF
THE PRODUCT BY ANYONE OTHER THAN AEI, OR (E) DAMAGE CAUSED BY NATURAL OR MANMADE ACTS OR
DISASTERS. THIS WARRANTY DOES NOT INCLUDE COSMETIC REPAIRS; REFURBISHMENT; FURNISHING
CONSUMABLES, SUPPLIES, OR ACCESSORIES; MAKING ACCESSORY CHANGES, OR ATTACHING ADDITIONAL
DEVICES.
5. AEI NEITHER ASSUMES NOR AUTHORIZES ANY OTHER PERSON OR ENTITY TO ASSUME FOR IT ANY OTHER
LIABILITY IN CONNECTION WITH THE SALE, INSTALLATION, MAINTENANCE, OR USE OF AEI PRODUCTS.
Limitation of Liability:
1. IN NO EVENT WILL AEI, ITS PARENT, SUBSIDIARIES, OR ANY THIRD PARTY OR PERSON BE LIABLE TO YOU OR
ANY OTHER PARTY FOR ANY DAMAGES, INCLUDING LOST DATA, LOST PROFITS, LOST SAVINGS OR OTHER
INCIDENTAL OR CONSEQUENTIAL DAMAGES ARISING OUT OF THE INSTALLATION, MAINTENANCE, USE,

Warranty & Terms of Sale
-4-
PERFORMANCE, OR INABILITY TO USE THE PRODUCT EVEN IF AEI OR THE OTHER THIRD PARTY HAS BEEN
ADVISED OF THE POSSIBILITY OF SUCH DAMAGES.
2. UNDER NO CIRCUMSTANCES NOR AT ANYTIME SHALL AEI’S LIABILITY EXCEED THE REFUND VALUE OF THE
PRODUCT SOLD WITH THIS DOCUMENTATION.
Miscellaneous:
1. REPRESENTATION: If you are an employee or agent, you represent and warrant that you have adequate legal capacity
to enter into this Agreement on behalf of your employer or principal. As such, the terms and conditions of this Agreement
bind your employer or principal to the terms and conditions of this Agreement.
2. PURPOSE: Product sold is provided for resale or commercial purposes only, regardless on how an individual buyer will
use said Product.
3. APPLICABLE LAW: The laws of the United States of America, State of California, and County of Riverside shall govern
this Agreement and any dispute hence forth arising. You hereby agree to personal jurisdiction in any of the State or
Federal Courts in that county. AEI (or its authorized legal representative) reserves the sole right to select or approve
alternative County, State, or Federal jurisdictions at its sole discretion, including, but not limited to trial or arbitration
forums.
4. SEVERABILITY. If a competent court holds any term or condition of this warranty void or unenforceable, all other terms
and conditions shall survive.
5. BREACH. This Warranty and all other obligations of AEI will terminate immediately if you breach any of these Warranty
terms and conditions. In that event, you subsequently acknowledge that AEI has no current or future liability to you, or
any third party.
6. IMPORT/EXPORT LAWS. You agree and are solely responsible to ensure you comply with the export laws, regulations,
and treaties of the United States of America or any other governing jurisdictions.
7. MODIFICATIONS AND CHANGES: This Agreement (and publication) is subject to change anytime without notice, at the
sole discretion of AEI, and shall be made effective upon the date of said change. Changes maybe made periodically to
the information herein; these changes will be incorporated in neweditions of the publication, which can be obtained at
www.aei-it.com (Software & Documentation Download Page). AEI reserves the right to make improvements and/or
changes at any time in the product and programs described in this publication.
8. PAYMENT. Customer agrees to pay all collection, court, attorney, travel, and all miscellaneous fees associated with their
slow -payment, or non-payment of any invoice(s) to AEI. All invoices 30 days past due shall be assessed the lesser of 1 ½
percent simple interest per month, or maximum allowable by law. Agreement shall be governed as described above
Section 3.
9. ENTIRE AGREEMENT: This Agreement sets forth the entire agreement and understanding between you and AEI with
respect to the subject matter hereof and supersedes and cancels all previous negotiations, agreements, commitments,
and writings in respect to the subject matter hereof.

About This Guide
-5 -
About This Guide
INTRODUCTION
This guide describes how to install and configure the AEI™ Ethernet Card 10/100BASE-T", and AEI's
PhobosLink Port Aggregation Software.
CONVENTIONS
The following are text and icon conventions that are used throughout this guide:
Text Conventions
• Items in bold should be typed in as they appear.
• Items in italics are produced by the system.
• Items offset by [brackets] are keys that you should press when instructed to do so.
• Commands appear in single quotes, like this: ‘command’ Important Notices
CAUTION:
These notes include directions that you must follow to avoid immediate system damage or loss of data.
NOTE:
These notes call attention to important features or instructions

Ch 1 -Introduction
-6 -
Chapter 1 -INTRODUCTION
The AEI ETHERNET CARD is a 32-bit Network Interface Card (NIC) for use in workstations and servers
with PCI 2.1 compliant expansion slots. The P100SC places one Fast Ethernet Port or Interface on a
single PCI card. The P100SC operates at 100Mbps as well as at both half and full duplex. The P100SC
also supports PhobosLink Port Aggregation Software.
The instructions for installing the P100SC on Windows, Netware, HP-UX, Linux, Solaris, and FreeBSD
are described in this manual.
AEI ETHERNET CARD FEATURES
The AEI ETHERNET CARD gives you the following capabilities:
•100Base-Fx port on a single PCI card.
•PhobosLink Port Aggregation Software.
•Tap resistant fiber optic connectivity.
•Boot ROM Support for all popular operating systems.
•Minimizes host CPU utilization and maximizes performance with bus mastering capability.
•Provides easy monitoring with two status LEDs per port: Link (green), and Transmit (amber).

Windows NT
-7-
Chapter 2 -INSTALLING NETWORK HARDWARE
This chapter describes how to install the AEI ETHERNET CARD in your computer and connect it
to a network.
INSPECTING THE AEI ETHERNET CARD
Before installing the AEI ETHERNET CARD in your computer, inspect the AEI ETHERNET
CARD for obvious damage that may have occurred in shipping.
The package should contain the following items:
•AEI™ P100SC network interface card (NIC)
•P100SC Driver Suite
•Boot ROM(s), if ordered separately.
If you find any omissions or damage, contact your network supplier and the carrier that delivered
the package immediately.
INSTALLING THE HARDWARE
Follow these steps to install the P100SC.
PREPARE THE P100SC CARD AND THE SERVER
1. Unpack and inspect the P100SC card for damage.
CAUTION:
The AEI ETHERNET CARD is packed in an anti-static caddy to protect it from static
charges and mechanical damage. Before removing the AEI ETHERNET CARD from the
box, touch the metal chassis of your computer. You can maintain grounding by wearing a
wrist ground strap attached to the chassis.
2. Exit all open applications and user processes.
3. Shut the computer down.
4. Turn off the power to the server and attached devices.
5. Unplug the power cable from the power source.
6. Remove the computer cover from the server.(You may need to refer to the
documentation that accompanied the computer for detailed instructions for removing the
cover and adding PCI cards.)
7. Locate an empty PCI-bus expansion slot.
CAUTION:
Ground yourself to the computer chassis to prevent static discharge.

Windows NT
-8-
INSTALL THE P100SC CARD
1. Remove the metal expansion slot cover and screw from the chassis.(Save the slot cover
in case you remove the card in the future and do not wish to replace it.)
2. Insert the P100SC card into the PCI-bus expansion slot. Press down firmly on the card to
seat it properly.
3. Use the screw removed earlier to secure the P100SC card bracket to the system chassis.
4. Replace the system cover.
5. Reconnect the server power cable, and turn on power to the server.
CONNECTING THE P100SC TO ETHERNET
1. Use 62.5/125 ∝m multi-mode fiber cables with SC connectors.
2. Align the keyways with the “key ” on the connector and put the connectors onto the ports
until the connectors click into place.
3. The green Link LED should be solidly lit. If the Link LED does not light, see the
Troubleshooting section for suggestions. The amber TX LED will flash as packets are
transmitted to the network.
4. To disconnect a cable, simply pull the SC connector away from the card.

Windows NT
-9-
Chapter 3 -WINDOWS NT, 2000 & 2000 Advanced Server
INSTALLING THE DRIVER
1. Make sure the computer is powered up and Windows NT is running.
2. Insert the P100SC Drivers CD-ROM into the server ’s disk CD-ROM drive.
3. Open the “Control Panel ”.
4. Double-click “Network ”. The “Network Configuration ” window will open.
5. Click the “Adapters ” tab.
6. Click “Add ”. The available adapter will appear in the list window.
7. Click “Have Disk ” and enter the drive letter of CD--ROM drive with the installation disk
followed by the directory “WinNT4 ” (e.g.,D:\WinNT4 ).The “Select OEM Option ” window
will appear, listing the software you can install.
8. Select “Phobos P100SC Fast Ethernet Adapter ”.The software will load, and the newly
installed adapters will appear in the adapter window list.
9. Click “Close ”. The window for assigning network addresses will open.
10. Go on to Assigning Network Addresses, below.
ASSIGNING NETWORK ADDRESSES
Follow these steps to assign an IP address to the interface on the P100SC card.
1. Select the “IP Address ” tab. You may either choose to specify an IP address or use the
DHCP server to assign an address. If you want to assign an IP address manually,
proceed to step 2.If you want to use a DHCP server, proceed to step 3.
2. To assign an IP address manually, you must enter an IP address and a Subnet Mask. If
you will be using a gateway, you must enter an IP address for the default gateway
setting. A message box will appear saying, “The adapter requires at least one IP
address. Please enter one.” Click “OK ”.Go on to step 4.
3. If you have elected to use a DHCP server, click “OK ” or “Apply ”.A message box will
appear saying, “The adapter requires at least one IP address. Please enter one.” Click
“OK ”.Go on to step 4.
4. You will have the option to reboot the server so that the changes take effect. If all other
applications are closed, reboot the server. Otherwise, select the option to not reboot,
close all applications, and then restart the server.

Windows 98
-10 -
Chapter 4 -WINDOWS 98
INSTALLING THE DRIVER
The P100SC is a plug-and-play device and should be automatically detected upon boot up.
Windows 98 will suggest loading its own driver. However, we recommend loading the driver off
the P100SC Drivers CD-ROM. Follow these instructions.
1. Upon bootup, the Windows 98 Wizard will appear and search for the appropriate drivers.
Click “Next ”.
2. Select the option to display a list of drivers in a specific location. Click “Next ”.
3. In the “Select Device ” window, select the “Have Disk ” button. Insert the P100SC Drivers
CD-ROM into the server ’s CD-ROM drive. Then click “Browse ” and select the drive with
the P100SC Drivers CD-ROM in it. Navigate to the Win98 directory, and select the file
NetPCI.inf .Click “OK ”.
4. Verify that the driver being installed is the P100SCn3.inf driver, and click “OK ”. Click
“Next ” to continue.
5. The server will copy file from the CD-ROM. When completed, click “Finish ” and restart
the server.
After rebooting Windows 98,you will be able to connect to your network by double-clicking the
“Network Neighborhood ” icon.

Windows 95
-11 -
Chapter 5 -WINDOWS 95
INSTALLING THE DRIVER
The P100SC is a plug-and-play device and should be automatically detected upon boot up.
Windows 95 will suggest loading its own driver. However, we recommend loading the driver off
the P100SC Drivers CD-ROM. Follow these instructions.
1. Upon bootup, the “New Hardware Found ” menu will appear.. Click “Driver from disk
provided by hardware manufacturer ”.
2. Click “Browse ”.Insert the P100SC Drivers CD-ROM into the server ’s CD-ROM drive.
Then click “Browse ” and select the drive with the P100SC Drivers CD-ROM in it.
Navigate to the Win95 directory, and select the file P100SCn3.inf .
3. Verify that the driver being installed is the P100SCn3.inf driver, and click “OK ”.
4. Restart the server.
After rebooting Windows 95,you will be able to connect to your network by double-clicking the
“Network Neighborhood ” icon..
NOTE:
If you are using a version of Windows 95 released prior to service pack 2.x, you will need to
follow the instructions found in the online documentation for Windows 95.

NetWare
-12 -
Chapter 6 -NETWARE
Depending upon the version of NetWare in use, you may use INSTALL or NWCONFIG to install the
drivers. The command-line options supported by the drivers are also presented in this chapter,
though you may wish to use INETCFG instead.
NETWARE 4.X DRIVERS
NOTE:
NetWare automatically detects any new network cards installed. Once it finds the new card, you
will be asked whether to allow NetWare to pick and load a network driver or to exit from the
operation. Please exit. As with any new network card, it is doubtful that the version of NetWare
currently running will have the latest network drivers. If you allow NetWare to continue, it will
make its best guess as to the proper driver to load. Using the incorrect driver could cause the
NetWare server to crash.
1. Place the installation disk into the CD-ROM drive.
2. At the System Console screen, enter load cdrom to load CD-ROM drivers for the system.
3. At the System Console, enter cd mount phobos to mount the installation disk.
NOTE:
At the time of publication, the installation CD-ROM label was “PHOBOS ”.If you receive
an error message that the volume is not found, you can verify the name of the CD by
entering cd volume list at the System Console to find the actual CD-ROM volume
name.
4. At the System Console, enter load install .The “Installation Options ” menu will open.
5. Select “Driver Options ”.
6. Select “Configure Network Drivers ”.The “Additional Driver Actions ” menu will open.
7. Select “Load an additional driver ” ((if other drivers have been installed previously) or
“Select a driver ” ((if no other drivers are present).A list of network drivers that NetWare
recognizes will open.
8. Press Insert .
9. Press F3 ,delete the entry already loaded, and enter phobos:nwserver \4x . Remember
to replace the CD-ROM volume label with the correct one, if necessary. A menu listing
two options will appear:
P100-SC.LAN
Select the “P100-SC.LAN ” option.
10. When prompted to copy the driver, select “Yes ”.
11. If asked whether to save the existing files, select “Yes ” if you want to keep backup
copies; otherwise, they will be overwritten.

NetWare
-13 -
12. Three windows will appear: “Protocols ”,“Parameters ”, and “Board Actions ”. The
“Protocols ” window contains the following fields:
•“IPX”—This option is always selected.
•“TCP/IP”—If you choose this option, you will be asked to specify the IP Address and IP
Mask for this Ethernet port.
•“AppleTalk”—Select this option if the NetWare server will be using the AppleTalk
protocol.
The “Parameters” window contains the following fields:
•“Port Number”—Enter the index number of the physical interface to use. This parameter
is required.
•“Node Address”—This field usually should be left blank, causing the driver to use the
unique pre-assigned Ethernet address supplied with the card. However, it can be used to
override the Ethernet address used by the port if you wish to administer Ethernet
addresses locally according to the IEEE 802.2 specification.
•“Connection Type”—The default is Auto-Negotiation. However, if the other node does
not support the standard IEEE auto-negotiation protocol, or does not implement it
properly, it may be necessary to force a particular connection type (10Base-T or
100Base-T,Full-or Half-Duplex).Note that if you disable Auto-Negotiation and force the
connection type on the P100SC,you must also force the connection type on the device at
the other end of the cable.
•“Receive Buffers ”—Indicates the number of packets that can be received by the NIC
and stored in the host ’s memory while waiting to be processed by the NetWare protocol
stacks bound to the P100SC driver. The default value is 10.Increasing this value may
improve performance and reduce the chance of packet loss on heavily loaded servers.
NOTE:
If you increase this value for the P100SC and if you have more than one NIC in the system, you
may have to increase the system-wide “Minimum Packet Receive Buffers ” and//or “Maximum
Packet Receive Buffers” settings. Otherwise, the P100SC driver instance you configured may not
load successfully. The Minimum and Maximum Packet Receive Buffers settings must both be at
least as large as the sum of the Receive Buffers settings for the P100SC port in the system. Use
the NetWare MONITOR program and select “Server parameters ”,then choose the
“Communications ” category, and edit the fields labeled “Maximum Packet Receive Buffers ” and
“Minimum Packet Receive Buffers ”.
• “Transmit Descriptors ”—Indicates the number of packets that can be queued at once
for transmission by the P100SC.Increasing this value may improve the transmit throughput of
heavily loaded servers; however, in most situations the default setting should be sufficient.
13. When you are done configuring the P100SC board, return to the System Console and
enter the commands down and restart server, pressing Enter after each command.
14. When the server is back online, you can test network communication with ping and
ipxping commands.
Command-Line Options for 4.x

NetWare
-14 -
Command-line options are the same for both NetWare 4.x and NetWare 5.x. The complete list of
command-line options for the P100SC driver is presented in the section Command-Line Options
for 5.x in the NetWare 5.x Drivers below.
NETWARE 5.X DRIVERS
NOTE:
NetWare will automatically detect any new network cards installed. Once it finds the new card,
you will be asked whether to allow NetWare to pick and load a network driver or to exit from the
operation. Please exit the operation. As with any new network card, it is doubtful that the version
of NetWare you are currently running will have the latest network drivers. If you allow the
operation to continue, NetWare will make its best guess as to the proper driver to load. Using the
incorrect driver could cause the NetWare server to crash.
1. Place the installation disk into the CD-ROM drive.
2. At the System Console screen, enter cdrom to load CD-ROM drivers for the system.
3. At the System Console screen, enter nwconfig .The “Configuration Options ” menu will
open.
4. Select “Driver Options ”.
5. Select “Configure Network Drivers ”.The “Additional Driver Actions ” menu will open.
6. Select “Load an additional driver ” ((if other drivers have been installed previously) or
“Select a driver ” ((if no other drivers are present).A list of network drivers that NetWare
recognizes will open.
7. Press Insert.
8. Press F3 ,delete the entry already loaded, and enter phobos:nwserver \5x .
NOTE:
At the time of publication, the installation CD-ROM label was “PHOBOS ”.If you receive
an error message that the volume is not found, you can verify the name of the CD by
entering volume at the System Console to find the actual CD-ROM volume label.
9. A menu listing two options will appear:
P100SC.LAN
Select the “P100SC.LAN ” option.
10. When prompted to copy the driver, select “Yes ”.
11. If you are asked whether to save the existing files, select “Yes ” if you want to keep
backup copies; otherwise, they will be overwritten.
12. Three windows will appear: “Protocols ”,“Parameters ”,and “Board Actions ”. The
“Protocols ” window contains the following fields:
•“IPX ”—This option is always selected.
•“TCP/IP ”—If you choose this option, you will be asked to specify the IP Address and IP
Mask for this Ethernet port.

NetWare
-15 -
•“AppleTalk ”—Select this option if your NetWare server will be using the AppleTalk
protocol.
The “Parameters ” window contains the following fields:
•“Port Number ”—Enter the index number of the physical P100SC port to use. This
parameter is required.
•“Node Address ”—This field usually should be left blank, causing the driver to use the
unique pre-assigned Ethernet address supplied with the card. However, it can be used to
override the Ethernet address used by the port if you wish to administer Ethernet
addresses locally according to the IEEE 802.2 specification.
•“Connection Type ”—The default is Auto-Negotiation. However, if the other node does
not support the standard IEEE auto-negotiation protocol, or does not implement it
properly, it may be necessary to force a particular connection type (10Base-T or
100Base-T,Full-or Half-Duplex). Note that if you disable Auto-Negotiation and force the
connection type on the P100SC, you must also force the connection type on the device at
the other end of the cable.
•“Receive Buffers ”—Indicates the number of packets that can be received by the NIC
and stored in the host ’s memory while waiting to be processed by the NetWare protocol
stacks bound to the P100SC driver. The default value is 10 receive buffers. Increasing
this value may improve performance and reduce the chance of packet loss on heavily
loaded servers.
NOTE: If you increase this value for the P100SC port and if you have more than one NIC
in the system, you may have to increase the system-wide “Minimum Packet Receive
Buffers ” and//or “Maximum Packet Receive Buffers ” settings.. Otherwise, the P100SC
driver you configured may not load successfully. The Minimum and Maximum Packet
Receive Buffers settings must both be at least as large as the sum of the Receive Buffers
settings for all the P100S C ports in the system. Use the NetWare MONITOR program
and select “Server parameters ”, then choose the “Communications ” category, and edit
the fields labeled “Maximum Packet Receive Buffers ” and “Minimum Packet Receive
Buffers”.
•“Transmit Descriptors ”—Indicates the number of packets that can be queued at once for
transmission by the P100SC.Increasing this value may improve the transmit throughput
of heavily loaded servers; however, in most situations the default setting should be
sufficient.
13. When you are done configuring the P100SC 430 board, return to the System Console
and enter restart server.
14. When the server is back online, you can test network communication with ping and
ipxping commands.
Command-Line Options for 5.x
For experienced system administrators who may want to install the driver manually by loading it
on the server console command line or editing the AUTOEXEC.NCF startup file, a list of command-
line options understood by the P100SC.LAN driver is presented below:

NetWare
-16 -
index The index number of the P100SC port for the driver to attach to. Index number 1
indicates the port on the first card,2 represents the ports on the second card, etc.
media This option selects the connection type for the given P100SC port to use as one of the
following numeric values:
0 :IEEE Auto-Negotiation
1 :Force 10Base-T Half Duplex mode
2 :Force 10Base-T Full Duplex mode
3 :Force 100Base-T Half Duplex mode
4 :Force 100Base-T Full Duplex mode
rxringsize This option selects the number of receive buffers for the driver to use.
txringsize This option selects the number of transmit buffers for the driver to use.
The P100SC driver also supports the standard frame, node, and name command-line options.

HP-UX
-17 -
Chapter 7 -HP-UX
INSTALLING THE DRIVER
You must be logged in as root to install and configure the drivers. If you do not know the root
password for the system, contact your system administrator.
1. If the system is already on, enter su at the command prompt. You will be prompted for
the root password. If the system is not on, power it up, and enter the root login and
password when prompted.
2. Place the P100SC Drivers CD in the CD-ROM drive. We recommend that you use the
am(1M)HP-UX graphical system management interface to mount the CD-ROM drive. To
start am(1M),enter:
#/usr/sbin/sam .
3. Click “Disks and File Systems ”.
4. Click “Disk Devices ” and select the appropriate CD--ROM entry.
5. Select “Add not using the logical volume manager ” from the “Actions ” menu. We
suggest that you use /cdrom as the mount point.
HP-UX 10.20 OR LATER
NOTE:
The following examples assume that you mounted the CD-ROM on to the /cdrom directory.
Otherwise, adjust the following commands as necessary:
1. Run the standard HPUX SWINSTALL program to install the system software, rebuild the
kernal, and reboot the server. Enter:
#swinstall -s /cdrom/HP -x software_view=products .
2. Following standard SWINSTALL practices, install the software product PSC_1020 .
3. The final stage of the SWINSTALL process will reboot the system with a new kernel that
contains the PSC driver. The new network interface names are “psc ”. After the reboot
process is complete, login again as a root user, and verify that the new interface is
present by entering:
#ifconfig.psc0
This command should return this line:
psc0: flags=822<BROADCAST,NOTRAILERS> .

IRIX
-18 -
Chapter 8 -IRIX
INSTALLING THE DRIVER
You must be logged in as root to install and configure the drivers. If you do not know the root
password for the system, contact your system administrator.
1. If the system is already on, enter su at the command prompt. You will be prompted for
the root password. If the system is not on, power it up, and enter the root login and
password when prompted.
2. Place the P100SC Drivers CD in the CD-ROM drive.
3. At the prompt, enter df to verify that mediad is running. If mediad is not running, enter
hinv to determine the SCSI address of your CD-ROM drive.
4. Use the mount command to mount the CD-ROM drive.
Enter mount -r /dev/ dsk/dks1d#s7 ,substituting the SCSI address of the CD-ROM drive
for the “#” character.
5. Enter the inst command. The prompt will change to “Inst>”.
6. For systems using the IRIX a 6.3 operating system, enter:
from /CDROM/IRIX/6.3/dist
For systems using the IRIX a 6.4 operating system, enter:
from /CDROM/IRIX/6.4/dist
For systems using the IRIX a 6.5 operating system, enter:
from /CDROM/IRIX/6.5/dist
7. Enter the go command.
8. Enter the quit command to leave the install mode.
9. Reboot the system by entering shutdown -go .
Table of contents
Other AEI Intelligent Technologies Adapter manuals
Popular Adapter manuals by other brands
Atlantis Land
Atlantis Land Wireless Turbo USB Adapter NetFly USB-54T Specifications
NETGEAR
NETGEAR ProSafe AX745 installation guide
Quantum
Quantum DLT-V4 installation guide
SMC Networks
SMC Networks HPAV-ETH - FICHE TECHNIQUE Product overview

TP-Link
TP-Link TL-WN910N - installation guide
Comcast
Comcast XFINITY user guide
