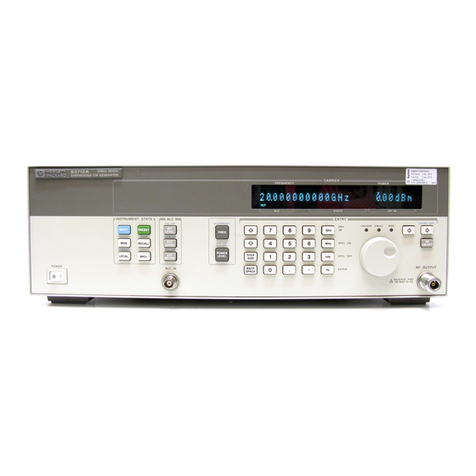
Agilent Technologies E8257D Installation and operation manual

Installation Note
Part Number E8251-90302
Printed in USA March 2008
Agilent Technologies E8257D PSG Signal Generators
Add Option 1E1 (Attenuator)
Kit Part Numbers:
E8251-60384 - For Option 520
E8251-60385 - For Option 540
E8251-60383 - For Options 550 and 567
NOTE For the latest revision of this installation note, go to the
following website:
http://www.agilent.com/find/psg

Notice
The information contained in this document is subject to change without notice.
Agilent Technologies makes no warranty of any kind with regard to this material, including but not
limited to, the implied warranties of merchantability and fitness for a particular purpose. Agilent
Technologies shall not be liable for errors contained herein or for incidental or consequential
damages in connection with the furnishing, performance, or use of this material.
© Copyright 2004-2008 Agilent Technologies Inc.

3
Add Option 1E1 (Attenuator)
Kit Part Numbers: E8251-60384, E8251-60385, and E8251-60383
Introduction
This upgrade kit adds Option 1E1 (Attenuator) to the E8257D (Analog) PSG Signal Generators.
Installation includes the following major steps, starting on page 6:
1. Check signal generator functionality, page 6.
2. Remove the outer and inner signal generator covers, starting on page 7.
3. Install Option 1E1, page 10.
4. Activate Option 1E1, page 13.
5. Verify proper installation of Option 1E1, page 16
6. Re-assemble the signal generator, page 16.
7. Verify signal generator calibration, page 16.
Product Affected: . . . . . . . . . . . . . . . . . . . . . . . . . E8257D
Serial Numbers: . . . . . . . . . . . . . . . . . . . . . . . . . . All
Options: . . . . . . . . . . . . . . . . . . . . . . . . . . . . . . . .
To Be Performed By: . . . . . . . . . . . . . . . . . . . . . . (X) Agilent Technologies Service Center
(X) Personnel Qualified by Agilent Technologies
(X) Customer
Estimated Installation Time: . . . . . . . . . . . . . . . 1.5 hours
Estimated Verification Time: . . . . . . . . . . . . . . . Option 520 = 8 hours
Option 540 = 15 hours
Option 550 = 16 hours
Option 567 = 16 hours

4
Installation Kit Parts List
Table 1 E8251-60384, for Option 520
Item Quantity Description Part Number
1 1 Installation Note E8251-90302
21 Attenuator 115 dB E8251-60070
3 1 Semi-Rigid Cable E8251-20094
4 1 Semi-Rigid Cable E8251-20026
5 1 Semi-Rigid Cable E8251-20027
6 1 Semi-Rigid Cable E8251-20095
7 2 Mounting Screw 0515-1035
8 1 Entitlement Certificate n/a
Table 2 E8251-60385, for Option 540
Item Quantity Description Part Number
1 1 Installation Note E8251-90302
21 Attenuator 115 dB E8251-60070
3 1 Semi-Rigid Cable E8251-20025
4 1 Semi-Rigid Cable E8251-20071
5 1 Semi-Rigid Cable E8251-20072
6 1 Semi-Rigid Cable E8251-20028
7 2 Mounting Screw 0515-1035
8 1 Entitlement Certificate n/a

5
Tools Required
• TORX T-10 driver
• TORX T-15 driver
• TORX T-20 driver
• 5/16” open-ended wrench
• Needle-nose pliers
•Scissors
Safety Considerations
WARNING Before you disassemble the instrument, turn the power switch off and
unplug the signal generator. Failure to unplug the signal generator can
result in personal injury.
CAUTION Electrostatic discharge (ESD) can damage or destroy electronic components. All
work on electronic assemblies should be performed at a static-safe workstation.
Table 3 E8251-60383, for Options 550 and 567
Item Quantity Description Part Number
1 1 Installation Note E8251-90302
21 Attenuator 90 dB E8251-60393
3 1 Semi-Rigid Cable (for Option 567) E8251-20319
4 1 Semi-Rigid Cable E8251-20320
5 1 Semi-Rigid Cable E8251-20322
6 1 Semi-Rigid Cable (for Option 567) E8251-20321
7 1 Semi-Rigid Cable (for Option 550) E8251-20025
8 1 Semi-Rigid Cable (for Option 550) E8251-20028
9 2 Mounting Screw 0515-1035
10 1 Entitlement Certificate n/a

6
Check Signal Generator Functionality
Use the following procedure to confirm that the signal generator powers up and the internal check
identifies no errors. The internal check evaluates the operation of the signal generator and returns an error
message if it detects a problem.
NOTE When the signal generator is first connected to ac line power, the error message
ERROR 514, Reference Oven Cold occurs which causes both the OVEN COLD annunciator
and the ERR annunciator to turn on.
After approximately five minutes, the OVEN COLD annunciator automatically clears, but the
ERR annunciator remains on until all errors are cleared from the error queue.
1. Turn on the signal generator and let it warm up for at least five minutes.
2. Run the signal generator self-test by pressing Utility > Instrument Info/Help Mode > Self Test >
Run Complete Self Test. Upon completion, a summary of the self-test will be displayed. Use the
E8257D/67D PSG Service Guide to troubleshoot any failures detected by the test.
NOTE Some circuits may require up to 50 minutes to warm up before passing the self-test. If
self-tests continue to fail after 50 minutes of warm up, troubleshoot the instrument.
3. Check to see if the ERR annunciator is on.
•IftheERR annunciator is on, review the error messages in the error queue by pressing
Utility > Error Info. The first page of error messages in the error queue appears in the display text
area. (Refer to the signal generator error messages document for information about each error
message.)
After resolving all problems causing errors, press Clear Error Queue(s).
•IftheERR annunciator is off, the signal generator functionality check has passed.

7
Remove the Outer and Inner Signal Generator Covers
Remove the Outer Cover
Refer to Figure 1.
1. Disconnect the power cord.
2. Using a T-20 driver, loosen the two screws (1) and remove the strap handle (2).
3. Using a T-15 driver, remove the center screws (3) on the four rear-panel feet (4).
4. Remove the four bottom feet (5) from the cover by lifting the tab and sliding the foot toward the tab.
5. Place the signal generator on its side.
6. Tilt the signal generator forward and slide the outer cover (6) back to remove it from the frame.
Remove the Inner Top Cover
Refer to Figure 2.
1. Using a T-10 driver, remove the twelve screws (1) from the inner-top cover (2).
2. Remove the inner-top cover.

8
Figure 1 Outer Cover Removal

9
Figure 2 Inner Top Cover Removal

10
Install Option 1E1 (Instruments with Front Panel RF Output)
For instruments with rear panel RF output (Option 1EM), go to page 12.
NOTE Write down the serial number for the new attenuator.
1. Position the signal generator with the A31 Motherboard facing you and the RF deck on top.
2. Using a 5/16” open wrench, remove the semi-rigid RF cable connecting the A23 Coupler Detector to the
RF output connector.
3. Refer to Figure 3. Position the attenuator so it can be attached to the RF deck.
4. Using the T-10 driver, insert the two screws (1) through the side deck into the metal bracket that is
attached to the attenuator. Torque these screws to 9 in-lbs.
5. Using the 5/16” open ended wrench, attach the semi-rigid cable, according to the signal generator you
have, between the A23 Coupler Detector output connector and the attenuator input connector; torque to
8 in-lbs.
• Option 520: W121 (E8251-20026)
• Option 540: W24 (E8251-20025)
• Option 550: W122 (E8251-20025)
• Option 567: W117 (E8251-20319)
6. Using the 5/16” open ended wrench, attach the semi-rigid cable, according to the signal generator you
have, between the attenuator and the RF Output connector; torque to 8 in-lbs.
• Option 520: W86 (E8251-20027)
• Option 540: W25 (E8251-20028)
• Option 550: W123 (E8251-20028)
• Option 567: W92 (E9251-20321)
7. Install AT1W1 ribbon cable to A26J13.

11
Figure 3 Option 1E1 (Front Panel RF Output)
Option 520 - W121
AT1
Option 520 - W86
AT1W1
Option 540 - W25
Option 550 - W123
Option 540 - W24
Option 550 - W122
1
Option 567 - W92 Option 567 - W117

12
Install Option 1E1 (Instruments with Rear Panel RF Output)
NOTE Write down the serial number for the new attenuator.
1. Position the signal generator with the RF deck on top.
2. Using a 5/16” open wrench, remove the semi-rigid RF cable connecting the A23 Coupler Detector to the
RF output connector.
3. Refer to Figure 4. Position the attenuator so it can be attached to the RF deck.
4. Using the T-10 driver, insert the two screws through the side deck into the metal bracket that is
attached to the attenuator. Torque these screws to 9 in-lbs.
5. Using the 5/16” open ended wrench, attach the semi-rigid cable, according to the signal generator you
have, between the A23 Coupler Detector output connector and the AT1 Attenuator input connector;
torque to 8 in-lbs.
• Option 520: W72 (E8251-20094)
• Option 540: W84 (E8251-20071)
• Options 550/567: W81 (E8251-20320)
6. Using the 5/16” open ended wrench, attach the semi-rigid cable, according to the signal generator you
have, between the attenuator and the RF Output connector; torque to 8 in-lbs.
• Option 520: W73 (E8251-20095)
• Option 540: W85 (E8251-20072)
• Options 550/567: W94 (E9251-20322)
7. Install AT1W1 ribbon cable to A26J13.

13
Figure 4 Option 1E1 (Rear Panel RF Output)
Activate Option 1E1
1. Turn the signal generator on and allow it to warm up for 5 minutes.
2. Connect the instrument to the LAN and write down the IP address.
3. Load the IP address into the instrument, by pressing Utility > GPIB/RS-232/LAN > LAN Setup > IP Address.
Enter the IP address.
4. Using the web browser on your PC enter the following URL, replacing <ip-address> with the actual IP
address you entered into the instrument in step 3: http://<ip-address>/update.
5. Scroll to “Update optional Mechanical ATTENUATOR”.
6. For Options 520 and 540 select, “add:33328-60001” and enter the serial number for the new attenuator.
For Option 550 and 567 select, “add:84908-60002” and enter the serial number for the new attenuator.
NOTE If you do not have the attenuator serial number, enter “99999”.
7. Cycle the power to the instrument.
8. Follow the instructions on the Entitlement Certificate to redeem Option 1E1.
9. If error message, 517, Calibration Failure appears, complete the "Error: 517, Calibration Failure"
section.
AT1
Option 520 - W73
Option 540 - W85 Option 520 - W72
Option 540 - W84
Options 550/567 - W94 Options 550/567 - W81
AT1W1

14
Error: 517, Calibration Failure
If error message 517, Calibration Failure appears on the instrument screen, the following two checks and
possible updates need to be performed:
• Check the firmware version and update if <C.04.71.
• Update the arrays.
Check Firmware Version and Update if <C.04.71
1. Press Utility > Instrument Info/Help Mode > Diagnostic Info.
2. If the firmware is <C.04.71, upgrade the firmware.
Update the Arrays
1. Connect the instrument to the LAN and write down the IP address.
2. Load the IP address into the instrument, by pressing: Utility > GPIB/RS-232/LAN > LAN Setup >IP Address.
3. Open a web browser on your PC.
4. Enter the following URL, replacing <ip-address> with the actual IP address of your instrument,
http://<ip-address>/update.
5. Type in or, if using the web to view this installation note, copy the appropriate script from below and
paste it into the text area on the update page.
NOTE The information must be typed exactly as it is shown and it must include “ky” with the value
shown. When typing the information in, it might be necessary to enter the information more
than once.
For E8257D-520
cs "ATTEN TRIP PWR SWP", 1
cd "ATTEN TRIP PWR SWP", 0, -3.0
cc "ATTEN TRIP PWR SWP"
cs "ATTEN TRIP", 6
cd "ATTEN TRIP", 0, 5.0
cd "ATTEN TRIP", 1, 0.0
cd "ATTEN TRIP", 2, 2.0
cd "ATTEN TRIP", 3, -1.0
cd "ATTEN TRIP", 4, -1.0
cd "ATTEN TRIP", 5, -4.0
cc "ATTEN TRIP"
cs "ATTEN TRIP AM", 6
cd "ATTEN TRIP AM", 0, 2.0
cd "ATTEN TRIP AM", 1, -3.0
cd "ATTEN TRIP AM", 2, -1.0
cd "ATTEN TRIP AM", 3, -4.0
cd "ATTEN TRIP AM", 4, -4.0
cd "ATTEN TRIP AM", 5, -6.0
cc "ATTEN TRIP AM"
ky 50279

15
For E8257D-540
cs "ATTEN TRIP PWR SWP", 1
cd "ATTEN TRIP PWR SWP", 0, -3.0
cc "ATTEN TRIP PWR SWP"
cs "ATTEN TRIP", 6
cd "ATTEN TRIP", 0, 2.0
cd "ATTEN TRIP", 1, -1.0
cd "ATTEN TRIP", 2, 1.0
cd "ATTEN TRIP", 3, -2.0
cd "ATTEN TRIP", 4, -2.0
cd "ATTEN TRIP", 5, -5.0
cc "ATTEN TRIP"
cs "ATTEN TRIP AM", 6
cd "ATTEN TRIP AM", 0, -1.0
cd "ATTEN TRIP AM", 1, -4.0
cd "ATTEN TRIP AM", 2, -2.0
cd "ATTEN TRIP AM", 3, -5.0
cd "ATTEN TRIP AM", 4, -5.0
cd "ATTEN TRIP AM", 5, -7.0
cc "ATTEN TRIP AM"
ky 36710
For E8257D-550/567
cs "ATTEN TRIP PWR SWP", 1
cd "ATTEN TRIP PWR SWP", 0, -3.0
cc "ATTEN TRIP PWR SWP"
cs "ATTEN TRIP", 6
cd "ATTEN TRIP", 0, -8.0
cd "ATTEN TRIP", 1, -8.0
cd "ATTEN TRIP", 2, -8.0
cd "ATTEN TRIP", 3, -8.0
cd "ATTEN TRIP", 4, -8.0
cd "ATTEN TRIP", 5, -1.1e01
cc "ATTEN TRIP"
cs "ATTEN TRIP AM", 6
cd "ATTEN TRIP AM", 0, -1.0e01
cd "ATTEN TRIP AM", 1, -1.0e01
cd "ATTEN TRIP AM", 2, -1.0e01
cd "ATTEN TRIP AM", 3, -1.1e01
cd "ATTEN TRIP AM", 4, -1.1e01
cd "ATTEN TRIP AM", 5, -1.3e01
cc "ATTEN TRIP AM"
ky 8356
6. Press Execute, to update the arrays.
7. Cycle the instrument power.

16
Verify Proper Installation of Option 1E1
1. Press: Utility > Instrument Info > Help Info > Options Info.
2. Make sure Option 1E1 is listed.
NOTE If you enable an option that does not have the required hardware installed, the menus for
that option will be activated but the option cannot operate.
Re-Assembling the Instrument
Refer to Figure 1 and Figure 2.
1. Reinstall the inner and outer instrument covers by reversing the order for removal.
2. Torque all T-10 screws to 9 in-lbs.
3. Torque all T-15 and T-20 screws to 21 in-lbs.
4. Cut out an Option 1E1 label and attach it to the rear panel, near the original serial number label.
Verify Signal Generator Calibration
1. Turn the signal generator on and allow it to warm up for 30 minutes.
2. Perform the following adjustment and performance tests, in the order listed, to verify signal generator
calibration. Refer to the PSG Family Signal Generators Service Software.
•SelfTests
• Power Flatness Calibration
• Lowband Attenuator Calibration (<3.2GHz)
• High Band Attenuator Calibration (>3.2GHz)
• V-Band Attenuator Calibration (>50GHz)
• Maximum Leveled Output Power
• Power Level Accuracy
Other manuals for E8257D
1
This manual suits for next models
2
Other Agilent Technologies Signal Processor manuals
Popular Signal Processor manuals by other brands

Lem Elettronica
Lem Elettronica DSP35-5G quick start guide

Deaf Bonce
Deaf Bonce Machete series owner's manual

West Mountain Radio
West Mountain Radio CLRdsp ClearSpeech operating manual

Motorola
Motorola Freescale Semiconductor DSP56000 manual

Electro-Voice
Electro-Voice DC-One owner's manual

HELIX
HELIX DSP PRO MK2 manual