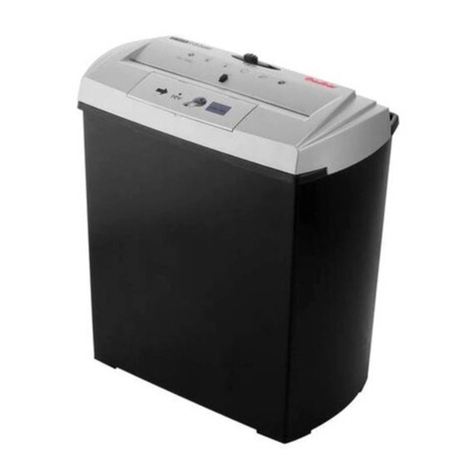
Agrimate AMS-76 User manual

User Manual
BEFORE OPERATING THIS MACHINE,
PLEASE READ THESE INSTRUCTIONS CAREFULLY
AMS-76
SHREDDER / CUTTER
DISCLAIMER: DUE TO CONSTANT UPGRADATION, FEATURES AND SPECIFICATIONS ARE
SUBJECT TO CHANGE WITHOUT NOTICE
• Double blades cutting
,more effective.
• Special discharge opening,
safer and nice looking.
• Tool kit equipped, more
practical and convenient.
AMS 76
SHREDDER / CUTTER

2
IMPORTANT
WARNING & SYMBOLS
READ CAREFULLY BEFORE USE
KEEP FOR FUTURE REFERENCE
ATTENTION: users. We are highly appreciated for your using AMS-76 shredder.
Read this operation manual carefully before attempting to assemble or operate the machine.
The power unit used for this shredder is type 168FA. Please read the attached engine manual for
detail information of 168FA.
Read operator’s manual.
Danger – Rotating blades. Keep hands
and feet out of openings while machine is
running.
Keep bystanders away.
Check if any fuel spills or leaks. Stop the
engine before refuel.

3
WARNING
Exhaust gas contains poisonous
carbon monoxide.
Never run the generator in an enclosed area.
Be sure to provide adequate ventilation.
When installed in ventilated place, protection
is to be observed to avoid to work downwind
of exhaust.
Recommended oil type: SAE 10W30 / SAE
10W40
To adjust the revolution speed of engine.
The rabbit direction for speeding up and the
tortoise direction for slow down.
The fuel can be controlled.
Don’t put your hand into the machine.
The label is for engine switch. If you want to start the engine, put the switch to “ON” position. If
the switch in “STOP” position, the engine stops.

4
MAINTENANCE
Unpack and checking contents.
• Remove all the items from the crate. If any part is
missing, contact your place of purchase at once.
• Assembly should be done on a clean, level
surface with a helper.
1. Remove the machine from the crate and put
it on a wood shelf. See picture 1.
ASSEMBLE INSTRUCTIONS
Be extremely cautious to rotating blade in machine.
1. Never allow hand, foot, or any part of body enter hopper.
2. Never place hand, foot or any part of body closed to discharge opening while machine in operation.
3. Do not peer into hopper or discharge opening when the machine is running.
4. Never allow metal objects or something similar into machine.
5. Never allow children to operate machine.
6. Never operate your shredder-chipper under the inuence of alcohol, drugs, or medication.
7. Never assemble or disassemble any parts of machine when in operation.
8. Never allow children, pets, bystanders in operation zone. Keep them in a minimum of 10 meters far.
9. Never run machine in an enclosed area since exhaust from engine contains carbon monoxide.
10. Never wear loose clothes or long jewelry and keep your long hair under a headgear when
operating machine.
11. Never use machine on a slope or hard smooth oor.

5
2. Attaching front foot to the basic machine. See picture 2.
2.1. Remove the nuts from bolts 1,2,remove the bolts and pipe spacer.
2.2. Forward the parts box to make the long pin 3 clear.
2.3. Pull the discharge hopper out of the parts box and align the holes 1,2.
2.4. Hitch front foot 5 to the side board of the parts box and align the mounting holes with holes 1,2.
2.5. Put the pipe spacer that was removed in step 1 back in place. Insert the bolts and secure
them tightly with gaskets and nuts.
3. Attach axle brackets, axle and tires. See picture 3.

6
3.1. Remove the wood shelf.
3.2. Disassemble the bolt 7 and pipe spacer.
3.3. Put the rear axle brackets in place and align the mounting hole with holes 6.7.
3.4. Insert M8*20 bolt in hole 6 from outside to inside and secure it slightly with gasket and nut.
3.5. Reassemble the pipe spacer and the long bolt 7and secure it tightly with gasket and nut.
Then screw the nut tight in 6 place.
4. Attaching the chipper tube to the basic machine.
4.1. Put the chipper tube 2 in place on the side of the basic machine. Align the three mounting
holes in the ange with three holes around place 1.
4.2. Secure the ange with gaskets and nuts M8. Make sure the chipper tube has no deection
before tighten the nuts.
5. Mounting the discharge grid
5.1. Remove the thumbscrews on both sides of the movable door and lift the door on the highest
position. Hook the grid on the axis of the door and clamp the grid with the spring to prevent
the grid falling off.
5.2. Put lower part of the grid outside of lower axis in the discharge opening. Tighten the screws
M5*15 on the left and right side of discharge opening to x the grid.
6. Mounting frame
6.1. The steel frame can be used as handle grip. Firstly, attach the steel bar on both left and
right side of hopper by screws. Please do not tighten the screws.

7
6.2. Put the frame on the bars and x it by tightening the screws. Then tighten the screws on
the hopper.
7. Safety instructions for machine with bagging attachments.
Cover the discharge opening with nylon bag and tighten the tie. When the machine is working,
the chips come into the bag. That’s easy to collect the chips.
8. Check all the screw, bolts, nuts and tighten them if they get loose.
9. Add fuel to engine.
9.1. There is no fuel and oil in new engine.
9.2. Open the cover of fuel tank and add pure gasoline. See picture 5.Do not ll closer than
10mm to 15mm from the top of the fuel tank
9.3. Open the cover and pull the dipstick out. See picture 6. Gasoline 10W-30 and 5W-30 are
available. Do not ll closer than 10mm to 15mm from the top of the fuel tank.
9.4. Refer to “starting the engine” for the instruction of adding fuel
The cover of fuel tank
Diostick cover

8
SAFETY INSTRUCTIONS
i. Training
Make sure to fully understand the owner’s manual before attempting to operate the machine.
ii. Preparation
1. Put the machine securely in a level surface.
2. Keep the operator area clear of other objects.
3. Do not allow children to operate this equipment.
4. Wear ear protection, safety goggles and gloves while operating the machine.
5. Do not wear any loose tting clothing or shoes with high heel.
6. Do not operate the machine in an enclosed area since the exhaust from an engine contains
carbon monoxide, which is poisonous to human.
7. Examine machine is in good condition, check all the screws, nuts and other fasteners are
properly secured and screen are in place. Replace unreadable labels.
8. Pay more attention while handling fuels. They are ammable and the vapors are explosive.
The points in the below should be followed.
• Never remove the fuel cap or add fuel with power source running. Stop engine, allow
engine & exhaust components to cool before refueling.
• Never adding fuel to the machine indoors.
• Do not smoke while adding fuel.
• Never refuel or store the machine in the place where there is open ame, spark or other
ignition object.
• Do not attempt to start the power source if fuel is spilled, but wipe away the spillage &
put it far away from the area before starting the machine.
• Always make sure the fuel cap is securely tightened and replace before starting.
• If the fuel tank needs to be drained, it should be done outdoors.
8. Check machine is in proper working condition after starting engine.
iii. Operation
1. Make sure the plastic cover on upper hopper is closed when your shredder is running.
Flying chips is very hazardous.
2. Do not use hands or metal tools but rough wood stick instead to push the material into feed hopper.
3. keep your face and body away from the feed intake opening.

9
4. Do not allow hands or any other parts of the body or clothing inside the feeding hopper,
discharge chute, or other rotating parts.
5. Do not touch the mufer in operation since the temperature of mufer surface is so high that
people will be burned.
6. Keep proper balance and footing at all times. Do not overreach. Never stand at a higher level
than the base of the machine when feeding material into it.
7. The operator should be extremely careful that pieces of metal, stone, glass or other foreign
objects are not put into the intake opening together.
8. Please check if there is abnormal noise or shaking in machine. If so, please turn off engine
immediately and solve problem. Please inspect for damage; check for and tighten any loose
part; have damaged parts replaced or repaired with parts having equivalent specications.
9. Big branches are fed comparatively slowly and branches larger than the yellow ring on hopper
can’t be put into machine.
10. Do not allow processed material to build up in the discharge zone; this may prevent proper
discharge and can result in kickback of material through the feed intake opening.
11. If the machine becomes clogged, shut-off the power source before clearing the debris. Keep
the power source clear of debris and other accumulations to prevent damage to power source
or possible re.
12. Never put something on the cover of hopper in case it will fall into machine.
13. Make sure the opening of chipping tube is always covered while not at work in case children
place their hands into the tube.
14. To move machine, rmly hold the handle by both hands, step on the shaft on rear wheel by one
foot, lift the front of machine, pay attention to barycenter of machine, walk slowly forward,
backward or turn around.
15. Before operating the machine, please check the direction of the wind to avoid to work
downwind of exhaust.
16. Keep all guards and deectors in place and in good working condition.
17. Turn off machine before transport the machine.
18. Do not tilt the machine while the engine is running.

10
1. When the machine needs servicing, inspection, or storage, or to replace a part, turn off the
engine, make sure all the moving parts completely stop and allow the machine to cool before
making any inspections, adjustment etc.
2. Store the machine where fuel vapors will not reach an open ame or spark. If for a long time
storage, drain the fuel out of the machine. Make sure the machine become cool before storing.
3. When the cutting means need servicing, the cutting means may be moved by manually
mechanism although the machine is stopped.
MAINTENANCE & STORAGE
Before attaching or removing the bag, the engine should be shut off. Cover the discharge opening
with a fabric bag and tighten the cord in the mouth of the bag. When the machine is working, all
the chips come into the bag. That’s convenience to collect the chips. Or you may take other way
to deal with the chips.
i. Branch chipping
1. Long branches like sunower stems, corn stems and tree branches etc are fed into the side
chipping tube for chipping by the rotating blade.
2. Some side shoots and branches may have to be trimmed from the main stalk before chipping.
3. Shorts stubs of branches may be pushed through the chipper section with next branch, never
use hand.
4. Last branch is pushed inside of the tube by some tools like wood stick. Never try by hand.
5. Never push the small branches by hand, use wood stick instead.
6. When feeding branches, be certain that thicker branches should be pushed more slowly than
thin ones. A technique and understanding will be acquired to successfully shred very soon.
7. Do not allow an accumulation of processed material to build up under discharge of the shredder-
chipper as this can result in clogging. Use wood tools to clear the build up.
8. Do not put your face close to the feed hopper, which may result in injury.
9. Do not stand in front of discharge opening and never attempt to open the outlet of discharge
while machine is on operation.
10. Set back the cover to the side tube once nishing chipping.
V. ADDITIONAL SAFETY INSTRUCTIONS FOR MACHINE WITH
BAGGING ATTACHMENT
VI. WOOD SHREDDER OPERATION

11
1. Leaves and short stalk (bean plants), cobs, sod and similar material should be fed into the
hopper and chipped in 16 interlaced chipping lots.
2. Do not open the plastic cover when adding more material.
3. The leaves and similar material is a little hard to go into the hopper. Use a wood stick to push
them in instead of by hand or other metal bars.
4. Keep your face and body away from the feed hopper to avoid being struck by any material that
may bounce back.
5. The discharge area is easily clogged if the material remains more water or sticky. Always stop
engine before clearing build-up with wood tools. Never use hand or foot.
6. Never attempt to clear an accumulation of processed material when engine is still on work.
7. Perhaps you get other pretty plants in your garden and the material will be processed to be
organic fertilizer as follows.
Put the discharge towards a wall, large board or other obstruction. Opening the discharge door
and remove the screen to allow the processed material pile up. With a garden spade feed this
material into the shredder until it reaches the consistency you want.
Keep pet, bystander away from the discharge area while the machine is on operation. Set the
screen back to the place and close the discharge door when shredding is nished.
VII. LEAVES & GRASS SHREDDING
VIII. SHARPEN THE BLADE
Cutting blade is made of special material and the blade is very sharp after heat treatment. It may
be dull after used for some time.
Judgment for dull blade: when the chipping sound become very ponderous and the belt always
skids while it is not loose, or feeding speed gets slow, please remove the blade and check if it is dull.
1. Turn off the engine before remove the blade.
• Remove the board covering the blade.
• Open the small outlet of the discharge.
• Remove the discharge screen.
2. Wearing safety gloves, turn the blade tray to a proper position.
3. Remove the location screw on the two pieces of blade.

12
• Two pieces of blade should keep the same weight as each other. They will shake if there
is much difference between weight.
4. Put the blade back to the place where they are removed and tighten with nuts.
5. Replace the board covering the blade.
6. Replace the discharge screen.
8.Close the outlet of the discharge.
There is a “V” belt under belt cover transmitting energy from engine to the blade tray. The belt
will be getting loose and skid after used for some time. So tension adjustment is required.
1. Turn off the engine and remove the belt cover.
2. Loose the four location nuts on the engine.
3. Move engine forward till the “V” belt is tight.
4. Put the main pulley and afliated pulley in the same plane. (A ruler can be used to measure if
lack of experience). Tighten the four location holes on the engine.
5. Set the belt cover back to its place.
3. Sharpen the blade.
• If the blade is struck a break by metal or stone or some hard subjects, please sharpen the
break lot at rst.
• Avoid changing the blade color and anneal when sharpening the blade.
• It may result in a breach on the edge if you overexert.
• Knifepoint angle should be kept in 45-40
IX. ADJUSTING THE BELT
40˚ ~ 45˚
40˚ ~ 45˚

13
There are 16 hammers in the machine box, when the blades are running fast, these hammers
will forceful hit the raw material constantly until crush them into small pieces. As the machine
working for a long time, the cutting edge of the hammer will become blunt. Then, the operator
needs to reinstall the hammers after overturning them 180°, let the blunt edge backward and the
sharp edge forward.
When both sharp edges of one end of the hammer become blunt we can also replace this end
with the other end which is with sharp edges.
1. Turn off the engine before adjusting the hammer.
2. Open the side door of the outlet of discharge, remove the discharge screen.
3. Remove the board covering the blade.
4. Remove the upper hopper.
5. Wearing safety gloves; turn the hammer to the upper position of one axle.
6. Turn the axle of the hammer; remove the roll pin which is at the end of the axle. There are four
roll pins and make sure take all the roll pins out of the machine.
7. Place the axle of the hammer in the middle of the board covering the blade, then pull out the axle.
8. Place the blunt edge of the hammer to the reverse and install them to the axle.
9. When adjust the hammer well, replace the roll pins.
The “V” belt need for replacement if it is too long or damaged.
1. Turn off the engine and remove the belt cover.
2. Remove the old belt. Pull the belt outside by tools and turn the pulley gradually to remove
the pulley.
Note: please mind your nger.
3. Place the new belt in the main pulley rst (“V” belt on engine) and then to the afliated pulley
beside the blade tray.
4. The new belt is tighter than the old. To assembly the new one is not as easily as to remove the
old. When you hold the belt into the slot, do not put your nger between the pulley and belt,
which may result in injury.
5. Replace the belt cover.
XI. ADJUSTING THE HAMMER
X. REPLACE THE BELT

14
10. Replace the upper hopper .
11. Replace the discharge screen .
12. Replace the board covering the blade.
13. Close the outlet of the discharge.
RIGHT WAY
RIGHT WAY
RIGHT WAY
Do stand back - wear glasses & gloves Don’t allow hands to enter hopper or peer
in to hopper with face.
Don’t clear discharge with hands. Never
place any part of your body in discharge area.
Don’t allow pets, children or bystanders in
operating area.
WRONG WAY
WRONG WAY
WRONG WAY
Do clear discharge area of machine with
spade, rake or long handle tool,
Use stick, never hands, if material bridges
in hopper, Do keep people away &
discharge shredded material into compost
heap or fixed obstruction.

15
SPECIFICATION
Name of the model AMS 76
Chipping Capacity 76mm
Chipping Efciency 3.53m3/Hr
Chipping Files 16pieces
Power 5HP Engine/Motor
Shredding Dia 48cm
Chipping Knives 2
No. of Blades 6Nos.
Engine GX 160
Engine type 4 Stroke
Displacement 163cc
Fuel tank volume 3.1L
Oil tank Volume 0.58L
Net weight 48Kg

16
AMS-76 SHREDDER / CUTTER DIAGRAM

17
AMS-76 SHREDDER / CUTTER PART LIST
Part No. Description
AMS76-01 Rubber Foot
AMS76-02 Leg
AMS76-03 Flat Washer
AMS76-04 Hex Nut
AMS76-05 Lock Washer
AMS76-06 Hex Bolt
AMS76-07 Discharge Chute
AMS76-08 Movable Door
AMS76-09 Tube
AMS76-10 Screen
AMS76-11 Side Door Plate
AMS76-12 Hitch Pin
AMS76-13 Door Axle
AMS76-14 Spacer I
AMS76-15 Spacer II
AMS76-16 Spacer III
AMS76-17 Hammer
AMS76-18 Spacer VI
AMS76-19 Roll Pin
AMS76-20 Hammer Axle
AMS76-21 Blade
AMS76-22 Flat HD SCR
AMS76-23 Box Frame Side Left
AMS76-24 Wheel
AMS76-25 Wheel Support
AMS76-26 Blade Cover Plate
AMS76-27 Wire Circ Lip 1
AMS76-28 Washer (Right)
Part No. Description
AMS76-29 Chipping Chute
AMS76-30 Bearing Seat
AMS76-31 Ball Bearing
AMS76-32 Spacer(Right)
AMS76-33 Impeller
AMS76-34 Key
AMS76-35 Rear Board
AMS76-36 Engine Seat
AMS76-37 Tool Box
AMS76-38 Rubber Gasket
AMS76-39 Hopper
AMS76-40 Handles
AMS76-41 Hook
AMS76-42 Hex Bolt
AMS76-43 Burn-Proof Net
AMS76-44 Clutch
AMS76-45 V-Belt
AMS76-46 Pulley Cover
AMS76-47 Belt Cover Bracket
AMS76-48 Spacer
AMS76-49 Pulley
AMS76-50 Special Washer(Left)
AMS76-51 Washer (Right)
AMS76-52 Box Frame Side
AMS76-53 Wheel Tube
AMS76-54 Wheel Axel
AMS76-55 Screw

18
For safety use, make sure the machine is cleaned every three-months. Before working, make sure
to inspect the lter and the nozzle,and ensure there is no impurity. After working, make sure there
is no water in the pump and the hose.
If the machine needs to be repaired in the guarantee period, please return the machine to the
shop. You need to provide the certicate of purchase in order to repair or get the substitute.
Before Packing, the machine should be cleaned, then use closed packaging, packaging should be
rm. Store the machine in dry place.
For transportation safety. The machine should comply with ISTA.
Meaning of crossed - out wheeled dustbin:
Do not dispose of electrical machines as unsorted municipal waste, use separate collection
facilities.
If electrical machines are disposed of in landlls or dumps, hazardous substances can leak into
the groundwater and get into the food chain, damaging your health and well-being.
When replacing old machines with new ones, the retailer is legally obligated to take back your
old machine for disposals at least free of charge.
INSPECTION & MAINTENANCE

19
Purchaser’s Name & Address
Product Name
Product Serial No.
Invoice / DN No.
Date of Delivery
Dealer’s Ofce Seal
Dealer Sign
Customer Sign.
I/We accept the terms and conditions of Warranty
as in the Warranty Card.
CUSTOMER COPY
Warranty Card
AMS-76 SHREDDER / CUTTER
Purchaser’s Name & Address
Product Name
Product Serial No.
Invoice / DN No.
Date of Delivery
Dealer’s Ofce Seal
Dealer Sign
Customer Sign.
I/We accept the terms and conditions of Warranty
as in the Warranty Card.
DEALER’S COPY
Warranty Card
AMS-76 SHREDDER / CUTTER
Purchaser’s Name & Address
Product Name
Product Serial No.
Invoice / DN No.
Date of Delivery
Dealer’s Ofce Seal
Dealer Sign
Customer Sign.
I/We accept the terms and conditions of Warranty
as in the Warranty Card.
COMPANY COPY
Warranty Card
AMS-76 SHREDDER / CUTTER

20
1. LIMITED WARRANTY PERIOD : For a period of six months from the date of Sale / delivery of the product which ever is earlier. 2. LIMITED
WARRANTY OBLIGATION : Replacement of defective part(s) by authorized dealer are free of charges. If found defective by reasons of defective
material / poor workmanship, parts will be replaced and there will be no value re-imbursement. 3. TERMS & CONDlTlONS : a. Claims under
warranty will be accepted on submission of Warranty Card duly lled and stamped by authorized dealer together with the original purchase
document. : b. Shipping / transportation / Incidental charges incurred in replacing defective parts under warranty shall be borne by the purchaser.
WARRANTY null & void if
(i) Lack of maintenance, (ii) Incorrect use of the machine or tampering, (iii) Use of non-genuine spare parts, (iv) Usage of acids, solvents, or any
ammable materials, (v) Non-usage of lter water / clear water / soft water & using water above 40°C temperature, (vi) While using the pressure
washers to draw water which is contaminated with dust & solvents (eg. paint thinners, gasoline, oil, etc.), (vii) Repair done by unauthorized
service people, (viii) Those parts subject to wear & tear due to normal operations and plastic parts, rubber items etc, (ix) Loose connections,
faulty electrical xtures & uctuations in power supply.
4. Should any failure occur during or after the warranty period, customer does not have the right to interrupt payment / price discount.
5. Incidental or consequential damages like inconvenience commercial loss, loss of tie, mental agony etc.
6. Loss of any nature due to operation or non-operation is not covered under warranty.
7. All free service are at Dealer’s service point only.
8. Warranty ceases if service is not done periodically.
9. The attached card should be completed and returned to Ratnagiri Impex Pvt. Ltd. for registration immediately after sale / delivery.
10. The warranty is void unless you register the warranty card with Ratnagiri Impex Pvt. Ltd.
11. The decision of Ratnagiri Impex Pvt. Ltd., in settling the warranty is nal in all respects.
12. All disputes are subject to Bangalore Courts Jurisdiction
Table of contents