Connections
DVD Player Video Output
TV/Monitor Video Input
VIDEO SYSTEM CONNECTION
Component Video
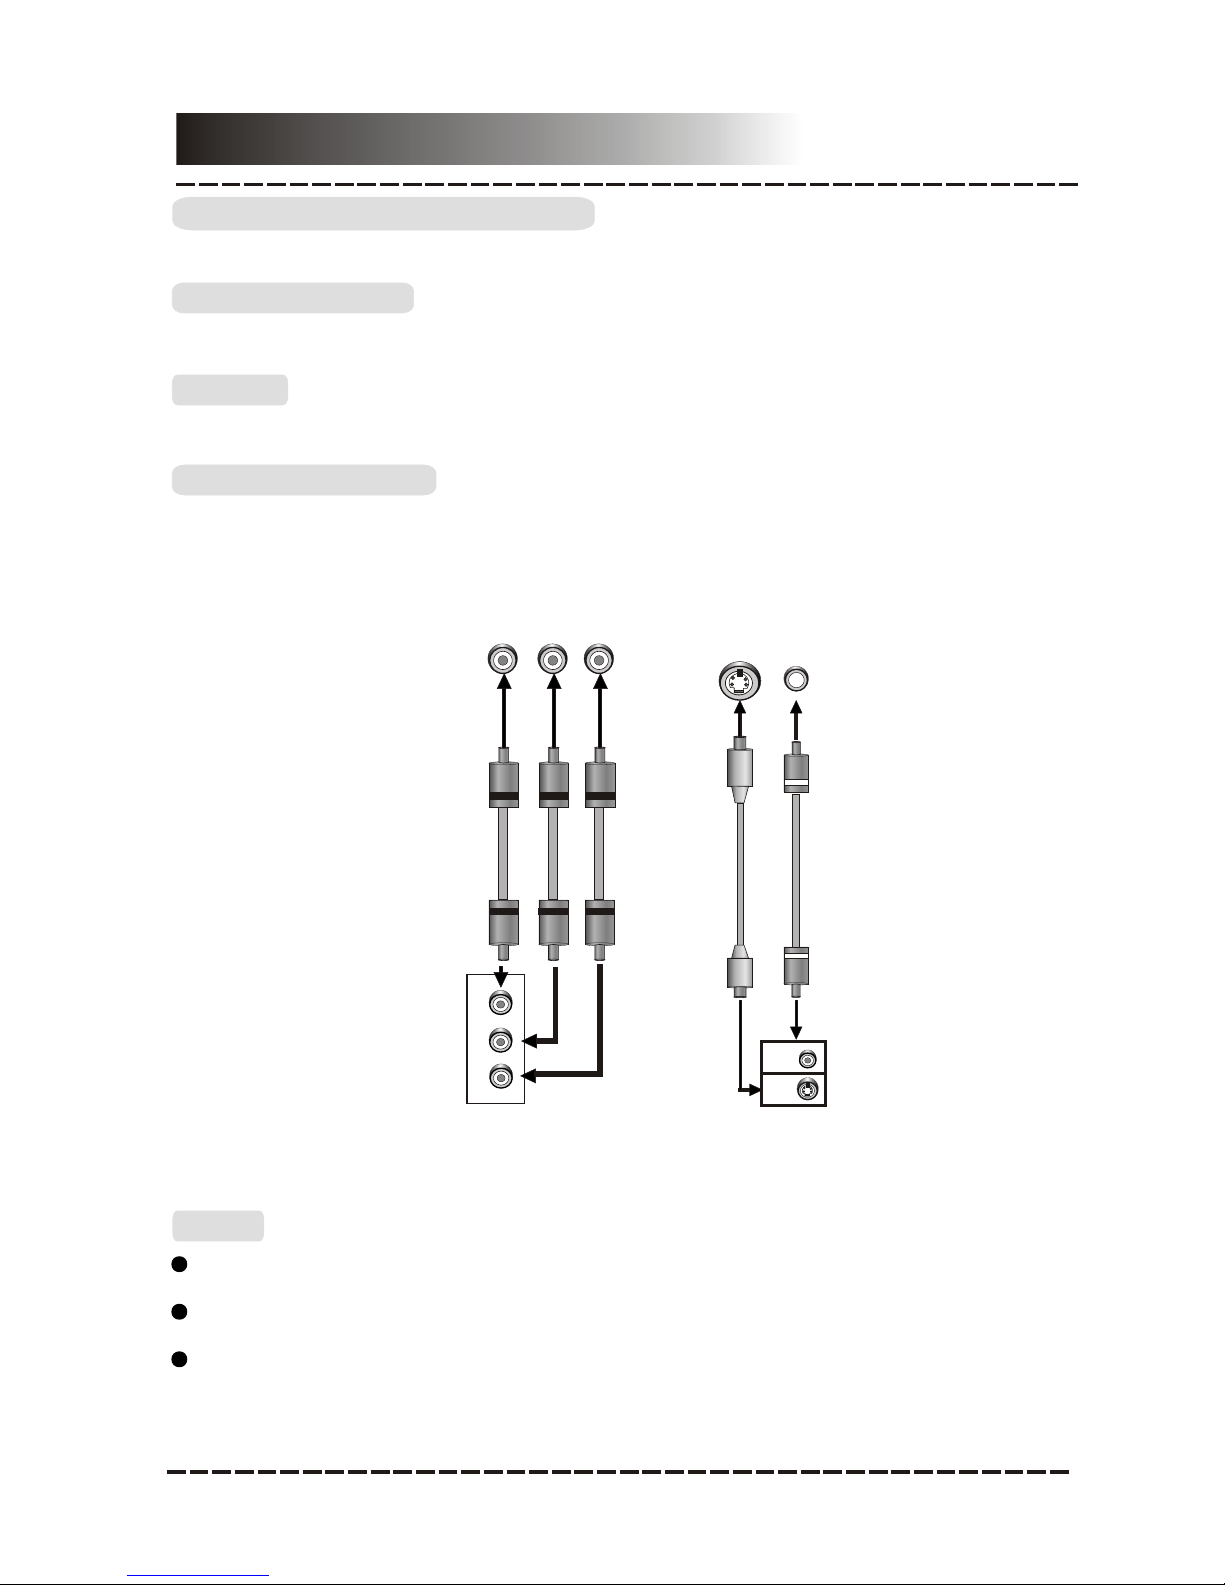
The following videooutputs are availablefor this unit.
S-Video
Use an S-Video cable to connect the S-Video output of this unit tothe S-video inputof a
TV/monitor.
Use a 3-coreAV cable toconnect the componentoutputs of thisunit to the
corresponding inputs ofa TV/monitor.
Composite Video
Use the yellowplug of anAV cable to connect the composite video output of this unit to
the video inputof a TV/monitor.
Notes:
Of the videooutputs above, componentvideo is the best, S-VIDEO is slightly better and
the composite videois standard. Usethe best availablevideo connection.
Don’t make allthe connections aboveat one time,otherwise the produced pictures will
be affected.
Only when thevideo settings conformto the actual video system connections does the
player produce thecorresponding video output.(Please refer to the Video Setup in
System Setup chapter).
Component Video Input
Connections
DVD Player Video Output
TV/Monitor Video Input
VIDEO SYSTEM CONNECTION
Component Video
The following videooutputs are availablefor this unit.
S-Video
Use an S-Video cable to connect the S-Video output of this unit tothe S-video inputof a
TV/monitor.
Use a 3-coreAV cable toconnect the componentoutputs of thisunit to the
corresponding inputs ofa TV/monitor.
Composite Video
Use the yellowplug of anAV cable to connect the composite video output of this unit to
the video inputof a TV/monitor.
Notes:
Of the videooutputs above, componentvideo is the best, S-VIDEO is slightly better and
the composite videois standard. Usethe best availablevideo connection.
Don’t make allthe connections aboveat one time,otherwise the produced pictures will
be affected.
Only when thevideo settings conformto the actual video system connections does the
player produce thecorresponding video output.(Please refer to the Video Setup in
System Setup chapter).
Component Video Input
Y
U/Pb
V/Pr
YU/Pb V/Pr
Component Video Output
VIDEO
S-VIDEO
VIDEO
S-VIDEO
Composite Video
and S-Video Input
Composite Video
and S-Video Output
-6-