Aim SmartyCam 3 Sport User manual

User Manual
The SmartyCam 3 Sport
Release 1.00

INDEX
1 – The SmartyCam 3 topics 2
2 – The SmartyCam 3 connections 3
3 – The SmartyCam 3 Pushbuttons and Power ON/OFF 5
3.1 – Pushbuttons 5
3.2 – Power ON/OFF 5
4 – SD card management 6
5 – The SmartyCam 3 Start/Stop recording 7
6 – The SmartyCam 3 Menu 8
6.1 – GPS Status 8
6.2 – Tracks 9
6.2.1 – Loading tracks to The SmartyCam 3 10
6.2.2 – Managing tracks on The SmartyCam 3 Sport 10
6.3 – Settings 11
6.3.1 – Auto Start Rec 11
6.3.2 – Auto Stop Rec 11
6.3.3 – Auto power off 12
6.3.4 – Exposure set 12
6.3.5 – Audio set 12
6.3.6 – Upside Down 13
6.3.7 – Overlay 13
6.3.8 – System time 13
6.1.4 – Rec Counter 14
6.3.11 – Log Files Export 14
6.3.12 – Info 14
6.3.13 – Factory RST 14
6.4 – Update 14
6.4.1 – Firmup 15
6.4.2 – Tracks update 15
6.3 – Video file 16
7 – The SmartyCam 3 and the PC 17
7.1 – Creating the SmartyCam 3 configuration 17
7.1.1 – Configuring the SmartyCam 3 overlay 18
7.1.2 – Logo and MAP Setting 20
7.1.3 – Configuring the SmartyCam 3 parameters 20
7.1.4 –The SmartyCam 3 connected to a master 21
7.4 – Loading the configuration to the SmartyCam 3 23
7.5 – Track Management 24
7.6 – Video Management 26
8 – Technical specifications and drawings 28

2
1 – The SmartyCam 3 topics
Wide Global Shutter CMOS sensor
The best way for avoiding wave effects when vibrations are strong
Full HD image
1920 x 1080 resolution, at 30 fps
Completely waterproof
Designed for being used in the hardest environments: water, dust, temperatures are not a problem.
Sapphire frontal glass
The strongest glass for facing all the high-speed impacts with pebbles, insects, dust that usually happen in a race
A lot of graphic controls
Choose your preferred layout for keeping your data under control
Auto start/stop recording
Avoid thinking at the camera while ready at the starting line
Automatic track selection
SmartyCam 3 automatically receives of the track selected by the AiM logger to which is connected, or selects the
right track in its database, if not connected to any AiM device, in order to easily draw it and calculate lap number,
lap times and rolling times.
Video and data in the same file
Your video and the most important data in the same MP4 file
Automatic data and video synchronization
In case the data in the MP4 are not enough for your analysis, simply import the video file and the data from your
AiM logger, and the software will automatically synchronize them: Position on the track, video frame and data on
the graph will be perfectly correlated
3
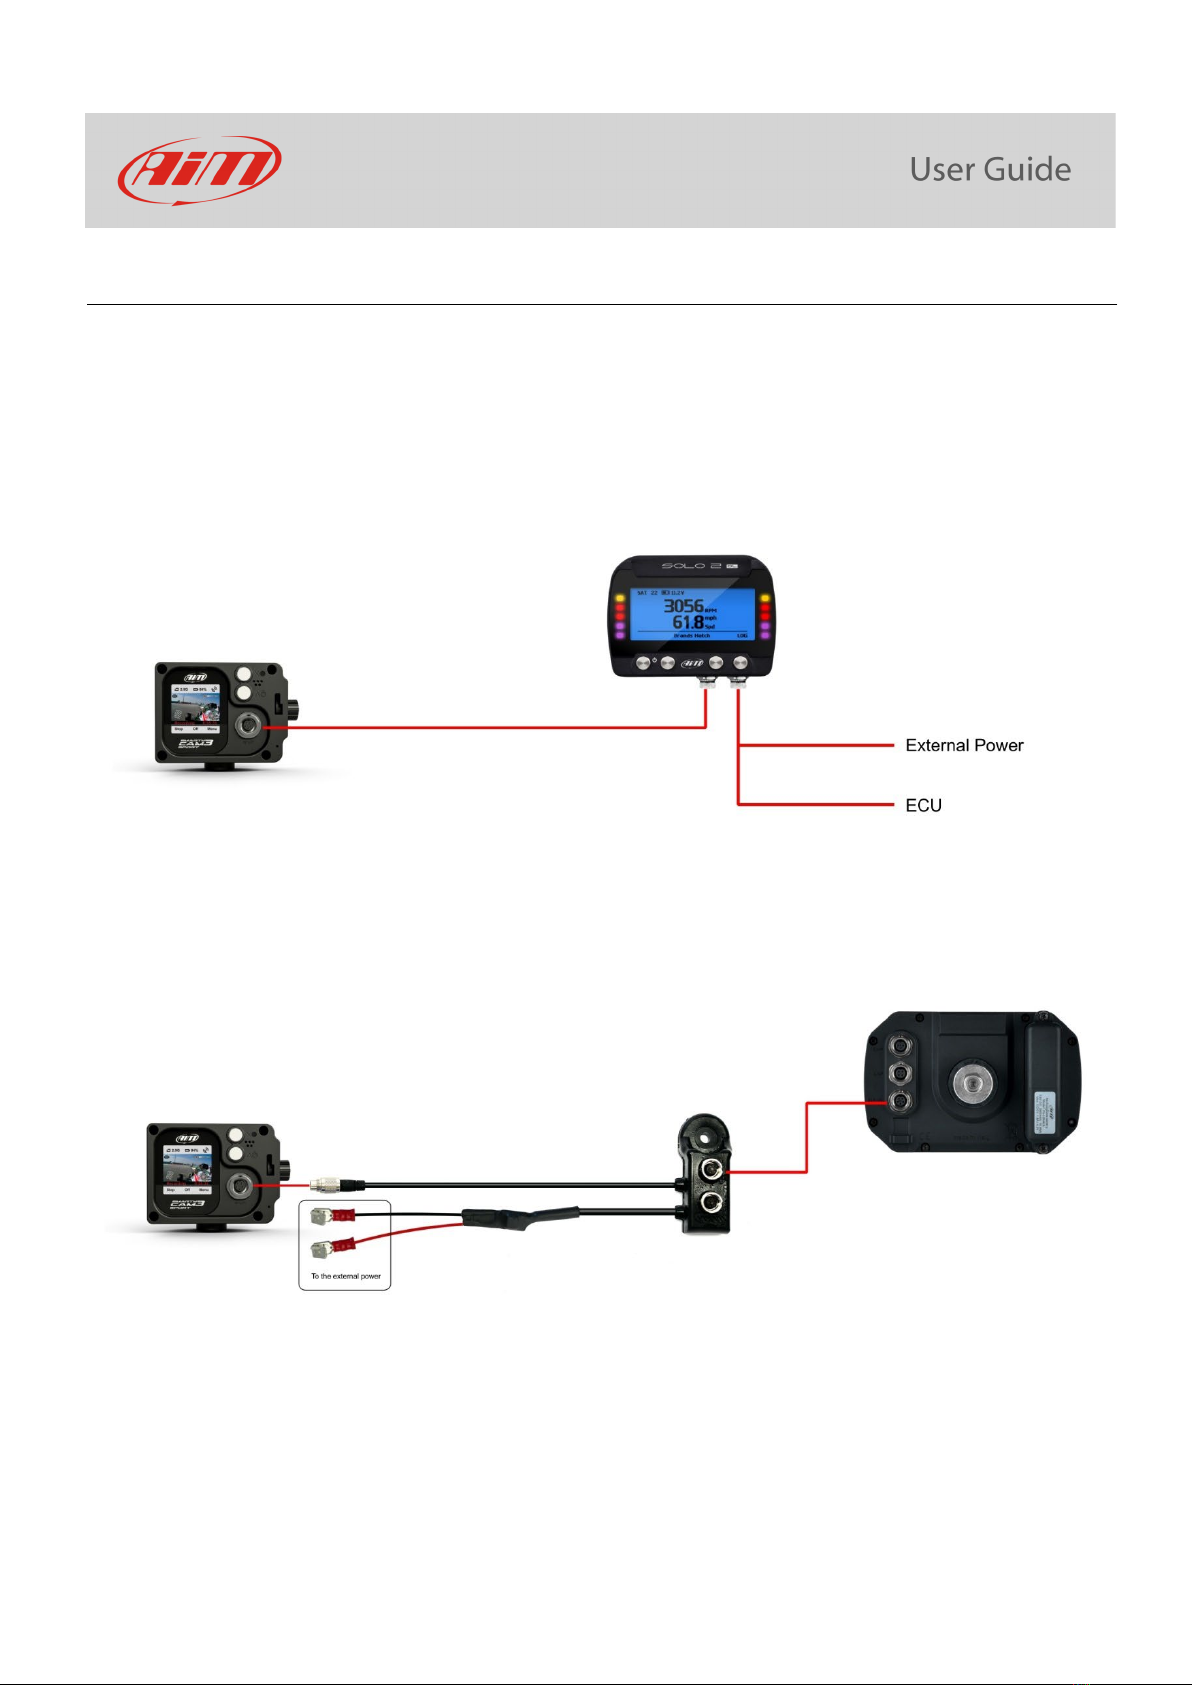
2– The SmartyCam 3 connections
The SmartyCam 3 has an internal battery that may powers the system for around 20 minutes only, so it is important to ensure
connection through an external 12 Volt battery directly or through an AiM logger, using the 5 pins connector placed on the back
of the camera, as shown in the pictures below.
To connect the SmartyCam 3 to GPS Module (optional) use the 5 pins Binder 712 female connector you will find on the back of the
camera and connect it to the 2 ways Data Hub needed to power the camera. The SmartyCam 3 can also be connected to AiM dashes
and loggers through the AiM CAN network. The images below show some examples of connection options.

4

5
3 – The SmartyCam 3 Pushbuttons and Power ON/OFF
3.1 – Pushbuttons
The SmartyCam 3 features two pushbuttons, each of which manage two different features, shown in the lower line of the display.
The upper pushbutton manages the features indicated with the icons:
X short pressure
long pressure
While the lower pushbutton manages the features indicated with the icons:
short pressure
Turn OFF: long pressure
3.2 – Power ON/OFF
The SmartyCam 3 powers ON when:
•You push the lower pushbutton
•An external power turns ON
6
It turns itself OFF after a period of inactivity, that you can set up in the menu as below:
“MENU>>SETTINGS>>AUTO POWER OFF
Available options are:
•5 min
•15 min
•30 min
•1 hour
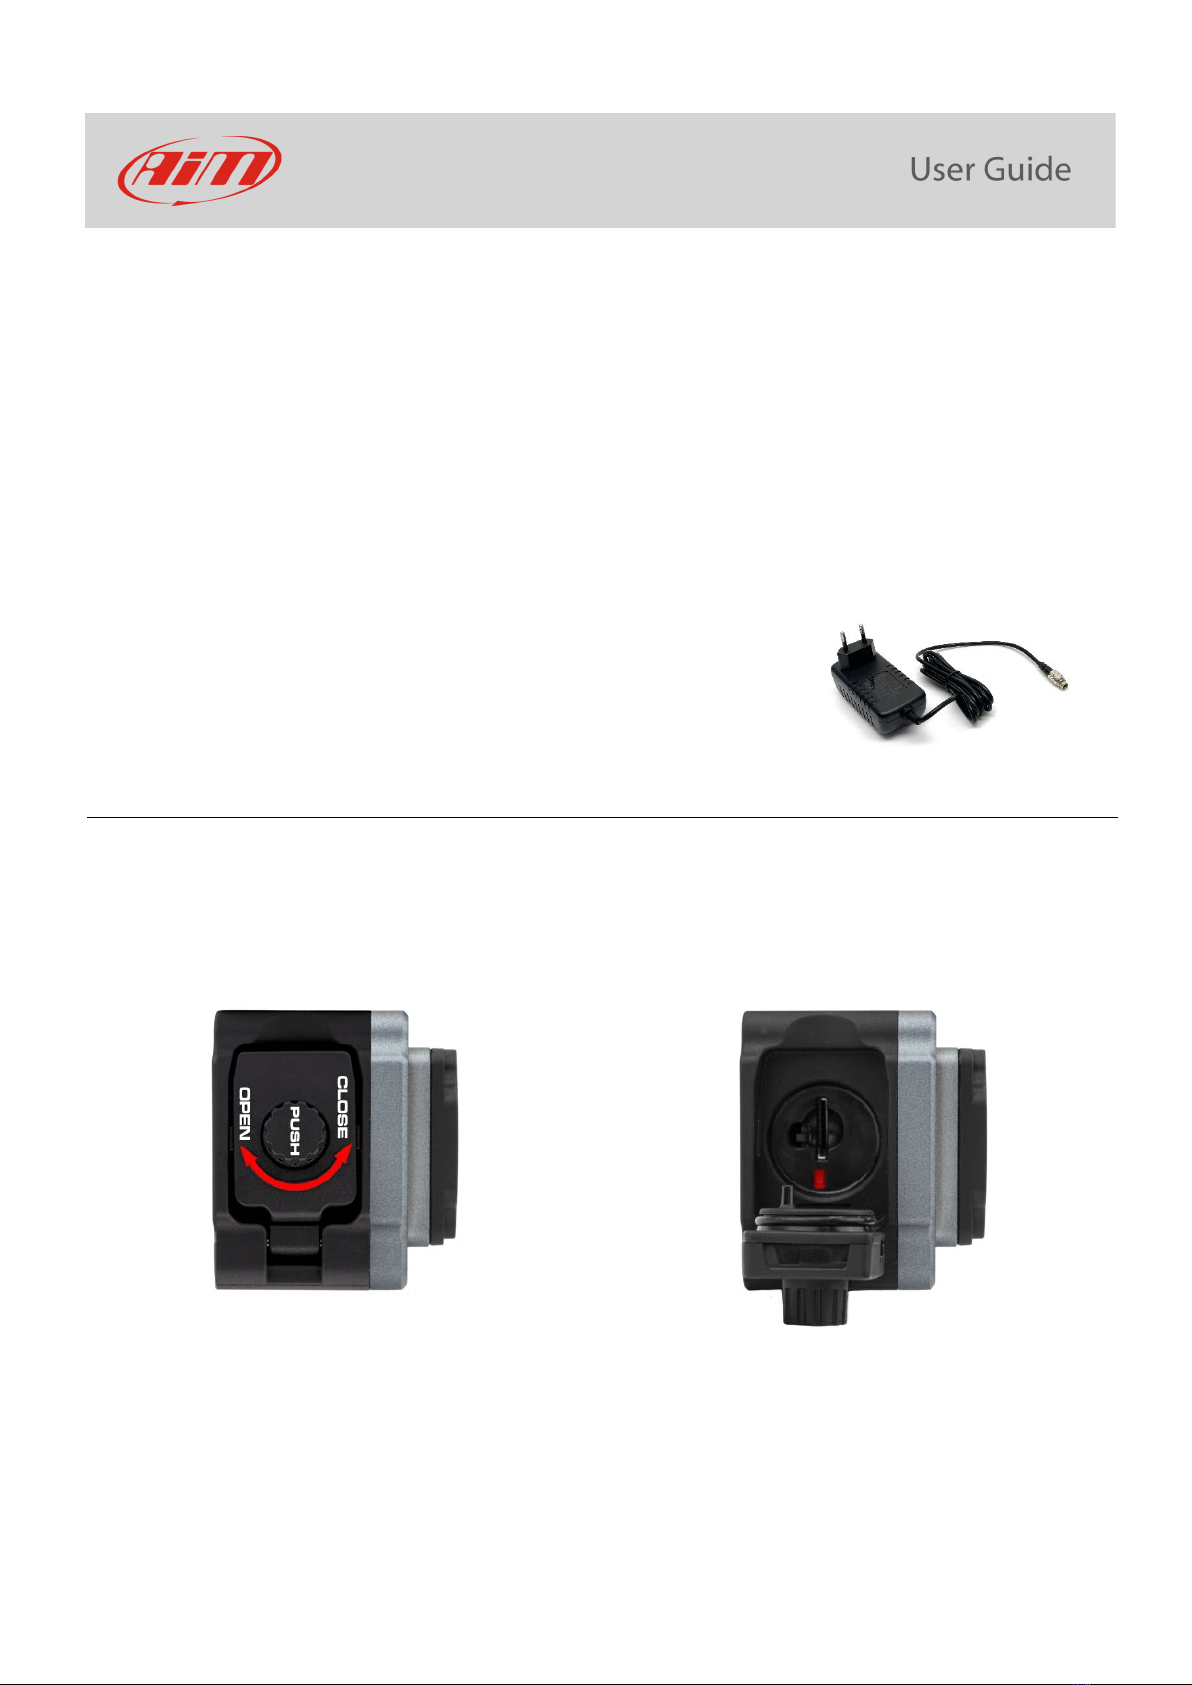
To charge the internal battery, or to keep the SmartyCam 3 powered while configuring
it, you may use the battery charger included in the kit.
4 – SD card management
The SmartyCam 3 supports up to 2 TB MicroSD cards. The MicroSD is not only used to store video footage recorded by the camera,
but also to load the configurations and the firmware to the same camera (see paragraph 6.4 for further information).
Its housing is closed by a plastic screw. To open, press and turn the plastic screw left as written on the camera and shown below. If
the SmartyCam is powered up, a steady red light is shown when the slot is open.

7
5 – The SmartyCam 3 Start/Stop recording
The SmartyCam 3 can start/stop recording in manual or in automatic mode.
When The SmartyCam 3 is recording the display becomes red and after a minute switches off.
Please note: it is always possible to start/stop recording in manual mode by pressing the “Rec” button to start and then you can
manually press the “stop” option to finish (left and central image below).
It is possible to enable the Automatic Start Recording, following this path:
•“MENU –>SETTINGS –>AUTO START REC –>”. Default setting is “Auto” press change to turn to “Manual” (image below on the
right).
To set automatic stop recording follow this path: “MENU –>SETTINGS –>AUTO STOP REC”
Available options are:
•“5 sec”
•“20 sec” (default)
•“1 min”
•“2 min”
•“5 min”
Please note: refer to chapter 7 “The SmartyCam 3 and the PC” to know how to set the parameters for automatic start/stop recording.
8
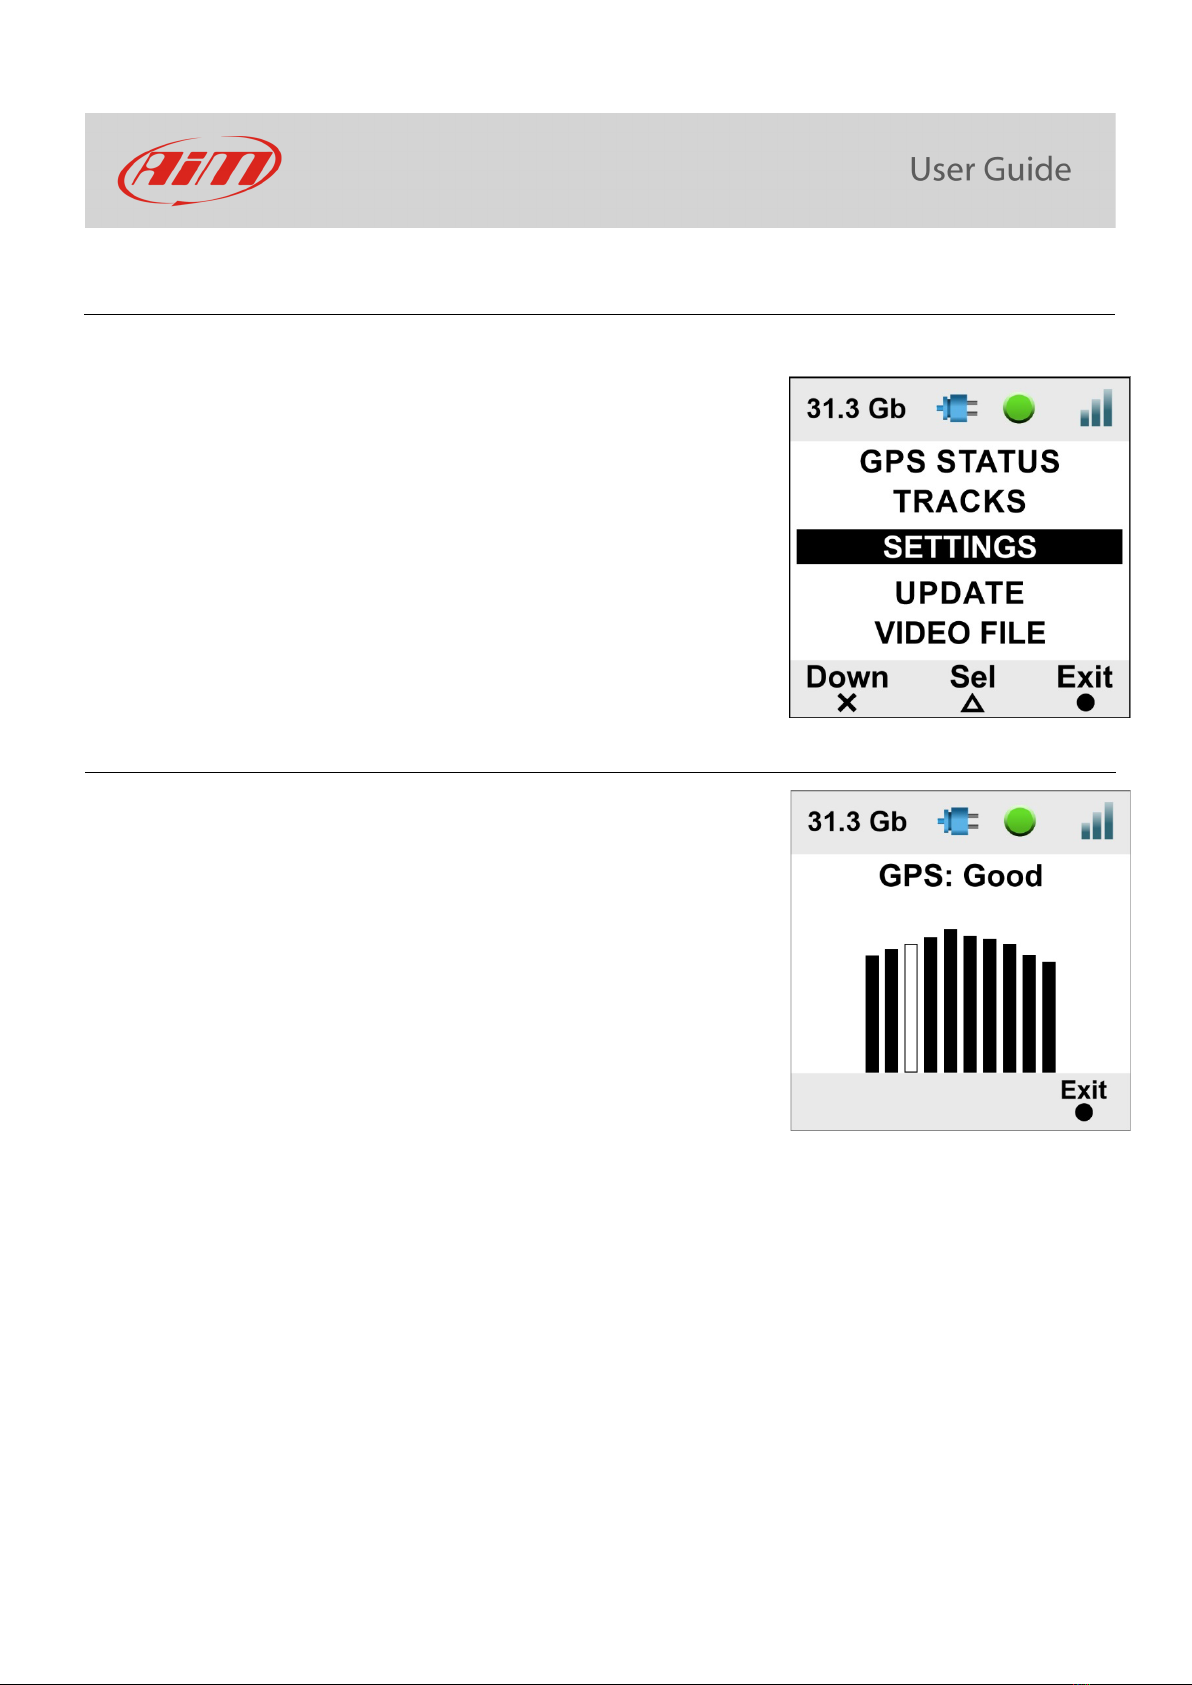
6 – The SmartyCam 3 Menu
The SmartyCam 3 can be set mainly via the bottom keyboard. When you press “MENU” this page shows up:
Available options are:
•GPS STATUS: status of the connected GPS
•TRACKS: to show the list
•SETTINGS
•UPDATE
•VIDEO FILE
In any situation use:
•“Down” (X) button to scroll the options
•“Sel” (
) to select and
•“Exit” (
) to quit and save
6.1 – GPS Status
Shows the number of connected satellites with the related
signal level.
9
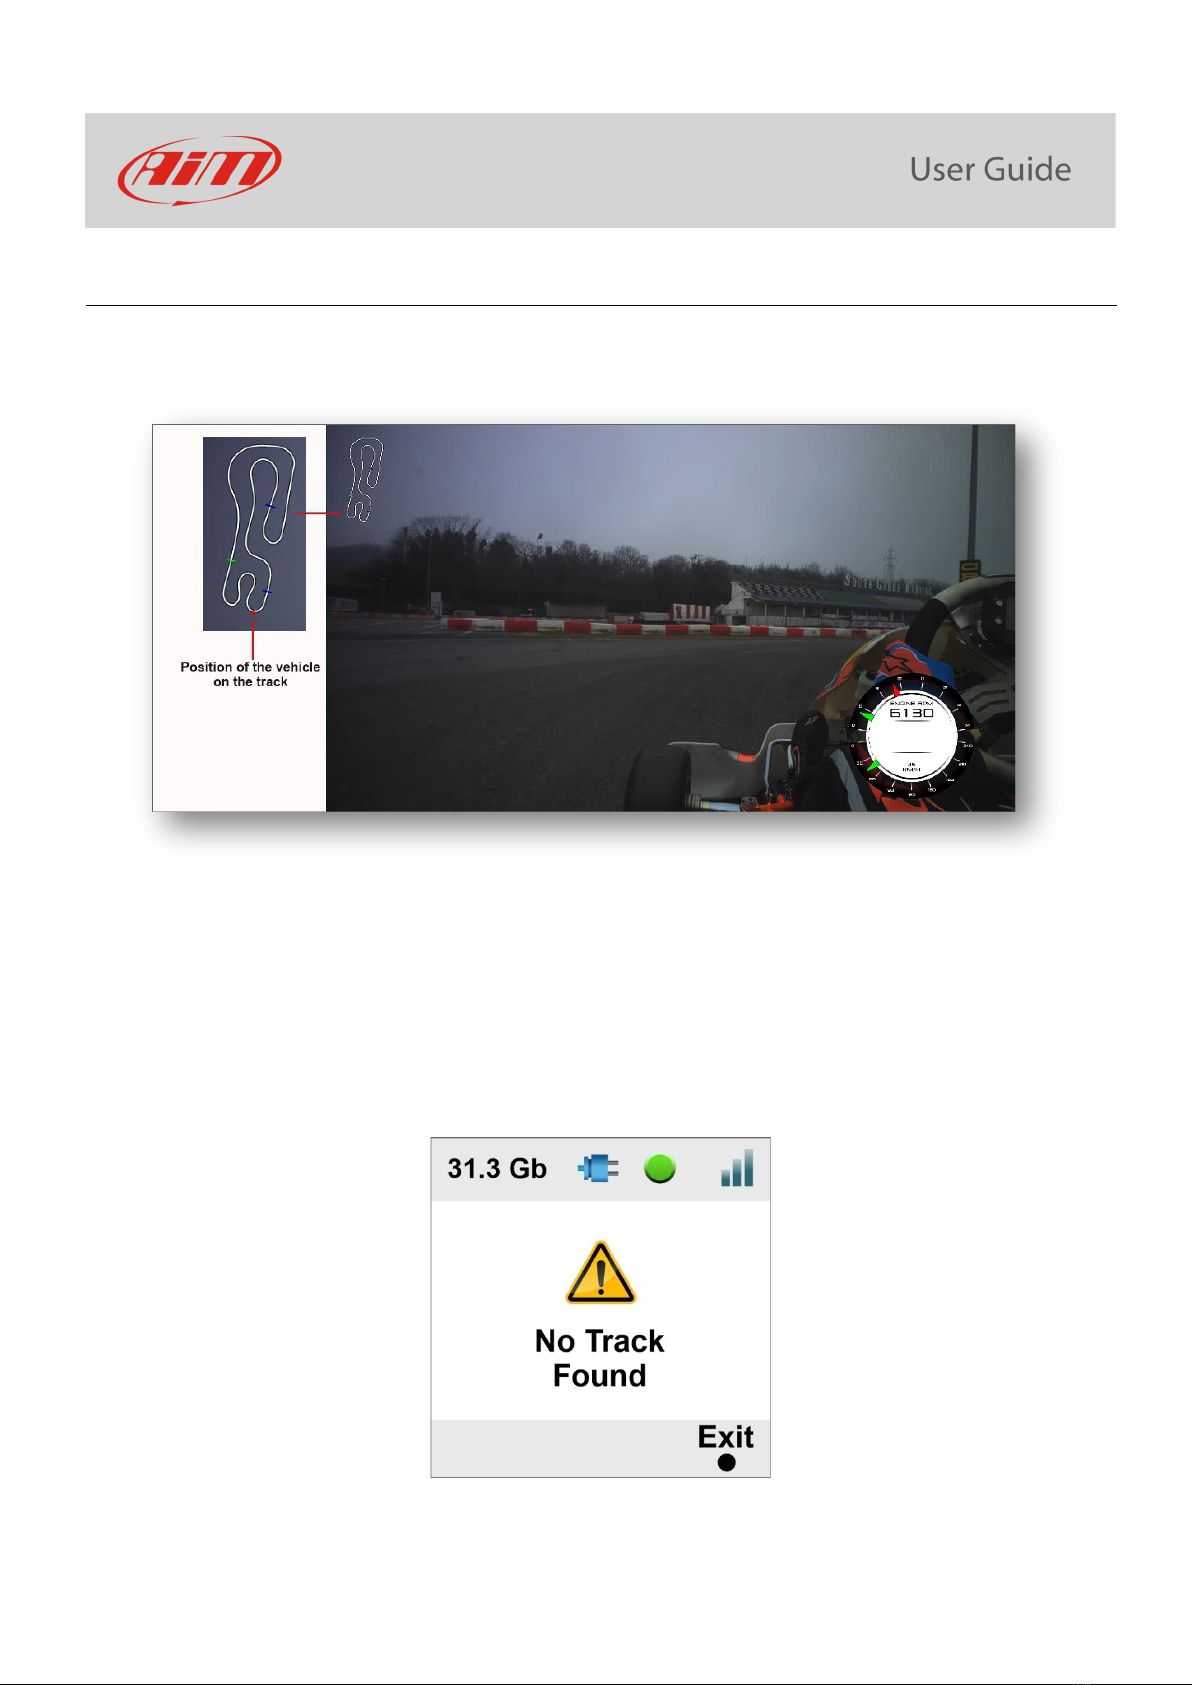
6.2 – Tracks
The SmartyCam 3 can show the map of the circuit if loaded in its configuration (see paragraph 7.1.2 for further information) as well
as the position of the vehicle on the track.
The SmartyCam 3 can be installed in two ways:
•connected to an AiM logger, such as : MyChron5, Solo 2 DL, MX* logger, SW4, PDMs and EVOs; in this case the maps are
loaded onto the AiM logger, this automatically selects the one you are racing on and transmits the information it to the
SmartyCam 3 Sport, this then shows in the video, the position you defined during the configuration (please refer to
paragraph7.1.2 for further information).
•Connected to a GPS Module; in this instance, you need to load the track maps directly to the SmartyCam 3 using a microSD.
At the very first switch on, the camera will show no tracks (image below): this is not an issue if the SmartyCam 3 is connected to any
AiM logger however if it is connected to a GPS Module, you need to load the tracks on it.
Other manuals for SmartyCam 3 Sport
1
Table of contents
Other Aim Action Camera manuals


