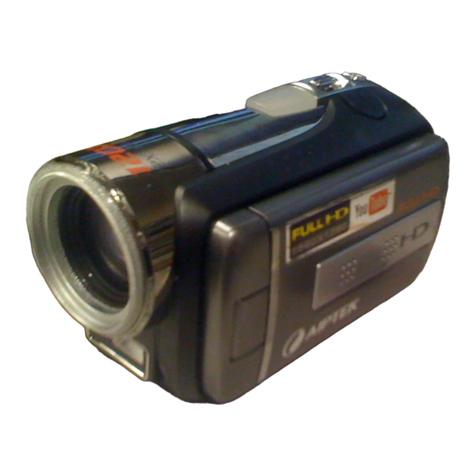
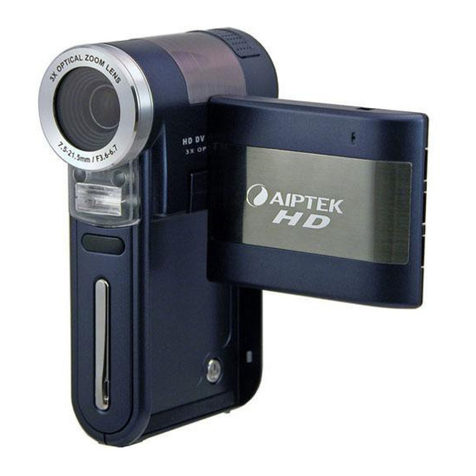
AIPTEK AHD-Z7 User manual

FCC Compliance Statement:
This device complies with Part 15 of the FCC Rules. Operation is
subjected to the following two conditions: (1) this device may not cause
harmful interference, and (2) this device must accept any interference
received, including interference that may cause undesired operation.
This equipment has been tested and found to comply with limits for a
Class B digital device, pursuant to Part 15 of the FCC rules. These limits
are designed to provide reasonable protection against harmful interference in residential
installations. This equipment generates, uses, and can radiate radio frequency energy, and if
not installed and used in accordance with the instructions, may cause harmful interference to
radio communications.
However, there is no guarantee that interference will not occur in a particular installation. If this
equipment does cause interference to radio or television equipment reception, which can be
determined by turning the equipment off and on, the user is encouraged to try to correct the
interference by one or more of the following measures:
-Reorient or relocate the receiving antenna.
-Move the equipment away from the receiver.
-Plug the equipment into an outlet on a circuit different from that to which the receiver is
connected.
-Consult the dealer or an experienced radio/television technician for additional suggestions.
<RXDUHFDXWLRQHGWKDWDQ\FKDQJHRUPRGL¿FDWLRQVWRWKHHTXLSPHQWQRWH[SUHVVO\DSSURYHG
by the party responsible for compliance could void Your authority to operate such equipment.
If the time arises to throw away your product, please
recycle all the components possible.
Batteries and rechargeable batteries are not to be
disposed in your domestic waste! Please recycle
them at your local recycling point.
Together we can help to protect the environment.
Welcome:
Dear user, thanks for purchasing this product.
Much investment in time and effort has gone into its development, and it is our hope
that it will give you many years of trouble-free service.
Safety Notice:
1. Do not drop, puncture or disassemble the device; otherwise the warranty will be voided.
2. Avoid all contact with water, and dry hands before using.
3. Do not expose the device to high temperature or leave it in direct sunlight. Doing so may
damage the device.
4. Use the device with care. Avoid pressing hard on the device body.
5. For your own safety, avoid using the device when there is a storm or lightning.
'RQRWXVHEDWWHULHVRIGLIIHUHQWVSHFL¿FDWLRQV'RLQJVRPD\OHDGWRWKHSRWHQWLDOIRUVHULRXV
damage.
7. Remove the battery during long periods between usage, as a deteriorated battery may affect
the functionality of the device.
8. Remove the battery if it shows signs of leaking or distortion.
9. Use only the accessories supplied by the manufacturer.
10. Keep the device out of the reach of infants.
11. Risk of explosion if battery is replaced by an incorrect type.
12. Dispose of used batteries according to the instructions.
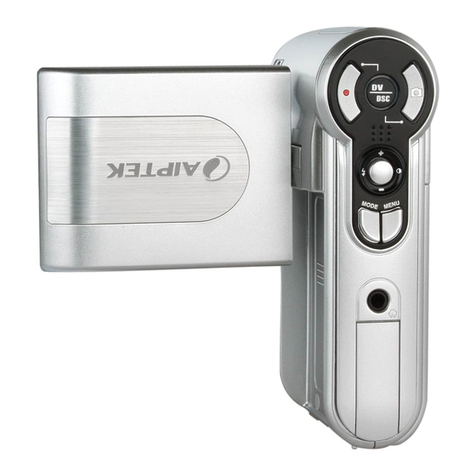
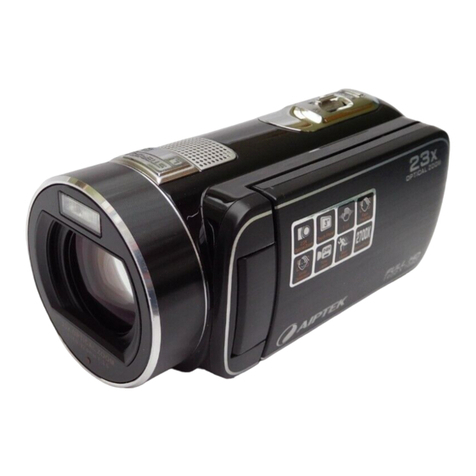
Table of Contents
Getting Started................................................................ 1
Knowing your camcorder parts............................................................. 1
Installing the battery.............................................................................. 2
Charging the battery ............................................................................. 2
Inserting a memory card (optional)....................................................... 2
Turning on/off your camcorder.............................................................. 2
Setting language................................................................................... 3
Reading LCD indicators........................................................................ 3
Basic Operations............................................................ 4
Recording a video clip .......................................................................... 4
Taking a still picture .............................................................................. 6
Playing back your recordings................................................................ 8
Playing back your recordings on PC..................................................... 9
Connecting the camcorder to TV.......................................................... 9
MENU Operations........................................................... 11
Basic Setting items ............................................................................... 11
Advanced Setting items........................................................................ 12
Advanced Setting items (continued)..................................................... 13
Menu items in Setting mode (continued) .............................................. 14
Battery Life Indicator............................................................................. 14
Battery Life............................................................................................ 14
Storage Capacity .................................................................................. 15
System Requirements .......................................................................... 15
6SHFL¿FDWLRQV........................................................................................ 16

1
Getting Started
Knowing your camcorder parts
Tripod socket
OK key/
Joystick 5-way
Battery cover
Strap hook
Flash strobe
Lens
Internal
Microphone
SD/MMC card slot
Speaker
Playback button
MENU button
Shutter button
Record button
Zoom (in/out) button
Macro mode
switch
ICON Display switch
Flash switch
Resolution switch
Power button
LCD monitor
Expert button
Delete button
AV connector/
Earphone
USB connector
HDMI
External
Microphone
LED

2
To insert a memory card, do the following:
(1) Open the SD/MMC card cover.
(2) Gently push the card until the card reaches the bottom of the slot.
To remove the memory card, gently push the card and it will pop up. Then pull the card
out of the slot.
Inserting a memory card (optional)
3OHDVHFKDUJHWKHEDWWHU\IRUDWOHDVWKRXUVSULRUWRLWV¿UVWXVH
1. Connect the cable.
Connect one end of the supplied AC adapter to the USB port of the
camcorder and the other end to a wall outlet.
OR
Connect one end of the supplied USB cable to the USB port of the camcorder and the
other end to a powered PC. Make sure the camcorder is powered off.
2. The charging LED turns red and charging begins.
3. When charging is interrupted or the battery pack is fully charged, the charging LED will
turn green.
When using a PC to charge the battery, do not power on the camcorder, or
charging will be halted.
Installing the battery
1. Press the PushEXWWRQ¿UVWDQGVOLGHWKHEDWWHU\FRYHURSHQ
2. Place the accessory Li-Ion battery into the compartment. Note
that the metallic contacts must be aligned with the contacts in the
compartment.
3. After the battery is properly installed, replace the battery cover.
Charging the battery
Open the LCD monitor or press and hold down the Power button for 1 second to turn on
the camcorder.
To turn off the camcorder, press and hold down the Power button for 1 ~ 3 seconds or
close the LCD monitor.
Turning on/off your camcorder
If the camcorder stays inactive for a long period of time, it may automatically
shut down due to the Auto-Off setting.

3
Setting language
1. Power on the camcorder.
2. Press the MENU button to enter the Setting screen.
3. Use the Joystick to select the Language item, and then Press OKWRFRQ¿UP
4. Move the Joystick up/down to select a language.
5. When done, press OKWRFRQ¿UPWKHVHWWLQJ
Reading LCD indicators
1Mode icon Battery life
Video resolution Zoom ratio indicator
Picture resolution Flash
Continuous shot Expert mode
Focus Remaining recordable time
Internal memory/SD card inserted Recording time
00:06:40
00:05:12
Optical zoom
Digital zoom

44
Recording a video clip
1. Select the video resolution in different scenarios.
To choose the video resolution among various options, push the Down (S-) button of the
5-way joystick to switch to preferred video resolution.
1) Full HD (1920x1080): allows you to record video in crystal-clear details and playback it
later on the HD TV.
2) HD 60fps (1280x720): allows you to capture high speed motion at 60 frames per
second rate, recording videos in precise quality level without any delay or jerky side-
effect.
3) HD 30fps (1280x720): for recording standard HD videos.
4) WVGA 60fps (484x480): for recording high speed motion at 60 frames per second rate
EXWLQDORZHUUHVROXWLRQWRNHHS¿OHVL]HVPDOO
5) QVGA 30fps (320x240): for recording iPod and iPhone compatible videos.
2. Adjust the focus:
Normally the camcorder can auto focus without adjusting focus. If you want to take close-
up pictures, you can push the Up button of the 5-way Joystick to switch to Macro mode
().
Basic Operations
Resolution switch
Macro mode
Switch

55
3. Adjust the zoom:
Move the Zoom button up or down to zoom in or zoom out the screen.
The camcorder possess 5X optical zoom and 4X digital zoom* for you to capture image in
detail even from a long distance.
The zoom function is also available during recording (except in macro mode).
4X digital zoom is not available for Full HD video recording.
4. Press the Record button to start recording.
5. Press the Record button again to stop recording.
6. While recording, press the button to pause recording, and press the button again to
resume recording.
7. Picture in Video (PIV)
During recording, you can capture images by pressing the Joystick switch. The image
you captured will appear the same resolution as the one you set for still picture.
T
W
Zoom (in/out) button
Record button
OK key / Joystick 5-way

66
1. Adjust the focus:
Normally the camcorder can auto focus without adjusting focus. If you want to take
close-up pictures, you can push the Up button to switch to Macro mode ( ).
2. Zooming:
Move the Zoom button up or down to zoom in or zoom out the screen.
3. For better image quality, it is recommended that you hold the LCD panel steadily to
avoid the image from blurring caused by hand shake.
4. Press the Shutter button half way down and hold
for the camcorder to auto focus. When the focus
frame turns green, press the button fully down to
take a still picture.
Taking a still picture
focus frame

77
Due to the sensor capture feature, the LCD preview and ratio of still picture
capture will vary depending upon different video resolution settings. The image
capture of the camera is set where as video resolutions are different.
Video resolution Preview Taking pictures
and focusing
FULL HD (1920x1080)
16:9 ratio 4:3 ratio
HD 60f(1280x720) 16:9 ratio 4:3 ratio
HD 30f(1280x720)
WVGA 60f(848x480)
QVGA 30f(320x240)
4:3 ratio 4:3 ratio
Continuous shot
While in preview mode you can capture continuous images (at video resolution) by
“clicking and holding down” the Joystick. The camcorder will continuously snap shots
(up to 10 per second) until you release the OK key / Joystick, or until the memory
is full.
OK key / Joystick 5-way

88
Playing back your recordings
1. Press the PLAYBACK ( ) button and use the Joystick WRVHOHFW¿OHV
2. Operations in playback mode:
File type How to... Action
Index mode
Full-screen mode
Shift between Index
mode and Full-
screen mode
In Index mode, press the OK key to switch to Full-
screen mode. In Full-screen mode, press the MENU
button to switch to Index mode.
6KLIWEHWZHHQ¿OHV
1. In Index mode: Use the Joystick to move the
highlight box.
2. In Full-screen mode: Use the Joystick to move
left or right.
Delete
1. In Index mode: Press the MENU button or the
DeleteEXWWRQWRGHOHWH¿OHV
2. In Full-screen mode: Press the Delete button to
GHOHWH¿OHV
Video
Start playing :KHQVHOHFWHGLQIXOOVFUHHQPRGHWKH¿OH
automatically starts playing.
Pause/Resume
playing During playing/While paused, press the OK key.
Adjust the volume
level During playing, push the Joystick up or down.
Stop playing During playing, press the MENU button.
Return to the
preview screen Press the Shutter button.
Fast forward During playing, push the Joystick to the right. To stop,
press the MENU button.
Fast backward During playing, push the Joystick to the left. To stop,
press the MENU button.
Zoom During playing, use the Zoom button to zoom in/out.
Adjust playback
speed
Press OK key to pause, then use the Joystick to move
up/down to adjust the playing speed at x1, x2, x4, x1/2,
x1/4, x1/8, or x1/16 speed. Press OK key again to
resume playing.
Picture
Zoom in/out Push the Joystick up or down.
Lock/Release zoom
ratio
When the zoom ratio is greater than 1.0x, press the
OK key.
Browse the enlarged
picture
When the zoom ratio is locked, use the Joystick to
browse the picture.

99
Playing back your recordings on PC
Connecting to PC
1. Connect one end of the USB cable to a powered PC, and the other end
(mini USB type) to your camcorder.
2. Turn on the camcorder.
3. After the embedded software is installed on your PC, you may view the
UHFRUGLQJVRQ3&2QO\QHHGHGLQWKH¿UVWWLPHFRQQHFWLRQ
Connecting the camcorder to TV
7KH+'79ZLOOGLVSOD\\RXUYLGHRFOLSVLQL¿HOGVUHVROXWLRQPRGH
even though it is recorded in 1080P (30 frames) setting.
1. Turn on your HDTV.
2. Connect the HDMI-in connector (the bigger end) of the HDMI cable to
the HDTV.
3. Turn on the camcorder.
4. Connect the other end of the HDMI cable to your camcorder.
5. Switch the HDTV to “HDMI input” mode.
TV
Connecting the camcorder to HDTV
TV: HDTV with HDMI input port
HDMI In
HDMI Out

1010
Connecting the camcorder to Standard TV
TV = Traditional CRT TV
1. Power on your TV and switch the TV to AV mode.
2. Connect the audio and video ends of the AV cable (yellow/white/red color)
to the TV “AV-IN” jacks.
3. Power on the camcorder.
4. Connect the other end of the AV cable to the “AV” port on your camcorder.
When the pop-up message appears on the screen, please select “AV-Out”.
AV cable
Video Audio
AV mode
AV-IN
AV

11
MENU Operations
Basic Setting items
3RZHURQĺ3UHVVWKHMenu button.
Item Option Description
Video
Resolution
FULL HD(30f) Set the video resolution to FULL HD (1920x1080 pixels).
HD 60f(720P) Set the video resolution to HD 60f (1280x720 pixels).
HD 30f(720P) Set the video resolution to HD 30f (1280x720 pixels).
WVGA
60f(DVD) Set the video resolution to WVGA 60f (848x480 pixels).
QVGA 30f Set the video resolution to QVGA 30f (320x240 pixels).
Picture
Resolution
3M Set picture resolution to 3 mega pixels.
5M Set picture resolution to 5 mega pixels.
8M Set picture resolution to 8 mega pixels.
12M Set picture resolution to 12 mega pixels.
Beep
Off
Disable beep sound.
On
Enable beep sound.
Shutter On
Disable beep sound, but keep Shutter sound.
Clock -
Set date and time.
Language
-
Let you select the language used for OSD.
Date Stamp
On Print a date mark on each picture.
Off Disable date mark.
Icon
On/Off
Enable/Disable OSD icons to display on the screen.
Slide Show On/Off Enable/Disable the camcorder from displaying images/videos in
sequence.

12
,I\RXZDQWWR¿QHWXQH\RXUFDPFRUGHUIXQFWLRQVSUHVVWKH
“E” (Expert) button on the side of the unit as illustrated. This
will expand the menu items as follows.
Item Option Description
Flash Strobe
On 7KHÀDVKLVIRUFHGWR¿UHLQHYHU\VKRW
Auto 7KHÀDVKDXWRPDWLFDOO\¿UHVZKHQWKHOLJKWLQJLVLQVXI¿FLHQW
Off 7KHÀDVKLVGLVDEOHG
NightShot Auto/Off
Default setting (Auto) allows you to take a photograph with a dark
background. Since the shutter speed will slow down when taking
photographs in dark locations, we recommend the use of a tripod
to help eliminate blur from hand shake.
Note: Noise increases when shooting in the dark with this
function enabled.
EV -2~+2
Manually adjust the exposure to gain better effect when the
preview image appears too bright or too dark. A positive value
indicates the image will be brighter than usual; while a negative
value makes the image dimmer.
Selftimer On/Off
Enable/Disable the selftimer. After the selftimer is turned on, the
camera will delay ten seconds before capturing when the Shutter
button is pressed.
Continuous
Shot
(at video
resolution)
On/Off Enable/Disable continuous shot function.
White Balance
Auto The camera automatically adjusts white balance.
Sunny This setting is suitable for outdoor recording in sunny weather.
Cloudy This setting is suitable for recording in cloudy weather or shady
environments.
Fluorescent 7KLVVHWWLQJLVVXLWDEOHIRULQGRRUUHFRUGLQJZLWKÀXRUHVFHQWODPS
lighting, or environments with high color temperature.
Tungsten This setting is suitable for indoor recording with incandescent
lamp lighting, or environments with low color temperature.
Effect
Normal Make recordings in natural color.
Black &
White Make recordings in black and white.
Classic Make recordings in sepia-toned color.
AF Lock On/Off Enable/Disable the auto focus function.
Advanced Setting items

13
Item Option Description
Face
Tracking On/Off Enable/Disable face tracking function.
LCD
Brightness
1~4
Set LCD brightness.
TV System
NTSC
Set TV system compatibility to NTSC. This option is suitable for
America, Taiwan, Japan, and Korea areas.
PAL
Set TV system compatibility to PAL. This option is suitable for
Germany, England, Italy, Netherlands, China, Japan, and Hong
Kong.
Flicker
50Hz
6HWÀLFNHUIUHTXHQF\WR+]
60Hz
6HWÀLFNHUIUHTXHQF\WR+]
Auto Off
Off
Disable Auto-off function.
3 min
The camera automatically shuts down after remaining inactive for
over 3 minutes.
Format
Yes
)RUPDWWKHVWRUDJHPHGLXP1RWHWKDWDOO¿OHVVWRUHGLQWKH
medium will be gone.
No
Cancel action.
Default
On
Restore factory defaults. Note that your current settings will be
overridden.
Off
Cancel action.
Advanced Setting items (continued)

14
Icon Description
Full battery life
Moderate battery life
Low battery life
7KHÀDVKVWUREHZLOOEHGLVDEOHG´
Empty battery life
Note: To avoid sudden outage of power supply, it is recommended that you replace the
battery when the icon indicates low battery life.
Battery Life Indicator
Still picture Video clip
Number of shots Recording time (minute)
500 80 min.
* shoot every 30 seconds
ÀDVKLVRII
*** resolution is set to 5M (2592x1944)
* resolution is set to 720P 60f
(1280x720 @60f)
Note: This table is for your reference only. The actual battery life depends on your battery
type and recharge level.
Battery Life
Menu items in Setting mode (continued)
* Flicker settings table:
Region England Germany France Italy Spain
Netherlands
Russia
Setting 50Hz 50Hz 50Hz 50Hz 50Hz 50Hz 50Hz
Region Portugal America Taiwan China Japan Korea Thailand
Setting 50Hz 60Hz 60Hz 50Hz 50/60Hz 60Hz 50Hz

15
Storage Capacity
Memory
Video (min.) Still picture
FULL HD 30f /
HD 720P 60f
HD 720P 30f /
WVGA 60f QVGA 30f 5M
SD card (512MB) 7 15 45 290
SD card (1GB) 15 30 90 580
SD card (2GB) 30 60 180 1160
SD card (4GB) 60 120 240 2320
SD card (8GB) 120 240 480 2320
Note: Actual capacity may vary (up to ± 30%) depending on the color saturation and
complexity of your subject and surroundings.
System requirements are different for different video resolution settings:
Video Resolution PC system requirements
FULL HD
(1920x1080) @30fps
OS = Windows XP SP2, Vista or above
CPU = Pentium 4 3.2GHz Core 2 Dual or above
System RAM = 1GB (2GB recommended)
Graphic card = 256MB of RAM
HD 60f (1280x720) @60fps
HD 30f (1280x720) @30fps OS = Windows XP SP2, Vista or above
CPU = Pentium 4 3.2GHz or above
System RAM = 512MB (1GB recommended)
Graphic card = 256MB of RAM
WVGA 60f (848x480) @60fps
QVGA 30f (320x240) @30fps
System Requirements

16
6SHFL¿FDWLRQV
Item Description
Image sensor 5 Mega (2592x1944 pixels)
Resolution
Still image: 3M, 5M, 8M, 12M
Video resolution:
1920x1080, up to 30fps (FULL HD)
1280x720, up to 60fps (HD 60f)
1280x720, up to 30fps (HD 30f)
848x480, up to 60fps (WVGA 60f)
320x240, up to 30fps (QVGA 30f)
Lens 5X Optical auto focus zoom lens
Focus Range Normal: 80cm ~ ; Macro focus: 1cm ~ 80cm
Aperture Range F3.5 ~ F3.7, f=6.8~34.0mm
Digital zoom 4X (N/A in FULL HD mode)
Shutter Speed 1 ~ 1/2000 sec.
File format MOV, JPEG
External memory SD/SDHC card (min. 256MB up to 32GB)
LCD display 7.6cm (3”) LTPS LCD
TV out HDTV HDMI, NTSC/PAL system supported
Interface USB 2.0
Microphone Embedded stereo microphone; external microphone jack
Speaker Yes
Nightshot Yes (both in still image and video modes)
Battery NP60 compatible Li-ion rechargeable battery
External Power Supply AC-input: 100~240V, 50~60Hz, 5V, 2A; DC-output: 5V, 2A
Dimensions 120 x 84 x 48 mm
Note:6SHFL¿FDWLRQVDUHVXEMHFWWRFKDQJHZLWKRXWQRWL¿FDWLRQ
For more information on camcorder details and more advanced operations, please
refer to the electronic manual included in the camcorder’s built-in internal memory.

FCC-Erklärung:
Dieses Gerät erfüllt Teil 15 der FCC-Regularien. Der Betrieb unterliegt
den folgenden beiden Voraussetzungen: (1) Dieses Gerät darf keine
Störungen verursachen, und (2) dieses Gerät muss jegliche empfangenen
Störungen hinnehmen, einschließlich Störungen, die zu unbeabsichtigtem
Betrieb führen können.
Dieses Gerät wurde getestet und als mit den Grenzwerten für
Digitalgeräte der Klasse B gemäß Teil 15 der FCC-Regularien
übereinstimmend befunden. Diese Grenzwerte wurden geschaffen, um angemessenen
Schutz gegen Störungen beim Betrieb in Wohngebieten zu gewährleisten. Dieses Gerät
erzeugt, verwendet und kann Hochfrequenzenergie abstrahlen und kann - falls nicht in
Übereinstimmung mit den Bedienungsanweisungen installiert und verwendet - Störungen der
Funkkommunikation verursachen.
Allerdings ist nicht gewährleistet, dass es in bestimmten Installationen nicht zu Störungen
kommt. Falls dieses Gerät Störungen des Radio- oder Fernsehempfangs verursachen sollte,
was leicht durch Aus- und Einschalten des Gerätes herausgefunden werden kann, wird dem
Anwender empfohlen, die Störung durch eine oder mehrere der folgenden Maßnahmen zu
beseitigen:
- Neuausrichtung oder Neuplatzierung der Empfangsantenne(n).
- Vergrößerung des Abstands zum Empfänger.
- Anschluss des Gerätes an einen vom Stromkreis des Empfängers getrennten Stromkreis.
- Hinzuziehen des Händlers oder eines erfahrenen Radio-/Fernsehtechnikers.
'DUEHUKLQDXVN|QQHQMHJOLFKHbQGHUXQJHQRGHU0RGL¿NDWLRQHQGHV*HUlWHVGLHQLFKW
ausdrücklich von der für die Übereinstimmung verantwortlichen Stelle zugelassen sind, Ihre
Berechtigung zum Betrieb des Gerätes erlöschen lassen.
Wenn die Lebensdauer des Produkts zu Ende kommt,
lassen Sie bitte möglichst alle Komponenten recyceln.
Batterien und Akkus dürfen nicht mit Hausmüll
zusammen entsorgt werden! Bitte entsorgen Sie sie
bei einer lokalen Recyclingstelle.
Zusammen leisten wir einen wertvollen Beitrag zum
Schutz unserer Umwelt.
Herzlich willkommen!
Lieber Benutzer, vielen Dank für den Kauf dieses Produkts.
In die Entwicklung dieses Geräts wurde viel Zeit und Mühe investiert, und wir hoffen, es
wird Ihnen viele Jahre störungsfreien Betrieb und Freude bescheren.
Sicherheitshinweise:
1. Lassen Sie die Kamera nicht fallen und beschädigen und zerlegen Sie die Kamera nicht,
andernfalls erlischt die Gewährleistung.
2. Vermeiden Sie jeglichen Kontakt des Geräts mit Wasser und trocknen Sie sich die Hände
ab, bevor Sie es verwenden.
3. Setzen Sie die Kamera keinen hohen Temperaturen aus und lassen Sie das Gerät nicht in
direkter Sonneneinstrahlung liegen. Andernfalls könnten Schäden an der Kamera auftreten.
4. Verwenden Sie die Kamera behutsam. Vermeiden Sie es, starken Druck auf das
Kameragehäuse auszuüben.
5.
Verwenden Sie die Kamera zu Ihrer eigenen Sicherheit nicht bei Gewittern oder Blitzschlag.
9HUZHQGHQ6LHNHLQH%DWWHULHQPLWDQGHUHQ6SH]L¿NDWLRQHQ$QGHUQIDOOVN|QQHQXQWHU
Umständen schwere Schäden am Gerät entstehen.
7. Entfernen Sie die Batterie, wenn Sie das Gerät längere Zeit nicht verwenden, da
mängelbehaftete Batterien die Funktionalität der Kamera beeinträchtigen können.
8. Entfernen Sie die Batterie, falls diese Anzeichen gibt auszulaufen oder Verformungen
aufweist.
9. Verwenden Sie ausschließlich vom Hersteller angebotenes Zubehör.
10. Bewahren Sie die Kamera außerhalb der Reichweite von Kindern auf.
11. Es besteht ein Explosionsrisiko, wenn die Batterie durch einen falschen Typ ersetzt wird.
12. Entsorgen Sie gebrauchte Batterien gemäß den Anweisungen.

Inhaltsverzeichnis
Erste Schritte .................................................................. 1
Die Komponenten Ihres Camcorders ................................................... 1
Akku einlegen ....................................................................................... 2
Akku laden............................................................................................ 2
Speicherkarte einlegen (optional)......................................................... 2
Camcorder ein- und ausschalten.......................................................... 2
Einstellen der Sprache.......................................................................... 3
LCD-Anzeigen ablesen......................................................................... 3
Grundbedienung............................................................. 4
Aufnehmen eines Videoclips ................................................................ 4
Aufnehmen eines Fotos........................................................................ 6
Aufzeichnungen wiedergeben .............................................................. 8
Wiedergabe der Aufnahmen mit dem PC ............................................. 9
Camcorder mit einem Fernsehgerät verbinden .................................... 9
Menübedienung.............................................................. 11
Elemente der Grundeinrichtung............................................................ 11
Elemente der erweiterten Einrichtung................................................... 12
Elemente der erweiterten Einrichtung (Fortsetzung) ............................ 13
Menüelemente im Einstellungsmodus (Fortsetzung) ........................... 14
Akkustandanzeige ................................................................................ 14
Akkuladestand ...................................................................................... 14
Speicherkapazität ................................................................................. 15
Systemvoraussetzungen ...................................................................... 15
Technische Daten ................................................................................. 16
Table of contents
Languages:
Other AIPTEK Camcorder manuals

AIPTEK
AIPTEK Pocket DV8800 User manual

AIPTEK
AIPTEK AHD Z700 Extreme User manual

AIPTEK
AIPTEK Pocket DVT300LE User manual

AIPTEK
AIPTEK HD-1 User manual

AIPTEK
AIPTEK AHD200 User manual

AIPTEK
AIPTEK PENCAM_HD User manual

AIPTEK
AIPTEK Pocket DVT100 User manual

AIPTEK
AIPTEK VideoSharier User manual

AIPTEK
AIPTEK AHD-H12 EXTREME User manual

AIPTEK
AIPTEK AHD-AF1 User manual

AIPTEK
AIPTEK V2T6 User manual

AIPTEK
AIPTEK PocketCam X User manual

AIPTEK
AIPTEK AHD T8 Pro User manual

AIPTEK
AIPTEK SportyCam Z3 User manual

AIPTEK
AIPTEK HDDV 8000 User manual

AIPTEK
AIPTEK T8 User manual

AIPTEK
AIPTEK PocketDV T290 User manual

AIPTEK
AIPTEK IS-DV2.4 User manual

AIPTEK
AIPTEK H350 User manual

AIPTEK
AIPTEK SD 2Mega User manual