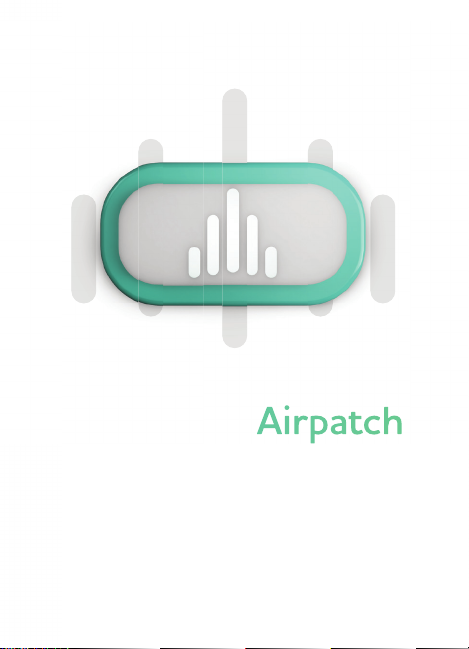
Airpatch 2AU4S-716 User manual

ELEVATE YOUR PLAY
Wireless Effects Pedal Controller Guide
BEYOND THE BOARD

What’s Included
Controller + Attachment System Charging
Cable
Dock

01
01 TABLE OF CONTENTS
02 AIRPATCH DOCK
03 PAIRING YOUR AIRPATCH
04 AIRPATCH CONTROLLER
05 CHARGING YOUR CONTROLLER
06 CONTROLLER ATTACHMENT
07 MAKING IT YOUR OWN
08 MODE SELECTION
09 PREPARE FOR LAUNCH
10&11 FLIGHT MODES
12 AIRPATCH SPECIFICATIONS
13 STAY PATCHED IN
Table of Contents

Airpatch
Dock
Select the effects pedals you
want to use with your Airpatch
and connect them between the
Send and Return jacks on the
Airpatch Dock. (See Figure A.1 for
connection example.) The audio
source connects to the Input jack
while the rest of your audio signal
chain connects to the Airpatch
Output. Ensure all pedals between
your Airpatch Send and Return are
powered ON and engaged.
For the 9V connection, use a
standard 2.1mm center negative
barrel connector ONLY. Power
supply is not included.
02

Airpatch
Dock
03
Pairing Your irpatch
Use your Airpatch Dock Button—with the Airpatch Sonic Bars—to
cycle through modes and pair your Controller. Hold the Dock Button
down for 3 seconds until the Dock’s LED starts blinking. Press your
Airpatch Controller once to pair it. The Dock’s LED will then stop
blinking and remain ON.

04
Airpatch Controller
When you press your Airpatch Controller, the surface will flash white.
When the LED flashes red, your battery is low (~1 hour remaining).
If the light does not flash at all, your battery is depleted and your
Controller must be charged.

05
Charging Your
Controller
Charge your Airpatch Controller with the magnetic USB cable
provided and a standard 5V USB power supply. The magnetic
charging connector is designed to fit one way only so look for the
light to appear red indicating your Controller is charging. It will turn
white once it’s complete (~45 minutes). Remove the charging cable
once your battery is full.

06
Controller
ttachment
Your Airpatch includes a Mounting Plate with a release lever and a
removable, finish-friendly adhesive pad, allowing you to quickly and
easily attach and detach your Airpatch from a variety of instrument
surfaces and positions. Simply peel off the white film from the
Mounting Plate’s adhesive pad to expose the permanent adhesive
and carefully stick it to the bottom of the Mounting Plate. The clear
side is finish-friendly adhesive. Peel off the clear film and secure
the Mounting Plate to your instrument. The adhesive is strong but
removable and reusable.

07
Making It Your Own
When connecting your effects pedals, Airpatch enables endless
combinations. Ever wish you could control your favorite effects right on
your instrument? What about getting more out of your go-to pedals?
Your Airpatch makes it possible.
Airpatch encourages freedom of movement and expression.
Experiment by placing the Airpatch Controller in different locations
on your instrument until you find the position that’s most comfortable
and best suited to your playing style. Airpatch uses medium-pressure
silicone switches to avoid accidental effects switching. The areas to the
left and right of the grip bars require slightly less pressure to activate
while the center of the Controller Button requires slightly more
pressure to engage.

08
Mode
Selection
Dock Button
Flight Mode
Latch
Momentary
Reverse
Momentary
LED Color Description
Simply press the Airpatch Dock
Button located in the left side of
the Dock to switch Flight Modes.
The three-color LED will indicate
which Flight Mode you’re in.
Press the Airpatch
Controller to activate pedals;
press again to turn them off.
You can connect multiple
pedals in your effects loop!
With responsive control,
your effects are activated
by pressing and holding the
Airpatch Controller.
Your effects default to ON.
The effects loop is bypassed
for as long as the Airpatch
Controller is pressed and held.

Mode
Selection
InstrumentAmp
out
out
in
in
09
Prepare for Launch
Figure A.1 — Airpatching Your Effects Pedals

10
Flight Modes
ToneTacks
Get more out of your pedals with wireless control and unique
switching features.
LeadButton
Distortion/Boost + Latch Mode — Use your Airpatch to launch into
your lead section. Add a modulation to your effects loop and activate
multiple pedals at once.
Tremolo/StutterButton
Tremolo Pedal + Momentary Mode — Press and hold Tremolo/Stutter
for accents and dramatic note and chord holds. This is a great modulation
when combined with distortion outside of your effects loop.
DelayTrail
Delay + Momentary/Latch Mode — Your Airpatch will continue to send
your audio signal into the delay pedal even when it’s bypassed, preserving
your delay trails. Dial in long delay times and use your Airpatch to bring in
the ambient delay trail during phrases and chords.

11
Pitch Button
Pitch Shifter + Latch/Momentary Mode — Incorporate new and
unprecedented harmonies and octaves into your soundscapes. Your
Airpatch’s Momentary Mode acts like new notes for your instrument
when combined with pitch effects.
Three-way Killswitch
Momentary Mode — Leave your effects loop blank or directly
connect your effects Send to the Return with just one patch cable.
No pedals necessary. This provides you with two killswitch options.
Use a distortion pedal in your Airpatch effects loop and a second
distortion outside of your effects loop to stack other-worldly tones
when switched rapidly.

12
Airpatch Specifications
• 2.4 GHz wireless signal, similar to other low latency wireless
guitar transmitters.
• Noiseless switching circuit.
• 9V center negative barrel connector — compatible with
standard pedal board power systems. (Power supply not included.)
• Over 50 feet of range (line of sight).
• Long-lasting battery life Controller that lasts for multiple
performances on a single charge.
• USB charging cable for Airpatch Controller with magnetic
connection.
• Estimated 45-minute charging time.
• Wireless controller LED indicator blinks white when button
is activated. LED indicator blinks red notifying you of
approximately 1 hour of battery life remaining.
Dock Dimensions
• Height: 2.42” (61.5mm)
• Width: 3.07” (78.0mm)
• Depth: 1.34” (34.0mm)
Controller Dimensions
• Height: 0.58” (14.7mm)
• Width: 1.71” (43.5mm)
• Depth: 0.93” (23.5mm)

13
Stay Patched In
aviateaudio.com
contactus@aviateaudio.com
@aviateaudio @aviate_audio
Disclaimer
FCC STATEMENT
1. This device complies with Part 15 of the FCC Rules. Operation is subject to the following two conditions:
(1) This device may not cause harmful interference.
(2) This device must accept any interference received, including interference that may cause
undesired operation.
2. Changes or modifications not expressly approved by the party responsible for compliance could void the
user's authority to operate the equipment.
NOTE: This equipment has been tested and found to comply with the limits for a Class B digital device,
pursuant to Part 15 of the FCC Rules. These limits are designed to provide reasonable protection against
harmful interference in a residential installation. This equipment generates uses and can radiate radio
frequency energy and, if not installed and used in accordance with the instructions, may cause harmful
interference to radio communications. However, there is no guarantee that interference will not occur in a
particular installation. If this equipment does cause harmful interference to radio or television reception,
which can be determined by turning the equipment off and on, the user is encouraged to try to correct the
interference by one or more of the following measures:
Reorient or relocate the receiving antenna.
Increase the separation between the equipment and receiver.
Connect the equipment into an outlet on a circuit different from that to which the receiver is connected.
Consult the dealer or an experienced radio/TV technician for help.

Table of contents