manuals.online logo
Brands
  1. Home
  2. •
  3. Brands
  4. •
  5. AirTime
  6. •
  7. Clock
  8. •
  9. AirTime AT12RPS Operation manual

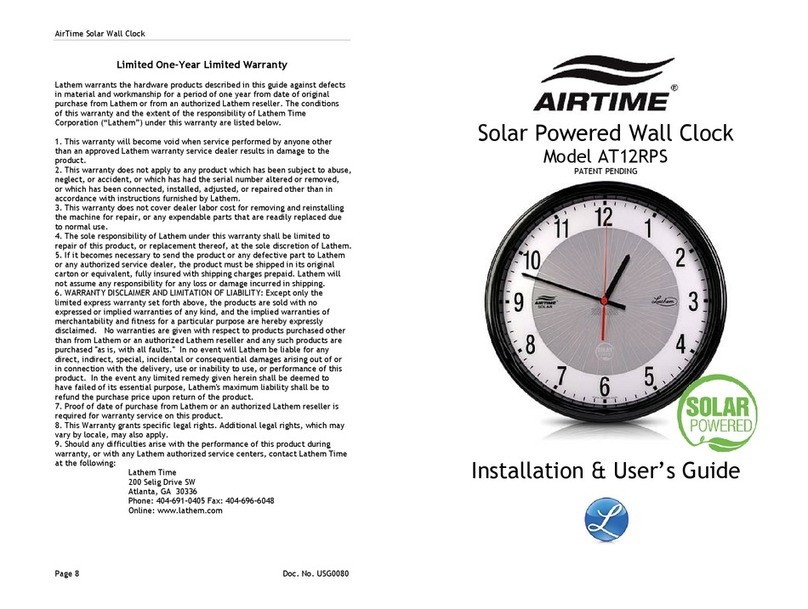
AirTime AT12RPS Operation manual

Solar Powered Wall Clock
Model AT12RPS
PATENT PENDING
Installation & User s Guide
Patent Pending Page 1
THIS EQUIPMENT COMPLIES WITH FCC CLASS-B REQUIREMENTS
PURSUANT SUBPART J OF PART-15
This device complies with Part 15 of the FCC Rules. Operation is subject to the following
two conditions: (1) this device may not cause harmful interference, and (2) this device
must accept any interference received, including interference that may cause undesired
operation.
NOTE: This equipment has been tested and found to comply with the limits for a Class B
digital device, pursuant to Part 15 of the FCC Rules. These limits are designed to provide
reasonable protection against harmful interference in a residential installation. This
equipment generates, uses, and can radiate radio frequency energy and, if not installed
and used in accordance with the instructions, may cause harmful interference to radio
communications. However, there is no guarantee that interference will not occur in a
particular installation. If this equipment does cause harmful interference to radio or
television reception, which can be determined by turning the equipment off and on, the
user is encouraged to try to correct the interference by one or more of the following
measures:
- Reorient or relocate the receiving antenna.
- Increase the separation between the equipment and receiver.
- Connect the equipment into an outlet on a circuit different from that to which the
receiver is connected.
- Consult the dealer or an experienced radio TV technician for help.
Disclaime
The information within this document has been carefully checked and is
believed to be entirely reliable. However, no responsibility is assumed for
inaccuracies. Lathem Time Corp. reserves the right to make changes to any
products herein to improve reliability, function, or design.
AirTime, Lathem and the Lathem logo are registered trademarks of Lathem
Time Corporation. Other product names mentioned in this manual may be
trademarks of their respective companies and are hereby acknowledged.
WARNING: Changes or modifications to this product not expressly approved by
the party responsible for compliance could void the user s authority to operate
this equipment.
Copyright © 2009 Lathem Time Corporation. All rights reserved.
Lathem Time Co po ation
200 Selig Drive SW
Atlanta, GA 30336
www.lathem.com
Document No. USG0080A / Revised August 19, 2011
AirTime Solar Wall Clock
Page 10 Doc. No. USG0080A
Othe Ai Time P oducts
ATX6 6 Watt Transceiver capable of
transmitting exact time in larger
facilities/areas
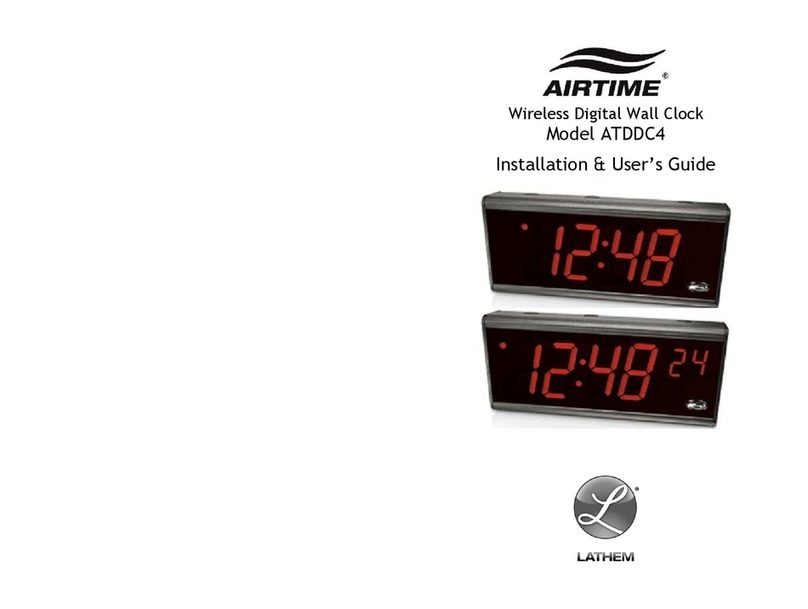
ATDDC4 4” Digital Wireless Wall Clock
AT-ANTOD Outdoor Antenna for maximum
coverage with the ATX6 or the AT20WT
AT-MSX AirTime receiver that accepts the
AirTime signals from an ATX,
ATX6 or AT20WT and corrects
Lathem RS485 devices or
Intercom systems via a 12:00AM
dry contact closure
Contact your distributer or visit www.lathem.com for more
information
Installation & User s Guide
Patent Pending Page 9
Limited One-Yea Limited Wa anty
Lathem warrants the hardware products described in this guide against defects
in material and workmanship for a period of one year from date of original
purchase from Lathem or from an authorized Lathem reseller. The conditions
of this warranty and the extent of the responsibility of Lathem Time
Corporation (“Lathem”) under this warranty are listed below.
1. This warranty will become void when service performed by anyone other
than an approved Lathem warranty service dealer results in damage to the
product.
2. This warranty does not apply to any product which has been subject to abuse,
neglect, or accident, or which has had the serial number altered or removed,
or which has been connected, installed, adjusted, or repaired other than in
accordance with instructions furnished by Lathem.
3. This warranty does not cover dealer labor cost for removing and reinstalling
the machine for repair, or any expendable parts that are readily replaced due
to normal use.
4. The sole responsibility of Lathem under this warranty shall be limited to
repair of this product, or replacement thereof, at the sole discretion of Lathem.
5. If it becomes necessary to send the product or any defective part to Lathem
or any authorized service dealer, the product must be shipped in its original
carton or equivalent, fully insured with shipping charges prepaid. Lathem will
not assume any responsibility for any loss or damage incurred in shipping.
6. WARRANTY DISCLAIMER AND LIMITATION OF LIABILITY: Except only the
limited express warranty set forth above, the products are sold with no
expressed or implied warranties of any kind, and the implied warranties of
merchantability and fitness for a particular purpose are hereby expressly
disclaimed. No warranties are given with respect to products purchased other
than from Lathem or an authorized Lathem reseller and any such products are
purchased "as is, with all faults." In no event will Lathem be liable for any
direct, indirect, special, incidental or consequential damages arising out of or
in connection with the delivery, use or inability to use, or performance of this
product. In the event any limited remedy given herein shall be deemed to
have failed of its essential purpose, Lathem's maximum liability shall be to
refund the purchase price upon return of the product.
7. Proof of date of purchase from Lathem or an authorized Lathem reseller is
required for warranty service on this product.
8. This Warranty grants specific legal rights. Additional legal rights, which may
vary by locale, may also apply.
9. Should any difficulties arise with the performance of this product during
warranty, or with any Lathem authorized service centers, contact Lathem Time
at the following:
Lathem Time
200 Selig Drive SW
Atlanta, GA 30336
Phone: 404-691-0405 Fax: 404-696-6048
Online: www.lathem.com
AirTime Solar Wall Clock
Page 2 Doc. No. USG0080A
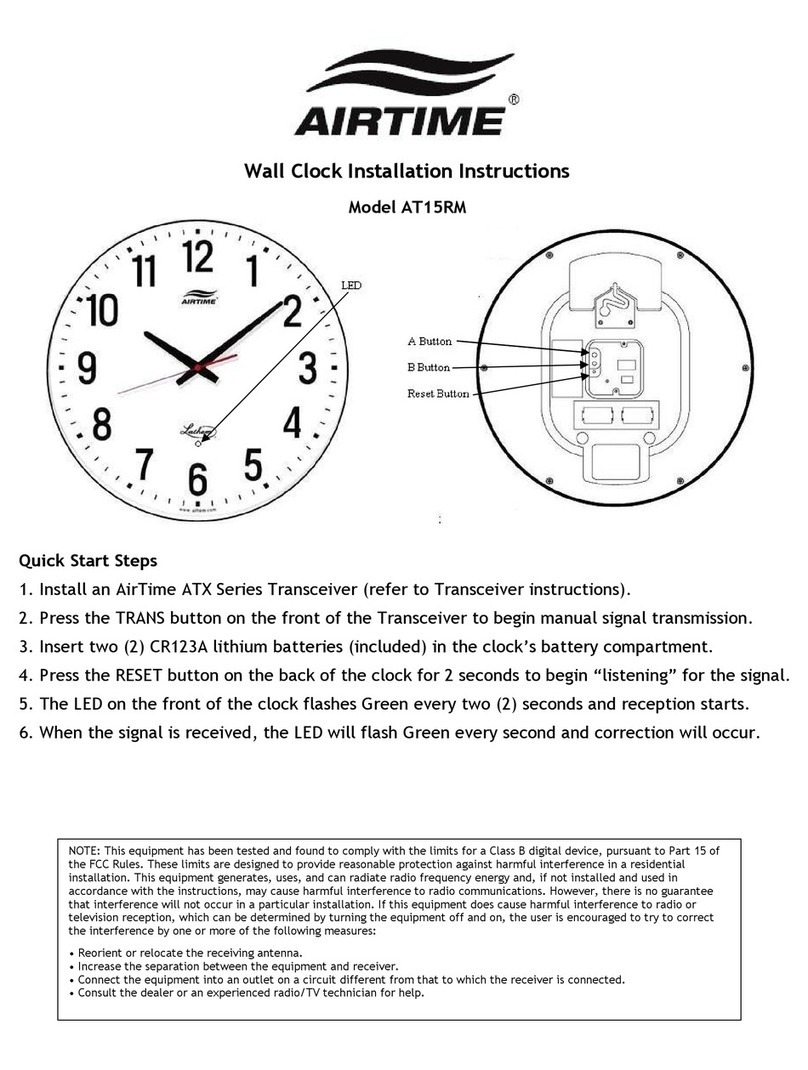
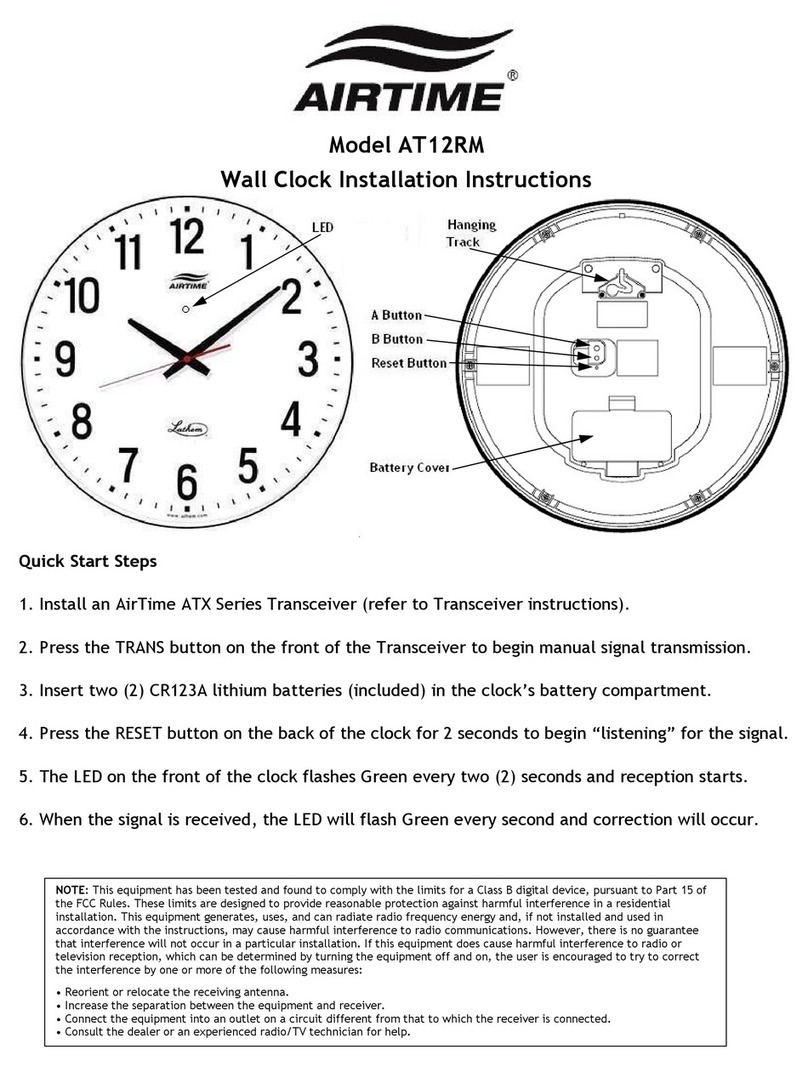
Quick Install Steps
Important: Before installing the wall clock, verify that an
AirTime Transceiver is installed and properly transmitting. You
should manually initiate the transmission of the AirTime signal
by pressing the TRANS button on the front of your transceiver.
If an AirTime transceiver is unavailable, you can still install the
clock and set to the current time (see “Setting the Time
Manually” on page 7).
1. Insert the supplied lithium battery (CR123A) into the
battery compartment on the back of the clock.
2. Turn the clock on, by sliding the Powe Switch to the Sta t
position.
3. Press the Reset button on the back of the clock to begin
listening for the AirTime correction signal.
4. The LED on the front of the clock will flash green every
two (2) seconds.
5. When the signal is received, the LED will flash green every
second and correction will occur. When correction is
complete, the LED will stop flashing.
Installation & User s Guide
Patent Pending Page 3
Room Lighting and Batte y Usage
The AirTime Solar Wall Clock uses a room s interior lighting for
power. Upon initial installation, or for extended periods of low
light, the clock will operate accurately using the supplemental
CR123A lithium battery (included). Each clock has an
innovative light meter feature is to check the light level at the
precise installation location.
1. Press and hold the Light Mete Button on the back of the
clock.
2. While holding the button down, position the clock where it
will be installed on the wall.
3. Look at the LED indicator on the front of the clock to
determine the light level (lux).
Ave age office lighting is between 350 and 500 lux.
LED Indicator Light Level* Battery Usage Battery Life
Green > 350 lux N/A N/A
Red 200 – 350 lux Yes ~ 4 years
None < 200 lux Yes ~ 2 years
* Battery usage and life is based on the lighting level
remaining consistent for an average of 8 hours per day.
If the light level is not adequate, you can try moving the clock
to a different location in the room or higher position on the
same wall closer to the light source.
AirTime Solar Wall Clock
Page 8 Doc. No. USG0080A
Setting the Time Manually
( equi es batte y be installed)
If the AirTime transceiver is not installed and transmitting, you
can manually set the time on the clock and it will operate as a
highly precise standalone clock until an AirTime signal is
received.
1. Press and hold the B button on the back of the clock for 5
seconds, until the red second hand stops.
2. Press the A button on the back of the clock to advance the
time one minute. You can press and hold the A button to
rapidly advance the minute and hour hands.
3. When the time on the clock is one minute after the current
time, wait until the exact time reaches the second that the
second handed stopped and then press the B button on the
back of the clock.
4. The clock will begin normal operation.
Installation & User s Guide
Patent Pending Page 7
5. Slide the second clock onto the lip of the double ring assembly
and secure using the 3 #4 x 1/4” screws at the 3, 6 and 9 O clock
positions.
6. Press the Transmit (TRNS) button on the Master and allow the
clocks to correct.
Ve ifying Signal Reception
During normal operation, the clock will listen for the AirTime
signal twelve times per day on even hours, at the 58
th
minute,
between the 50
th
and 59
th
second. For example, the clock
listens between 10:58:50 – 10:58:59 and then between 12:58:50
– 12:58-59, continuing every even hour. The LED will not flash
during normal operation. To verify that the clock has properly
received an AirTime signal:
1. Press the A button the back of the clock
2. Look at the LED on the front of the clock
a. Green: Signal was received successfully
b. Red: Signal was not received.
The LED on the front of the clock will flash Red automatically
if the signal is not received within the previous 72 hours.
AirTime Solar Wall Clock
Page 4 Doc. No. USG0080A
The AirTime Solar Wall Clock is equipped with an internal
power cell that stores energy from the light source. It can take
8 days or more to fully charge the internal cell. With a fully
charged cell the clock can run in complete darkness without a
supplemental battery for approximately 7 days.
Sma t Second™ Ene gy Save
The AirTime Solar Wall Clock has an innovative energy saving
feature that conserves power at night or when the lights in the
room are turned off. When the room lighting is less than 10 lux,
the second hand will stop at 0 seconds and the hour and minute
hands continue displaying the correct time. When the room
lighting rises above 10 lux, the second hand returns to normal
smooth sweeping operation indicating the correct second.
Average office lighting is between 350 to 500 lux.
Installation & User s Guide
Patent Pending Page 5
Hanging the Clock – Su face Mount
AirTime wall clocks feature an innovative maze style mounting
bracket that prevents simple upward motion from removing
them from the wall.
Figu e 1: 12 inch Su face Mount
1. Secure the supplied anchor and mounting screw into the
wall leaving the head exposed.
2. Slide the clock onto the screw head at the bottom of the
maze track.
3. Move the clock down, left, down and then right until it
rests securely at the top of the bracket.
4. To remove the clock, reverse the process above.
AirTime Solar Wall Clock
Page 6 Doc. No. USG0080A
Hanging the Clock – Double Mount
The AirTime AT12RPSD is available for wall mount applications.
1. Install wall box (Fig. 2, #1)
2. Attach box adaptor plate (Fig 2, #2) to wall box with (4) #8-
32 x 1” screws (Fig 2, #3).
3. Attach the case assembly to couplings with recessed
flanged washers (Fig. 2, #4) and chase nipples (Fig. 2, #5).
Tighten all components securely.
Figu e 2: 12 inch Sola Double Mount Assembly
4. Slide one clock onto the lip of the double ring assembly and
secure using the 3 #4 x 1/4” screws at the 3, 6 and 9 O clock
positions. (Fig. 2, #6)
a. Install 1 CR123A battery in each clock and press the
Reset button on each clock.







Other AirTime Clock manuals

AirTime AT15R User manual

AirTime

AirTime AT15R User manual

AirTime AT12RM User manual

AirTime

AirTime AT12RM User manual

AirTime ATDDC4 Operation manual

AirTime

AirTime ATDDC4 Operation manual

AirTime AT12RPS User manual

AirTime

AirTime AT12RPS User manual

Popular Clock manuals by other brands

Imagine DTD-5230 Installation and operation manual

Imagine

Imagine DTD-5230 Installation and operation manual

Perel WC208 user manual

Perel

Perel WC208 user manual

Oregon Scientific RM968A user manual

Oregon Scientific

Oregon Scientific RM968A user manual

Pyramid 6400 user manual

Pyramid

Pyramid 6400 user manual

TFA DESIGN operating instructions

TFA

TFA DESIGN operating instructions

Oregon Scientific TW369 user manual

Oregon Scientific

Oregon Scientific TW369 user manual

Velleman WC50D user manual

Velleman

Velleman WC50D user manual

Jensen JCR-231 user manual

Jensen

Jensen JCR-231 user manual

TFA 60.4505 instruction manual

TFA

TFA 60.4505 instruction manual

La Crosse Technology 513-1417BS manual

La Crosse Technology

La Crosse Technology 513-1417BS manual

TFA 60.2013 instruction manual

TFA

TFA 60.2013 instruction manual

TFA 60.2035 instruction manual

TFA

TFA 60.2035 instruction manual

Time Machines 760-240-000 Installation and operation manual

Time Machines

Time Machines 760-240-000 Installation and operation manual

Spectracom EPSILON EC1S user manual

Spectracom

Spectracom EPSILON EC1S user manual

TFA 98.1100 operating instructions

TFA

TFA 98.1100 operating instructions

Amano TS-3000i user manual

Amano

Amano TS-3000i user manual

Philos GARDE 4668 Instructions for the Operation

Philos

Philos GARDE 4668 Instructions for the Operation

Bodet Profil 930 L Installation and operation manual

Bodet

Bodet Profil 930 L Installation and operation manual

manuals.online logo
manuals.online logoBrands
  • About & Mission
  • Contact us
  • Privacy Policy
  • Terms and Conditions

Copyright 2025 Manuals.Online. All Rights Reserved.