Small Systems Specialists ALFA-Club User manual
ALFA-Club
Owners Manual
Rev 4.0, August 2018
Small Systems S ecialists
201 N. Lobb Ave.
Pen Argyl, PA 18072
609-301-0541
[email protected] On the web at www.rally.cc
Memory
Che kpoint Clo k
Dual
Odometer/Clo k

Contents:
Introdu tion …………………………………………………………………. 3
Power On! ……………………………………………………………………. 3
Normal Operation …………………………………………………………… 3
Clo k Mode ……………………………………………………………… 4
Odometer Mode ………………………………………………………… 5
Clearing Memory …………………………………………………………5
Setup Options ……………………………………………………………….. 5
Clo k/Odo mode sele t ………………………………………………… 6
Set Clo k ………………………………………………………………… 6
Bump Clo k ………………………………………………………………8
Zero Odometer …………………………………………………………..7
Preset Odometer ……………………………………………………….. 7
Odometer Fa tor ………………………………………………………..7
Zero-on-Hold ……………………………………………………………. 7
Sending Unit Test Mode ……………………………………………….. 8
Ba klight On/Off ………………...……………………………………… 8
Time Syn hronization ………………………………………………….. 8
Options …………………………………………………………………………… 8
12 Volt Power Cable ……………………………………………………………. 9
Te hni al Information ……………………………………………………… 9
Warranty ……………………………………………………………………… 11
ALFA-Club Owners Manual
2

Introduction:
Congratulations! You have just pur hased the latest in rally lo k te hnology. The ALFA-Check oint
has been the leading rally lo k on the market sin e 1983, and its newest in arnation is the best yet.
In addition to its fun tion as a multi-split lo k with memories, the ALFA-Club now in orporates a Dual
Corre table Odometer as well!
The ALFA-Club is a more advan ed version of the ALFA-Check oint. It provides a 3 times larger
display area, a more effi ient user interfa e, plus all of the advan ed features of the ALFA-
Check oint. The ALFA-Club is perfe t for laying out rallies as well working ontrols and ompeting.
Power On !
The ALFA-Check oint and ALFA-Club do not have a power on/off swit h! As soon as you insert the
battery, or plug in the 12-volt power ord, the unit begins working. (Without a power swit h, it
be omes impossible to a identally shut off the lo k in the middle of a rally.) To insert the 9-volt
battery, slide the battery over off of the bottom of the ALFA to expose the battery ompartment. The
battery atta hes to the snaps found inside the ompartment. To make sure the battery snaps fit
snugly (with a “ li k”) you may have to o asionally give the snaps a gentle squeeze.
It is important to use only 9-volt Alkaline batteries in your ALFA lo k. (Energizer and Dura ell are
examples of appropriate batteries.) In normal operation, the battery will last for more than 24 hours of
ontinuous operation. This life will vary depending upon the display lighting and other sele ted
options. We suggest a fresh battery for ea h full day of operation for best results.
(When operating from an external 12-volt power sour e, the internal battery is used as a ba kup.)
When the ALFA first turns on, it will briefly display its serial number, and then will begin normal
operation in Clo k Mode.
Normal Operation:
Your new ALFA lo k has two modes of
operation, “Clo k Mode” and “Odometer Mode”.
Within ea h mode there are various options
whi h you may turn on and off. You may swit h
between these two basi modes whenever you
like without effe ting either the lo k or the
odometer.
See the “Menu Options” se tion of this manual
for instru tions on hanging modes, setting the
lo k, and sele ting various options. Refer to
the illustration for the lo ation of all ontrols,
onne tions and displays:
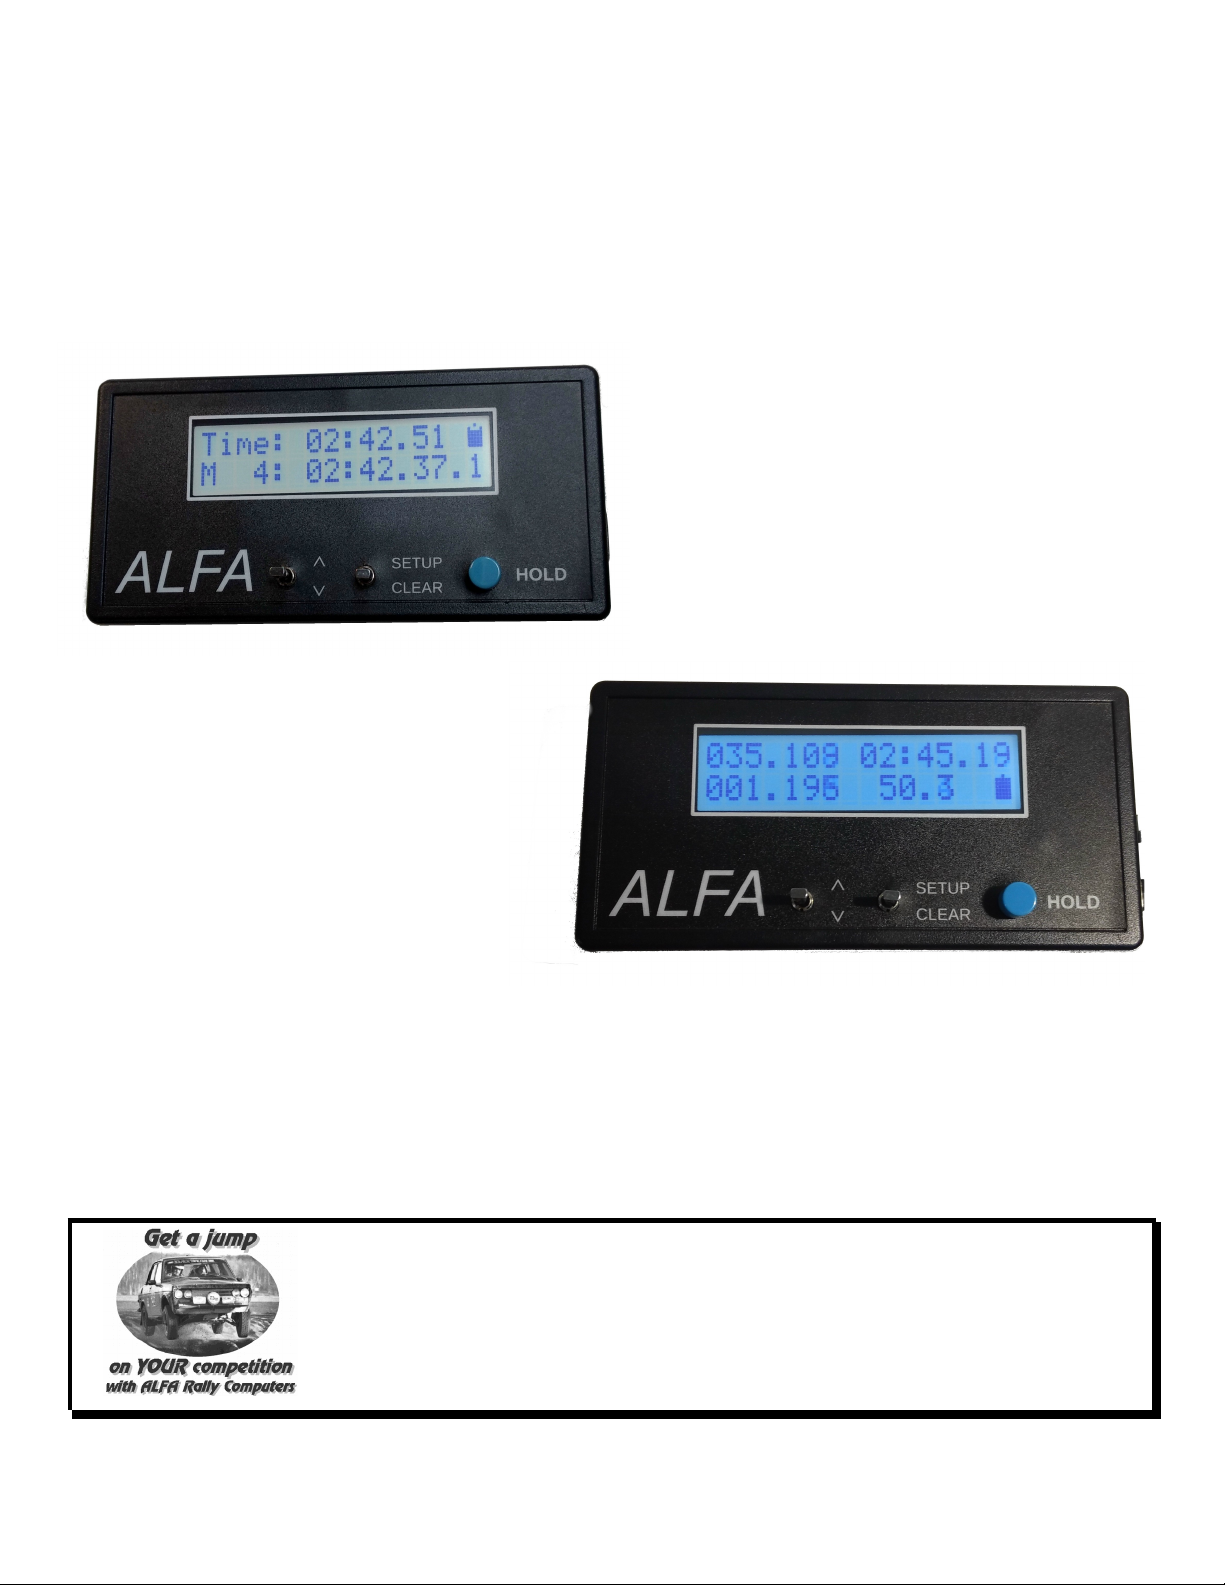
1. The LCD display shows the user all time, distan e and memory information. It is also used to
reate intera tive menus to onfigure the lo k for use. The display lights up for use at night.
ALFA-Club Owners Manual
3
2. The SWITCH is used to display memories and to set values. This is a spring loaded swit h
whi h may be moved upward (in rement or next) or downward (de rement or prior).
3. The SETUP CLEAR swit h provides a short ut for learing memories, zeroing the in remental
odometer, and swit hing between modes.
4. The HOLD BUTTON is used to split (freeze) the lo k and odometer display. It also is used as an
ENTER button while setting the lo k or odometer, et .
5. The BATTERY COVER is lo ated on the ba k side of the ALFA.
6. The DB9 CONNECTOR provides a single point plug in for power, remote hold, time syn and
Rally-Link ™ ommuni ations.
The three modes, Clo k, Odometer and Setup, are a essed by moving the SETUP/CLEAR swit h
upward to the SETUP position.
Clock Mode:
“Clo k Mode” is generally used for timing he kpoints. In this mode,
the display is divided into two areas – the Time of Day and the Memory.
The time and memory are displayed as either Se onds or
Hundredths of a minute, with pre ision to either 1/10 of a se ond,
or 1/1000 of a minute. (You an tell whi h time mode is being displayed by looking for either a olon
(se onds) or a de imal point (hundredths) between the minutes and se onds display.
The Time of Day runs ontinuously on the top line of the display, regardless of user input to split the
lo k or s an the memories. The HOLD button, when pressed, transfers the present Time of Day into
the next available Memory, and displays this on the bottom line of the display. (The remote HOLD
input may be triggered by an automati timing line with the same effe t.) Up to 99 “splits” may be
stored in the ALFA’s memory. Note that on e the HOLD has been triggered, there is about a ¼
se ond delay before it may be triggered again. This prevents the front and rear wheels of a ar
passing over an automati timing line from generating two splits.
Splits are stored in hronologi al order, and may be reviewed by using the swit h.
This swit h is spring loaded, so you simply move it up or down with your finger, and then
let it return automati ally to its enter position. (Do not for e the swit h beyond its “ li k”
position.) Moving the swit h UP will display the next memory position (later time) and
pressing the swit h DOWN displays the previous (earlier) memory. Note that when
the HOLD is pressed, the most re ent memory is automati ally displayed regardless of user
s anning. Also, if the memory size is ex eeded (99 splits), the split is saved in the highest numbered
memory, repla ing whatever was previously stored.
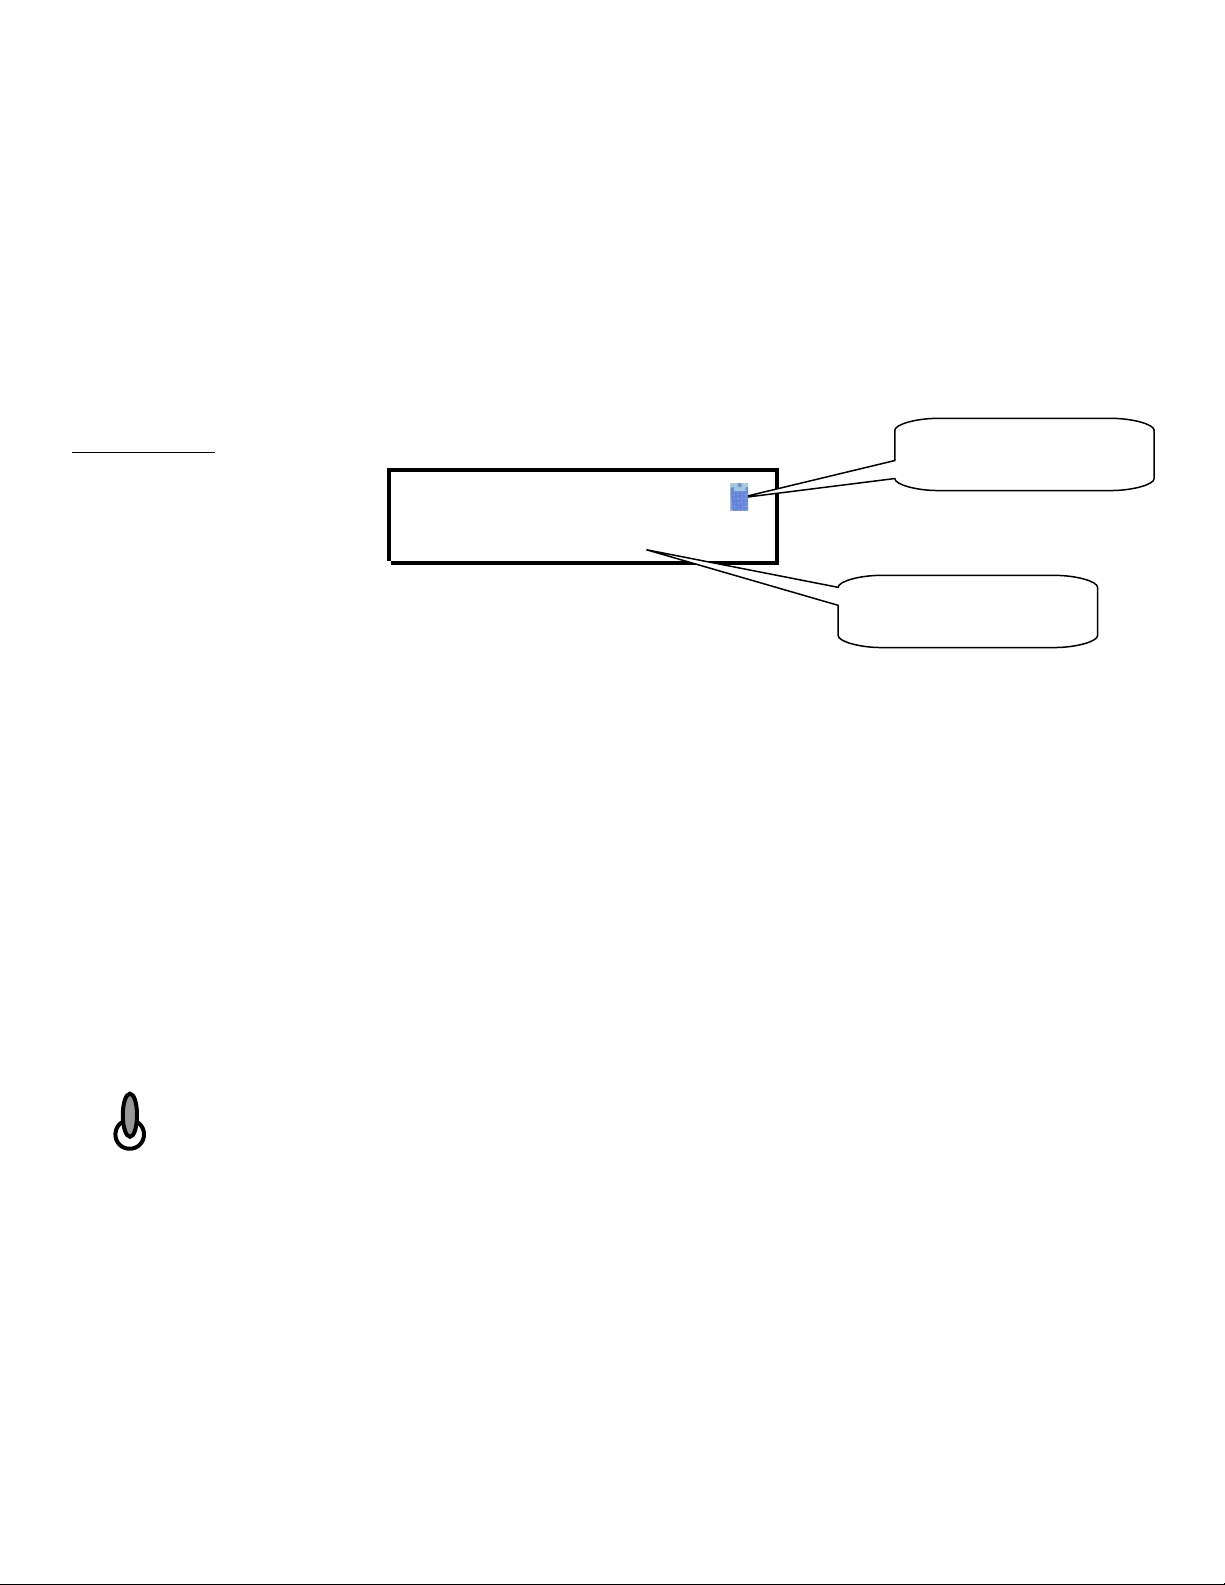
The u er right corner of the screen contains a battery voltage indicator. If the indicator is solid, the
ALFA-Club is running on 12 volt external power. A new 9 volt alkaline battery will always read one
bar low. This is intentional so that if a lighter ord a identally be omes unplugged, it is obvious by
looking at the display. A short time before the battery is ompletely dead, the indi ator will hange to
ALFA-Club Owners Manual
4
Time =10:02.78
M 13 =10:01.34.2
Se onds/Hundredths
indi ation
Battery Condition
Indi ator

a flashing “X”. When this happens, please hange the battery immediately! To retain the time during
a battery hange, be sure to first plug the unit into a 12 volt power sour e.
See the “Menu Options” se tion of the manual for other Clo k ontrols and options.
Odometer Mode:
Your ALFA-Club ontains dual odometers. In the Odometer Mode, your display shows these two
odometers on the left side of the display, and displays the Time of Day in the upper right orner. The
odometer is fully fa tor orre table (6 digit fa tor) like all other ALFA odometer produ ts, and may be
setup to display miles or kilometers.
In Odometer Mode, pressing the HOLD button will alternately freeze and release the time and
distan e on the display. These ontinue to progress unseen, and the up to date values are displayed
as soon as the Hold is released. (The Speed readout ontinues to update even during HOLD.) The
word “HOLD” appears in the lower right orner to remind you that the display is frozen.
The swit h ontrols the dire tion of the odometer. Pressing the swit h upward auses the
odometer to run forward, pressing it downward on e parks the odometer (odometer off) and
downward again runs the odometer in reverse. Note that the shape of the de imal point in the
odometer display indi ates the dire tion of the odometer.
The lower right orner of the display ontains the battery ondition when in Odometer Mode. The
indi ations are the same as in the Clo k Mode.
See the “Menu Options” se tion of the manual for other Odometer ontrols and options.
Clearing:
Moving the enter swit h downward a tivates the Clear fun tion. In Clo k Mode, the Clear fun tion
will erase all of the memorized splits. In Odometer Mode, the Clear fun tion resets the se ond
odometer (in remental distan e) to zero.
Setup Options:
The final ALFA-Club mode is the Setup Mode. This is where you set the lo k, odometer fa tor, and
other operating features of the devi e. At any time during the setting of values or options, you may
move the swit h to the SETUP position to abort and a ess the standard Clo k or Odometer modes.
Whenever a menu appears, you will be asked to make a sele tion using the swit h. To sele t the
option on the top line of the display, press the swit h upward, and to sele t the option on the
lower line of the display press the swit h downward. For menus requiring that you enter a value,
the HOLD button will serve to enter the value.
ALFA-Club Owners Manual
5
045.376 10:02.78
002.400 43.4

The following menu options are available in Version 4.10 of the ALFA-Check oint and ALFA-Club
software. Additional options will be added from time to time, and software upgrades will be offered to
all ALFA owners as they be ome available.
Clock Setting Set Clock Seconds Whole Secs
More Options Bump Clock Hundredths 1/10 Secs
Hundredths 12 Hour Enter Time
Thousandths 2 Hour
Enter Bump Value
Odo Setting Clear Odo
Device More Options
Zero-on-Hold Preset Odo Enter Odometer
Normal Hold Preset Factor Enter Factor
Backlight Brighter Constant
More Options Dimmer Automatic
Longer
Shorter
Sender Setup Shows Sender Status
More Options
Future Options
Clock Setting:
“Set Clo k” allows you to set the timekeeping mode and the time of day. Timing modes may be
hanged without affe ting the time of day, so it is possible to swit h between se onds and hundredths
of a minute, or hange the pre ision “on the fly”. (Note: If you intend to swit h between 12 and 24
hour time, please set the lo k initially to 24 hour time.)
The lo k is always set at the top of a whole minute. Use swit h to set the hours and minutes to
the next whole minute. As your offi ial time sour e (offi ial lo k or WWV re eiver, for example)
rea hes that time, press HOLD to set the lo k.
Bump Clock:
If the time is off by a fra tion of a se ond after setting, you may use the “Bump Clo k” feature to
syn hronize it. When sele ted, this mode displays the lo k, and the swit h advan es or retards
the lo k a fra tion for ea h operation. When the lo k is syn hronized with the offi ial sour e, use
the HOLD button return to normal operation.
ALFA-Club Owners Manual
6
Adjust 05:23
Select ^

Odometer Settings:
Clear Odometer:
Sets the first odometer (overall distan e) to zero. See the “Odometer Mode” se tion for zeroing the
se ond (in remental) odometer.
Preset Odometer:
This sele tion allows you to preset the first odometer to any value. On e sele ted, the display shows
the present odometer value, and two swit h options. Moving the swit h downward sele ts whi h
digit will be altered, and pressing the swit h upward in rements the digit. By manipulating the
s an swit h, all 6 digits of the odometer may be hanged, one at a time.
When the desired value is entered, press the HOLD swit h to resume normal operation.
Odometer Factor:
The odometer orre tion fa tor is entered in the same manner des ribed for presetting the odometer.
The orre tion fa tor is used to alibrate your ALFA odometer so that it measures the same distan e
as the rally-master for easier ourse following.
To determine your odometer orre tion fa tor use this formula:
Current Fa tor
New Fa tor = X Course Miles
Measured Miles
For example: Start the odometer leg with the fa tor set to 5000. The end of the odometer he k leg
is offi ially at 12.56 miles, but your ALFA measured only 11.21 miles. 5000 divided by 11.21,
multiplied by 12.56 equals 5602. 5602 is your new fa tor and should be entered into your ALFA.
Zero-on-Hold:
This feature of the ALFA auses the se ond odometer (in remental distan e) to be automati ally
zeroed whenever the HOLD button is pressed. The previous distan e is displayed while the new
distan e is a umulated in the ba kground. When the HOLD is released, the new distan e is
immediately displayed.
ALFA-Club Owners Manual
7
Adjust 051.234
Select ^
Adjust 05000.0
Select ^

Sending Unit Test:
Installing the sending unit on your rally ar has always been a hallenge. Sele ting the Sending Unit
Test mode provides visual and audio feedba k of when the sensor engages and releases ea h
magnet. This makes alignment of the magnets easy, and insures that you’re getting all of your pulses
all of the time.
Backlight On Off:
Your ALFA has an adjustable ba klight. It may be turned on or off, has 5 brightness settings, and an
automati setting whi h preserves battery life. The best battery life is obtained when the backlight is
com letely OFF. The LCD display used in the ALFA is a type whi h has extremely good viewing
hara teristi s with no ba klighting while in normally lit situations. The ba klight is only ne essary in
darkness.
The best ompromise is to use the AUTOMATIC ba klight setting when you are running the ALFA on
battery power. This setting turns on the ba klight for about 5 se onds whenever and swit h is
a tivated. The default setting for the ALFA is Brightness 3 and AUTOMATIC.
Note that you should only use the CONSTANT setting (either bright or dim) when running with the 12-
volt adapter! Battery life will be extremely limited if the ba klight is on onstantly.
Time Synchronization:
The ALFA is equipped with Rally Link ™ whi h allows one lo k to read the time settings from
another lo k through an optional Syn Cable. No user input is required to sync two clocks,
simply plug the marked end of the syn able into the Master Clo k, and the other end of the syn
able into the lo k whi h needs to be set. Within a few se onds, the two lo ks will be in perfe t
syn – that’s all that’s required! On e the lo ks are in syn , simply unplug the able.
Your ALFA-Club will syn to older ALFA-Club and ALFA-Che kpoint lo ks, as well as the newest
version of the ALFA-Elite rally omputer and ALFA-Pro advan ed “B Unit”.
Options:
12 volt power able and sending unit adapter
Syn able
DIN adapter to use newer and older ALFA lo ks to syn hronize
Built in GPS re eiver (Syn s time and provides alternate odometer input)
Timewise syn hronization adapter
Basi Sending Unit (wheel mounted magneti sensor with rare-earth magnets)
EZ-Pulse hub mounted (removable) sending unit
ALFA-Club Owners Manual
8

12 Volt Power Cord:
The optional 12 Volt power adapter for the ALFA-Club allows you to power your lo k from any 7-16
volt power sour e. It also provides the atta hment point for a sending unit and for a remote hold
swit h.
There are 2 onne tion points on the able:
1: The DB9 onne tor whi h atta hes to the ALFA.
2: The Terminal Blo k whi h provides s rew terminals for easy atta hment of the sending unit and
hold swit h.
The terminals are as follows:
RED: +12 volt power input. Also the power connection for a sending unit.
BLACK: Ground. This is the ommon point for power, sender and hold inputs.
GREEN: Sending unit pulse input.
BLUE: Hold swit h input.
Notes:
1: You should keep a battery in your ALFA lo k as a power ba kup in ase the 12 volt ord falls out of the lighter plug.
2: It is best to wire the ALFA dire tly to the battery or fuse box, and not use a lighter ord. Use a lighter ord only for
temporary installations.
3: The ALFA sending unit will operate from 5-16 volts DC. If you use another brand sending unit,
make sure it will withstand the 12 volt power sour e.
4: You an onne t the pulse input dire tly to the pulse output of most ar’s Vehi le Speed Sensors (VSS). In this ase,
DO NOT onne t the 12 volt power to the VSS – it gets its power from the ar’s system independently. See
WWW.RALLY.CC for onne tion details. NEVER US THE ABS BRAKE SENSOR AS AN ODOMETER INPUT!
5: When using the ALFA-Club or Che kpoint with a sending unit, the lo k should be powered from the ar’s 12 volt
system. Battery life is limited when running in odometer mode.
ALFA-Club Owners Manual
9

Technical Information:
This information is provided for the te hni ally urious and otherwise insane user. There is no need
for most users to read or understand this se tion. The manufa turer of this ALFA Clo k/Odometer
takes no responsibility for damage aused to or by, this or any other equipment, when reated or
wired by the user.
The 9 Pin DB9 male onne tor on the right side of the ALFA is its outlet to the rest of the world. The
pins are defined as follows:
1. 12-volt DC power Input. The ALFA requires a minimum of 6-volts DC to operate. Power
onsumption is approximately 15ma without the ba klight, 50ma with the ba klight full bright.
2. Serial ommuni ations Output. (0-5v signal, idle high)
3. Serial ommuni ations Input. (A epts either 0-5v signal or RS-232)
4. Remote Hold Input. (Ground to trip input)
5. Ground.
6. 5-volt, ½ amp output. (May be used to power external sending unit or other devi es)
7. GPS Serial Input. (9600bps, NMEA-183 data stream, 3.3v max)
8. Odometer Input. (Negative edge triggered)
9. Mode Swit h Input. (For use with ALFA-Elite and ALFA-Pro only)
ALFA-Club Owners Manual
10
Female DB9 onne tor as
viewed from the solder side

WARRANTY :
Your ALFA is warranted against defe ts in material and workmanship for a period of one year from
the original date of pur hase. This warranty does not over any parts broken due to abuse, negle t,
normal wear or misuse of this produ t as determined by Small Systems Spe ialists.
The Liquid Crystal Display is warranted against ele tri al failure for one year, but not against
breakage of the glass en losure.
Although every effort has been made to assure reliable, a urate operation, Small Systems
Spe ialists will not be responsible for any loss of money, property, time, or trophies due to the
malfun tion of this produ t. Good operating pra ti e di tates that the user verify the produ t is in
good working order before it is relied upon in ompetition.
The ALFA, like many ele troni lo ks, may require periodi alibration. This fun tion will be
performed for the ost of shipping and handling only at any time during the life of the produ t.
ALFA-Club Owners Manual
11
This manual suits for next models
1
Table of contents
Popular Clock manuals by other brands

Oregon Scientific
Oregon Scientific TW221 user manual

Oregon Scientific
Oregon Scientific BAR623PA user manual

Oregon Scientific
Oregon Scientific Slim Projection Clock RA368P user manual

TimePilot
TimePilot Extreme instruction manual

Perel
Perel WC200 user manual

Oregon Scientific
Oregon Scientific JM889 user manual


