manuals.online logo
Brands
  1. Home
  2. •
  3. Brands
  4. •
  5. Akai
  6. •
  7. Sampler
  8. •
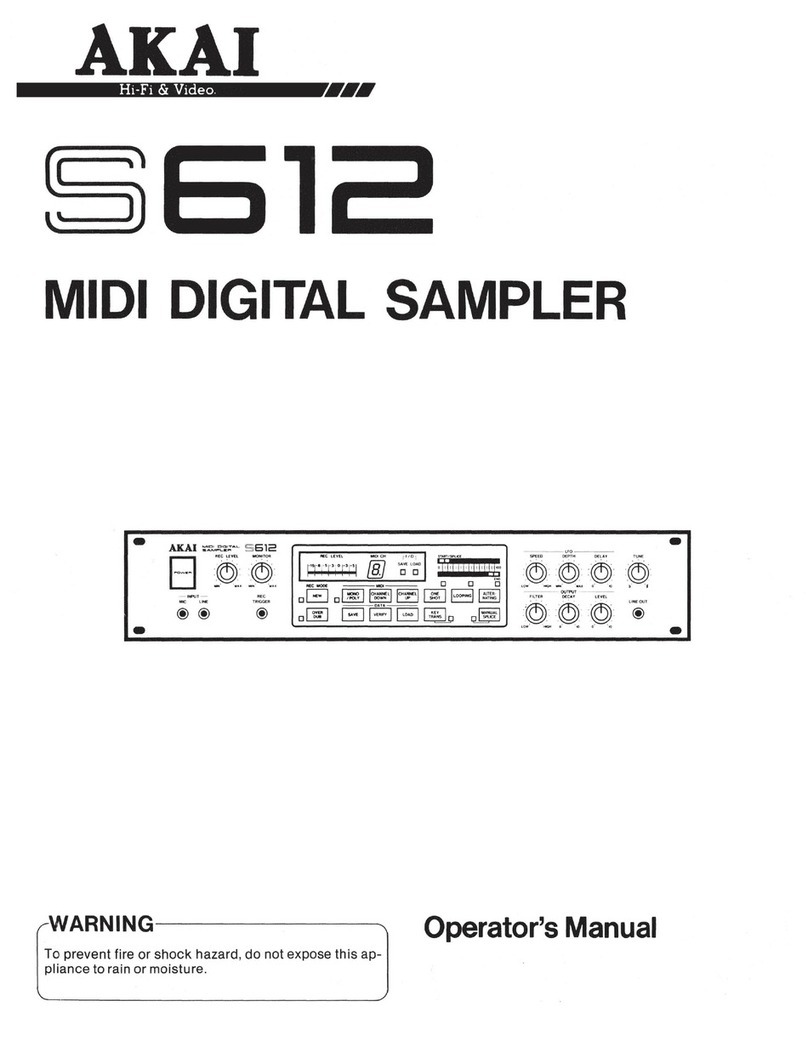
  9. Akai S01 User manual

Akai S01 User manual

WLlMllllllllllllMlJf
o
lllf
1
Dl
MIDI DIGITAL SAMPLER
Bill
Jill
Illllllti
11111
1
.^-VI
lip
III A*,-.'
fcaf
'if ;
WARNING
:\:i \1''.I
ra "I: |f '-\.
<»i'' s
-'«
.#$"
To [re/f nt fiic or shock ria/ai'j do not
expose this appliance to rain or motstute,
Operatb^fcnua.
AKAI
professional
,,,,.,, i...... ii 1,1 __._- _
._ _•""in~iBiimiiii -~--i .i.. ...J.... iiiii.iiiiiii.iiiii.iii.. rMil,I, lll .l,.,.. „Illllll, lllllllllll.il ...I
bi**iiim<™r***ntiM«Ti**i^^ inni.ijiii.nim
Operator's Manual
To show our support for the protection of the earth's environment,
this manuai has been printed on recycled paper.
WARNING
To prevent fire or shock hazard, do not expose this appliance to rain or moisture.
CAUTION
RISK OF ELECTRSC SHOCK
DO NOT OPEN
CAUTION: TO REDUCE THE RISK OF ELECTRIC SHOCK
DO NOT REMOVE COVER (OR BACK).
NO USER-SERVICEABLE PARTS INSIDE.
REFER SERVICING TO QUALIFIED SERVICE PERSONNEL.
The simbois are ruled by UL standard (U.S.A).
The lightning flash with the arrowhead symbol superimposed across
agraphical representation of aperson, within an equilateral triangle,
is intended to alert the user to the presence of uninsulated "dangerous
voltage" within the product's enclosure; that may be of sufficient
magnitude to constitute arisk of electric shock.
The exclamation point within an equilateral triangle is intended to alert
the user to the presence of important operating and maintenance
(servicing) instructions in the literature accompanying the appliance.
Congratulations...
Wewouldlike to thank you for purchasing the Akai SO18voice polyphonic MIDIdigital sampler. Your
SOI comes from along line of highly reputable Akai Sseries digital samplers. Avariety of functions,
high quality sound, and simple andconsistent ways ofoperations makes the SO1easy to use, and optimal
for live performance, recording, or any other musical activities. To completely understand and fully
utilize the SOI ,please read through this manual before use. Also remember to keep this manual in a
safe place for future reference.
Features
•8polyphonic voice MIDI digital sampler
•Guarantees high-quality sampled sound using 16 bit sampling technique and 32 kHz sampling
frequency.
•Supplies easy operation with matrixed panel keys and adata entry knob. You can edit samples
monitoring them at any time.
•Offers sampling of 15.6 seconds (max.) using selectable 2sampling methods —Auto-trigger or
Manual. With an optional memory expansion board EXM01 installed, the total sampling time can
be expanded up to 31.2 seconds.
•Samples can be divided into up to 8banks, individually edited, saved as individual programs.
•8banks applied to 8point multi-sampling technique to obtain anatural sound variation.
•Operates as amulti-timbral sound module when 8banks are assigned to individual MIDI channels.
•Foot switch can be used for sampling or playback control.
•Equipped with a3.5 inch 2DD/2HD micro floppy disk drive.
•Enables you to load samples from the sound library for Akai S 1000 series.
•Provided with 2MIDI input connectors switchable by the front panel control.
Contents
Congratulations 1
Features -1
WARNING .........3
WARRANTY... ..........6
Copyright notice 7
Nomenclature 8
Operation Panel 8
Rear Panel 10
Connections ...11
Basics of the S01 12
Banks..... ....12
Original Pitch 13
Programs 13
Files 13
Memory 13
Controls and Signa! Flow 15
Modes and Operational Flow .....15
Play Mode 16
Basic Operation 16
Play Mode —Supplementary Explanation ..17
Playback with the Foot Switch .18
Using the S01 As AMulti-timbral Sound Module 18
Sampling 19
Basic Operations .....19
Manual Sampling 22
Foot Controlled Sampling 22
Remaining Memory Indication •23
Erasing Samples 23
Multi-sampling 23
Edit Mode 24
Basic Operations... 24
Parameters .....26
(TRIM)... 27
(LOOP) 28
(Trial 1:Setting the START/END/LOOP POINT) ...30
(LEVEL)..... 33
(PITCH) 34
(MIDI) 35
(Trial 2: Tempo and Pitch) 36
(SETUP) 37
Saving and Loading Data 38
Loading from aDisk .....38
Disk Formatting and Saving Data 40
Deleting Files in the Disk 42
Saving and Loading Data Spanning Several Disks 43
Data Compatibility among the S01 and S1000/S1100 .......45
When Expanding the S01 Internal Memory 45
Transmission and Reception of Buik Data 46
Using the Operation Guide Disk 48
Default Program and Parameter Attributes for Bank 151
Contents of Supplied Sound Library Disks •........52
Sampling Frequency~to~TRANSPOSE/SAMPLE TUNE Conversion Table .....53
Tempo-to-Sample Point Conversion Tabie .54
Tempo-to-TRANSPOSE/SAMPLE TUNE Conversion Table 56
Specifications •........58
S01 MIDI IMPLEMENTATION CHART 59
S01 SOUND LIBRARY Date Sheet. 60
REMARKS 1.Rememberto always make backup of necessary data because floppy disks are NO
PERMANENT media for data storage.
2. Use 2DD or2HD 3.5 inch micro floppy disks for the SO1
.
3. While the disk drive LED is lit, DO NOTturn off the SO 1nor try to remove the floppy
disk. This may destroy not only the disk but also the disk drive as well.
Writ© Protection
A3.5 inch floppy disk has a "write-protect" switch to prevent you from carelessly erasing, deleting, or
overwriting the stored data. As seen in the diagram below, when the switch is moved to open awindow,
the stored data on the disk is protected. The data, of course, can be loaded in write-protect status.
3.5 inch 2HD disk
write-protect ON
back
*When using the supplied disks (mentioned later), always set them to write-protect ON.
*Formatting Floppy Disks
Generally, disk formatting enables aspecific system to read (load) or write (save) data from/onto the
disk. Therefore before using adisk on the SOI ,it is necessary to format it to the SOI system. For a
detailed explanation of disk formatting, refer to page 40.
Supplied Floppy Disks
Your SOI has been shipped with 4data floppy disks:
Operation guide disk 1(#01)
Sound library disks 3(#2~#4)
This manual has written for you to leam operations of the SOI utilizing those supplied disks. So
remember to keep those disks. For detailed information of supplied disks, see page 48-52.
WARNING
Power requirements for electrical equipment vary from area to area. Please ensure that your SOI meets
the power requirements in your area. If in doubt, consult aqualified electrician.
120V @60Hz for USA and Canada
22QV-230V @50Hz for Europe (excluding UK)
240V @50Hz for UK and Australia
Protecting yourself and the S01
Never touch the plug with wet hands.
Always disconnect the SOI from the power supply by pulling on the plug, not the cord.
Allow only aqualified professional engineer to repair or reassemble the SOI .Apart from voiding
the warranty, unauthorized engineers might touch live internal parts and receive aserious electric
shock.
Do not put, or allow anyone to put any object, especially metal objects, into the SOL
Use only ahousehold AC power supply. Never use DC power supply.
If water or any other liquid is spilled into or onto the SO 1,disconnect the power, and call your dealer.
Make sure that the unit is well-ventilated, and away from direct sunlight.
To avoid damage to internal circuitry, as wei Ias the external finish, keep the SO1away from sources
of direct hert (stoves, radiators, etc).
Avoid using aerosol insecticides, etc. near the SOI .They may damage the surface, and may ignite.
Do not use denaturated alcohol, thinner or similar chemicals to clean the SOL They will damage
the finish.
Make sure that the SOI is always well-supported when in use (either in aspecially-designed
equipment rack, or afirm level surface).
When installing the SOI in a19" rack system, always allow 1U of ventilated free space above it to
allow for cooling. Make sure that the back of the rack is unobstructed to allow aclear airflow.
#Handling Floppy Disks
The SOI is equipped with adisk drive that can accommodate a3.5 inch 2DD or 2HD floppy disk. As
usual with personal computers, the SOI has no backup memory for data. Thus, every time when using
the SOI, you have to load any data into the SOI internal RAM and, if necessary, save it again onto a
floppy disk before turning off the SOL First of all operations you should learn on the SOI is loading/
saving data using the disk drive so that you should adhere to the cautions listed below concerning the
floppy disk.
1
.
The disk should be inserted horizontally into the disk drive,as it held the labelled side up, the shutter
facing the drive. Make sure the disk is set properly with aclick.
2. Do not bend the disk, nor put pressure on it.
3. Do not put the disk near speakers, atelevision or close to any device that produces amagnetic field.
It may cause data destruction.
4. Prevent any other objects than adisk from intruding the disk drive.
5. Do not smoke, eat, or drink around the disks. Also do not leave them in dusty areas.
6. Do not leave disks in areas of direct sunlight, heat, humidity, etc. They should be kept in proper
temperature: 5°C~45°C. Also care for the room temperature when carrying disks by car.
7. Do not touch the disk shutter or inner magnetic disk itself. Also never leave disks around any
chemical solvents such as alcohol or paint thinner. It may lead to data destruction.
UK customers
Important safety notice: The flex supplied with this machine has three wires, as shown in the
illustration.
WARNING: THIS APPLIANCE MUST BE EARTHED
IMPORTANT
The wires in this mains lead are coloured in accordance with the following cord:
Green-and-yellow: earth
Blue: neutral
Brown: live
As the colours of the wires in the flex may not correspond to the colour
markings in your plug, make sure that wires are connect in the following
way. The green-and-yellow wire should be connected to the terminal
marked "E" or marked with the safety earth symbol (4); the blue wire is
connected to the terminal marked "N", or coloured black. The brown wire
should be connected to the terminal marked "L", or coloured red. Make
sure all terminal screws are tightened and there are no loose strands of wire.
Green/Yellow
(Earth)
Blue Brown
(Neutral) (Live)
FCC warning
This equipment has been tested and found to comply with the limits for aClass Bdigital device,
pursuant to Part 15 of the FCC Rules. These limits are designed to provide reasonable protection
against harmful interference in aresidential installation. This equipment generates, uses, and can
radiate radio frequency energy and, if not installed and used in accordance with the instructions, may
cause harmful interference to radio communications. However, there is no guarantee that interference
will not occur in aparticular installation. If this equipment does cause harmful interference to radio or
television reception, which can be determined by turning the equipment off and on, the user is
encouraged to try to correct the interference by one or more of the following measures:
•Reorient or relocate the receiving antenna.
•Increase the separation between the equipment and receiver.
•Connect the equipment into an outlet on acircuit different from that to which the receiver is connected.
•Consult the dealer or an experienced radio/TV technician for help.
Avis pour les acheteurs Canadians du S01
Le present appareil numerique n'emet pas de bruits radioelectriques depassant les iimites
applicables aux appareils nurneriques de la Class Bprescrites dans le Reglement sur le brouillage
radioeleclrique edicte par le ministere des Communications du Canada.
FUR KUNDEN IN DER BUNDESREPUBUK DEUTSCHLAND
Bescheinigung von AKAI
Hiermit wird bescheinigt, daR das Gerat AKAI
S01
in Obereinstimmung mit den Bestimmungen der
Amtsblattverfugung 1046/1984
funkentstSrt ist.
Der Deutschen Bundespost wurde das Inverkehrbringen dieses Gerates angezeigt und die
Berichtigung zur Oberprufung der Serie auf Einhaltung der Bestimmungen eingeraumt.
AKAI ELECTRIC CO., LTD.
This equipment conforms to No. 82/499/EEC, 87/308/EEC Standard.
CONFORME AL D.M. 13 APRILE 1989 DIRETTIVA CEE/87/308
WARRANTY
AKAI Electric Co., Ltd. warrants its products, when purchased from an authorized AKAI dealer, to be
free from defects in materials and workmanship for aperiod of 12 (twelve) months from the date of
purchase. Warranty service is effective and available to the original purchaser only, and only on
completion and return of the AKAI Warranty Registration Card within 14 days of purchase.
Warranty coverage is valid for factory-authorized updates to AKAI instruments and their software,
when their installation is performed by an authorized AKAI Service Center, and aproperly completed
Warrantry Registration has been returned to the "AKAI professional" service representative for your
country.
To obtain service underthis warranty, the product must, on discovery of the defect, be properly packed
and shipped to the nearest AKAI Service Center. The party requesting warranty service must provide
proof of original ownership and date of purchase of the product.
If the warranty is valid, AKAI will, without charge for parts or labor, either repair or replace the
defective part(s). Without avalid warranty, the entire cost of the repair (parts and labor) is the
responsibility of the product's owner.
AKAI warrants that it will make all necessary adjustments, repairs and replacements at no cost to the
original owner within 12 (twelve) months of the purchase date if:
1
.
The product fails to perform its specified functions due to failure of one or more of its components.
2. The product fails to perform its specified functions due to defects in workmanship.
3. The product has been maintained and operated by the owner in strict accordance with the written
instructions for proper maintenance and use as specified in this Operator's Manual.
Before purchase and use, owners should determine the suitability of the product for their intended use,
and the owner assumes all risk and liability whatsoever in connection therewith. AKAI shall not be
liable for any injury, loss or damage, direct or consequential, arising out of the use, or inability to use
the product.
The warranty provides only those benefits specified, and does not cover defects or repairs needed as
aresult of acts beyond the control of AKAI, including, but not limited to:
1
.
Damage caused by abuse, accident or negligence. AKAI will not cover under warranty any original
factory disk damaged or destroyed as aresult of the owner's mishandling.
2. Damage caused by any tampering, alteration or modification of the product: operating software,
mechanical or electronic components.
3. Damage caused by failure to maintain and operate the product in strict accordance with the written
instructions for proper maintenance and use as specified in this Operator's Manual.
4. Damage caused by repairs or attempted repairs by unauthorized persons.
5. Damage caused by fire, smoke, falling objects, water or other liquids, or natural events such as rain,
floods, earthquakes, lightning, tornadoes, storms, etc.
6. Damage caused by operation on improper voltages.
IMPORTANT NOTE: This warranty becomes void if the product or its software is electronically
modified, altered or tampered with in any way.
AKAIshall not be liable for costs involved in packing orpreparing the product for
shipping, with regard to time, labor or materials, shipping orfreight costs, ortime
and expenses involved in transporting the product to and from an AKAI
Authorized Service Center or Authorized Dealer.
AKAI will not cover under warranty an apparent malfunction that is determined to be user error, or the
owner's inability to use the product.
THE DURATION OF ANY OTHER WARRANTIES, WHETHER IMPLIED OR EXPRESS,
INCLUDING BUT NOT LIMITED TO THE IMPLIED CONDITION OF MERCHANTABILITY,
IS LIMITED TO THE DURATION OF THE EXPRESS WARRANTY HEREIN.
AKAI hereby excludes incidental or consequential damages, including but not limited to:
1. Loss of time
2. Inconvenience
3. Delay in performance of the Warranty
4. The loss of use of the product
5. Commercial loss
6. Breach of any express or implied warranty, including the Implied Warranty of Merchantability,
applicable to this product
Copyright notice
The AKAI SO1is acomputer-based instrument, and as such contains and uses software in ROMsand disks.
This software, and all related documentation, including this Operator's Manual, contain proprietary
information which is protected by copyright laws. All rights are reserved. No part of the software or its
documentation may be copied, transferred or modified. You may copy the operating software and any
samples, programs, etc. contained on disks for your own personal use. All other copies of the software are
in violation of copyright laws. You may not distribute copies of the software to others, or transfer the
software to another computer by electronic means. You may not modify, adapt, translate, lease, distribute,
resell for profit or create derivative works based on the software and its related documentation or any part
thereof without prior written consent from AKAI Electric Co., Ltd, Tokyo, Japan.
Nomenclature
Operation Panel
©MIDI input select switch
©EDIT key
©Cursor right key
•©Cursor down key
ii
''©Parameter list
AKAl
POWER
ON
profmioimt MIDI DIGITAL
o
i
i
MIDI WPUT
SELECT
1.1.2
i
(SAMPLER" iOl
ll'l
TRIM I•LOOP I•LEVEL
START
POINT LOOP
/ONI SHOT LEVEL
START
FINE MONO
TfUOQIH
1NO POINT LOOP f»0INT VELOCITY
SAM
TUI
CONS
PIT
ENDWNI LOOP FINE
ED
i
©Power Switch Drive LED
OKEC O1O203
LP
Eject button ©Record key
©Floppy disk drive
©Power Switch
Turns the power ON/OFF. When the power is tuned on, the Bank 1LED will light. When no disk
is inserted, the SOI loads the default program (while the PROG. NO./DATA display showing rapid
movement, the drive LED lit) and goes into Play mode.
©MIDI input select switch
Switches to either of two MIDI IN jacks on the rear panel.
©EDIT key
When this key is pressed, the EDIT LED will light, the SOI goes into Edit mode, and two LEDs in
combination shows available parameter.
©Cursor right key
®Cursor down key
These twocursor keys arc used in Edit modeto select aparameter. Also in Play mode, pressing either
key shows remaining sampling time in the PROG. NO/DATA display.
©Floppy disk drive &Eject button
3.5 inch 2DD/2HD disk drive. The drive LED will light in yellow while saving/loading data. To
eject the disk, push the Eject button.
©Parameter list
List of all parameters of the SOI. In Edit mode the selected parameter will be recognized with two
LEDs in vertical and horizontal lines.
©Record key
Initiates recording (sampling) with this key.
©PROG. NO./DATA display
J©Record level control
1i
!!©Main volume control
i
PROG. N0./DATA BEC LEVEL
HI
=1
tSf
;ity
PITCH I•MIDI I* strup
TWWW H,aH TRANSPOSE
MHMA
TUNB KEYRAHOII
LOW masto*
TUN*
-r MAIN VOLUME
CONSTANT
PITCH P.CHANGE
CHANNgt DATA
MIDI
CHANHB.
04 S06 07 08
REC GAIN
LOW HIGH
(13-
INPUT
MAX MM MAX
PHONES
OUTPUT
®Bank keys 1~8 ©Data entry knob
©Input jack (mono)
,©Headphone jack
©Output jack 1(mono)
©Record gain switch
(D Bank keys 1~8
Selects the corresponding bank to record or edit. Also as aBank key is pressed, sampled sound
contained in the bank can be played back.
©PROG. NO./DATA display
7segment three digit LED displays the program number in Play mode, while in Edit mode, the
parameter value and other information.
®Data entry knob
Selects the program number and adjusts the parameter value.
©Record level control
Adjusts the recording level during sampling.
©Main volume control
Adjusts the headphone jack and the audio level at the output jacks 1&2.
®Record gain switch
Adjusts the input level sensitivity at the input jack. (HIGH: -52dBm, LOW: -12dBm)
©Headphone jack
An input jack for stereo headphone plug. However, the headphone output signal is not stereo.
©Input jack (mono)
An audio input jack for output from amicrophone or any other instrument you would like to record.
@Output jack 1(mono)
An audio output jack of the SOI to be connected to an amplifier or mixer. The same audio signal
is output from the output jack 2 on the rear panel.
#Rear Panel
•• • •
©Output jack 2
©Foot switch jack
@MIDI THRU
(g)MIDIOUT
#MIDl'lN1&2
AKAtBiCWrCOlTD. €3>
@AC socket
©Output jack 2.
An audio output jack of the SOI to be connected to an amplifier or mixer. The same audio signal
is output from the output jack 1on the front panel.
©Foot switch jack
When afoot switch (normal-closed type) is connected to this jack, it enables to start recording and
to play back the sampled data in Bank 1with your foot.
®MIDIIN1&2
Input connectors to receive MIDI data from external MIDI devices. Use them to play the SOI from
an external keyboard or sequencer. Select one of these connectors using the MIDI input select
switch on the front panel.
®MIDI OUT
An output connector to transmit MIDI data generated on the SOI
.
(g) MIDI THRU
An output connector to retransmit the same MIDI data as received at MIDI IN.
@AC socket
Connect the supplied AC cable here.
*Each jack is for 1/4 inch phone plug.
Connections
Refer to the diagram below and connect the SOI to your system.
801 Rear Panel '
monitor
speakers
mmQwmh
amplifier
audio mixer,
recorder
effect units
smiiiMmam
keyboard amplifier
>.©©©©
foot switch
(normal-closed type)
4
MIDI IN
MIDI sound module
MID! IN
personal computer, etc.
MIDI OUT
1iaeaseeaeeft
II
MID
III 111 II III II III II III II III II
I
master device (keyboard, sequencer, etc.)
S01 Operation Pane!
microphone
03CHH
electric guitar, etc.
headphones
to audio mixer or amplifier, etc.
sound source
*Before connection, remember to turn off all the devices to be connected.
*If you plan to use your S01 in areas other than you purchased it, refer to your "AKAt professional"
dealer concerning the area voltage.
11
Basics of the S01
Through asimple operation, the SOI can digitally record any sounds—pianos, string instruments,
percussive instruments and other acoustic instruments, and then clearly play back those sounds. Not
only instruments, even noise—wind, rain, machinery, etc., can be recorded and transformed into sound
you have never heard. This wonderful technology in aword is sampling.
Once you sampled sounds, you can simply play them using aMIDI keyboard, as they are. On the other
hand, you can edit or arrange them into another synthesized tone. Using atone arranged like that, the
SOI may work as an 8polyphonic multi-timbral tone generator.
It is important that you grasp some basics of sampling technology.
What is Sampling?
Briefly, sampling is transformation of an analogous waveform (audio signal) into digital data, generally
using aprocedure comprised of:
Sampling process: Recording the level of an electric signal (analogue waveform) every specific
period. The specific period is determined by the "sampling frequency (FS)".
The SO l's sampling frequency is fixed at 32 kHz and will sample an audio signal
every 1/32,000 second. Also, each sample's signal level is determined by
"sampling resolution". The SOl's sampling resolution is 16 bits and it will
record each signal level in 65,536 steps (=28=16 bits). Therefore the SOI is able
to capture subtle changes in the original audio signal.
Quantizing process: Arranging anumber of recordings obtained in sampling process appropriately
in the memory. This has to be done because the original waveform has been
divided into thousands of "pieces" in sampling process. Unless those pieces are
arranged in recorded order, it cannot be correctly reproduced.
Encoding process: Transforming the level of each recorded piece to an appropriate binary digit so
that it can be recognized or handled by the SOI
.
These processes are tasks of an analogue-to-digital converter (ADC). The encoded waveform data will
finally be sent to memory and can be edited or arranged. When the digital waveform is played back,
it is processed by digital-to-analogue converter (DAC) and output as an analogous waveform (audio
signal).
#Banks
The SOI contains eight banks. Into these banks you are free to sample sounds or load information from
asound library disk. Also, you can edit samples by bank using awide variety of parameters—loop,
level, pitch, or MIDI options, etc.
01 02 03 04 OS 0( O? OS
"»— naannnno
s> %i§si/
UlflJ
parameters TRiM/LOOP/LEVEL/PlTCH/
PMiDI/SETUP/DlSK
*The SETUP parameters are used for general setup for the S01
.
1?
*Original Pitch
In this manual, "original pitch" refers to the pitch without transposition, which an original sound has
when it is sampled, and in which the sample is played back when you press its corresponding Bank key
or C3 key (: MIDI note number 60) on the MIDI keyboard.
#Programs
By assigning each bank an individual MIDI program number, you can make them up to 8different
programs. Also, when the same program number is assigned to several banks, it is applied for multi-
sampled programs (programs that contain several samples).
Example: Individual program numbers for banks 1-4, the same program number for banks 5-8
banks
MIDI program number 5120 22
01 02 304 OS 06 07 08
ooooano
ttft ttj U
*Files
Afile is aunit for an amount of data. The SOI offers two basic file types to handle data. "ALL" files
are comprised of 8all bank data (including samples) and all other settings for the SOI, whereas
"SAMPLE" is comprised of asingle bank data (sample and its basic settings).
Additionally, your SOI can load sample data for AkaiSlOOO/Sl 100. For further information about this,
see page 45.
Memory
The SO1has basically 1megabyte (512 kiloword) internal memory, and the user area is assigned with
500 kiloword (500,000 sample points) of it. This area is used for actual sampling: Sampling
time=l 5.625 seconds(*) (500,0O0/FS=32,000) .You can freely assign this capacity to each of 8 banks.
Following diagrams show how to assign amount of memory within the capacity:
(*) The PROG. NO./DATA display shows "15.6" seconds.
Example 1: Using ail memory for bank 1
15.6
seconds
bankl
In this case, you cannot do sam-
pling for other banks.
Example 2: Assigning to several banks within the capacity
15,6
seconds"
1^^,^^-igg^
bank2 bank3bank 44
remaining memory
15.6-12=3.6 (seconds)
In this case, youcan doan additional
3.6 seconds sampling for other
banks.
13
Example 3: After using up all memory for bank 1&2, replacing bank 2sample with ashorter one,
to do additional sampling for other banks.
15.6
seconds
bankl vreplacing v«th astater sample,
bank 2remaining memory
In this case, you can do additional
sampling using remaining memory
for other banks.
Example 4: After sampling for bank 1&2 with some memory remaining, replacing bank 2sample
with alonger one.
15.6
"seconds
bankl bank 2remaining memory
$*In this case, you can redo longer
sampling for bank 2using the cur-
rent bank 2area and remaining
memory.
bankl bank 2
Example 5: Editing the start &end points of a sample, discarding(*) unnecessary areas to add it
to remaining memory.
OSee page 32 in details.
15.6
"seconds
By discarding ,you can add amount
of memory for discarded area(s) to
remaining memory. It enables you
to economically use the memory
bankl bank 2
—_^ 1capacity.
remaining memory
Controls and Signal Flow
The signal flow in the SOI is outlined in the following diagram.
banks numker
audio
input
O-H
REC GAIN
HIGH
LOW
audio
interface
(16-bit ADC)
floppy disk
drive
sound library disk A
sample 1
sample 2
sample 3
sample 4
samples
samples
sample?
8
ft
controls
—-.—
^foot switch
MIDI operation
8-time
over
sampling
filter
H>
audio audi0 outPut 1
interface —£> Q)
a6«dac) audio output 2
_Jh>—
o
headphone jack
data entry
knob pR0G No./DATA
Idisplay
ys, etc.
Modes and Operational Flow
The following diagram shows the mode formation of the S01.
power on!
J)-
Play mode $. Edit mode
(for various operations)
The following diagram shows four operational flows (A/B/C/D) of the S01.
®-loading both samples and
rograms from sound
disks
jJ5w^ng~samp\eslfom
S1000/S1 rary
100
©sampling
yourself
#loading suitable programs
only from data disks (then
make samples yourself)
sampling
Z3Z
editing
playing using aMIDI keyboard, etc.
saving necessary data to floppy disks
15
Play Mode
<#> Basic Operation
First, begin with loading the supplied "#01 operation guide disk" and try playing it.
*Set the write-protect switch of the disk "ON". (See page 4.)
1. Connecting the d®vfe®s
Refer to the section entitled "Connections" on page 11and connect MIDI instruments and other
devices.
2. Setting the disk
Make sure the SOI is turned off and then insert the disk #01 horizontally into the disk drive, with
its labelled side up, and the shutter facing the drive. Make sure the disk is set properly with aclick.
3. Power on
When the SOI is turned on, it will automatically load "ALU" file and will go into Play mode after
afew seconds. Bank 1LED will light and the PROG. NO./DATA display will show the program
number"!".
DATA
HSC *102 03 0* OS OS 07 08
1Play mode
*White the S01 is loading data, the disk drive LED will light and the PROG. NO./DATA display will
flicker quickly.
*Data loading is available by DISK/LOAD parameter in Edit mode. See page 38 for details.
4. Playback of the sampled sound
When playing the MIDI keyboard (any transmit channel will be acceptable.), the sampled voice
"ONE" in bank 1can be reproduced at various pitches. Adjust the volume by turning the main
volume control.
GffiD
mcwiB.
/^IS? CD
iMM «**
.v^y.
\s°a moms
\<fo o
1INCUT outwit
/o o CD
*This program from the operation guide disk is set to receive MIDI velocity data. Its sampled
sounds are reproduced with volume changed according to keyboard dynamics.
Selecting aProgram
In "ALL1"file, banks 1-8 are respectively assigned to MIDIprogramnumber 1-8 and each contains
asampled voice: "ONE" for bank 1, "TWO" for bank 2"EIGHT" for bank 8.
Toplay another sampled sound, use the data entry knob to select another program. The PROG. NO./
DATA display will show the program number selected. Also abank LED will light indicating the
selected program is reproduced from that bank.
*If the connected keyboard sends MIDI program change, you can select the desired bank directly
from the keyboard, by sending the same MIDI program number that is set to the bank.
If the S01 receives aprogram number that is not set to any banks, the PROG. NO./DATA display
will blink showing that program number and no sound is reproduced.
Playback using Bank keys
Regardless of the bank LED or PROG. NO./DATA display status, every time when abank key is
pressed, the sampled sound contained will be played back in the pitch when the C3 key (: MIDI note
number 60) is pressed.
afree 01 02 ®3 04 OS 06 07 08
•With default setting of "ALU "file, each sample is played back in its original pitch. If transposition
or tuning is set to samples, they will be played back at that setting.
Up until now, we have only used disk #01 .Forthose of you interested in the disks #02-04 samples,
first refer to the following supplemental explanation. Then go to "Saving and Loading Data" on
page 38. It should enable you to master the data loading method.
*Play Mode —Supplementary Explanation
®When the S01 is turned on...
•If a disk has not been inserted, the SOI will load the default program and go into Play mode.
*The default program contains the test tone signal and default parameter settings. Test tones
will be reproduced only from bank 1.(See page 51 .)
•If adisk is in the disk drive, the SOI will automatically load the "ALL1" file and go into Play
mode.
If the disk contains no "ALL1"file or only "SAMPLE" files (including S1000/S 1100 sound library
disks), the SOI will lead the default program and go into Play mode.
In case the default program is loaded, you should load files in Edit mode. See page 26 for details:,
Additionally, see page 38 on file types when loading or saving them.
17

Other manuals for S01

1

Other Akai Sampler manuals

Akai Z4 User manual

Akai

Akai Z4 User manual

Akai S612 User manual

Akai

Akai S612 User manual

Akai MPX16 User manual

Akai

Akai MPX16 User manual

Akai MPCX User manual

Akai

Akai MPCX User manual

Popular Sampler manuals by other brands

Agilent Technologies 8697 Safety manual

Agilent Technologies

Agilent Technologies 8697 Safety manual

Spectra 2100 Series Installation and operation manual

Spectra

Spectra 2100 Series Installation and operation manual

ELMACRON VA/V3 manual

ELMACRON

ELMACRON VA/V3 manual

globalwater WS700R manual

globalwater

globalwater WS700R manual

Alpha Moisture Systems PSS user manual

Alpha Moisture Systems

Alpha Moisture Systems PSS user manual

Endress+Hauser Liquistation CSF48 Brief operating instructions

Endress+Hauser

Endress+Hauser Liquistation CSF48 Brief operating instructions

Endress+Hauser Liquiport 2000 operating instructions

Endress+Hauser

Endress+Hauser Liquiport 2000 operating instructions

Honeywell HERMetic GTN Chem Operation and service manual

Honeywell

Honeywell HERMetic GTN Chem Operation and service manual

manuals.online logo
manuals.online logoBrands
  • About & Mission
  • Contact us
  • Privacy Policy
  • Terms and Conditions

Copyright 2025 Manuals.Online. All Rights Reserved.