Allen Sports OT-70 User manual
MODEL OT-70
OWNER'S MANUAL
INSTALLATIONAND
OPERATING INSTRUCTIONS
PLEASE READ THIS
OWNER'S MANUAL
CAREFULLY BEFORE
USE. KEEP FOR
YOUR REFERENCE.
MINI WALKIETALKIE
NOTE: Charge the Battery for approximately 12 hours before initial use.
CAUTION: Do not use charger before inserting battery.
!
TIME
DATE
SUN MON TUE WED THU FRI SAT
RADIO
RX
TX
VX
SC
CH
CTC
CALL
AM
PM
S
PTT

Make certain you receive the
best performance from your
MINI WALKIE TALKIE
Read this Owner's Manual first.
STOP
Made in China

Contents
Contents
CARE AND SAFETY
.............................................................. 16
TROUBLESHOOTING
..............................................................
Battery Installation ..................................................................... 4
Changing the Battery .................................................................. 5
LCD Screen .............................................................. .................
6
Turning the Unit ON .................................................................... 7
Turning the Unit OFF ................................................................... 7
Changing Channels .................................................................... 8
Receiving a Signal ...................................................................... 7
Transmitting a Signal .................................................................. 7
Special Features ......................................................................
2
Mini Walkie Talkie Contents 3
GETTING STARTED
MINI WALKIE TALKIE OPERATION
Changing Sub-Channels ............................................................. 8
Channel Scan ............................................................................. 9
VOX Selection ............................................................................ 9
Melody Call Tone ........................................................................ 10
Power Saving Function ................................................................ 10
Calendar Date Setting.................................................................. 11
Time Setting................................................................................ 11
Stopwatch Setting....................................................................... 11
Clock .................................................................... 12
Alarm Clock Setting..................................................................... 12
Key Lock Function....................................................................... 12
Clock Hour Mode......................................................................... 13
Battery Capacity Level/Low Battery Indication............................... 13
Charging the Battery Pack............................................................ 13
Adjusting the Speaker Volume...................................................... 7
17-18
.
Accessories................................................................................ 14-15
................................................................ 19-24
.
Countdown ...
...
..
SPECIFICATIONS
1
.......................................................
.
.
.

2
Congratulations on your selection of a quality MINI WALKIE TALKIE
Product. With proper care and adherence to the set-up and
user instructions in this Owner's Manual, this unit will provide
The MINI WALKIE TALKIE is the newest generation
in personal two-way communications. It’s a lightweight,
compact two-way communication device that can be used
to stay connected with family or friends at parks, shopping
malls, sporting events, concerts - virtually any indoor or
you with years of trouble-free service.
outdoor activity.
Mini Walkie Talkie with interchangeable accessories.
PRODUCT FEATURESand CHARACTERISTICS
around buildings or large structures.
NOTE: The maximum transmission range will vary depending on terrain and
environment. Range will be greater in open fields, while range is shorter within and
38 CTCSS Codes
Output Power (ERP): 500 milliwatts
Range: 2 Miles
Call Melody Tone
Calendar Date
Stop Watch
Clock Countdown
Alarm Clock
Power Battery Saving
Internal VOX
Channel Scan
12/24 Hour Mode
Backlit LCD Screen
Power Source: 3.6V, 650mAh Lithium-ion Battery
Battery Life: Varies per user
Special Features

3
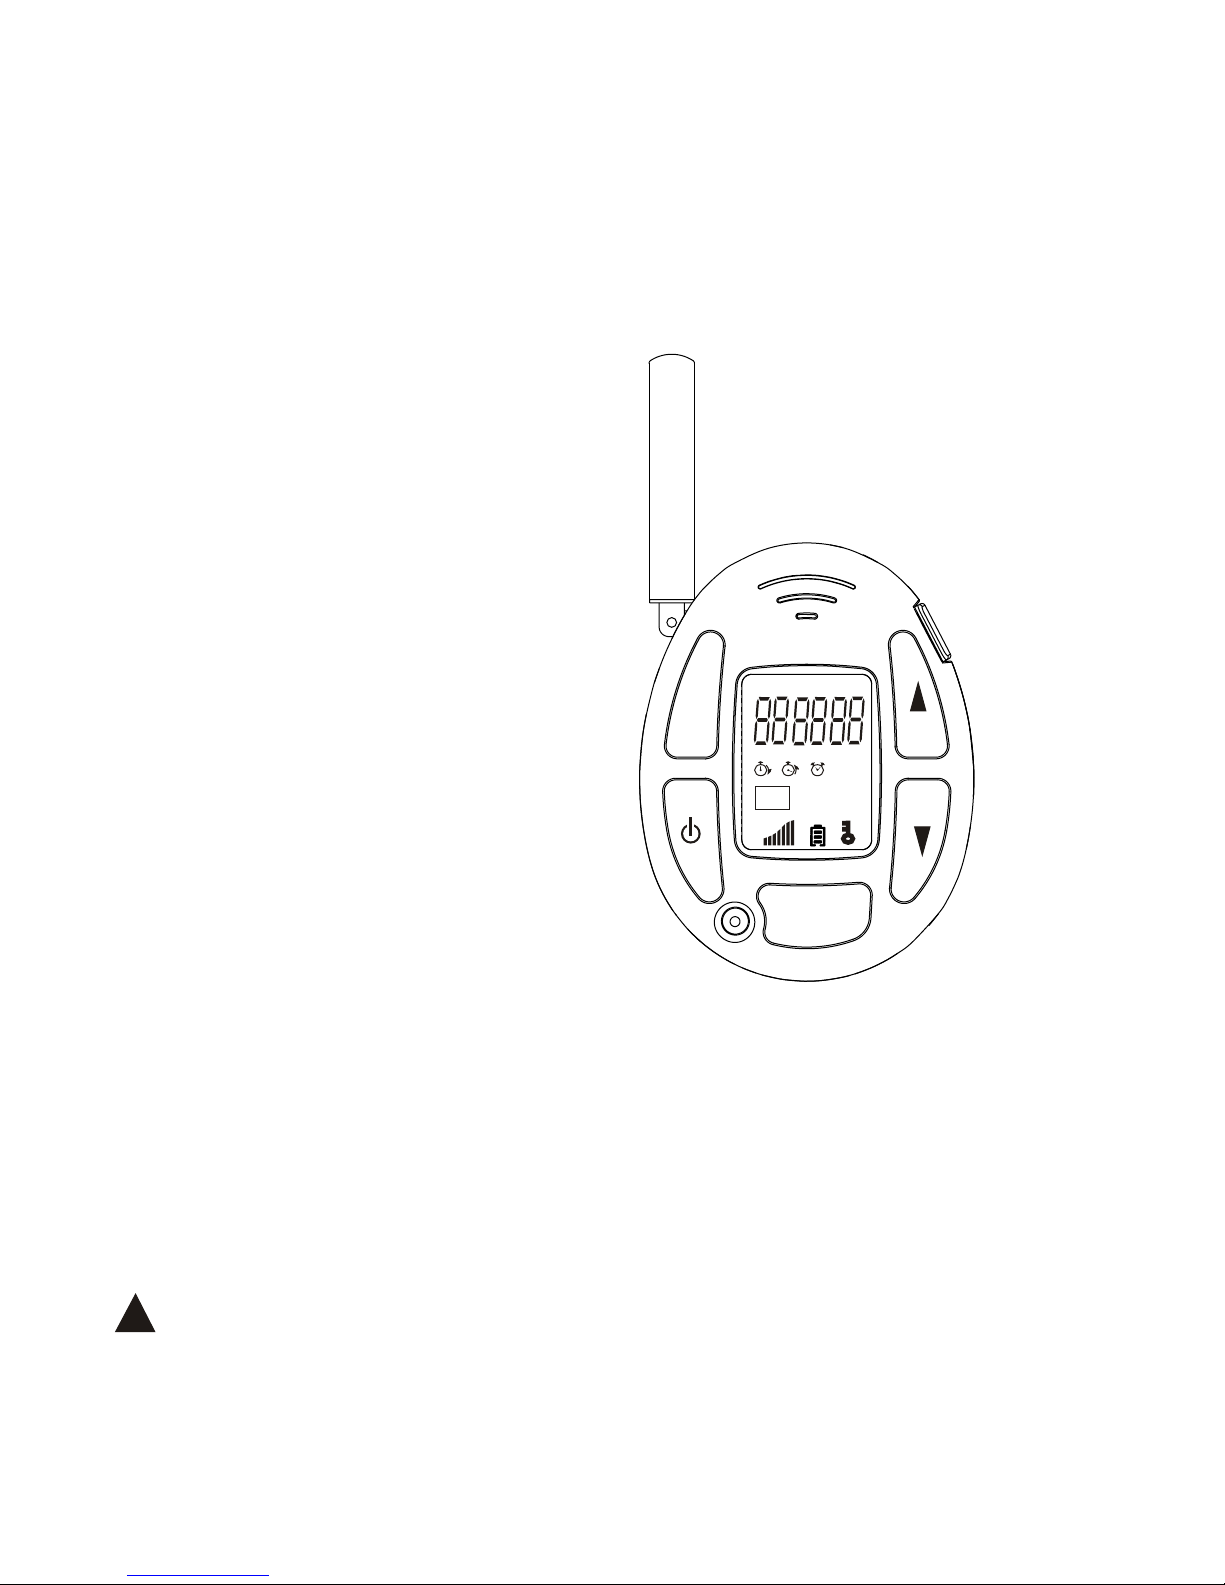
Mini WalkieTalkie Controls
Display Icon, LCDand Button Description
1. Set Button - Press to enter setting and Scan function
2. Headset/Charger Jack - Use for Hands free communication.
3.Power/Menu - Press and hold to turn the unit ON/OFF.
Aquick, single press to access the Menu and a Watch mode.
4. Antenna
5. UP Button - Adjust Volume level and makes channel and watch
adjustments in Menu mode.
6. DOWN Button - Adjust Volume level and makes channel and
watch adjustments in Menu mode.
7. PTT/CALL Button - Press and hold to transmit voice commu-
nication. Press and hold about 100 milliseconds to transmit
CALL tones
8. Microphone
9. Speaker
NOTE: The LCD Screen emits light for 3 seconds everytime you press
the button.
TIME
DATE
SUN MON TUE WED THU FRI SAT
RADIO
RX
TX
VX
SC
CH
CTC
CALL
AM
PM
S
PTT
1
2
3
4
5
6
9
8
7

4
Getting Started
Your MINI WALKIE TALKIE is powered by a Lithium-Ion BATTERY.
Battery Installation
To install and replace the BATTERY:
1. Release the BATTERY COMPARTMENT COVER LATCH located on
the rear side of the unit, and pull up the BATTERY COMPARTMENT
COVER (See Figure 1).
2. Install the Lithium-ion BATTERY into the BATTERY COMPARTMENT.
Be certain to follow the correct orientation in the compartment.
Abattery installed incorrectly can prevent the unit from operating.
3. Replace the BATTERY COMPARTMENT COVER and lock the battery
compartment cover latch into position.
NOTE: If you install/replace the BATTERY the LCD Screen remains
blank for more than 3 seconds, press and hold the POWER/
MENU button for 2 second to start WATCH mode.
CAUTION:
Toreduce the risk of personal injury, use only the battery listed in the
Owner’s Manual. The MINI WALKIE TALKIE
has a built in POWER
SAVER feature for maximum battery life. When the MINI
WALKIE TALKIE is not being used,
conserve battery power by setting
the POWER SAVER To “On”
Mode. Remove the battery if the unit will
not be used for a long period of time.
!
Figure 1

Getting Started
Your MINI WALKIE TALKIE comes with an A/C ADAPTER CHARGER.
Tocharge your Lithium-Ion BATTERY:
Charging the Battery
1. Lift the HEADSET/CHARGER JACK COVER located on the left side of
2. Connect the AC ADAPTER CHARGER into an AC outlet.
3. Insert the CHARGER PLUG into the HEADSET/CHARGER JACK,
The LOW BATTERY LEVEL icon will flash until it is removed.
NOTE: Charge the BATTERY for approximately 12 hours before
your MINI WALKIE TALKIE ( See Figure 1).
initial use.
5
Figure 1
+
-
6
Getting Started
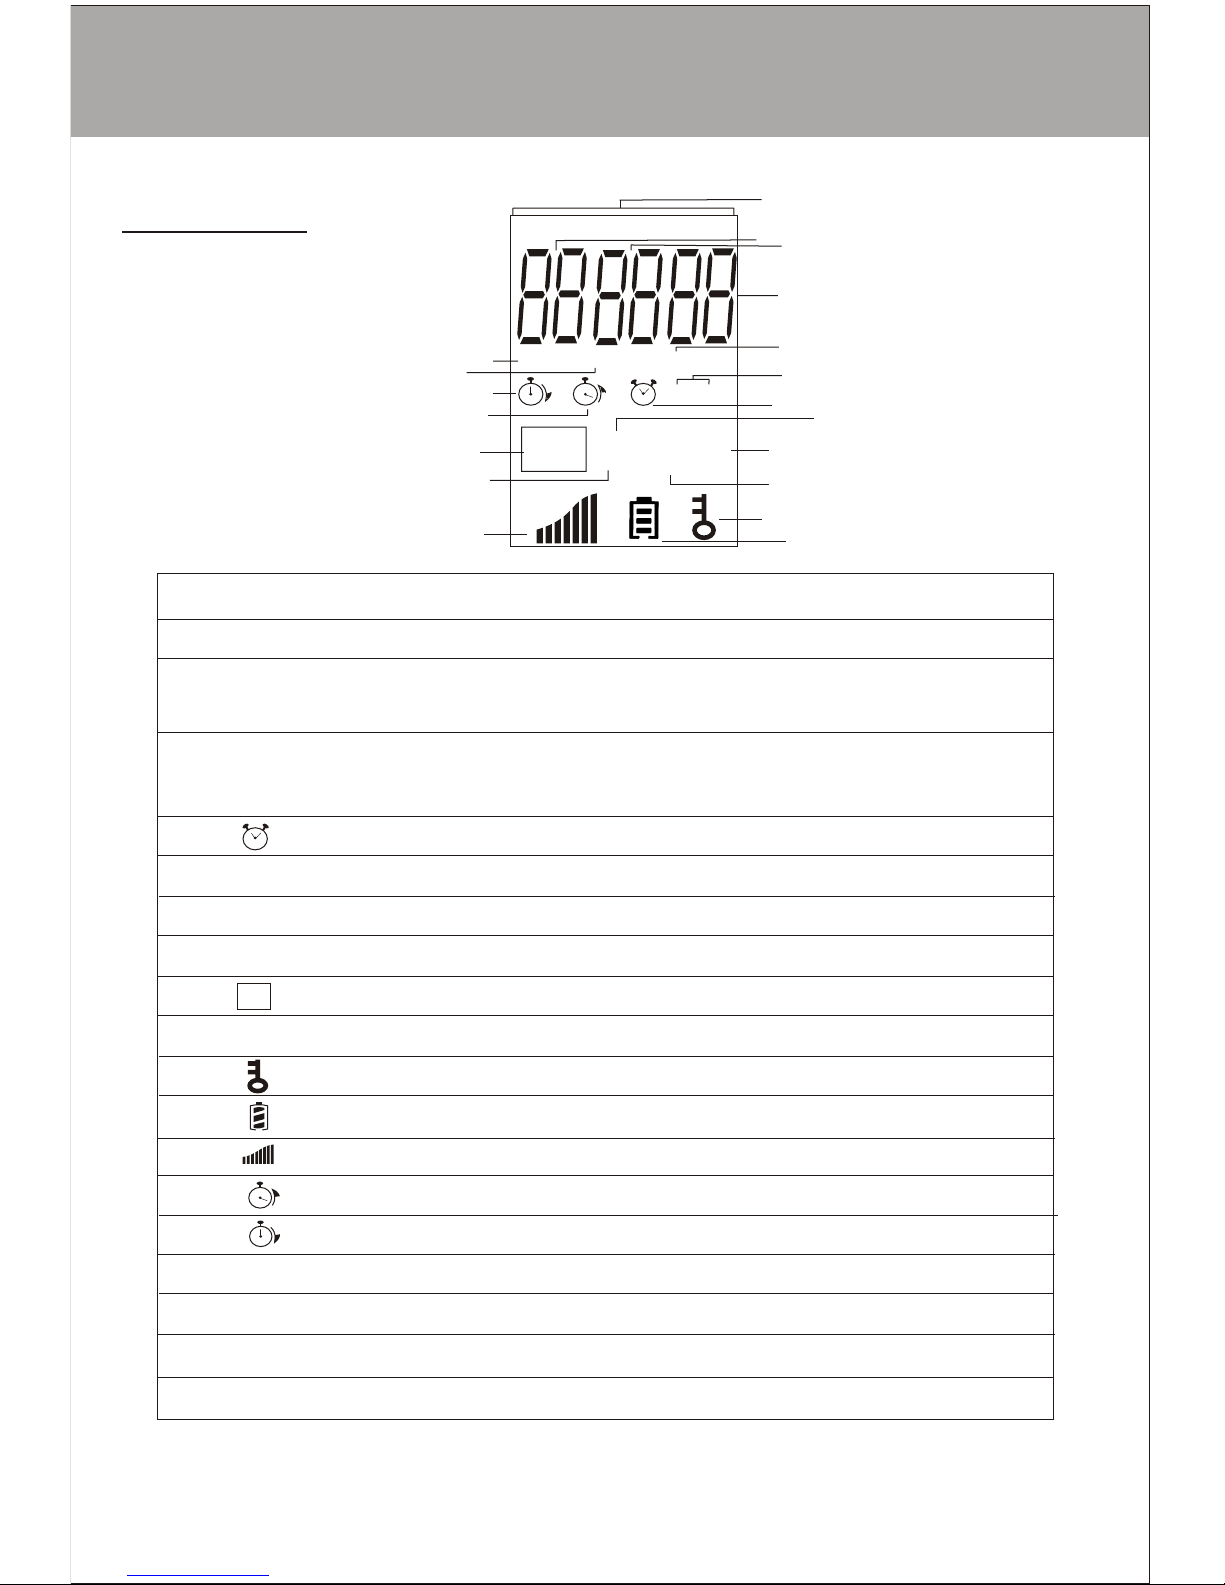
CALL
A. Day display
B. Hour segment display
C. Minute segment icon in Watch mode. Channel
number icon in Walkie Talkie mode.
D. Second segment icon in Watch mode. CTCSS
channel number in Walkie Talkie mode.
E. - Alarm clock icon
F. - Display during the VOX mode
G. - Display when receiving signal
H. - Display when transmitting signal
I. - Display during Call melody tone mode.
J. - Display during the Channel Scan mode.
K. - Display when button lock is activated
L. - Display the Battery level charge
M. - Display the current volume level
N. - Clock Countdown icon
O. - Stopwatch icon.
P. -12 Hour mode icon
Q. - Display Radio icon during Walkie Talkie mode.
R. - Display Date icon during Watch mode.
S. - Display Time icon during Watch mode.
AM
PM
TIME
DATE
RADIO
RX
TX
VX
SC
LCD Screen
J
M
O
Q
R
S
I
N
A
TIME
DATE
SUN MON TUE WED THU FRI SAT
RADIO
RX
TX
VX
SC
CH
CTC
CALL
AM
PM
D
BC
E
F
G
H
K
L
P
7
Getting Started
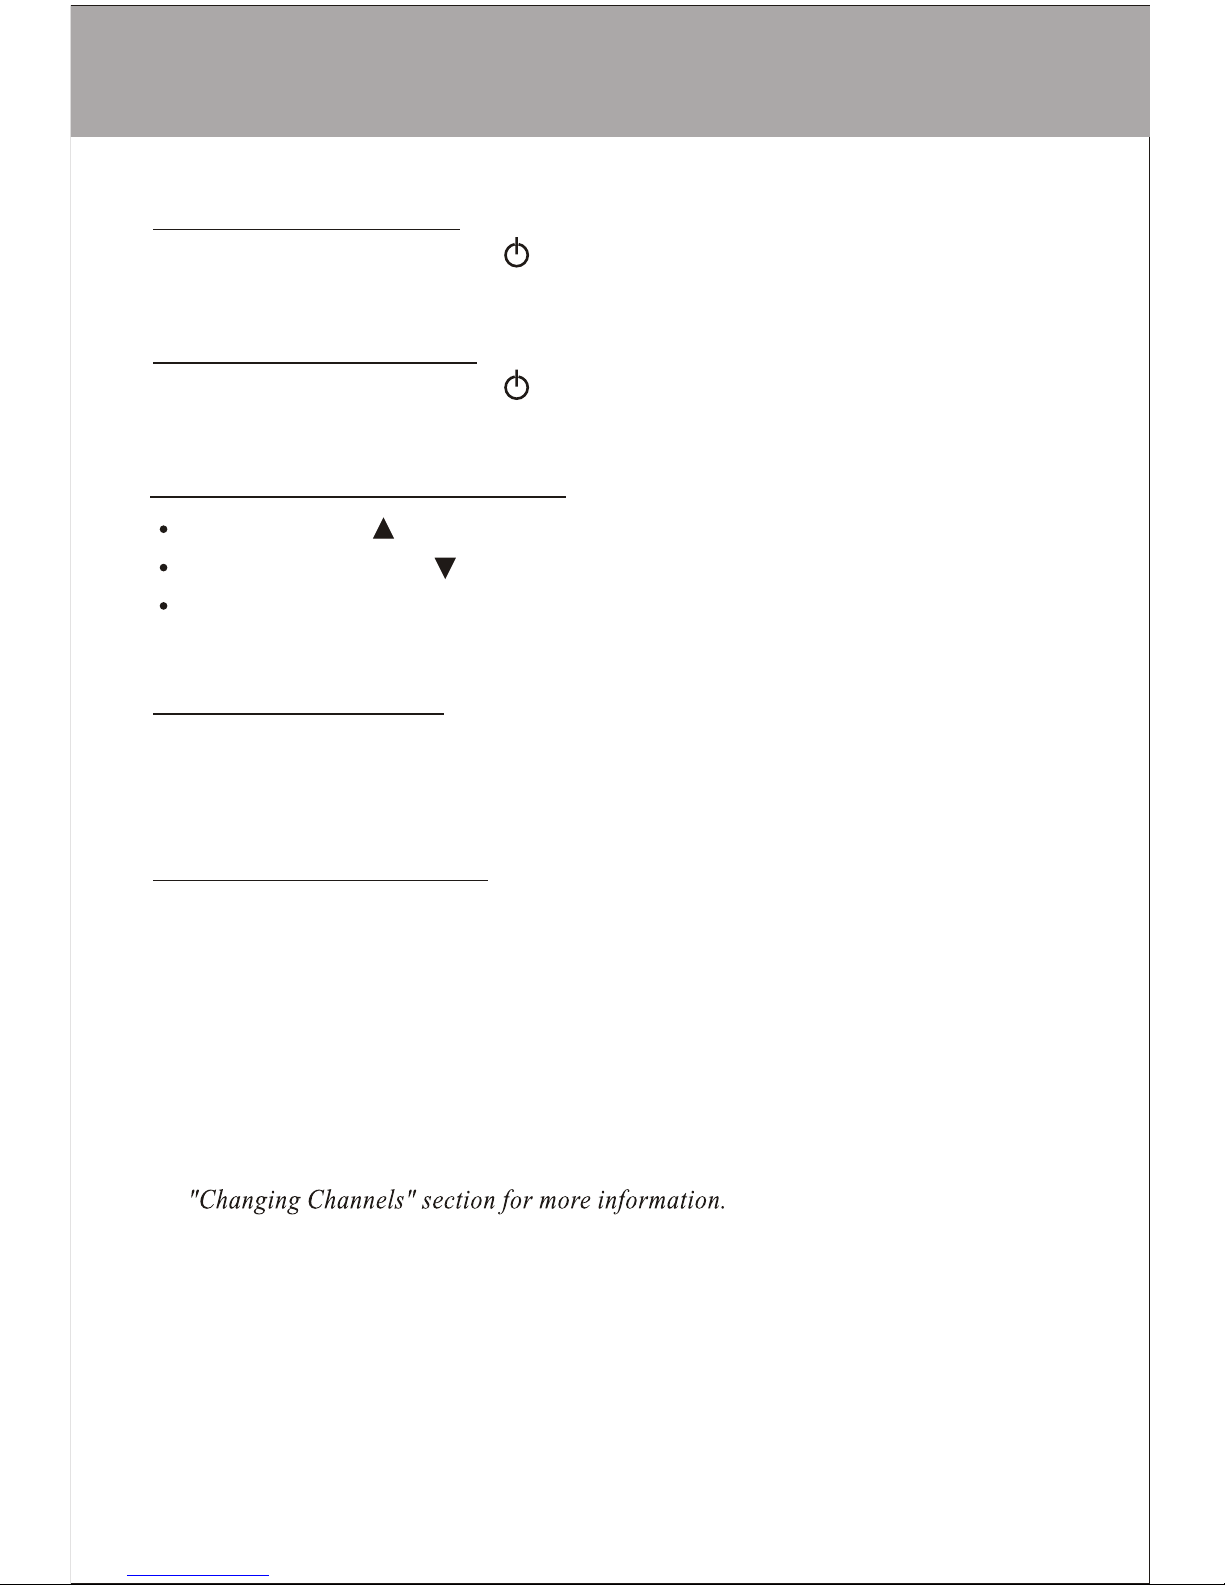
Turning theUnit ON
Turning theUnit OFF
Receiving a Signal
LCD Screen will display the current channel.
Transmitting aSignal
While holding the PTTbutton, speak into the unit using a normal
tone of voice.
Release the PTT button when you have finished transmitting.
1.
2.
3.
NOTE: In order for other people to receive your transmission, they must also be
on the same channel and CTCSS sub-channel you are currently using. Refer to the
LCD Screen will return back to Watch mode.
Adjusting Speaker Volume
Press the DOWN button to decrease the .Speaker Volume
Press the UP button to increase the Speaker Volume.
The level is indicated by the number of bars
displayed in the lower corner of the LCD Screen.
Speaker Volume
Press and hold the PTT button to TRANSMIT. The TX icon will
display. Hold the unit in vertical position with the Microphone 2 to 3
inches from the mouth.
Press and hold the Power button. The unit will “beep”and the
Press and hold the Power button. The unit will “beep”and the
The unit is continuously in the RECEIVE mode when the unit is ON
and not transmitting. When you receive a signal on the current
channel, the RX icon is displayed. (See LCD SCREEN”for details).“

8
Mini WalkieTalkieOperation
Changing CHANNELS
1. In Walkie Talkie mode, press the button once, the current
channel number flashes on the LCD Screen.
2. While the channel number is flashing:
Press the UP button to move to a higher channel.
Press the DOWN button to move to a lower channel.
Tochange channels:
3.Press the button to confirm the channel setting.
S
Changing CTCSS Sub-Channels
sub-channel number flashes on the LCD Screen.
2. While the channel number is flashing:
Press the UP button to move to a higher channel.
Press the DOWN button to move to a lower channel.
The channel changes from 0 to 38, or from 38 to 0.
3.Press the button to confirm the selected sub-channel.
Your Walkie Talkie has 38 available CTCSS sub-channels.
Tochange channels:
NOTE: To communicate with other Walkie Talkie units, both units must be
switched to the same channel and CTCSS sub-channel.
NOTE: Refer to the “Channel Table”section of this Owner’s Manual
for detailed frequency listing.
S
1. In Walkie Talkie mode, press the button 2 times, the CTCSS

9
Mini WalkieTalkie Operation
VOX Selection
1. In Walkie Talkie mode, press the button 3 times, the
VX icon will
blink on the LCD Screen.
2. Press the / UP/DOWN button to select VOX sensitivity.
VOX sensitivity 1,2,3 or 4 can be selected on this unit.
4. In the VOX mode, the VX icon will be displayed.
5. Press the button to confirm the setting and return to Standby
mode.
NOTE: On VOX mode, user can speak with their voice through the microphone
to activate transmitting mode automatically.
CHANNEL SCAN
CHANNEL SCAN performs searches for active signals in an endless
loop .
1. In Walkie Talkie mode, press the button the LCD screen will display
the channel and sub-channel number continuously changes.
The unit will only stop until an active signal is detected.
2. When an active signal is detected, Channel SCAN pauses keeping the
active broadcasted.
3. Press the PTT button to communicate through the active signal
channel and Channel SCAN is deactivated.
Your Walkie Talkie is capable of voice activated (VOX) transmission.
In VOX mode, the radio will transmit a signal only when it is activated by
your voice or other sound around you. VOX operation is not recommended
if you plan to use your Walkie Talkie in a noisy or windy environment.
S
S
4. When an active signal is detected, but another channel is desired,
press the UP or DOWN button to bypass the current
channel and continue to search for another active channel.
5. Press the button to deactivate Channel SCAN mode.
S
“Off”

10
Mini WalkieTalkie Operation
S
Melody Call Tone Selection
1. In Walkie Talkie mode, press the button 4 times, to select Melody
Call tone mode.
2. Press the UP or DOWN button to select the desired Melody Call tone.
This function will let user to select the desired Melody Call Tone.
3. Press the button to confirm the setting and return to Standby mode.
NOTE: Melody Call Tones is available up to 10 melody tones.
S
Power Saving Function
1. In Walkie Talkie mode, press the button 5 times, to activate
Power Saving function in Walkie Talkie mode.
2. Press the UP button to switch to Power Saving On.
3. Press the DOWN button to switch to Power Saving Off function.
This function can help user to save battery life on their unit.
The unit has a built in Power saver feature to make the batteries last longer.
4. Press button to confirm the setting and return to Standby mode.
NOTE: If your Walkie Talkie set to standby mode and the Power Saver set to
ON , the Walkie Talkie will automatically return back to Standby Watch mode
after 20 minutes.

11
Mini WalkieTalkieOperation
Calendar Date Setting
Time Setting
This function allows user to adjust the Hour/Minute/Second setting.
1. In Watch mode, press the button 3 times for Time setting.
4. To continue setting for Minute and Second, user will do the same step
from number 2 to 3.
5. Press the button to confirm the setting.
3. Press the UP or DOWN button to set the hour.
2. Press the button the Hour segment will flash.
S
Stop Watch Setting
This feature is compatible to sports minded people.
For Stopwatch setting;
1. In Watch mode, press the button 4 times to activate
Stopwatch
function.
4.
2. Press the PTT button to start the Stopwatch function.
3. Press the PTT button again to stop the Stopwatch function.
S
Press the UP or DOWN button to reset the stopwatch.
S
S
This unit has been pre-set at the factory according to the country format
where it is intended for use.
(Field 1) (Field 2) ( Field 3)
In Europe DATE MONTH YEAR
In USA MONTH DATE YEAR
Other Areas YEAR MONTH DATE
To adjust this setting:
1. In WATCH mode, press the button 2 times.
2. Press the button and Field 1 will flash.
3. Use the UP or DOWN button to adjust.
4. Press the button again to move to the next field. Repeat step 3.
5. When finish with Field 3, press the button to confirm the setting.
S

12
Mini WalkieTalkieOperation
Clock Countdown
This function allows user to adjust the Clock Countdown setting
1. In Watch mode, press the button 5 times to set the Clock
Countdown function.
4. Tocontinue setting for Seconds and Milliseconds, user will do the
same step from number 2 to 3.
5. Press the button to confirm the setting.
3. Press the UP or DOWN button to set the minute.
2. Press the button the Minute segment will flash.
S
Alarm Clock Setting
Toset for Alarm Clock function;
1. In Watch mode, press the button 6 times to set the Alarm
Clock function.
4. Tocontinue setting for Minute and Second, user will do the same step
from number 2 to 3.
5. Press the button to confirm the setting.
3. Press the UP or DOWN button to set the hour.
2. Press the button the Hour segment will flash.
S
Key Lock Function
The unit have a Key Lock function, to activate;
1. In Watch mode, press the button 7 times to activate
Key lock function.
2. Press the button to set the Key lock function
NOTE: *If the unit is set to Alarm ON function the “Alarm”icon will display on the LCD,
but when the unit is set to Alarm OFF function the “Off”icon will display
on the LCD.
* To Stop the Alarm Clock tone, press the PTT button.
* Alarm Tone will last up to 60 seconds.
S
3. Press the UP button to set the Key Lock On.
4. Press the DOWN button to set the Key Lock Off.
5. Press the button to confirm the setting.
NOTE: If Key Lock function is activated the “KEY icon”will display on LCD
Screen. To deactivate the Key lock function press the button at least
2 seconds.
S
S
S
7. Press the UP or DOWN button to reset the Clock Countdown .
S
6. Press the PTT button to ON/OFF the Alarm Clock setting.
6. Press the PTT button to start or stop the Clock Countdown.

13
Mini WalkieTalkieOperation
Clock Hour Mode
This function allows user to select Clock Hour mode.
1. In Watch mode, press the button 8 times to activate the
Clock Hour mode.
2. Press the button to set the Clock hour into 12 hour or
24 hour mode
S
3. Press the UP button to select the 24 hour mode.
4. Press the DOWN button to select the 12 hour mode.
5. Press the button to confirm the setting.
NOTE: In 24 hour mode there is no AM or PM icon will display on LCD Screen.
Battery Capacity Level/LowBattery Indication
The Battery Charge Level is indicated by the number of squares
present inside the Battery icon on the LCD Screen.
When the Battery Charge Level is low, the Battery icon will flash to
indicate that the battery need to be replaced.
Do not charge this unit using an AC/DC Adaptor with regular batteries,
use only the Battery Pack as specified on this manual.
To Chargeyour Walkie Talkie
Touse this Walkie Talkie with an AC/DC adaptor and Li-ion Battery
(both included) do the following instructions:
1. Plug the 5V/350mAh adaptor into the Charger Jack on the side
of the Walkie Talkie and plug the Adaptor to the AC main socket.
S
A) It takes approximately 12 hours to fully charge the new battery.
NOTE: The battery icon will flash whenever the charger plug is inserted, even if
the battery is fully charged. Flashing will stop when the plug is removed.
B) For succeeding charging, you have to charge at least 5 hours.
14
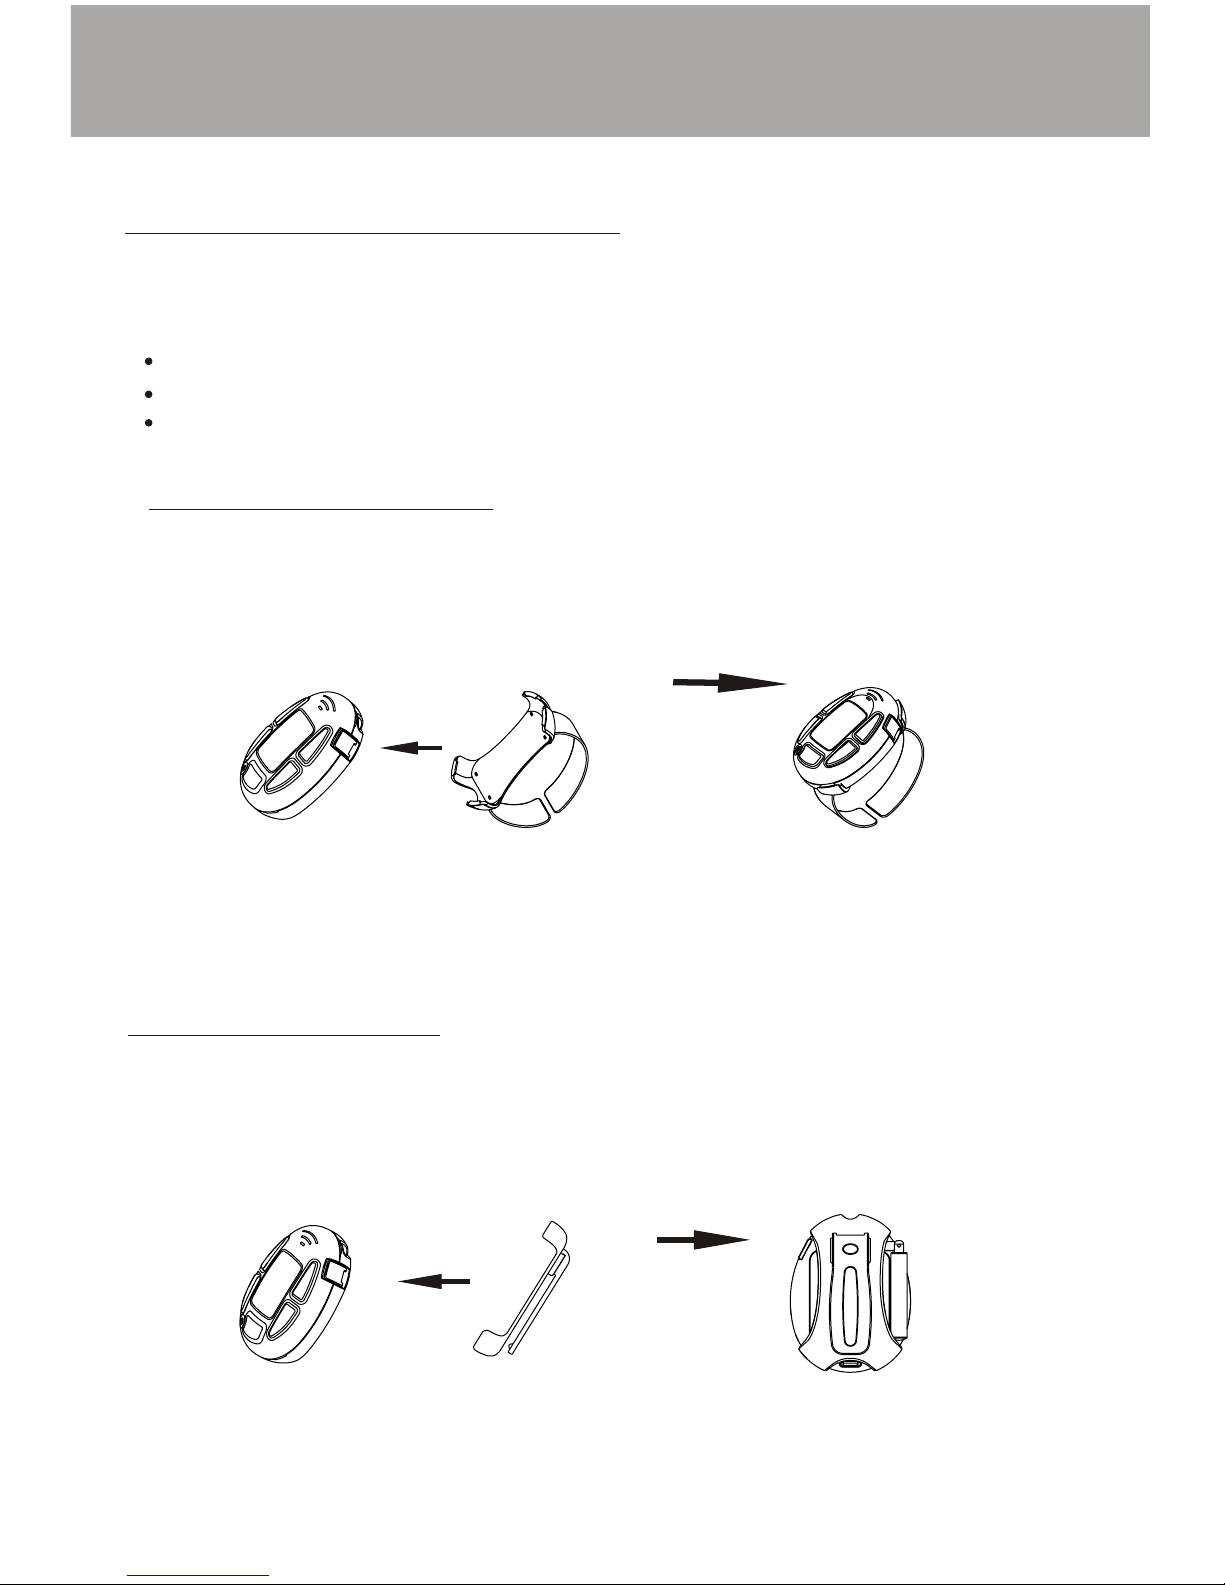
Accessories
ToAssemble Other Accessories
This Mini WalkieTalkiehave the followingaccessories wherein the
user can select,such as;
Wrist Band
Pendant Loop
1. Connect the Wristband holder onthe back ofunit as shown on
Figure 1.
Figure 1
ToAssemble Wrist band
2. See Figure 2 for Wristband final assembly.
Belt Clip
1. Connect the beltclip holder on the back ofunit as shownon
Figure 1.
Figure 2
ToAssemble Belt Clip
2. See Figure 2 for BeltClip final assembly.
Figure 2
Figure 1
15
Accessories
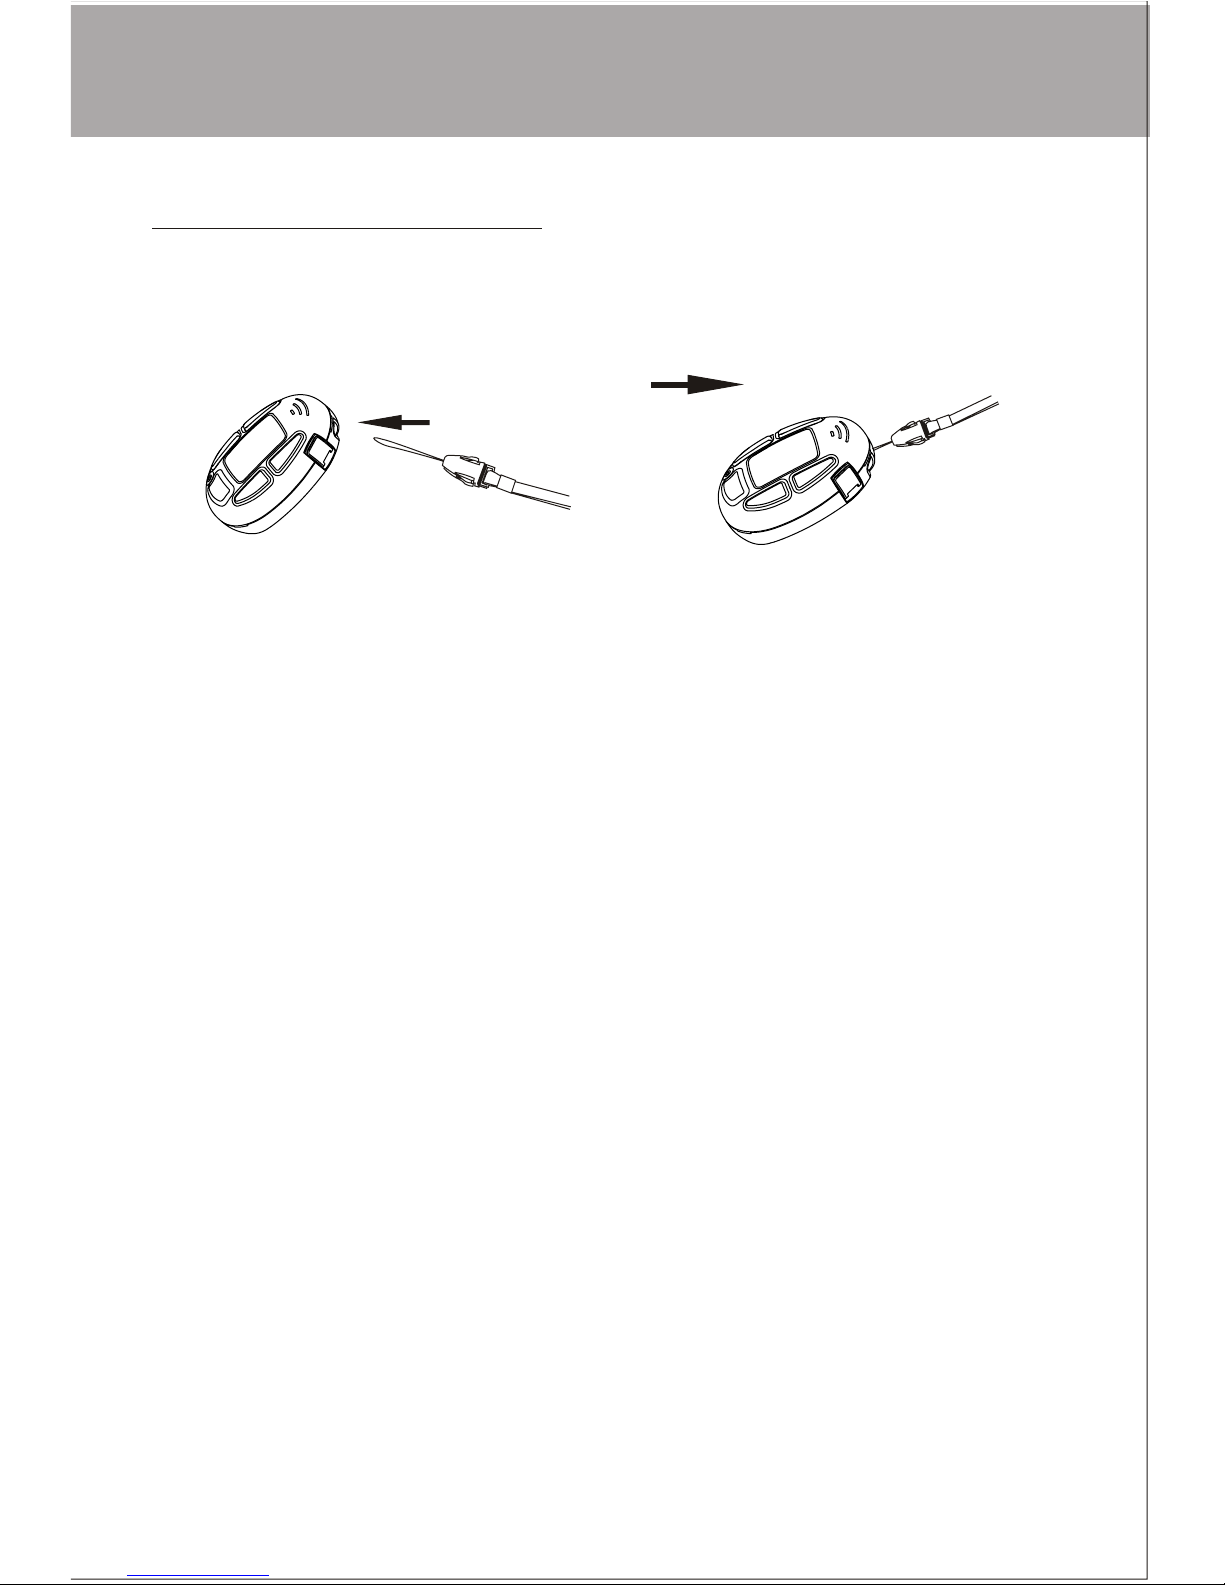
1. Insert the stringinto the holeon the top of unit asshown in Figure1.
2.
See Figure 2 for Pendant Loop final assembly.
ToAssemble Pendant Loop
Figure 1 Figure 2

16
Troubleshooting
SYMPTOM SOLUTION
No power.
The may be weak.battery
Check battery. Ensure that the battery are installed properly.
Reception
is weak. Press the UP button toincrease VOLUME.
The receiving signal may beweak and/or out of range.
Range is
limited.
Wearing the radio close to the body, such as ina pocket or on
a belt, will decrease range; change the location of the radio.
may limit the range significantly.
Open fields provide the maximum range, while steel/concrete
structures, heavy foliage, and use in buildings andin vehicles
Replace with new if the BATTERY CHARGE LEVEL
indicator is low.
battery
Battery may be weak.
Radios too far apart. Obstacles interfere with transmission.
Talk range is up to 2 miles in clear unobstructed conditions.
Radios too close. Radios must be atleast 5 feetapart; increase
your distance.
Sound distortion
problems.
If you are transmitting, speak in a normal tone of voice, 2 to 3
inches away from the MICROPHONE.
If you are receiving,lower the VOLUME toa comfortable level.
Cannot change
CTCSS sub-
channels.
BUTTON LOCK mode must be deactivated if the BUTTON LOCK
icon (key) is displayed on the LCD Screen.
To change CTCSS sub-channels, press the button
until the CTCSS sub-channel number flashes on the LCD Screen.
Press the UP or DOWN buttons to change the CTCSS
sub-channels.
Battery may be weak.
Replace the old battery with new Li-ion 3.6V, 650mA.
The maximum range will varydepending on terrain and
environment.

Care and Safety
17
NOTE: Areas with potentially explosive atmospheres are often, but not always,
clearly marked. They include fueling areas such as below deck on boats; fuel or
chemical transfer or storage facilities; areas where the air contains chemicals or
particles, such as grain, dust, or metal powders; and any other area where you
would normally be advised to turn off your vehicle engine.
WARNING
For Vehicleswith an AirBag
Potentially Explosive Atmospheres
Batteries
Batteries
Blasting Caps andAreas
Do not use any Wa l k i e Talkie that has a damaged ANTENNA.
If a damaged ANTENNA comes in contact with the skin, a minor burn may result.
Turn your Wa l k i e Talkie OFF when in any area with a potentially explosive
atmosphere, unless it is a type especially qualified for such use (for example,
Factory Mutual Approved). Sparks in such areas could cause an explosion or fire
resulting in bodily injury or even death.
Do not place your Walkie Talkie in the area over an air bag or in the air
bag deployment area. Air bags inflate with great force. If Walkie Talkie is placed
in the air bag deployment area and the air bag inflates, the Walkie Talkie may
be propelled with great
force and cause serious injury to the occupants of the vehicle.
All batteries can cause property damage and/or bodily injury such as burns if
conductive material such as jewelry, keys, or beaded chains touches exposed
terminals. The material may complete an electrical circuit (short circuit) and
become quite hot. Exercise care in handling any charged battery, particularly
when placing it inside a pocket, purse, or other container with metal objects.
To avoid possible interference with blasting operations, turn your Walkie Talkie
OFF near electrical blasting caps or in a "blasting area" or in areas posted:
"Turn off two-way radio". Obey all signs and instructions.
Do not replace or charge batteries in a potentially explosive atmosphere.
Contact sparking may occur while installing or removing batteries and cause
an explosion.
WARNING

Care and Safety
18
To clean the unit, wipe with a soft cloth dampened with water. Don't use
cleaners or solvents on the unit; they can harm the case and leak inside,
causing permanent damage. Battery contacts may be wiped with a dry, lint-
free cloth.
For Mini Walkie Talkie
Electromagnetic Interference/Compatibility
Nearly every electronic device is susceptible to electromagnetic interference
(EMI) if inadequately shielded, designed, or otherwise configured for
electromagnetic compatibility.
Turn your unit OFF in any facilities where posted notices instruct you to do
so. Hospitals or health care facilities may be using equipment that is
Turn your unit OFF when on board an aircraft when instructed to do so. Any
use of the unit must be in accordance with airline regulations or crew
instructions.
sensitive to external RF energy.
If the unit gets wet, turn it OFF and remove the batteries immediately. Dry the
BATTERY COMPARTMENT with a soft cloth to minimize potential water
damage. Leave cover off the BATTERY COMPARTMENT overnight or until
completely dry. Do not use the unit until completely dry.
When transmitting with Walkie Talkie, hold the Unit in a vertical
position
with its MICROPHONE 1 to 2 inches (2.5 to 5.0 cm) from your mouth.
Keep the ANTENNA at least 1 inch (2.5 cm) from your
If you wear a Walkie Talkie on your body, ensure that the ANTENNA is at
least one inch (2.5 cm) from your body when transmitting.
head and body.
Care and Safety
Table of contents


