Alphacool HDX - 5 User manual

HDX - 5
Scope of delivery - Lieferumfang - Contenue de livraison
thermal pads
M3x11
cooling plates
Raid controller
60x18x1mm
M2x5
M2 nuts
60x18x2mm
15x15x3mm

2
Cooler mounting - Kühlermontage - Montage du refroidisseur
1. Legen Sie Ihre Raidkarte auf eine antistatische
Unterlage. Platzieren Sie zwei der 1mm starken Wärmeleitpads,
wie abgebildet, vor den M2 Steckplätzen.
1. Lay your RAID card onto an anti-static mat. Place two of the
1mm thick thermal pads in front of the M2 slots, as pictured.
1. Placez la carte contrôleur raid sur un support antistatique.
Placez les deux pads thermiques d’un millimètre, comme montre
l’image, devant les emplacements M2.

3
Cooler mounting - Kühlermontage - Montage du refroidisseur
2. Stecken Sie Ihre M2 SSDs ein und verschrauben Sie diese
mit den beiliegenden M2x5 Schrauben und den Muttern.
M2x5
nuts M2 SSD
2. Insérez vos SSD M2 et xez-la avec les vis M2x5 et les
écrous inclus.
2. Plug in your M2 SSDs and fasten them with the included
M2x5 screws and washers

4
Cooler mounting - Kühlermontage - Montage du refroidisseur
3. Drehen Sie die Platine und legen Sie das quadratische 3mm
Pad, wie gezeigt, auf den Chip.
4. Platzieren Sie den oberen Kühlblock auf der Platine und wenden
Sie die Karte erneut.
3.Turn the card and place the square 3mm pad onto the chip,
as shown
4. Place the upper cooling block onto the card and turn the card
again.
3.Tournez la carte et placez le pad thermique carré de 3mm,
comme montré, sur la puce.
4. Placez le bloc de refroidissement supérieur sur la puce et
retournez la carte.

5
Cooler mounting - Kühlermontage - Montage du refroidisseur
5. Legen Sie die entsprechenden Wärmeleitpads auf ihre M2
SSDs. Leere Platinenseiten werden mit einem 2mm starken Pad
bestückt, Platinenseiten mit Bauteilen bekommen ein 1mm Pad
aufgeklebt.
on occupied
sides
on empty
sides
5.Place the corresponding thermal pads onto the M2 SSDs.
A 2mm thick pad goes onto empty sides, and a 1mm pad onto sides
with components.
5. Placez les pads thermiques correspondantes sur les SSDs
M2. Des côtés sans puces seront équipés par des pads de 2mm, des
côtes avec des puces par des pads d’un millimètre.

6
Cooler mounting - Kühlermontage - Montage du refroidisseur
6. Platzieren Sie nun die Backplate auf Ihrer Raidkarte und
verschrauben Sie den Kühler mit den drei M3x12 Schrauben.
Drehen Sie die Schrauben vorsichtig, kreuzweise an.
7. Die passiv gekühlte Controllerkarte ist nun einsatzbereit. Sie
können die Karte auf Ihr Mainboard stecken und ggf. weitere
Festplatten über SATA anschließen.
6. Placez maintenant la plaque arrière sur la carte contrôleur
raid et xer le refroidisseur avec les trois vis M3x12. Serrez les vis
doucement et de façon croisée.
7. La carte contrôleur refroidi passivement est maintenant prête à
l’emploi.Vous pouvez installer la carte contrôleur sur la carte mère
et connecter des disques durs SATA si nécessaire.
6. Now place the backplate onto your RAID card and screw
the cooler together with the three M3x12 screws. Fasten the
screws crosswise carefully.
7.The passively-cooled controller card is now ready for use.You
can attach the card onto your motherboard and connect additional
hard drives via SATA if necessary.

Installation / Con guration 8-9
Installation / Kon guration 10-11
Installation / Con guration 12-13
Installation / Kon guration 10-11
Installation / Con guration 12-13
Setting up drivers and utilities
Einrichten von Treibern und Diensten
Con guration des pilotes et des services

8
Installation / Con guration
1. Plug in RAID controller
2. Start up PC, press CTRL+M during startup
3.This will launch Marvell Bios Utility (MBU)
4. Use the arrow keys to select HBAO:Marvell 0 and con rm with
Enter
5. Select the con guration assistant and establish a virtual drive
with Enter
6. Select the drives to be attached to RAID
7. Press enter to continue
8. Select RAID mode
9. Select the size of the “stripes” (i.e. data blocks)
10. Further options:
HyperDuo Mode: Safe (data mirrored)
Capacity (ef cient)
Keep original data: Yes / No (only in safe mode)
Threshold: 10-100% (indicates what percentage of
storage space will be used)
11. Select Continue and con rm with [Y] to establish a virtual drive
12. Press F10 and con rm with [Y] to leave the MBU
Note: For a virtual drive in HyperDuo Mode, it must contain at
least one SSD and one HDD.
Setting up virtual drive
Installing drivers
1. Launch Windows and insert drivers CD
2.Windows will recognise the new hardware and will ask for the
drivers. Enter the path for your CD drive:

9
Windows 32-bit:
Ex.: E:\2010A2\Marvell\92XX\Betriebssystem_wählen\i386
Windows 64-bit:
Ex.: E:\2010A2\Marvell\92XX\Betriebssystem_wählen\amd64
3. If you do not have access to a CD drive, download the drivers
from the website Alphacool.com
4. If you are not prompted to select the location of the drivers, you
can also install them through the device manager
Installing utilities
1. Launch Windows and insert drivers CD
2. Execute the MSU Setup.exe
File path:
Ex.: E:\Marvell\MSU4.1.0.2023\
3. If you do not have access to a CD drive, download the drivers
from the website Alphacool.com
4. Follow the instructions in the installation menu
5. Launch the newly-installed program Marvell Tray
6.The program will open your browser and take you to a
registration site
7. If you do not have any registration data yet, just click on Login
8. Your RAID system will be identi ed as Adapter 0
9. Under Operation you can change additional settings, such as
changing the RAID mode
10. In the Management area you can set up a secure account and
enter an email address to receive status updates
Installation / Con guration

10
Installation / Kon guration
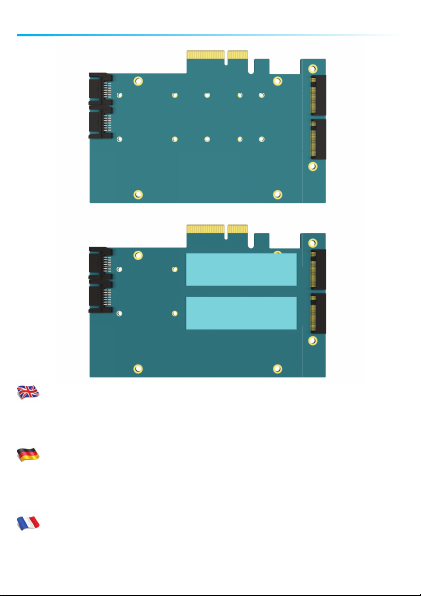
1. Raidcontroller einstecken
2. PC starten, während des Hochfahrens STRG+M drücken
3. Marvell Bios Utility (MBU) startet
4.Wählen Sie mit den Pfeiltasten HBAO:Marvell 0 und bestätigen
Sie mit Enter
5. Wählen Sie den Kon gurations-Assistent und Erstellen Sie mit
Enter ein virtuelles Laufwerk
6. Laufwerke auswählen welche dem Raid hinzugefügt werden
sollen
7. Zum Fortfahren Enter drücken
8. Raid Modus wählen
9. Größe der “Stripes” bzw. Datenblöcke wählen
10.Weitere Optionen:
HyperDuo Modus: Sicher (Daten gespiegelt)
Kapazität (kostenoptimiert)
Originaldaten behalten: Ja / Nein (nur im abgesicherten Modus)
Grenzwert: 10-100% (gibt an wieviel Prozent des
Speichers beschrieben werden)
11.Wählen Sie Weiter und bestätigen Sie mit [Y] um ein virtuelles
Laufwerk zu erstellen
12. F10 drücken und mit [Y] bestätigen um das MBU zu verlassen
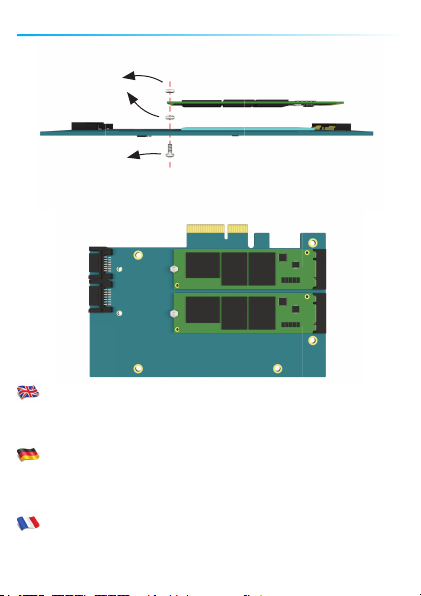
Beachten Sie: Für ein virtuelles Laufwerk im HyperDuo Modus
benötigen Sie mindestens eine SSD und eine HDD.
Virtuelles Laufwerk erstellen
Treiber installieren
1.Windows starten und Treiber CD einlegen
2.Windows erkennt die neue Hardware und wird nach dem
Treiber fragen. Geben Sie den Pfad Ihres CD Laufwerks an:

11
Windows 32-bit:
z.B.: E:\2010A2\Marvell\92XX\Betriebssystem_wählen\i386
Windows 64-bit:
z.B.: E:\2010A2\Marvell\92XX\Betriebssystem_wählen\amd64
3. Falls Sie kein CD Laufwerk verwenden können, laden Sie die
Treiber von der Webseite Alphacool.com runter
4. Falls Sie nicht nach dem Standort der Treiber gefragt werden,
können Sie die Treiber über den Gerätemanager installieren
Dienstprogramm installieren
1.Windows starten und Treiber CD einlegen
2. Führen Sie die MSU Setup.exe aus
Ordnerpfad:
z.B.: E:\Marvell\MSU4.1.0.2023\
3. Falls Sie kein CD Laufwerk verwenden können, laden Sie die
Treiber von der Webseite Alphacool.com runter
4. Folgen Sie den Anweisungen des Installationsmenüs
5. Starten Sie das eben installierte Programm Marvell Tray
6. Das Programm öffnet den Browser und führt Sie auf eine
Anmeldeseite
7.Wenn Sie noch keine Anmeldedaten haben, klicken Sie einfach auf
Login
8. Ihr Raidsystem wird als Adapter 0 aufgeführt
9. Unter Operation können Sie weitere Einstellungen vornehmen
sowie den Raid Modus ändern
10. Im Management Bereich können Sie ein gesichertes Konto
erstellen und eine E-Mail Adresse einrichten um Statusupdates zu
erhalten
Installation / Kon guration

12
Installation / Con guration
1.Insérer contrôleur Raid
2. Démarrer PC, appuyer sur CTRL+M au démarrage.
3. Démarrer Marvell BIOS Outil (MBU).
4. Sélectionnez, avec les touches directionnelles, HBAO:Marvell 0
et con rmer avec Entrée.
5. Choisissez l’assistant de con guration et créez un lecteur virtuel
en con rmant avec Entrée.
6. Sélectionner lecteur(s) à ajouter dans le Raid
7.Appuyer sur Entrée pour continuer
8. Choisir mode Raid
9. Choisir taille des “stripes” / des blocs de données
10.Autres options:
Mode HyperDuo: Sécurisé (données en miroir)
Capacité (économique)
Garder données originales: Oui/Non (qu’en mode sécurisé)
Valeur limite: 10-100% (combien de pourcent de la
mémoire seront utilisés
11. Sélectionnez continuer et con rmez avec [Y] pour créer le
lecteur virtuel.
12.Appuyer sur F10 et con rmer avec [Y] pour quitter MBU.
Remarque: Pour un lecteur virtuel à Mode HyperDuo doit
comprendre au moins un disque dur et une SSD.
Création d’un lecteur virtuel
Installation du pilot
1. Démarrer Windows et insérer CD pilot
2.Windows reconnaît le nouveau matériel et vous demandera les
pilotes. Entrez le chemin pour votre lecteur de CD:

13
Windows 32-bit:
p.ex.: E:\2010A2\Marvell\92XX\Betriebssystem_wählen\i386
Windows 64-bit:
p.ex.: E:\2010A2\Marvell\92XX\Betriebssystem_wählen\amd64
3. Si vous n’êtes pas en capacité d’utiliser le CD, le pilot est
disponible en téléchargement sur la site web Alphacool.com
4. Si vous n’êtes pas invité à sélectionner l’emplacement des pilotes,
vous pouvez donc les installer par le gestionnaire de
périphériques
Installation du programme utilité
1. Démarrer Windows et insérer CD pilot.
2. Exécutez MSU Setup.exe
Emplacement dossier :
p.ex.: E:\Marvell\MSU4.1.0.2023\
3. Si vous n’êtes pas en capacité d’utiliser le CD, le pilot est
disponible en téléchargement sur la site web Alphacool.com
4. Suivez les instructions d’installation
5. Démarrez le logicielle Marvell Tray
6. Le logicielle ouvre une fenêtre du navigateur et vous dirige sur
la page d’accueil
7. Si vous n’avez pas encore dé ni d’identi ant appuyez simplement
sur Login.
8. Votre système Raid est af ché comme adaptateur 0
9. Sous l’ongle opérations vous trouvez des con gurations avancées
ainsi que la possibilité de changer le mode Raid
10. Sous l’ongle Management vous pouvez créer un compte protégé
et con gurer une adresse e-mail pour recevoir des noti cations.
Installation / Con guration


16
Imprint:
Alphacool International GmbH
Marienberger Str. 1
38122 Braunschweig
Head Ofce: +49 (0) 531 28874 - 0
Fax: +49 (0) 531 28874 - 22
E-Mail: [email protected]
General Manager: Fabian Noelte
WEEE-Reg.-Nr.: DE 54464644
Trade Register: Amtsgericht Braunschweig
HRB 202390
VAT.ID.Nr.: DE27058421
Tax number: 13/207/02047
Table of contents
Other Alphacool Freezer manuals
Popular Freezer manuals by other brands

Vitrifrigo
Vitrifrigo VFREE Plus VFP40-50-60 instruction manual

AEG
AEG SCN51810S0 user manual

VOX electronics
VOX electronics VF 2510 operating instructions

True
True GDM-10F installation manual

Mermaid
Mermaid REFRIGERATION/FREEZER Installation instructions and owner's manual

Kenwood
Kenwood KNF60X18 Installation instructions manual