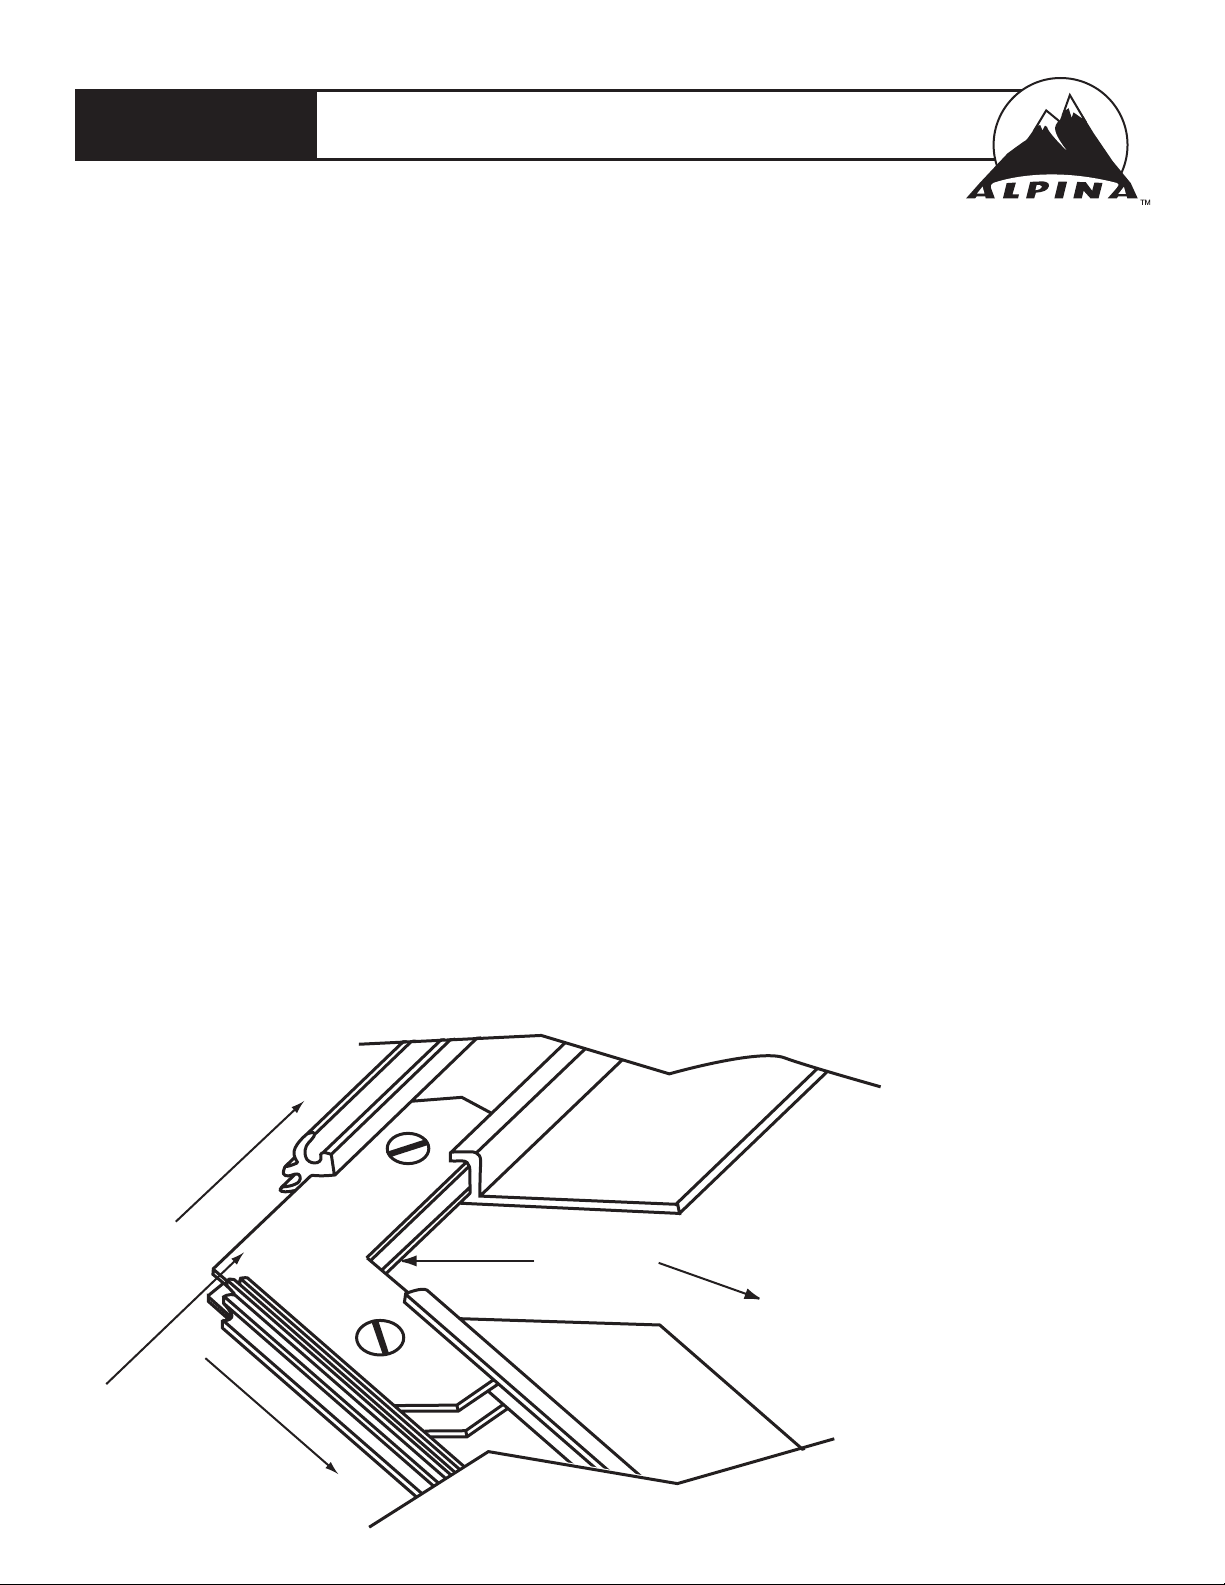
Close-up view of FlipUpTM frame
bottom piece showing tapped
corner with back plates
going into corners
for assembly
Tapped Corner
Back Plate
Make sure to use the back plate
for a strong corner joint when
assembling the 4 frame sides.
“Up” side for the back plate either
has a “B” stamped on its face,
or if no “B”, then “made in USA
AMS” side is the “Up” side.
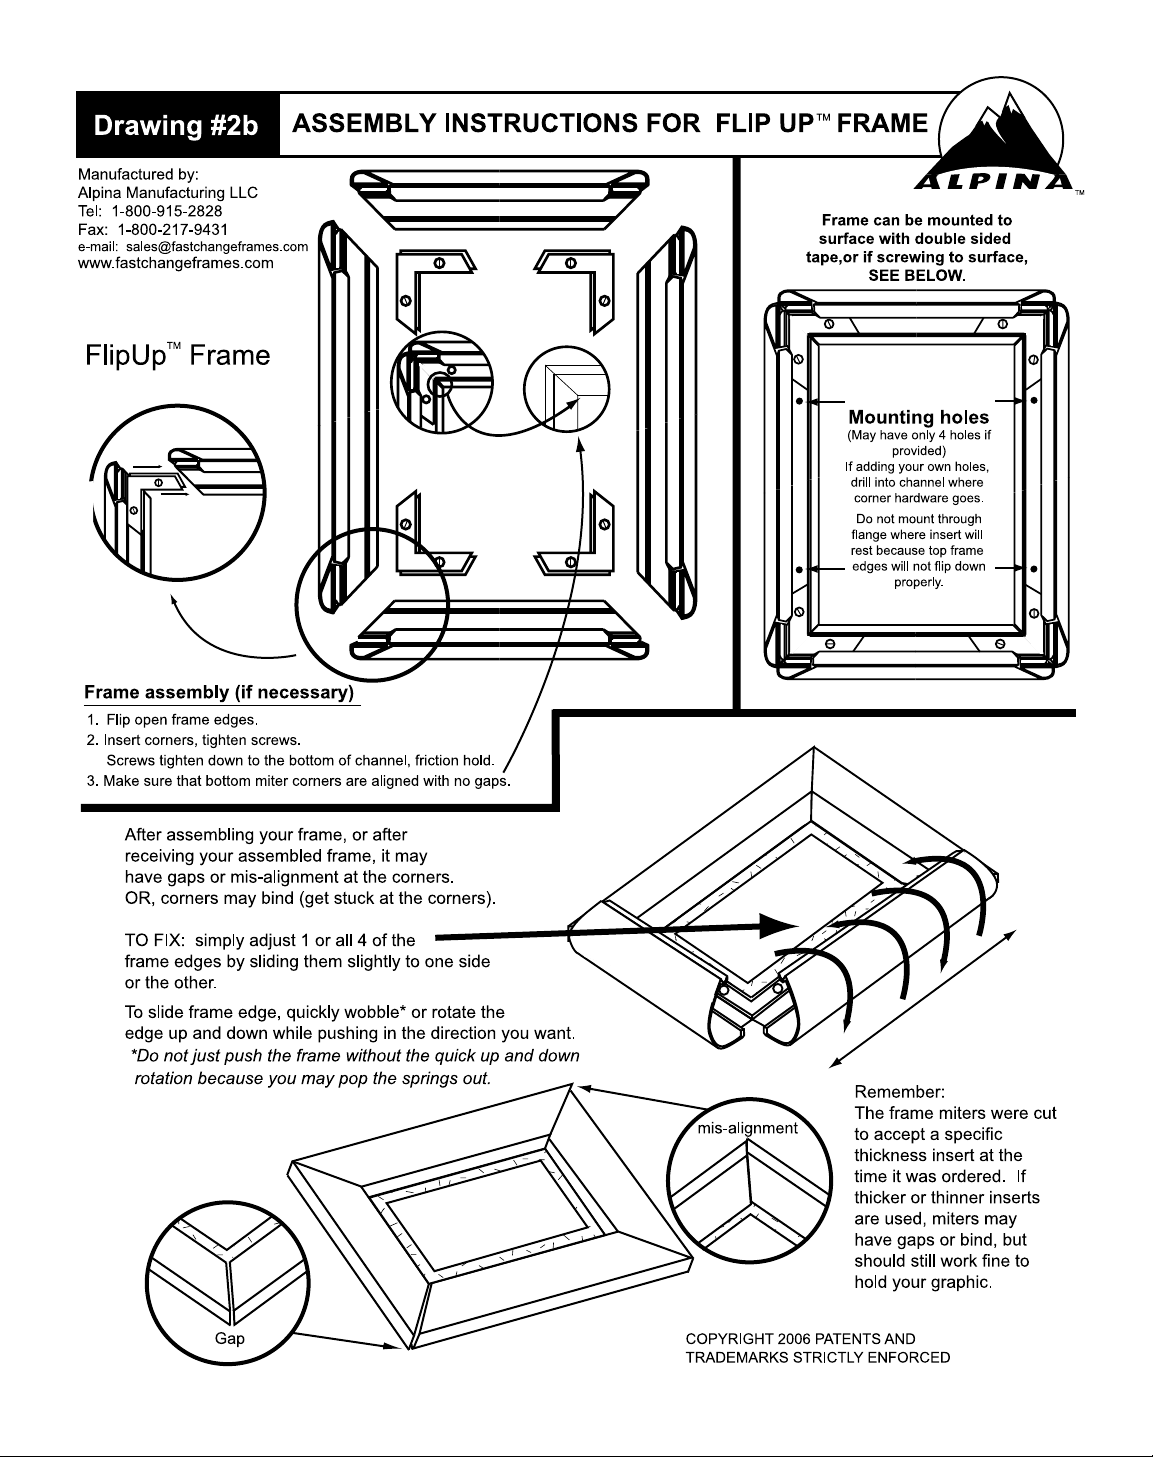
Thank you for your purchase of the FlipUpTM frame.
Changing a poster or any graphics will be fast, easy and convenient for you.
The frame’s miters have been cut to fit either a thin poster or a thicker mounted graphic and this is known by the person
who placed the order for the frames from the factory. Using a graphic thicker or thinner than that for which the frame was
made may cause the miters to bind or have gaps. This is only an appearance matter. The frame works great just the
same. The graphic holding size of the frame may be indicated on a sticker when you flip up the frame edges.
If provided:
Clear Plastic Overlay (may be rolled up if frame was sent un-assembled)
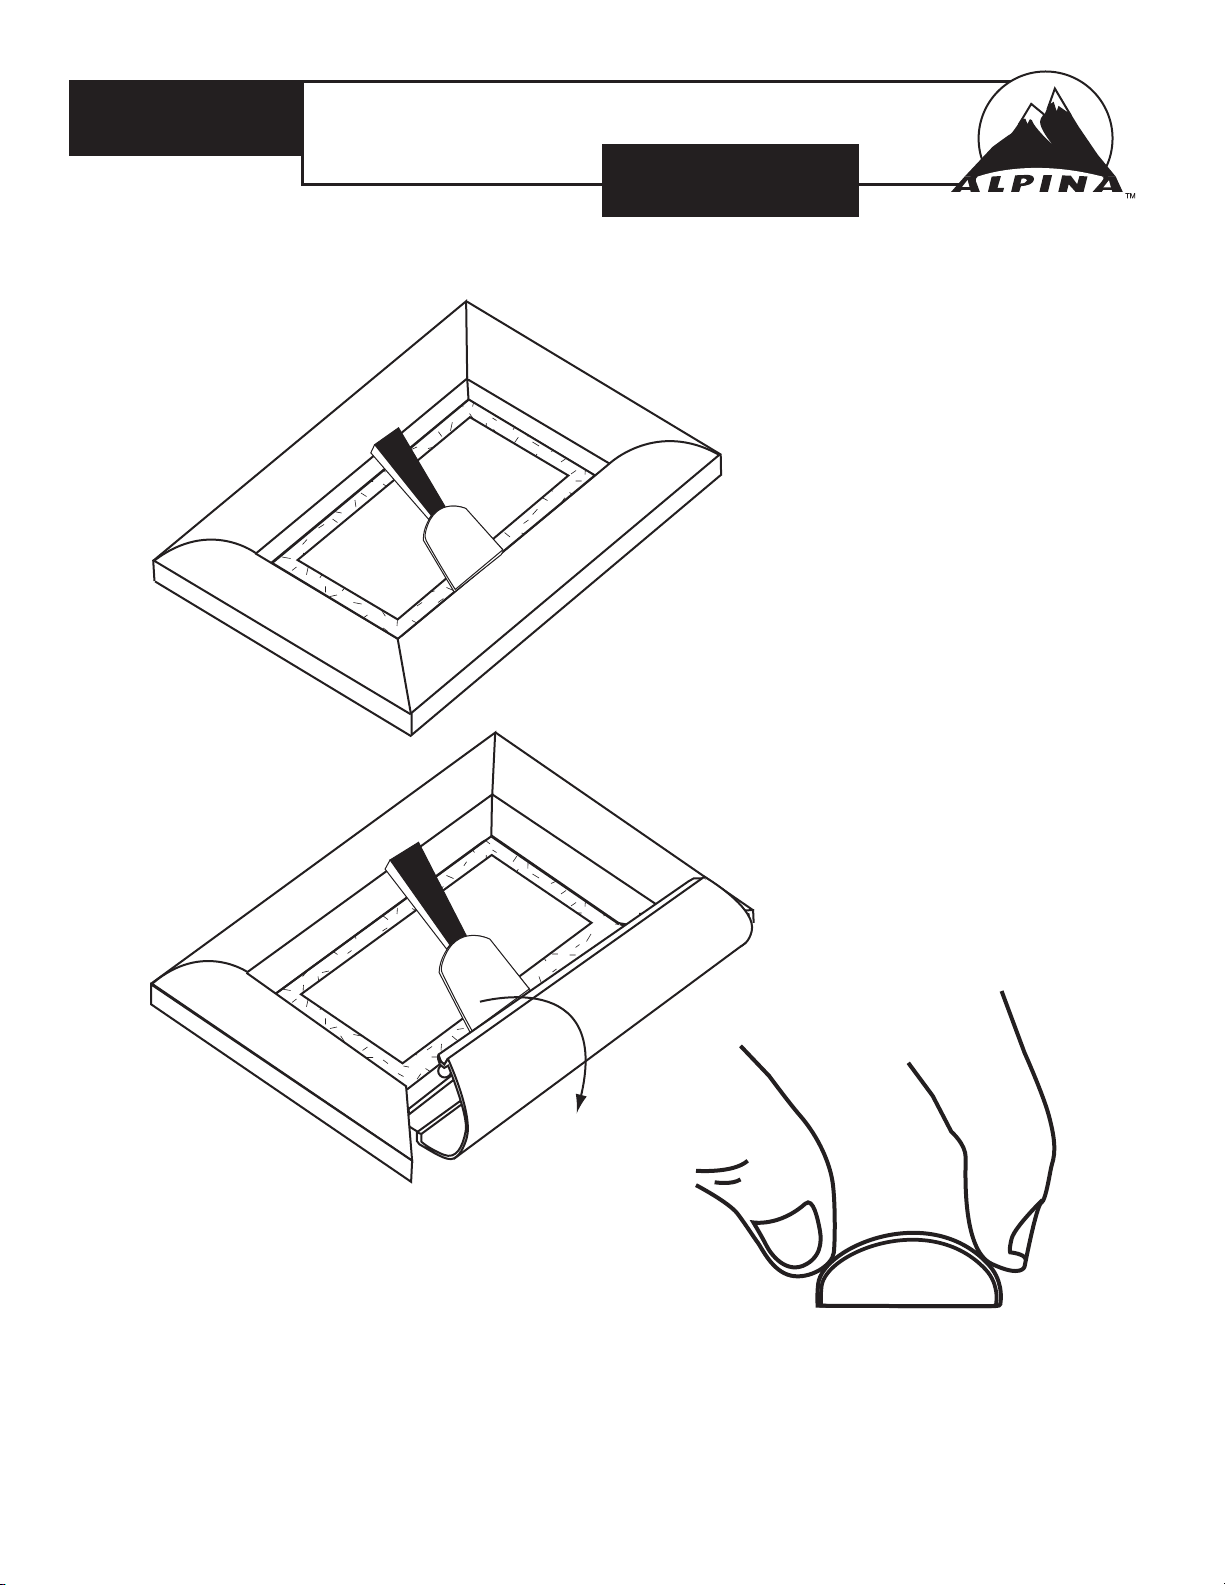
1. CAREFULLY unroll overlay so you don’t damage or dent it
2. Remove the protective masking from both sides of clear window overlay
BACKER sheet (if provided; backer is not necessary in most cases and is an option only)
This may be a black or white plastic sheet OR it may be a second clear overlay sheet which you
can use as a backer. For use as a backer, leave on the protective masking and you’ll have a
second clear overlay to switch out with the first one in the event it gets scratched, bent or dirty.
For Mounting the FlipUpTM frame to your wall:
After assembling frame you must mount it by screwing to a flat wall. Whether your frame has a backer or not,
it must be mounted tight to your wall so that the wall acts as the backing support for the frame. Use drywall
anchors and No. 6 screws; they may have been included with your frame. You can also purchase these at
your local hardware store. Use a bubble level before screwing to wall so that frame is mounted straight.
If you’re mounting the frame to a bumpy or rough wall such as brick or stucco, you’ll need a backer if you’ll be
displaying thinner graphic materials, such as, poster paper if one has not been enclosed here. Otherwise you
don’t need the backer if mounting on a flat wall, or are displaying graphics printed on thicker material, such as
10 mils (.10”) or thicker.
Drawing #2a Instructions for FlipUpTM front-loading frame
Alpina Manufacturing LLC Fax: 1-800-217-9431 www.fastchangeframes.com
Use dual corners for this frame