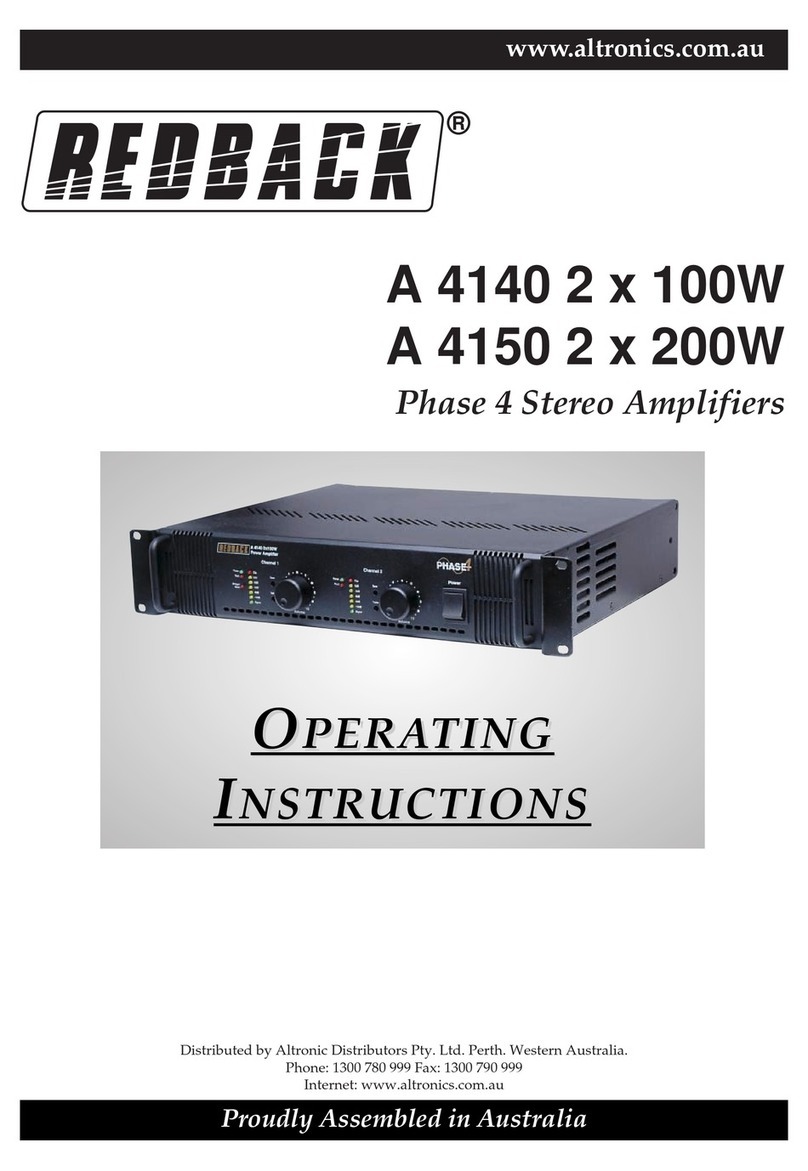
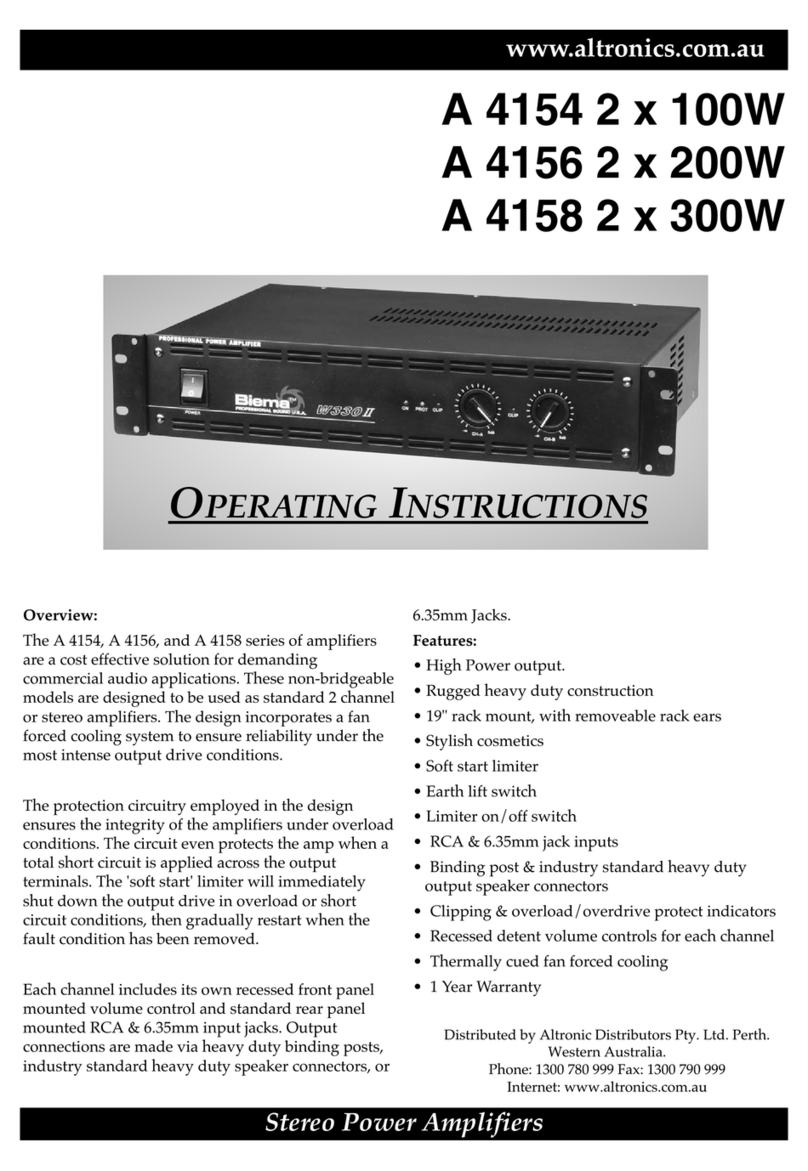
Altronics K 5171 User manual

174 Roe Street, PERTH. Western Australia. 6000
Phone: (08) 9428 2188 Fax: (08) 9428 2187
E-mail: [email protected]
Ultra Low Distortion
Preamplifier with
Tone Controls
K 5171
1
Introducing our state-of-the-art stereo preamplier. Along
with almost unmeasurable noise and distortion (typically
0.0003% THD+N!) it sports remote volume control, input
selection and muting plus bass and treble adjustment
knobs on the front panel.
Reprinted with kind permission of Silicon Chip Magazine
This high-quality, low-distortion and low-noise
stereo preamplifier can be used with just
about any amplifier modules to form a stereo
amplifier. It can also be used as a standalone
preamp. A low-cost infrared remote control
is used to switch between 3 to 6 separate
inputs, adjust the volume or temporarily mute
the output. It also includes manual volume,
bass and treble controls and pushbuttons to
select between the three stereo inputs. LED
indicators in the pushbuttons show which
input is active. It also has power, acknowledge
and mute status LEDs. All in all, it offers con-
siderable advantages over previous models.
You could build it into an amplifier based on
our Ultra-LD series of amplifier modules, such
as the Ultra-LD Mk.4 (August-October 2015;
www.siliconchip.com.au/Series/289). Or
you could use easy-to-build, low-cost SC200
amplifier modules (January-March 2017; sili-
conchip.com.au/Series/308; Altronics kit Cat
K5157). Or build it in a case and use it with
an existing power amp. It’s up to you.
Since it has a motorised potentiometer for
volume control, you can adjust the volume di-
rectly with a knob if you don’t want to use the
remote. It has an effectively-infinite number of
possible volume settings, unlike most digital
volume controls, which can have quite large
steps.
This preamp has much better performance
than most. While we have published a couple
of very low noise and distortion preamps
designs over the last decade or so, none of
them had tone controls. This one provides
wide-range bass and treble adjustment knobs
to allow you to overcome deficiencies in your
loudspeakers, compensate for the room
response or just adjust the sound to be the
way you like it.
While the performance is excellent when the
tone controls are active, we have provided the
option to bypass them using a push on, push
off switch. Its integrated LED indicator shows
when the tone controls are switched in or out.
This switch has three benefits. One, it’s
difficult to centre the tone controls precisely
when you want the response to be flat, so the
switch provides an easy way to achieve that.
Two, it provides slightly better performance
with the tone controls switched out. And
three, it gives you an easy way to hear exactly
what effect the tone controls are having, by
toggling them on and off. A PIC microcon-
troller is used to provide the remote control,
muting and input selection functions.
Input selection is by way of a separate PCB
unit (Altronics Kit - K 5172) interconnected
to the main preamplifier using 10-way ribbon
cable. If you don’t need the input selector, you
can build the project without it.
Performance
This preamplifier has excellent performance.
It uses low-distortion, low-noise op amps
throughout, plus we have taken great care to
specify very linear types of capacitor and to
keep resistor values low, where their Johnson
(thermal) noise contribution is likely to affect
the signal.
Inevitably, the tone control circuitry adds
some noise when it is switched in. But perfor-
mance is still very good with the tone controls
in, giving a THD+N figure of just 0.00054%
at 1kHz and 0.0007% at 10kHz. By compari-
son, with the tone controls out, those figures
become 0.00044% and 0.00048% respective-
ly – see Fig.1.
Those measurements were made with a
bandwidth of 20Hz-80kHz, which is necessary
to measure distortion at higher frequencies
accurately. But such a measurement includes
a significant amount of ultrasonic noise (ie,
in the 20-80kHz range). And Fig.1 shows
that the distortion performance is dominated
by noise. So we also made measurements
with a 20Hz-22kHz bandwidth, shown in
blue on Fig.1, and this reveals that the true
audible distortion and noise level is closer to
0.00025% – an astonishingly low figure.
Fig.3 shows the frequency response with the
tone control at either extreme, and switched
out (the blue curve). This demonstrates that
when you’re not using the tone controls, the
frequency response is very flat. You can barely
see the deviation on this plot; zooming in, we
can see that the response is down only 0.2dB
at 20Hz and less than 0.1dB at 20kHz.
Fig.4 shows the coupling between channels,
which is typically less than -80dB, and the
coupling between adjacent inputs, typically
around -100dB. So isolation between channels
and inputs is very good. The signal-to-noise ra-
tio figure is especially good; over 120dB with
a 2.2V RMS input signal (typical for CD/DVD/
Blu-ray players), the tone controls switched
out and the volume pot at unity gain.
In summary, you can be confident when using
this preamp that it will not negatively affect the
audio signals passing through it, regardless of
whether you are using the tone controls.
Capacitor and potentiometer selection
We mentioned earlier that we’re using linear
capacitor types where that’s important, and
also keeping resistance values low to mini-
mise thermal noise.
For capacitors between 10nF and 100nF, we
have specified MKT polyester (plastic dielec-
tric) types. While polyester is not quite as line-

2
K 5171 ULTRA LOW DISTORTION PREAMPLIFIER WITH TONE CONTROLS
Fig.4: the crosstalk and separation figures are good. Crosstalk is
how much of the left channel signal feeds into the right channel
or vice versa. Channel separation is how much signal from input
#1 couples into input #2 or vice versa.
Fig.3: the blue line shows the preamp’s frequency response with
the tone controls switched out, and you can see that it’s very flat,
varying by only 0.2dB across the entire audible frequency range.
The red and green curves demonstrate the range possible of bass
and treble adjustments.
Fig.2: this shows the effect of noise; as you reduce the volume
and thus the output signal level, the fixed circuit noise becomes
larger in proportion and so total harmonic distortion goes up.
However, even at very low volume levels, it’s below 0.01% so it
won’t be noticeable.
Fig.1: distortion across the entire range of audible frequencies is
extremely low, whether the tone controls are active or not. There
is a slight rise in distortion above 10kHz, but below that, the
distortion is below the noise floor.
Fig.6: if you must use a 20kΩmotorised potentiometer to build
this preamp, fitting the two extra 4.7kW resistors (R1 & R2)
will keep high-frequency distortion low, by lowering the input
impedance seen by the following buffer stage. This allows it to
perform optimally and also lowers thermal noise.
Fig.5: distortion versus frequency of a simple low-pass filter using
either a 470pF MKT capacitor or a 470pF ceramic (non-NP0/C0G)
capacitor. As you can see, distortion rises dramatically at higher
frequencies with the ceramic capacitor due to its non-linearity and
its lower impedance at higher frequencies, which causes it to shunt
more of the signal and thus have a stronger effect.

3
K 5171 ULTRA LOW DISTORTION PREAMPLIFIER WITH TONE CONTROLS
ar as polypropylene or polystyrene dielectrics,
none of those capacitors are critical enough to
cause a measurable increase in distortion, as
demonstrated by our performance graphs.
But there are some capacitors with values be-
low 1nF where the dielectric is important and
this presents us with some difficulty, since
MKT capacitors with values below 1nF are not
particularly easy to get. However, we’ve found
them (see parts list) and that is what we have
used in our prototype, with good result.
If you can get MKP (polypropylene) capacitors
instead, those will certainly work well and we
would encourage that. But we have also men-
tioned the possibility of using NP0 ceramics.
We have tested these in the past and found
that they are just as good as the best plastic
dielectrics in situations where linearity is
critical. But be careful because many ceramic
capacitors are not NP0 (also known as C0G)
types, especially values above 100pF. Fig.5
shows a distortion plot for a simple low-pass
filter comparing two capacitors of the same
value, one polypropylene and one ceramic
(not NP0/C0G). As you can see, the ceramic
capacitor produces a lot more distortion. So
make sure you use one of the types specified.
Regarding resistance, you may find it a bit
strange that we have specified a 5kΩvolume
control potentiometer as values in the range
of 10kΩ-100kΩare more commonly used.
But we have chosen 5kΩbecause the ther-
mal noise contribution of the volume control
pot can be a major limiting factor in the
performance of a low-distortion preamplifier
and suitable motorised pots are available.
Op amps IC1a & IC2a buffer the signal from
the source so that it does not have to drive
the 5kΩimpedance; the op amps are more
than capable of driving such a load without
increased distortion.
If you can’t get the 5kΩmotorised pot (availa-
ble from Altronics; see parts list), you can use
a 20kΩpot instead; also a pretty standard
value.
In that case, we have made provision for two
4.7kΩshunt resistors to lower the impedance
seen by the following stage, giving you most of
the performance benefits of a 5kΩpot. These
have minimal effect on the pot curve, so it still
works well as a volume control.
Fig.6 shows the difference in distortion with
and without these shunts (the signal level is
lower here than in the other figures, hence the
higher base level). The performance with the
proper 5kΩpot is slightly better again.
Remote control
Pressing the Volume Up or Volume Down
buttons on the infrared remote causes the mo-
torised pot to rotate clockwise or anticlockwise.
It takes about nine seconds for the pot to travel
from one end to the other using these
controls.
For finer adjustment, the Channel Up and
Channel Down buttons on the remote can be
used instead. These cause the pot shaft to ro-
tate about one degree each time one of these
buttons is briefly pressed. Holding one of
these buttons down rotates the pot from one
end to the other in about 28 seconds.If any
of these buttons is held down when the pot
reaches an end stop, a clutch in the motor’s
gearbox begins to slip so that no damage is
done to the motor.
The code also provides a convenient auto-
matic muting feature. Press the Mute button
on the remote and the volume control pot
automatically rotates to its minimum position
and the motor stops. Hit the button again and
it returns to its original position. If you don’t
want the pot to return all the way to its original
setting, you can simply increase the volume to
your desired new level instead.
So how does the unit remember its original
setting during muting? The answer is that the
microcontroller monitors the time it takes for
the pot to reach its minimum setting and the
minimum pot setting is detected when the
load on the motor increases at the potentiom-
eter end stop, as the clutch begins to slip.
When the Mute button is pressed again, pow-
er is applied to the motor drive for the same
amount of time, rotating it back to the original
position.
The orange “Ack” LED flashes whenever an
infrared signal is being received from the
remote, while the yellow Mute LED flashes
while the muting operation is in progress and
then remains on when the pot reaches its
minimum setting.
Circuit description
Fig.7 shows the main preamplifier circuit but
only the left channel components are shown,
for clarity. The right channel is identical and
the matching part designators are provided,
in brackets. The following description refers to
the left-channel part names.
The audio signal from the Input Switching
board is AC-coupled to the input of the first
op amp (IC1a) via a 22µF non-polarised (NP)
electrolytic capacitor and 100Ωresistor. A
22kΩresistor to ground provides input DC
biasing and sets the input impedance to
around 22kΩ. The 100Ωresistor, ferrite bead
and 470pF capacitor form a low-pass filter to
attenuate radio frequency (RF) signals ahead
of the op amp input.
IC1a operates as a voltage amplifier with a
gain of two, due to the two 2.2kΩfeedback
resistors. The 470pF capacitor combines with
the feedback resistors to roll off the top-end
frequency response, with a -3dB point at
about 150kHz. This gives a flat response
over the audio spectrum while eliminating the
possibility of high-frequency instability or RF
demodulation. IC1a’s pin 1 output is fed to
the top of volume control potentiometer VR1a
(5kΩlog) via a 22µF non-polarised capacitor.
The signal on its wiper is then AC-coupled
to the pin 5 non-inverting input of IC1b via a
4.7µF non-polarised capacitor. This coupling
arrangement prevents direct current from
flowing through any part of the volume control
potentiometer, VR1. Even a small direct
current can cause noise when the volume is
adjusted.
As mentioned earlier, the circuit was designed
for a 5kΩmotorised volume control pot as
this results in good noise performance but in
case you can’t get one, you can use a more
common 20kΩpotentiometer and fit resistors
R1 and R2, so that the circuitry has a similar
impedance, resulting in the same overall
frequency response.
lC1b operates as a unity-gain buffer and
provides a low-impedance output regardless
of the volume control setting. Its pin 7 output
is fed to the tone control section and also to
switch S4a. When S4a is set to the ‘tone out’
position, the output from IC1b is coupled via
the 22µF capacitor to output socket CON3,
via a 100Ωresistor. Therefore, the tone con-
trols are effectively out of circuit. The 100Ω
resistor isolates the op amp output from any
capacitive loads that might be connected, to
ensure stability. This resistor and ferrite bead
in series with the output also attenuate any
RF noise which may have been picked up by
the board.
Tone controls
When S4a is in the ‘tone in’ position, output
CON3 is instead driven from the tone control
circuitry, so potentiometers VR2a and VR3a
adjust the amount of bass and treble in the
signal. Op amp IC3a forms the active tone
control in conjunction with VR2a and VR3a
and associated resistors and capacitors. The
bass and treble tone circuitry is a traditional
Baxandall-style design. This is an inverting
circuit, so it must be inverted again by unity
gain buffer IC3b to restore the original signal
phase.
When the wipers of potentiometers VR2a and
VR3a are centred, the impedance between
output pin 1 of IC3a and each wiper is equal
to the impedance between the wiper and out-
put pin 7 of IC1b. So in this condition, IC3a
operates as a unity gain inverting amplifier
for all audio frequencies. Therefore, in this
case, the tone controls have little effect on the
signal – they just add a little noise.
Bass adjustment
The bass control (VR2a) provides cut (an-
ti-clockwise) or boost (clockwise) to low fre-
quencies. The impedance of each of the two
100nF capacitors for high-frequency signals

4
K 5171 ULTRA LOW DISTORTION PREAMPLIFIER WITH TONE CONTROLS
1
2
3
4
5
6
7
8
CON1
(CON2)
LEFT
IN
22F
NP
FERRITE BEAD
FB1
(FB2)
470pF
22k
100
100
IC1a
(IC2a)
IC1a
(IC2a)
22 F
NP
22 F NP
2.2k
2.2k
470pF
5k
LOG
VR1a
(VR1b)
4.7F
NP
100k
–15V
–15V
–15V
100nF
100
FERRITE
BEAD
+15V
+15V+15V
LEFT
OUT
CON3
(CON4)
IC1b
(IC2b)
IC1b
(IC2b)
+15V
–15V
LEFT GNDROU
RIGHT GNDROU
CON5
+15V
0V
470 F
16V
470F
16V
–15V
(NOTE: ONLY LEFT CHANNEL SHOWN; LABELS
IN BRACKETS REFER TO RIGHT CHANNEL)
IC1IC:–4NE5532 OR LM833
NE5532/LM833
1
4
8
LOW-PASS
FILTER
BUFFER
AMPLIFIER
GAIN = 2
R1 (R2)
4.7k
FIT R1 & R2 ONLY IF DUAL 20k
POTENTIOMETER IS USED FOR VR1
+
–
C
BE
C
B
E
C
B
E
C
B
E
MOTOR
10nF
100nF
LK3
+5V
22pF22pF
X1 4MHz 330
330
22
+V15
100 F
V16 10F0
16V
REG78051
100
100 F
16V
1
3
2
IRD1
10k
10k
100nF 2.7k
LED1
POWER
1k
1k
1k
1k
100nF
18kVR4
1k10
ENDSTOP
ADJUST
100 F
16V
Q1
BC327 Q3
BC327
Q2
BC337
Q4
BC337
A
K
A
K
A
K
LED2 LED3
ACKMUTE
+5V
1
2
3
4
5
6
7
8
9
10
11
12
13
14
15
16
17
18
MCLR
Vdd
RB4
RB5
RA0
AN3
RB2
RB3
RA4
RB6
RB7
RB0
OSC2
OSC1
Vss
RB1
RA1
RA2
IC5
PIC16F88-I/P
IC5
PIC16F88-I/P
LK3:MUTE RETURNOUT
LK3 IN: NO MUTE RETURN
LEDS
A
K
CE
B
BC327,
BC337
LOW NOISE PREAMP EMOTE VOLUME CONTROLWITH TONE CONTROLS & R
12
34
56
78
910
CON7
+5V
TO
INPUT
BOARD
CON6 123
IRD1
OUT
GND
GND
IN
7805
20 91
SC
1.8k
1.8k
12k
1k
1k
1k
1M
100 F
100nF
100nF
15nF
15nF
VR2a
(VR2b)
10k
LIN
BASS TREBLE
VR3a
(VR3b)
10k
LIN
BOOSTBOOST
CUTCUT
47pF
IC3a
(IC4a)
IC3a
(IC4a)
IC3b
(IC4b)
IC3b
(IC4b)
100nF
2.2k
2.2k
100k
22 F NP
TONE
SWITCH
IN
OUT
S4a
(S4b)
TONE CONTROLS
INVERTER
100 F
35V
–15V
10
10
100 F
35VW
LEFT
CHANNEL
ONLY
CURRENT
MONITOR
GND
IN
OUT
1
2
3
4
5
6
7
8
VOLUME
S4c
IN
IN
OUT
OUT
10k
A
K
LK4
LED
(IN S4)
100k
100 F
FB3
()FB4
INPUT1
INPUT2
INPUT3
Fig.7: here’s the circuit diagram for the main preamplifier PCB, incorporating the volume and tone controls and tone switching (at the top) and the infrared remote volume control and input
switching circuitry (at bottom). The analog signal path is built around dual low-noise op amps IC1-IC4 and motorised potentiometer VR1. The volume control and input selection circuity is
based on microcontroller IC5, motor driver transistors Q1-Q4 and infrared receiver IRD1.

5
K 5171 ULTRA LOW DISTORTION PREAMPLIFIER WITH TONE CONTROLS
is low and so they can bypass VR2a entirely.
Any change in the position of VR2a’s wiper
will thus have little effect on high frequencies.
For example, at 1kHz, the 100nF capacitors
have an impedance of 1.6kΩeach. That is
considerably lower than the 5kΩvalue of the
half of the potentiometer track that they are
connected across when VR2a is centred and
therefore the capacitors shunt much of the
signal around VR2a. But at 20Hz, the 100nF
capacitors have an impedance of 80kΩand
so minimal current passes through them;
almost all of it goes through VR2a. Therefore
VR2a has a significant effect on the amplitude
of a 20Hz signal and so it provides much
more boost or cut at lower frequencies.
When VR2a is rotated clockwise, the resistance
from output pin 1 of IC3a to its wiper increas-
es, while the resistance from the wiper to the
input signal decreases, providing increased
amplification. And when rotated anti-clockwise,
the opposite occurs, decreasing amplification.
Because the capacitors shunt a different
amount of signal around the pot at different
frequencies, this gain is also frequency-de-
pendent.
The 1.8kΩresistors set the maximum boost
and cut range. They have been chosen to
allow up to ±15dB adjustments at around
20Hz, dropping to around ±1dB at 1kHz. The
measured frequency response with the con-
trols at minimum, centred and at maximum is
shown in Fig.3.
Treble adjustment
Treble control VR3a operates differently to
VR2a. It is configured to have more effect on
higher frequency signals. This is achieved by
connecting capacitors in series with the pot
channel, rather than across it.
At low frequencies, the 15nF capacitors have
a high impedance, eg, 106kΩat 100Hz. This
is very high compared to the 10kΩchannel
resistance and so most of the feedback
signal at this frequency will flow through the
bass network, which has a DC resistance of
13.6kΩand therefore a much lower imped-
ance. So VR3a will have little effect on the
gain at low frequencies. At high frequencies,
the 15nF capacitors have a lower impedance,
eg, around 1kΩat 10kHz and so the treble
controls are effectively brought into circuit,
providing adjustable gain similarly to the cir-
cuitry surrounding VR2a. The 1kΩresistors at
each end of VR3a set the maximum boost or
cut for high frequencies, up to around ±15dB,
similar to the bass control. You can see this
in Fig.3.
The 12kΩand 1kΩresistors between
the bass and treble potentiometer wipers
minimise the inevitable interaction between
the two controls. Note that while the treble
potentiometer is isolated from direct current
flow due to the 15nF capacitors in series, the
bass potentiometer requires two extra 100µF
capacitors. These do not affect the action of
the bass control; they are just there to block
direct current flow through VR2a. This is for
the same reason that DC is blocked for VR1;
to prevent noise during adjustments.
The 1MΩfeedback resistor between pins 1
and 2 of IC3a provides DC bias for the pin
2 input, while the 47pF capacitor prevents
high-frequency oscillation of the op amp by
reducing the gain at ultrasonic frequencies.
When S4a is set to the ‘tone in’ setting, the
output from IC3b (reinverting IC3a’s signal
inversion) is then fed to the CON3 output
as mentioned above. Another pole of the
switch (S4c) controls the indicator LED that is
contained within the switch. It is powered from
the ±15V supplies via a 10kΩresistor and
therefore receives about 3mA.
Jumper link LK4 can be removed to prevent
this LED from lighting, or moved into one
position or the other to invert its function. In
other words, LK4 selects whether the LED
lights when the tone is in or out. Note that the
‘tone out’ position of S4 is when the switch is
pressed in. In other words, it acts like a defeat
switch.
Remote control circuitry
The Remote Control circuitry is also shown in
Fig.7. Signals from the handheld remote are
picked up by infrared receiver IRD1. This is
a complete infrared detector and processor.
It picks up the 38kHz pulsed infrared signal
from the remote and amplifies it to a constant
level. This is then fed to a 38kHz bandpass
filter, after which it is demodulated to produce
a serial data burst at its pin 1 output.
The resulting digital data then goes to the RB0
digital input (pin 6) of PIC16F88-I/P micro-
controller IC5 for decoding. Depending on
the button pressed on the remote, IC5 either
drives the volume control motor (via an exter-
nal transistor circuit) to change the volume, or
sends one of its RB6, RB7 or RB5 output low
to select a new input.
The input routing is controlled by the Input
Selector board which is connected via CON7.
IC5 is programmed for a remote control which
sends Philips RC5 codes. It supports three dif-
ferent sets of RC5 codes, normally referred to
as TV, SAT1 or SAT2. You must also program
the universal remote control with the correct
number for one of these sets of code. For the
Altronics A1012, use a code of 023 or 089 for
TV mode, 242 for SAT1 or 245 for SAT2.
Driving the pot motor
IC5’s RB1-RB4 outputs (pins 7-10) drive the
bases of transistors Q1-Q4 via 1kΩresistors.
These transistors are arranged in an H-Bridge
configuration and control the motor. The
motor is off when the RB1-RB4 outputs are
all high. In that state, RB3 and RB4 turn PNP
transistors Q1 and Q3 off, while RB1 & RB2
turn NPN transistors Q2 and Q4 on.
As a result, both terminals of the motor are
pulled low and so no current flows through
it and it won’t rotate. The emitters of Q2 and
Q4 both connect to ground via a common
10Ωresistor, which is used for motor current
sensing. The transistors operate in pairs so
that the motor can be driven in either direc-
tion to rotate the potentiometer either way, to
increase or decrease the volume.
To drive the motor clockwise, RB2 goes low
and turns off transistor Q2, while RB3 goes
low and turns on Q1. When that happens, the
left-hand terminal of the motor is pulled to
+5V via Q1, while the right-hand terminal is
pulled low via Q4. As a result, current flows
through Q1, through the motor and then via
Q4 and the 10Ωresistor to ground.
Conversely, to turn the motor in the other
direction, Q1 and Q4 are switched off and Q2
and Q3 are switched on. As a result, the right-
hand motor terminal is now pulled to +5V via
Q3, while the left-hand terminal is pulled low
via Q2. Regardless of the direction of rotation,
current flows through the 10Ωshared emitter
resistor and so the voltage across it varies with
the current drawn. Typically, the motor draws
about 40mA when driving the potentiometer
but this rises to over 50mA when the clutch is
slipping. As a result, there is about 0.4-0.5V
drop across the 10Ωresistor.
This is ideal because the motor is rated at
4.5V and the result of subtracting the resistor
voltage from the 5V supply is that it provides
the correct motor voltage.
Current sensing & muting
Once the potentiometer has reached full travel
in either direction, a clutch in the motor’s
gearbox begins to slip. This prevents the motor
from stalling and possibly overheating if the
button on the remote continues to be held
down. The clutch mechanism also allows the
user to rotate the pot shaft manually.
As mentioned earlier, when you press the
mute button on the remote control, the
volume control is rotated fully anti-clockwise.
Microcontroller IC5 detects when the wiper
reaches its end stop by detecting the increase
in the motor current when the limit is reached
and the clutch slips. That’s done by taking a
sample portion of the voltage across the 10Ω
resistor using trimpot VR4. The voltage at
VR4’s wiper is filtered using an 18kΩresistor
and a 100nF capacitor to remove the motor
commutator hash and is applied to lC5’s
analog AN3 input (pin 2). IC3 then measures
the voltage on AN3 to a resolution of 10 bits,
or about 5mV (5V ÷ 210).
Provided this input is below 200mV, the PIC
microcontroller allows the motor to run. How-
6
K 5171 ULTRA LOW DISTORTION PREAMPLIFIER WITH TONE CONTROLS
ever, as soon as the voltage rises above this
200mV limit, the motor is stopped. When the
motor is running normally, the current through
it is about 40mA, which produces 0.4V across
the 10Ωresistor. VR4 attenuates this voltage
and is adjusted so that the voltage at AN3 is
slightly below the 200mV limit.
Note that the AN3 input is monitored only
during the muting operation. At other times,
when the volume is being set by the Up or
Down buttons on the remote, the clutch in
the motor’s gearbox assembly slips when
the potentiometer reaches its clockwise or
anticlockwise limits.
As described previously, pressing the Mute
button on the remote again after muting re-
turns the volume control to its original setting,
by driving it clockwise for the same amount of
time that it was driven anti-clockwise to reach
its end stop. This mute return feature in the
software is enabled by leaving shorting link
LK3 open. This allows the RA4 input (pin 3) to
be pulled to 5V by a 10kΩresistor. Installing
the jumper shunt at LK3 will pull RA4 to
ground, disabling the mute return feature.
Status LEDs
LEDs1-3 indicate the status of the circuit. The
blue Power LED (LED1) lights whenever power
is applied to the circuit. The other two LEDs,
Acknowledge (LED2) and Mute (LED3) light
when their respective RA2 and RA1 outputs
are driven high (ie, to +5V). LED2 indicates
that an infrared command was received and
LED3 lights when the mute function is active.
Pins 15 & 16 of IC5 connect to the oscillator
which drive 4MHz crystal X1, providing the
microcontroller system clock. This oscillator
runs when the circuit is first powered up for
about 1.5 seconds. It also runs whenever an
infrared signal is received at RB0 or when
a button on the front panel switch board is
pressed and then for a further 1.5 seconds
after the signal ceases.
The oscillator then shuts down and the
processor goes into sleep mode, as long as
a muting operation is not in process. This
ensures that no noise is radiated into the sen-
sitive audio circuitry when the remote control
circuit is not being used.
A 10nF capacitor connected directly across
the motor terminals also prevents commu-
tator hash from being transmitted along the
supply leads,
while further filtering is provided
by a 100nF capacitor located at the motor
output terminals on the PCB. This reduces the
amount of noise that gets into the preamplifier
signals when the volume pot motor is being
driven.
Power supply
The Preamplifier is powered from ±15V rails.
These are typically derived either from two
separate 15V windings on the main power
transformer, or a small secondary 15-0-15
transformer and rectifier.
Our Ultra-LD power supply board, (K 5168)
described in the September 2011 issue, is
suitable for use with a wide range of audio am-
plifiers but more importantly for this project,
provide regulated +15V and -15V outputs.
These 15V rails are bypassed on the preamp
board by 470µF capacitors. There are other
capacitors connected across the supply rails at
various points of the circuit which provide local
bypassing for the op amps on the PCB.
We use both 100nF capacitors and 100µF
capacitors to ensure low impedance at a range
of frequencies. The capacitors connected
across the full 30V supply are rated at 35V or
more.
The 5V supply for microcontroller IC5 is
derived from the +15V rail via a 22Ωdropping
resistor and 5V linear regulator REG1. The
22Ωresistor reduces the dissipation in REG1
and provides some additional filtering, in com-
bination with REG1’s 100µF input capacitor.
The power LED, LED1, lights up when 5V
is present and its current is set by a 2.7kΩ
series resistor. If you aren’t using our Ultra-LD
Amplifier power supply board, or another
board which provides the required ±15V rails,
don’t worry. It’s quite easy to build a suitable
regulated supply. For the Altronics A1012, use
a code of 023 or 089 for TV mode, 242 for
SAT1 or 245 for SAT2.
Construction
Fig.10 shows the assembly details for the main
Preamplifier module. It is built on a PCB cod-
ed 01111119 which measures 216 x 66mm.
Begin by installing the resistors (use your
DMM to check the values), followed by the four
ferrite beads. Each bead is installed by feeding
a resistor lead off-cut through it and then
bending the leads to fit through their holes in
the PCB. Push each bead all the way down
so that it sits flush against the PCB before
soldering its leads.
Following this, install the IC sockets for the
five ICs. Make sure that each socket is seated
flush against the PCB and that it is orientated
correctly, as shown in Fig.10. Note that IC5
faces in the opposite direction to the op amp
ICs (IC1-IC4). It’s best to solder two diagonally
opposite pins of a socket first and then check
that it sits flush with the board before solder-
ing the remaining pins.
The MKT and ceramic capacitors can now
go in, followed by the electrolytic capacitors
(regular and non-polarised). The electrolytic
capacitors must be oriented with the correct
polarity, ie, with the longer lead through the
pad marked with a “+” symbol. The 100µF
capacitors that are marked on the overlay and
PCB with 35V must be rated at 35V or higher.
If you use ceramic 470pF or 47pF capacitors,
make sure they are the specified NP0 (or
the equivalent C0G) type. Using other types
of ceramic capacitors in these positions will
degrade the distortion performance.
The next step is to install the four transistors
(Q1-Q4) in the remote control section. Be sure
to use the correct type at each location. Q1
and Q3 are both BC327s, while Q2 and Q4 are
BC337s.
The PC stake (near VR3), 2-way SIL
pin header for LK3 and 3-way SIL header for
LK4 can now be installed, followed by polar-
ised pin header CON6 and box header CON7.
Crystal X1, trimpot VR4, the 3-way screw ter-
minal block (CON5) and the four vertical RCA
sockets (CON1-CON4) can then be fitted.
Ensure the terminal block wire entry holes
face the nearest edge of the PCB. Use white
RCA sockets for the left channel input and
output positions and red for the right channel
positions.
Switch S4 can be mounted now. Take care
that all the pins are straight before attempting
to insert them into the PCB. Press the switch
fully down onto the PCB before soldering each
pin. Also fit REG1, taking care to orientate this
correctly.
Mounting the pots
Before mounting the potentiometers, the
shafts should be cut to length. The length
depends upon the knobs and the type of box
that the preamplifier is to be mounted into.
The thickness of the front panel will have an
impact on the required shaft length.
Make sure the motorised pot (VR1) is seated
correctly against the PCB before soldering its
leads. Once the pot fits correctly, solder two
diagonally opposite pot terminals and check
that everything is correct before soldering the
rest. The two gearbox cover lugs can then be
soldered.
That done, connect the figure-8 wire to the
motor terminals along with the 10nF capacitor
that also connects to these terminals.
These leads pass through a hole in the board
immediately behind the motor. They are then
secured to the underside of the PCB using
cable ties and then brought up to the top side
of the PCB just behind CON6.
Strip the wire ends and crimp them to the
header pins. The wire from the positive motor
terminal (marked with a red dot) should
connect to the CON6 pin that is closer to IC5.
Insert the pins into the 2-way shell and plug it
into the CON6 header. Before fitting VR2 and
VR3, scrape off some of the coating on the top
of the pot body using a file so that they can
be soldered to. Don’t breathe in the resulting
dust.

7
K 5171 ULTRA LOW DISTORTION PREAMPLIFIER WITH TONE CONTROLS
LOW NOISE STEREO
PREAMPLIFIER
01111119
100 F
100 F
100 F
100 F
1M
1M
100 F
*10
*10
470 F
470 F
Q4
Q3
Q2
Q1
LK4
100 F
22 F22 F
22 F
22 F
22 F4.7 F
100k
100k
100k100k
100k
100k
10k
100nF
100nF
47pF
VR3
VR2
100 F
100 F
IRD1
REG1
100 F
100nF
22pF
22pF
4MHz
100nF
100nF
100nF
470pF
470pF
22k
22k
22
18k
S4
4x 100nF
47pF
12k
12k
1.8k
1.8k
1.8k
1.8k
1k
1k
1k
1k
1k
1k
2.2k
2.2k2.2k
2.2k2.2k
2.2k
2.2k
2.2k
100
100100
100100
100
100
470pF470pF
100nF
4.7 F
22 F
22 F
22 F
100 F
VR4
10
330
330
2.7k
1k
1k
1k
1k
100 F
10k
10k
LK3Return
Mute
TREBLE
35V
35V
35V
REV.B
C 2019
STEREO PREAMP
LOW NOISE
01111119
To Chassis
MUTE
POWER
ACK.
LED1
LED2
LED3
7805
R
R1 *
VR1 5k2x LOG
10k Lin
10k Lin
R2 *
A
A
A
CON6
L
1k
2 x BC327
2 x BC337
NP
NP
NP
NP
NP
NP
NP
NP
NP NP
GND
+15V
0V
–15V
Right in
Left in
Right out
Left out * see text
CON7
CON5
CON1 CON2
CON3 CON4
BASS
VOLUME
4x 15nF
IC3
IC3
5532
5532
IC4
5532
IC4
5532
IC1
5532
IC1
5532
IC2
5532
IC2
5532
IC5PIC16F88-I/P
IC5PIC16F88-I/P
+
+
+
+
+
+
+
+
+
+
+
+
+
1
9
2
10
K
A
X1
MOTOR
GEARBOX
* OPTIONAL – ONLY REQUIRED IF
20k POT IS USED FOR VR1 (SEE TEXT)
FB1FB1
FB2
FB2
FB3 FB4FB4
FB3
Fig.10: use this PCB overlay diagram as a guide when building the main preamp board. Don’t forget to cut the pot shafts to length before
soldering them. You will also need to remove some of the passivation layer from the top of VR2 and VR3 to allow you to solder the GND wire
to Earth the pot bodies. Bend the leads of LED1-LED3 and IRD1 to suit your case, so that the LEDs protrude through the front of the case.
You can make a hole for infrared light to reach IRD1 at the same level and cover it with a small piece of perspex to prevent dust ingress. See
the parts list for details on the red capacitors.

8
K 5171 ULTRA LOW DISTORTION PREAMPLIFIER WITH TONE CONTROLS
VR2 and VR3 must be seated correctly before
being soldered to the board. They are then
earthed using 0.7mm diameter tinned copper
wire soldered to the GND PCB stake and the
top metal shield on both pots. Make sure that
you apply sufficient heat for the solder to form
a good joint.
Mounting the LEDs and IRD1
We mounted the infrared receiver lRD1 with
its lens about 18mm above the PCB. Similarly,
the LEDs were mounted with the base of the
LED body 18mm above the PCB. This will
allow sufficient length for the LED leads to be
bent forward, to line up with the potentiometer
shafts, and then poke forward through the
front panel of the amplifier.
Parts list
Main module
1 double-sided PCB, code 01111119, 216 x
66mm
1 universal remote control [Altronics A1012 or
similar]
1 dual-gang 5kΩlog motorised potentiometer
(VR1) [Altronics R1998] (a 20kΩlog pot can
be substituted)
2 dual-gang 10kΩlinear 16mm
potentiometers (VR2,VR3) [Altronics R2296]
1 1kΩmini horizontal trimpot (VR4)
3 knobs to suit VR1-VR3
1 4PDT push-on, push-off switch (S4)
[Altronics S1451]
4 8-pin DIL IC sockets (for IC1-IC4)
1 18-pin DIL IC socket (for IC5)
4 ferrite beads (FB1-FB4) Altronics L5250A,
1 4MHz crystal (X1)
2 vertical PCB-mount RCA sockets, white
(CON1,CON3) [Altronics P0131]
2 vertical PCB-mount RCA sockets, red
(CON2,CON4) [Altronics P0132]
1 3-way PCB-mount terminal block, 5.08mm
pitch (CON5)
1 2-way vertical polarised header, 2.54mm
pitch (CON6) [Altronics P5492,
1 2-way polarised header plug (for CON6)
Altronics P5472 & P5470A]
1 10-pin PCB-mount IDC vertical box header
(CON7) [Altronics P5010
1 2-way SIL pin header (LK3)
1 3-way SIL pin header (LK4)
2 jumper shunts (LK3,LK4)
1 6.35mm chassis-mount single spade
connector
4 12mm long M3 tapped Nylon spacers
1 M4 x 10mm panhead machine screw
1 M4 hex nut
1 M4 star washer
4 M3 x 6mm panhead machine screws
2 100mm cable ties
1 150mm length of light-duty figure-8 hookup
wire
1 50mm length of 0.7mm diameter tinned
copper wire
1 PC stake
Semiconductors
4 NE5532AP or LM833P dual op amps (IC1-
IC4)
1 PIC16F88-I/P microcontroller programmed
with 0111111A.hex (lC5)
1 infrared receiver module (IRD1) Altronics
Z1611A
1 7805CV 5V regulator (REG1)
2 BC327 PNP transistors (Q1,Q3)
2 BC337 NPN transistors (Q2,Q4)
1 3mm blue LED (LED1)
1 3mm orange/amber LED (LED2)
1 3mm yellow LED (LED3)
Capacitors
2 470µF 16V PC electrolytic
3 100µF 35V PC electrolytic
8 100µF 16V PC electrolytic
8 22µF small non-polarised electrolytic
2 4.7µF small non-polarised electrolytic
11 100nF MKT polyester
4 15nF MKT polyester
1 10nF MKT polyester
4 470pF MKT polyester, MKP polypropylene
or NP0 ceramic
[eg, element14 1005988]
2 47pF MKT polyester, MKP polypropylene or
NP0 ceramic
[eg, element14 1519289]
2 22pF ceramic
Resistors (all 0.25W, 1% metal film)
2 1MΩ6 100kΩ2 22kΩ1 18kΩ
2 12kΩ
3 10kΩ1 2.7kΩ8 2.2kΩ4
1.8kΩ10 1kΩ
2 330Ω7 100Ω1 22Ω3 10Ω
When bending the LED leads, keep in mind
that the longer (anode) leads must go into the
pads marked “A” on the PCB. IRD1 should
be fitted with its hemispherical lens facing
towards the front of the board. The assembly
can now be completed by installing the spade
connector to the left of the motorised pot. It is
secured with an M4 screw, shake-proof washer
and nut. Leave the ICs out of their sockets for
now. They are installed later, after the power
supply checks have been completed.
Initial checks
Before installing the three ICs on the preamp
board, it’s a good idea to check the supply
voltages. You will need to wire up a power
supply, then connect the supply’s +15V, 0V
and -15V outputs to the relevant inputs on
the main preamplifier PCB. Now check the
voltages on pins 8 & 4 of the four 8-pin IC
sockets (IC1-IC4) on the preamp board; ie, be-
tween each of these pins and the 0V (centre)
terminal of CON6. You should get readings of
+15V and -15V respectively.
Similarly, check the voltage on pin 14 of
IC5’s socket. It should be between +4.8V and
+5.2V. If these voltages are correct, switch
off and install the ICs. Note that IC1-IC4 face
one way while microcontroller IC5 faces the
other way.
Remote control/switch testing
The remote control functions can
now be
tested using a suitable universal remote, eg,
Altronics A1012. As stated earlier, the default
device mode programmed into the micro is
TV but if this conflicts with other gear you can
choose SAT1 or SAT2 as the device instead.
Whichever mode is chosen, you must also
program the correct code into the remote
(see panel).
Note that if you don’t have a split rail power
supply ready yet, you can still check the
remote control functions by using a single
9-15V DC supply connected between the
+15V and 0V terminals of CON6 (watch the
polarity). As before, check the voltage on pin
14 of IC5’s socket (it must be between +4.8V
and +5.2V), then switch off and install IC5
(pin 1 towards IRD1). Also, insert the jumper
link for LK3 to enable the mute return func-
tion. Now connect the three boards using the
ribbon cable assemblies. The connectors are
all keyed so as long as you plug the 10-wire
cable into the 10-pin sockets and the 14-wire
cable into the 14-pin sockets, everything
should be connected properly.
Next, rotate VR2 fully anticlockwise and use
the remote to check the various functions. If
the 6-input selector board is used, connect
is using the 10-wire cable. The inputs can be
selected using the buttons on the pushbutton
board or the 1-6 buttons on the remote. Each
time a button is pressed, you should hear
a “click” as its relay switches on and the
blue LED in the corresponding switch button
should light.
Also, the orange Acknowledge (ACK) LED
should flash each time you press a button
on the remote. If the ACK LED doesn’t flash,
make sure the code programmed into the
remote matches the device mode (ie, TV,
SAT1 or SAT2). The ACK LED won’t flash at
all unless the code is correct. Now check that
the volume pot turns clockwise when the Vol-
ume Up and Channel Up buttons are pressed
and anti-clockwise when Volume Down and
Channel Down are pressed. It should travel
fairly quickly when Volume Up/Down buttons
are pressed and at a slower rate when the
Channel Up/Down buttons are used.
If it turns in the wrong direction, reverse the
leads to the motor.

9
K 5171 ULTRA LOW DISTORTION PREAMPLIFIER WITH TONE CONTROLS
Adjusting trimpot VR2
Next, set the volume control to mid-position,
set VR2 fully anti-clockwise and hit the Mute
button. The pot will rotate anti-clockwise and
as soon as it hits the stops, the clutch will
start to slip.
While this is happening, slowly adjust VR2
clockwise until the motor stops. Now press
Volume Up to turn the potentiometer clock-
wise for a few seconds and press Mute again.
This time, the motor should stop as soon as
the pot reaches its anticlockwise limit.
A programmed time-out of 13 seconds will
also stop the motor if it continues to run after
Mute is activated. This means that you have
to adjust VR2 within this 13s period. If the
motor stops prematurely or runs for the full
13s after the limit is reached, try redoing the
adjustment.
Troubleshooting
If the unit fails to respond to remote control
signals, check that the remote is in the cor-
rect mode (TV, SAT1 or SAT2) and has been
correctly programmed.
If you’re using a remote other than those
listed in the panel, work through the different
codes until you find one that works. Start with
codes listed under the Philips brand as these
are the most likely to work.
If the unit responds to the 1, 2 & 3 buttons
on the remote but the button switches don’t
work, check that the ribbon cable to the
pushbutton board has been crimped properly.
Similarly, if the remote volume function works
but not the remote input selection, check the
cable from the Preamplifier board to the input
selector board.
Note that the cable from the Preamplifier
board also supplies power to the other two
boards. So it’s worthwhile checking that there
is 5V between pins 8 & 4 of IC4 on the Selec-
tor Board and again check the ribbon cable if
this supply rail is missing.
Audio testing
If you are using a ±15V supply for testing, you
can test the preamplifier further by con-
necting its outputs to a stereo amplifier and
feeding in audio signals from a mobile phone,
tablet, iPod, CD/DVD/Blu-Ray player or just
about any other source.
Depending on your device, you may need a
cable with a 3.5mm stereo plug at one end
and red/white RCA plugs at the other end to
make the connection. These are commonly
available.
Resistor Colour Codes (all three PCBs)
Qty. Value 4-Band Code (1%) 5-Band Code (1%)
2 1MΩbrown black green brown brown black black yellow brown
9 100kΩbrown black yellow brown brown black black orange brown
2 22kΩred red orange brown red red black red brown
118kΩbrown grey orange brown brown grey black red brown
212kΩbrown red orange brown brown red black red brown
510kΩbrown black orange brown brown black black red brown
1 2.7kΩred violet red brown red violet black brown brown
19 2.2kΩred red red brown red red black brown brown
4 1.8kΩbrown grey red brown brown grey black brown brown
10 1kΩbrown grey black brown brown black black brown brown
2 330Ωorange orange brown brown orange orange black black brown
13 100Ωbrown black brown brown brown black black black brown
1 22Ωred red black brown red red black gold brown
310Ωbrown black black brown brown black black gold brown

10
K 5171 ULTRA LOW DISTORTION PREAMPLIFIER WITH TONE CONTROLS
Selecting The Mode and
Programming The Remote
As stated in the text, it’s necessary to
program the universal remote control
correctly. By default, the microcontroller’s
RC5 code is set to TV but SAT1 or SAT2
can also be selected. Just press and
hold button S1 on the pushbutton board
during power-up for SAT1 or button S2 for
SAT2. Pressing S3 at power-up reverts to
TV mode. Once you’ve chosen the mode
or “device”, the correct code must be
programmed into the remote. This in-
volves selecting TV, SAT1 or SAT2 on the
remote (to agree with the microcontroller
set-up) and then programming in a three
or 4-digit number for a Philips device.
That’s because most Philips devices (but
not all) use the RC5 code standard that’s
expected by the Preamplifier.
Most universal remote controls can be
used, including the model shown above,
the Altronics A1012 ($29.95). For the
Altronics A1012, use a code of 023 or
089 for TV mode, 242 for SAT1 or 245
for SAT2. In the case of other universal
remotes, it’s just a matter of testing the
various codes until you find one that
works. There are usually no more than 15
codes (and usually fewer) listed for each
Philips device, so it shouldn’t take long to
find the correct one.
Note that some codes may only partially
work, eg, they might control the volume
but not the input selection. In that case,
try a different code. Also, some remotes
may only work in one mode (eg, TV but
not SAT). A variety of infrared remote
controls can be used to control the
preamplifier: the one photographed came
from Altronics.
QUICK
CONNECT
M4 x 10mm
SCREW & NUT
M4 FLAT
WASHER M4 STAR
WASHER
PC BOARD
Fig.16: here’s how the male spade quick
connectors are secured to the power supply
PCB. Vertical spade terminals with solderable
pins can also be used.
Making the interconnecting cables
To connect the input selector boards, you need to make two IDC cables. These diagrams show
how these cables are made.
Pin 1 on the header sockets is indicated by a small triangle in the plastic moulding and the red
stripe of the cable must always go to these pins.
You can either crimp the IDC headers to the cable in a vice or use an IDC crimping tool (eg,
Altronics T1540).
Don’t forget to fit the locking bars to the headers after crimping, to secure the cable in place.
Having completed the cables, it’s a good idea to check that they have been correctly terminated.
The best way to do this is to plug them into the matching sockets on the PCB assemblies and
then check for continuity between the corresponding pins at either end using a multimeter.
300mm x-WAY IDC RIBBON CABLE14 CABLE EDGE STRIPE
14-WAY
IDC
SOCKET
14-WAY
IDC
SOCKET
200mm x0-WAY IDC RIBBON CABLE1 CABLE EDGE STRIPE
1-WAY0
IDC
SOCKET
1-WAY0
IDC
SOCKET
LOCATING UNDERSPIGOT
Dear Kit Constructor,
At Altronics we take great pride in the quality and
presentation of our kits. If you nd any deciency in
this kit or have any constructive comments whatso-
ever, please write to us.
Altronics
Attention: The Kit Manager
P.O. Box 8350,
Perth Business Centre
W.A. 6849
or email
Important Note:
Please note that we can
offer a warranty only on
the components supplied
with this kit. Because we
are unable to guarantee
your labour, there is no
warranty on either partially
or fully built kits. We are
able to offer a repair service,
but once construction has
commenced, this service is
chargeable.
Table of contents
Other Altronics Amplifier manuals

Altronics
Altronics A 4115 User manual

Altronics
Altronics redback A 4140 2 x 100W User manual

Altronics
Altronics Redback A 4036A User manual

Altronics
Altronics Biema A 4154 Series User manual

Altronics
Altronics Proart A 5030 User manual

Altronics
Altronics Redback A 4395 User manual

Altronics
Altronics A 4075 User manual
Popular Amplifier manuals by other brands

Aquarian Audio Products
Aquarian Audio Products UPA-1 user manual

CYP
CYP AU-A200 Operation manual

Axon
Axon MultiClamp 700B Theory and operation

Constellation audio
Constellation audio Inspiration INTEGRATED 1.0 owner's manual

Audio Note
Audio Note M1 Phono Owner's Information

Fractal Audio
Fractal Audio AXE-FX II Quick reference guide