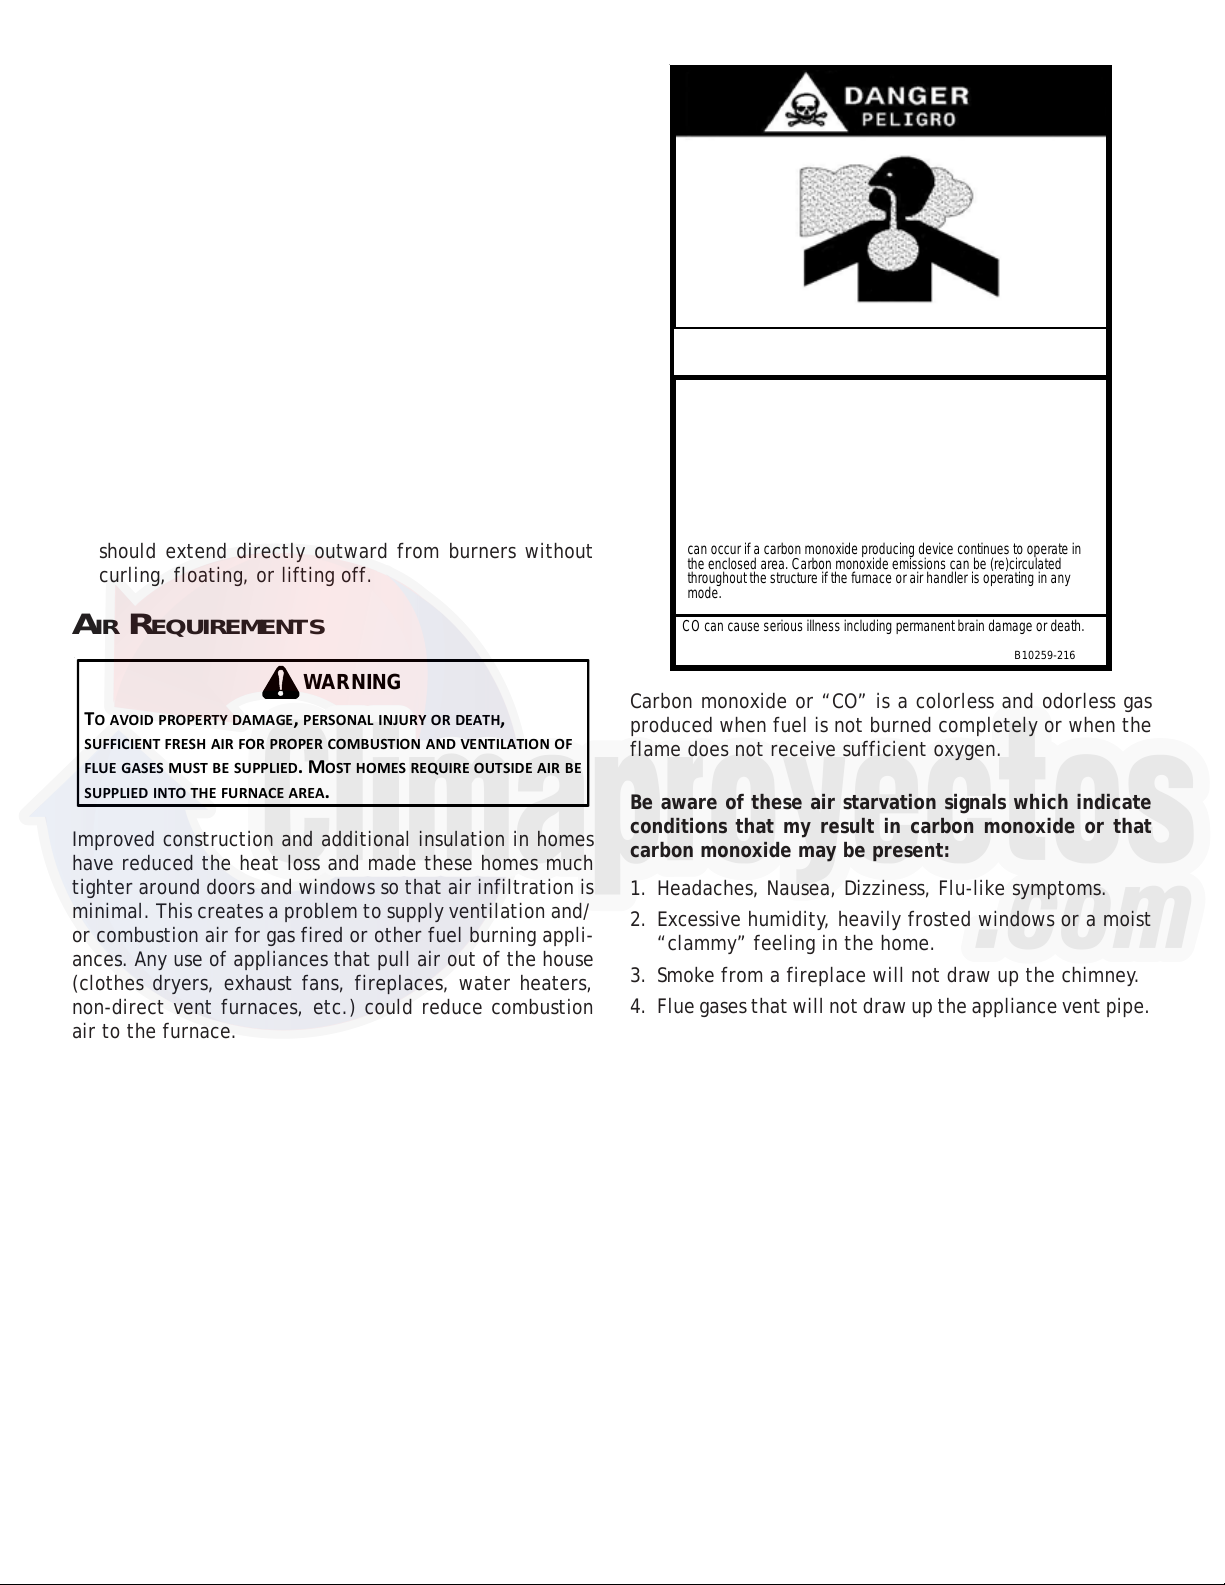
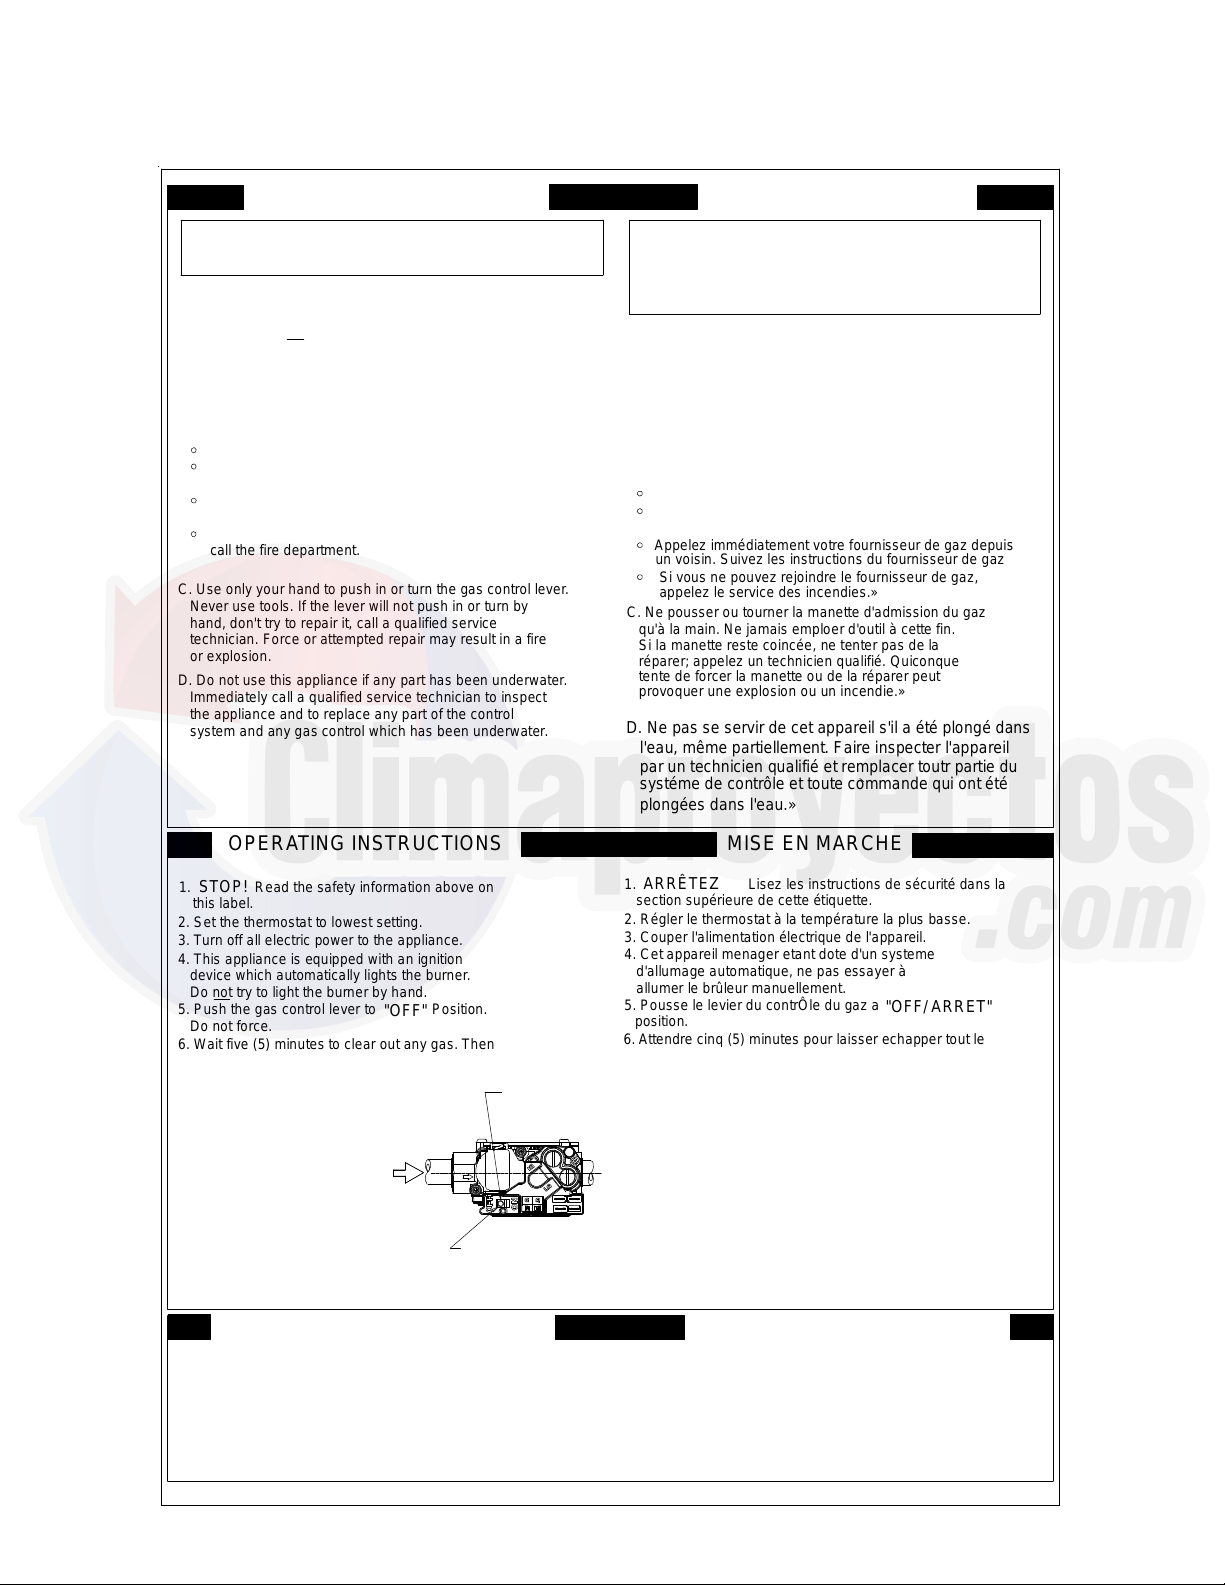
9
S
AFETY
L
ABELS
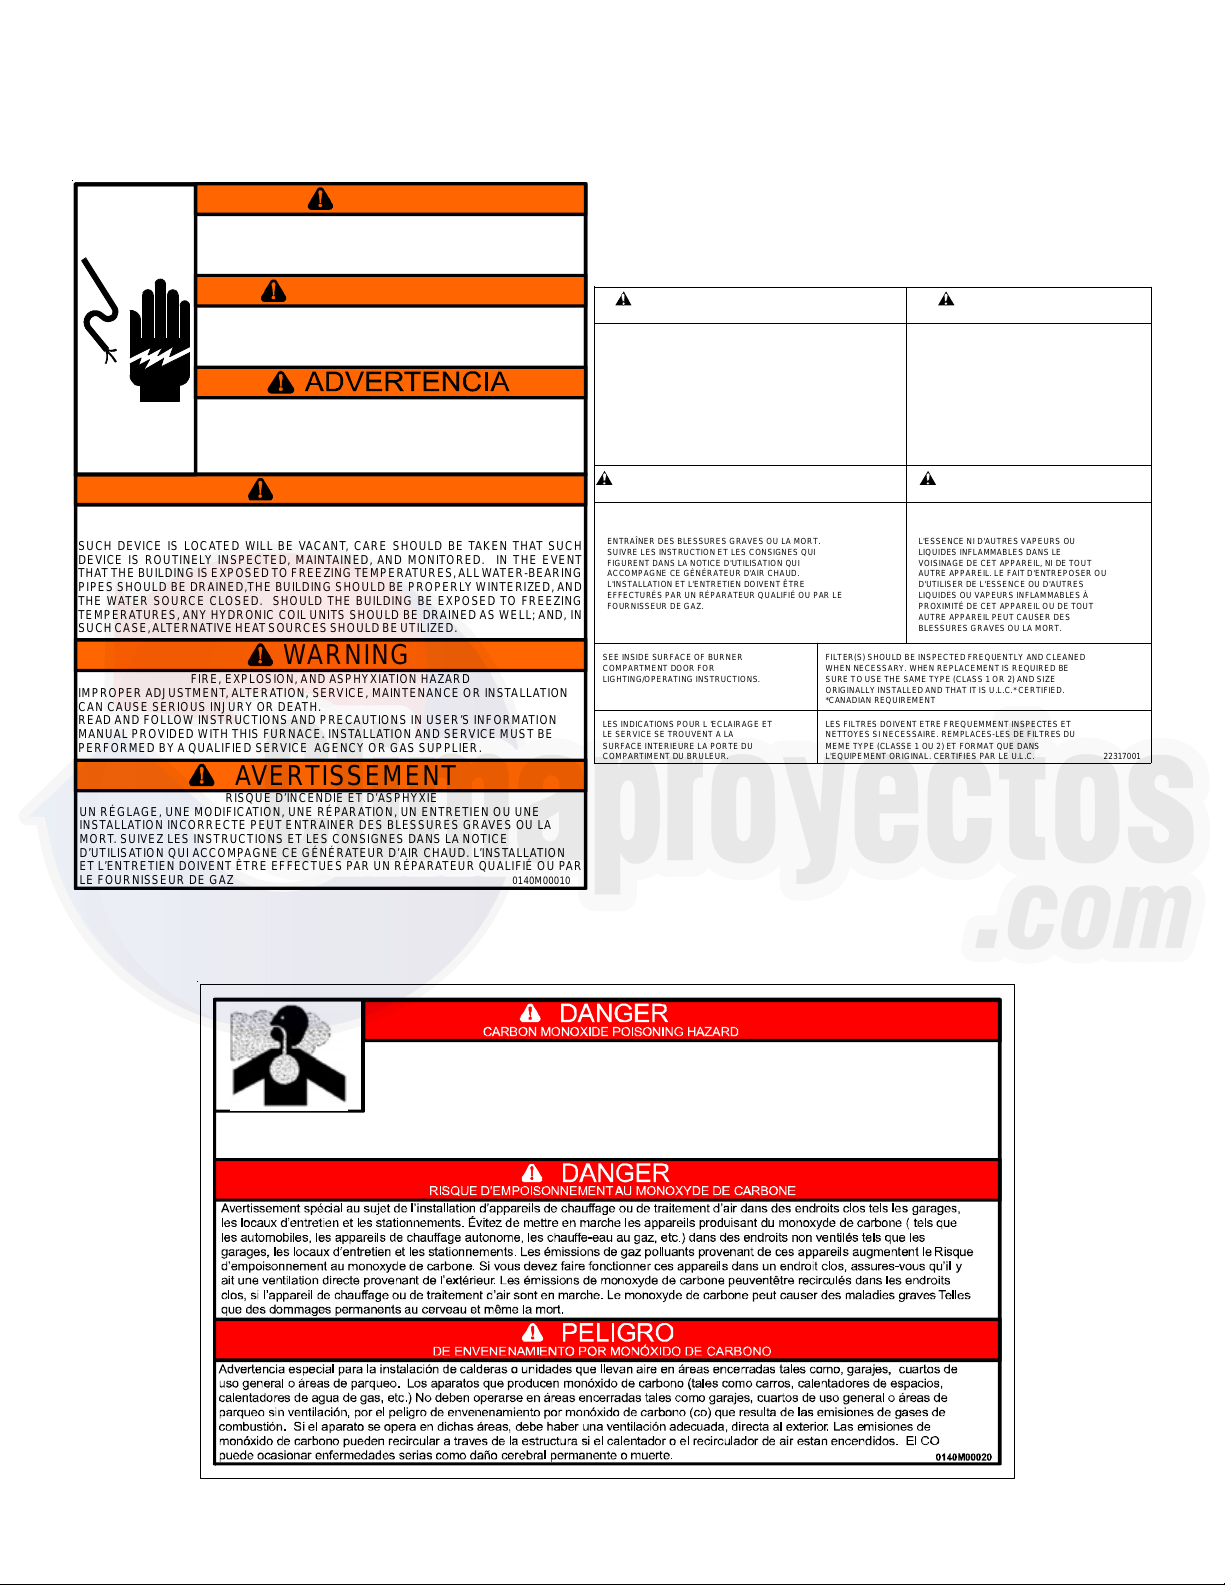
NOTE: If safety labels are missing or illegible, contact the installing dealer or our Customer Service Department for
ordering information.
risque de déclencher un incendie ou une explosion
because some gas is heavier than air and will
DU GAZ
ARRIVEE
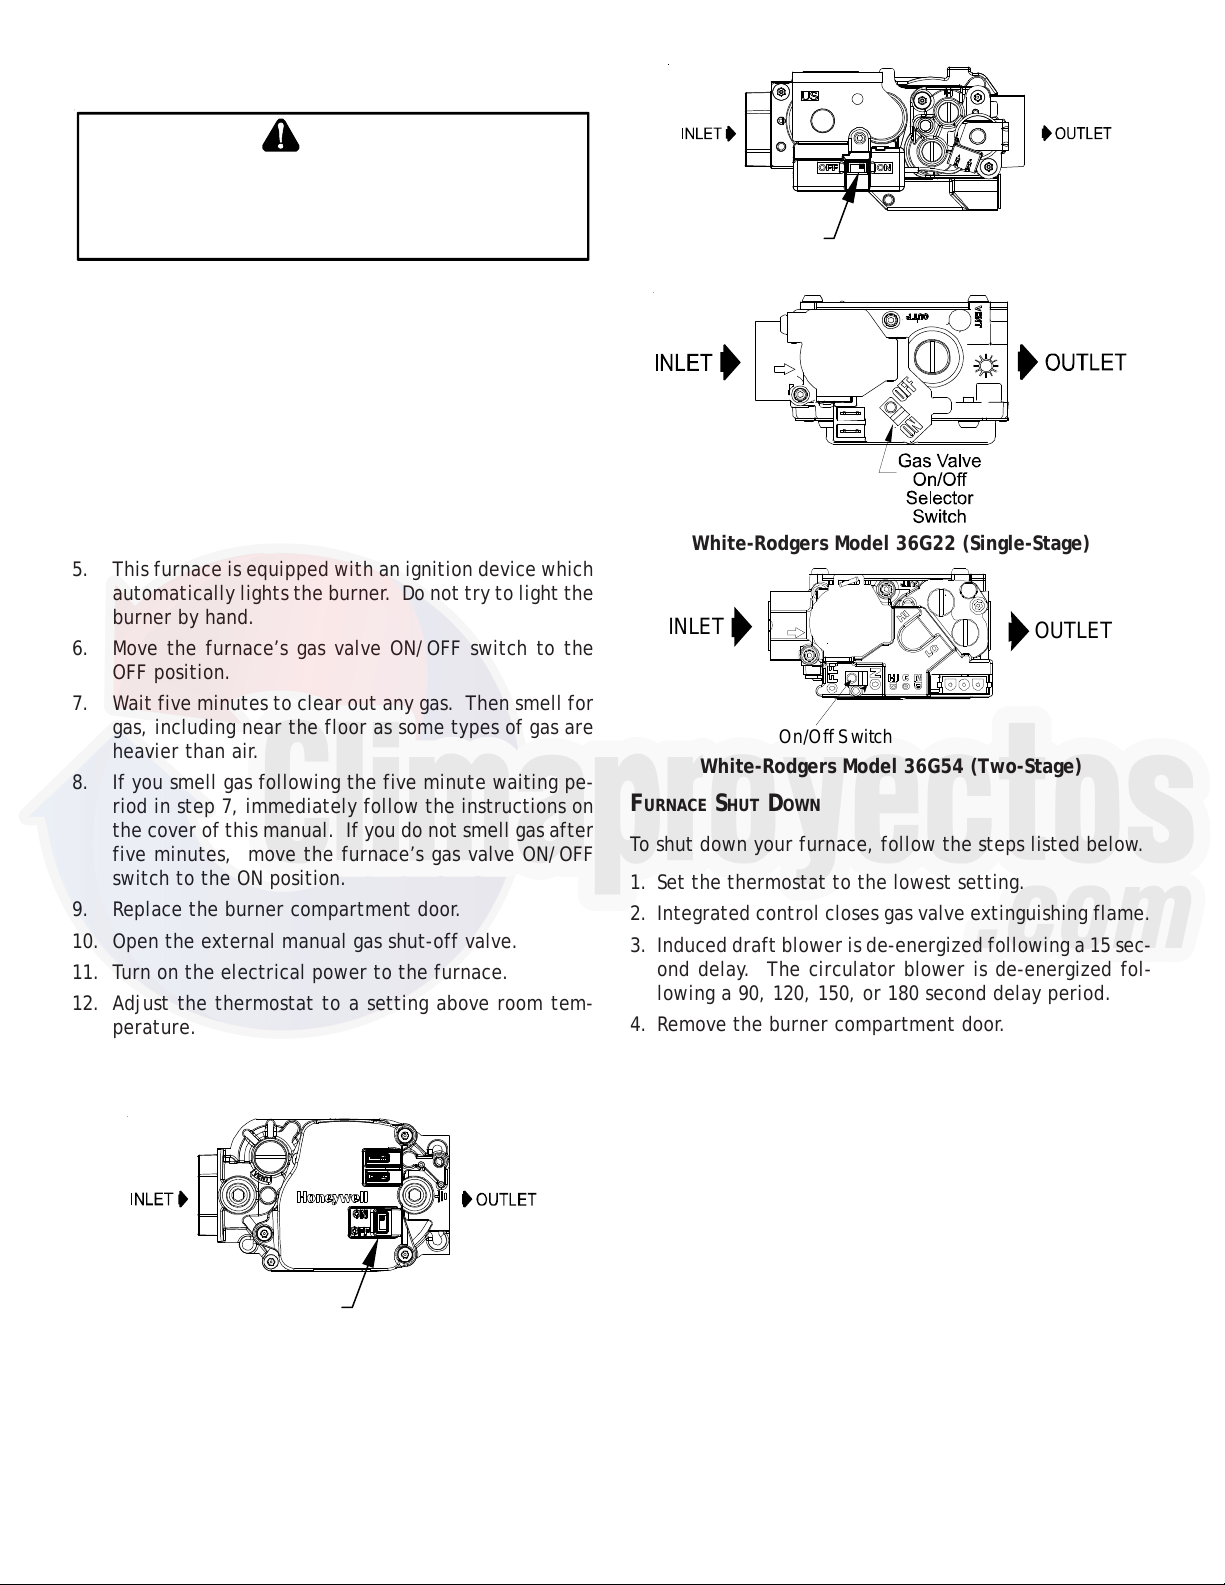
INLET
GAS
position.
gaz. Renifler tout autour de l'appareil, y compris prés du
"OFF/ ARRET"
"ON/MARCHE”
ARRÊTEZ
IN "ON" POS
LEVER SHOWN
MANUAL GAS
"ON/MARCHE"
MANUEL, EN POS
ROBINET A GAZ
plancher, pour déceler une odeur de gaz. Si c'est le cas,
STOP!
faut procéder à des operations d'entretien.
DE GAZ DE L'APPAREIL
POUR COUPER L'ADMISSION
ARRÊTEZ.
Ne pas tenter d'allumer d'appareils.
S'il n'y a pas d'odeur de gaz, passer à l'etàpe suivante.
sur la portion superieure de cette etiquette.
Passer à l'etape B des instructions de securite
position.
6.Attendre cinq (5) minutes pour laisser echapper tout le
STOP! "B"
gas, go to next step.
on this label if you don't smell
in the safety. information above
then smell gas, Follow
smell for gas, including near the floor. If you
6. Wait five (5) minutes to clear out any gas. Then
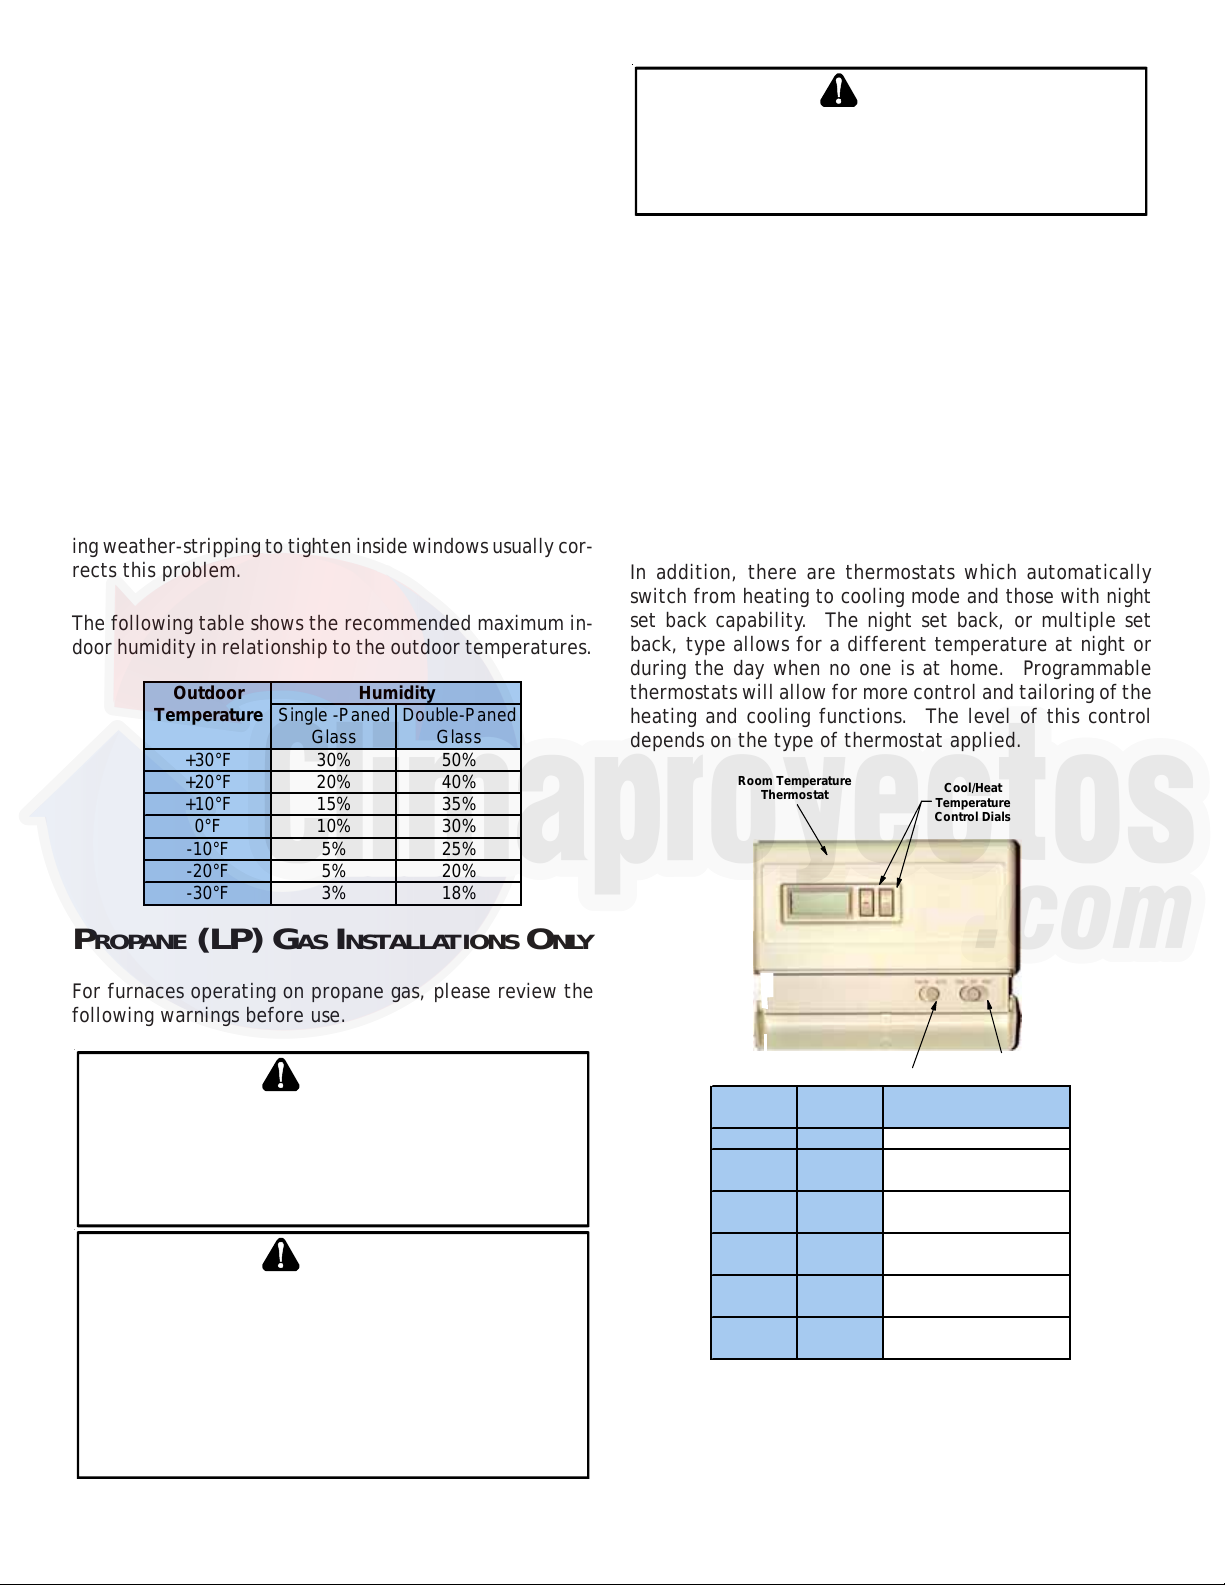
10. Set thermostat to desired setting.
Immediately call your gas supplier from a neighbor's
to light the burner by hand.
qualifié ou le fournisseur de gaz.
de gaz de l'appareil et appeler un technicien
instructions intitulées Comment couper l'admission
loss of life.
explosion may result causing propertyexactly,a fire or
0140F00000P REV C
Ne pas forcer.
"OFF/ ARRET"
A.
d'allumer le brûleur manuellement.
automatiquement le brûleur. Ne pas tenter
muni d'un dispositif d'allumage qui allume
Cet appareil ne comporte pas de veilleuse. Il est
"ON".
"OFF"
service technician or gas company.
Off Gas ToAppliance" and call your
follow the instructions "To Turn
11. If the appliance will not operate,
power to the appliance.
9. Turn on all electric
8. Replace access panel.
TO TURN OFF GAS TO APPLIANCE
OPERATING INSTRUCTIONS
READ BEFORE OPERATING
FOR YOUR SAFETY
"OFF"
WHAT TO DO IF YOU SMELL GAS
BEFORE OPERATING
WARNING:
damage, personal injury or
If you do not follow these instructions
4. Replace control access panel.
Do not force.
3. Push the gas control lever to Position.
if service is to be performed.
2. Turn off all electric power to the appliance
1. Set the thermostat to lowest setting.
to
7. Push gas control lever
Do not force.
5. Push the gas control lever to Position.
Do not try to light the burner by hand.
device which automatically lights the burner.
4. This appliance is equipped with an ignition
3. Turn off all electric power to the appliance.
2. Set the thermostat to lowest setting.
this label.
1. Read the safety information above on
system and any gas control which has been underwater.
the appliance and to replace any part of the control
Immediately call a qualified service technician to inspect
D. Do not use this appliance if any part has been underwater.
or explosion.
technician. Force or attempted repair may result in a fire
hand, don't try to repair it, call a qualified service
Never use tools. If the lever will not push in or turn by
C. Use only your hand to push in or turn the gas control lever.
call the fire department.
If you cannot reach your gas supplier,
phone. Follow the gas supplier's instructions.
do notuse any phone in your building.
Do not touch any electric switch;
Do not try to light any appliance.
settle on the floor.
area for gas. Be sure to smell nextto the floor
B. smell all around the appliance
the burner. Do not try
with an ignition device which automatically lights
A. This appliance does not have a pilot. It is equipped
11. Si l'appareil ne se met pas en marche, suivre les
10. Régler le thermostat à la température désirée.
9. Mettre l'appareil sous tension.
8. Remettre en place le panneau d'accés.
MISE EN MARCHE
EN MARCHELIRE
LIREAVANT DE METTRE
QUE FAIRE S'IL YA UNE ODEUR DE GAZ
B. AVANT DE LE FAIRE FONCTIONNER,
AVERTISSEMENT:
corporelles ou la perte de vies humaines.
entraînantdes dommages matériels, des lesions
la lettre les instructions dans le presént manuel
Quiconque ne respecte pas à
4. Remettre en place le panneau d'accés.
position.
3. Pousse le levier du contrôle du gaz à
2. Couper l'alimentation électrique de l'appareil s'il
1. Régler le thermostat à la température la plus bassé.
7. Pousse le levier du contrôle du gaz à
5. Pousse le levier du contrÔle du gaz a
allumer le brûleur manuellement.
d'allumage automatique, ne pas essayer à
4. Cet appareil menager etant dote d'un systeme
3. Couper l'alimentation électrique de l'appareil.
2. Régler le thermostat à la température la plus basse.
section supérieure de cette étiquette.
1. Lisez les instructions de sécurité dans la
plongées dans l'eau.»
systéme de contrôle et toute commande qui ont été
par un technicien qualifié et remplacer toutr partie du
l'eau, même partiellement. Faire inspecter l'appareil
D. Ne pas se servir de cet appareil s'il a été plongé dans
provoquer une explosion ou un incendie.»
tente de forcer la manette ou de la réparer peut
réparer; appelez un technicien qualifié. Quiconque
Si la manette reste coincée, ne tenter pas de la
qu'à la main. Ne jamais emploer d'outil à cette fin.
C. Ne pousser ou tourner la manette d'admission du gaz
appelez le service des incendies.»
Si vous ne pouvez rejoindre le fournisseur de gaz,
un voisin. Suivez les instructions du fournisseur de gaz
Appelez immédiatement votre fournisseur de gaz depuis
des téléphones dans le bâtiment.
Ne toucher à aucun interrupteur; ne pas vous servir
peuvent s'accumuler au niveau du sol.
certains gaz sont plus lourds que l'air et
une odeur de gaz. Renifler prés du plancher, car
renifler tout autour de l'appariel pour decéler