ETHERNET WIFI
SETUP
SETTING UP YOUR CAMERA
13 14
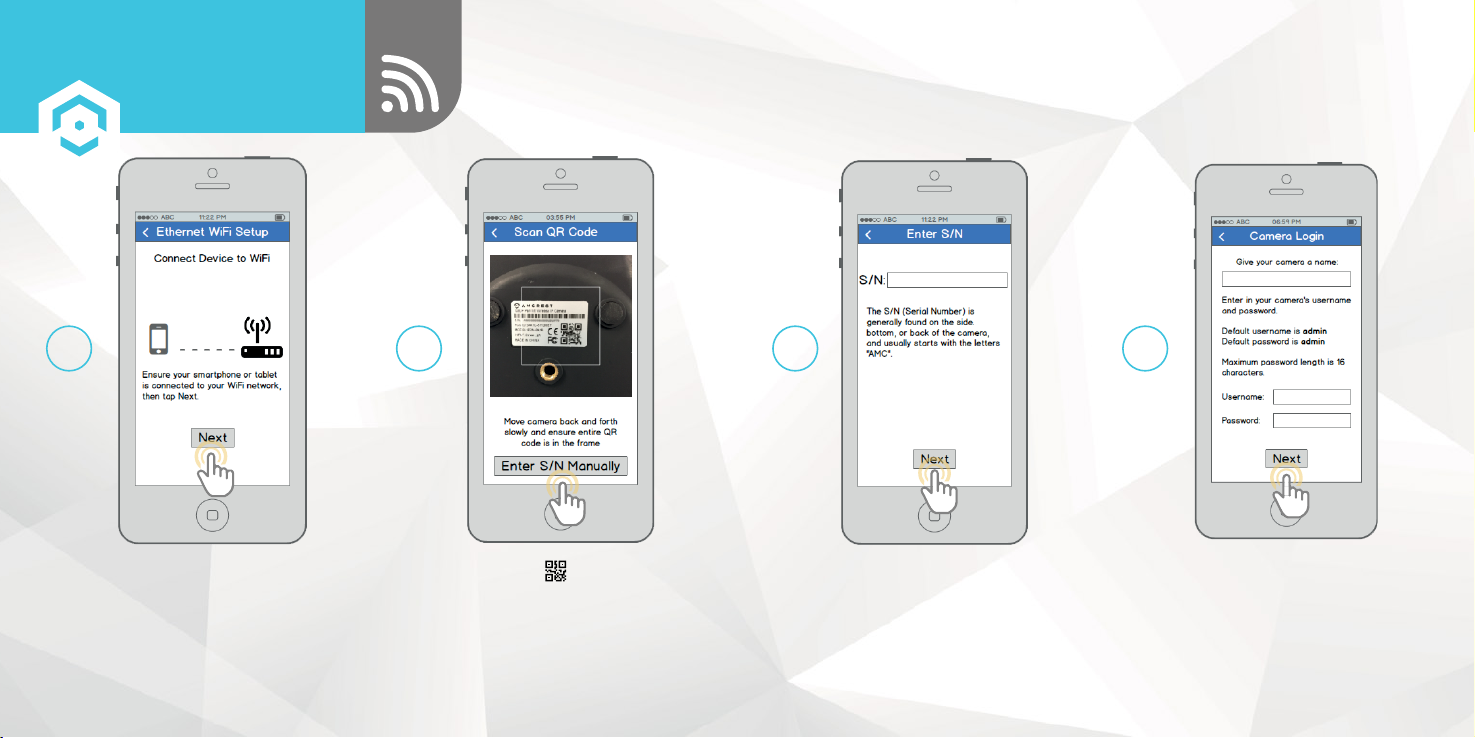
Pick a WiFi network, enter in the
password, then tap “Next”.
Note: Most Amcrest cameras can only
connect to 2.4 GHz WiFi networks, so
please ensure that your phone is
connected to a compatible network.
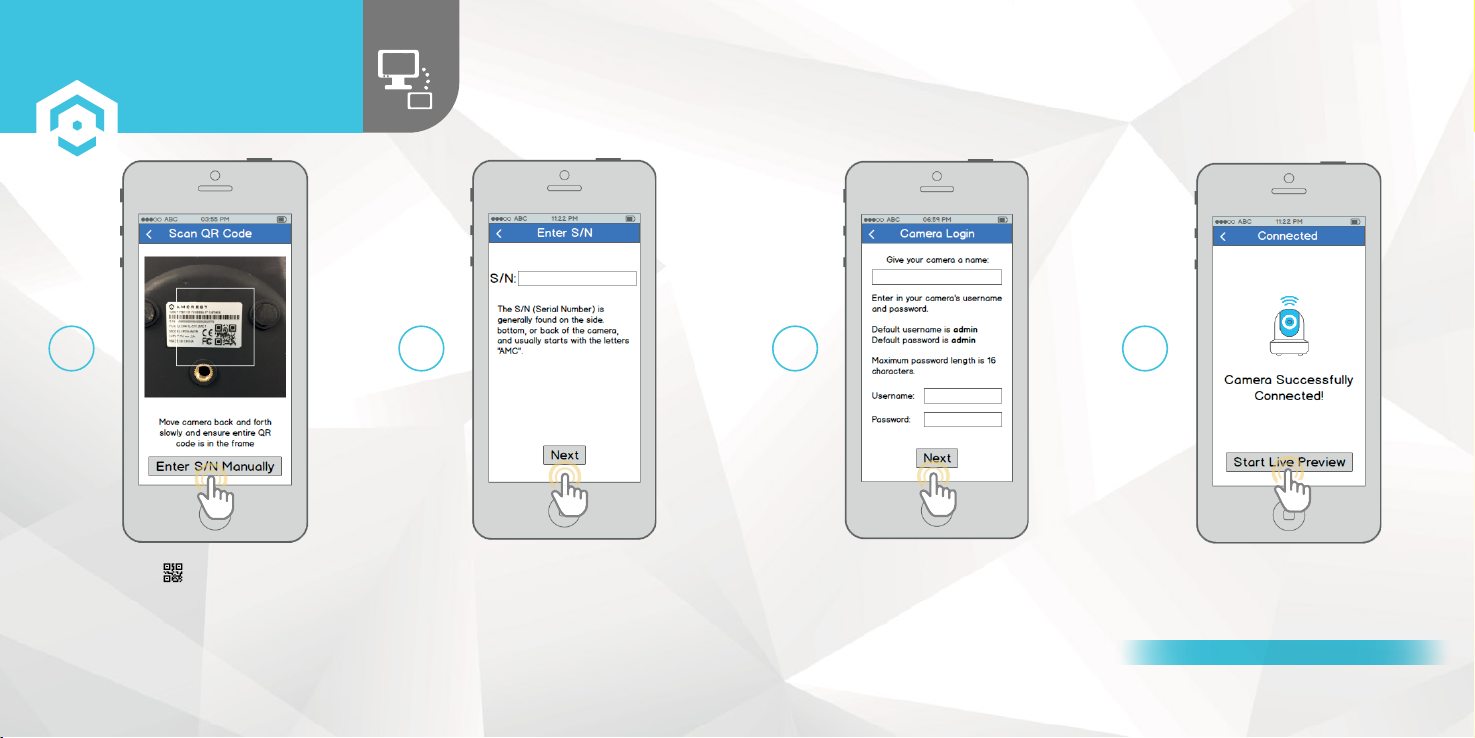
Tap the "Start Live Preview"
button to proceed with changing
your password.
11 12
To ensure the security of your camera, you will
be asked to change the password for your
camera’s default username (admin). Please select
a password that is at least 8 characters long and
one that uses a combination of uppercase letters,
lowercase letters, and numbers. Note that once
the password is changed here it will take effect
immediately. If you forget your password, you
can always hard reset the camera using the steps
detailed in the Troubleshooting section of this
guide.
Your camera is now ready to go! Unplug the
camera from Ethernet and power, then relocate
the camera to anywhere within range of the
WiFi network that you connected the camera
to. Plug in the camera, then wait 1-2 minutes
before tapping the "Start Live Preview" button.
13
14
For additional assistance, please contact us at
www.amcrest.com or give us a call at 1-888-212-7538.
Step-by-step video tutorials available at
www.amcrest.com/videos