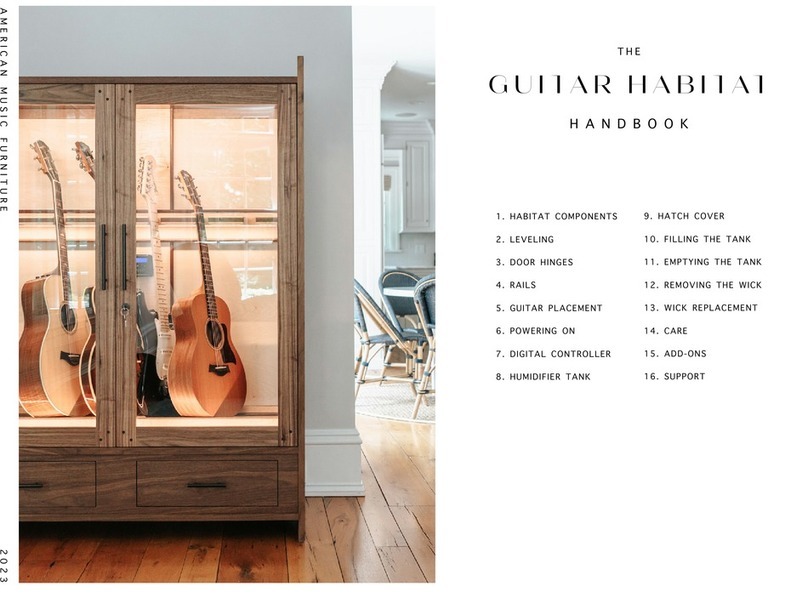
American Music Furniture Guitar Habitat Modular User manual

User Manual
Guitar Habitat® - Modular
HUMIDITY CONTROLLED DISPLAY CABINETS

2 AMERICANMUSICFURNITURE.COM 3 AMERICANMUSICFURNITURE.COM
Pictured: Modular Guitar Habitat®featured in natural cherry, standard neck rest, aromatic cedar back,
standard LED lighting, and patented Horneff door, humidication/dehumidication system
TABLE OF CONTENTS
4WELCOME
Thank You!
5DELIVERY & INSPECTION
What to do when you receive your cabinet
6DIAGRAM OF YOUR GUITAR HABITAT®
The parts to your cabinet
7PLACEMENT
Where to put your cabinet
8LEVELING YOUR CABINET
How to level your cabinet
10 YOUR HUMIDIFIER
Getting to know your humidifier
11 FILLING YOUR HUMIDIFIER
Filling your tank for the first time
12 USING YOUR CABINET
How to use your cabinet
14 SERVICE & SUPPORT
Troubleshooting, Care & Maintenance

4 AMERICANMUSICFURNITURE.COM 5 AMERICANMUSICFURNITURE.COM
DELIVERY & INSPECTION
WELCOME
From all of us here at American Music Furniture, THANK YOU! Thank you for
bringing us into your home and allowing us to help protect and preserve your
fine instruments. As a small business, we appreciate each and every one of our
customers and could not be in business without you.
Delivery of your cabinet is important. We use only certified freight carriers and
package your cabinet with the utmost care.
A few days before delivery, you will be contacted by the freight company to
schedule when you would like your cabinet to arrive.
When you receive your cabinet, please take the time to review the cabinet for any
damage that may have occurred during transit. If damage occured,
note all issues on all shipping documents.
If any damage is found or you have any concerns with your shipment, please call
us at 1-267-272-2460. All damage MUST BE reported before the freight company
leaves your premises.
Your cabinet will arrive with the humidifier, humidistat, and dehumidifier (if
ordered) already in place. Several items are included inside your cabinet:
• Shims for leveling your cabinet
• Applicable User Manual
• Any loose hardware that will need to be reinstalled
• Keys to your cabinet

6 AMERICANMUSICFURNITURE.COM 7 AMERICANMUSICFURNITURE.COM
Some of the items called-out on the diagram may not be a part of the Modular Guitar Habitat®you purchased. Please reference your specific cabinet for similar features.
Diagram of Your Guitar Habitat®
GALLERY TOP
FOR ACCESSORIES
HANDLE
DOOR LOCK
PATENTED HORNEFF
NON-WARP DOORS
HATCH COVER
HUMIDIFIER UNDERNEATH
BOTTOM LIGHT RAIL
ENHANCED LIGHTING AREA
LED DIMMER SWITCH
FACE FRAME
WITH DRAWERS
CORKLINED
INSTRUMENT RAILS
NECK REST
OR
NECKTIE™
ENHANCED LIGHTING AREA
HUMIDIFICATION
CONTROL PANEL
HUMIDIFY/DEHUMIDIFY PANEL
SHOWN HERE
DEHUMIDIFICATION VENT
CUSTOMIZED OPTION
ADJUSTABLE
EUROPEAN HINGES
TOP LIGHT RAIL
STANDARD LED LIGHTING WITH ALL CABINETS
BACK WOOD PANEL
AROMATIC CEDAR SHOWN HERE

8 AMERICANMUSICFURNITURE.COM 9 AMERICANMUSICFURNITURE.COM
ASSEMBLY
1. Each section of your modular cabinet will come packaged separately. After
you have unboxed each section, face the non-glass sides next to each other.
Remove the guitar rails. Lift and remove the hatch cover and the humidifier from
it’s location.
2. Next, bring each section approximately 3” to 4” apart and insert the light
plug into it’s receptacle. Plug in lights to proper receptacles. (re: photos for
dehumidifier plug)
The delivery service team will place
your cabinet in the room for you and
will also remove all packing materials.
Be sure that they do not remove the
plastic bag with our logo that includes
your keys and shims.
Extra charges do apply for stairs or
more than 30 minutes of delivery time.
There are a few things to consider
about the location:
• Do not locate directly over or in front of heat or air conditioning vents.
Your cabinet is well insulated, but it is made of solid wood and is best kept
away from hot or cold air blowing directly on or under it.
• Do not locate your Guitar Habitat® in rooms greater than 80°F .
Excessive heat is detrimental to your cabinet and your instruments.
• Do not locate next to a window with bright direct sunlight.
Even with Low E UV resistant glass, the sun will fade your instruments and
the wood on the cabinet.
• Carefully measure the space where you plan to place your cabinet.
This includes the hallways, the doorways, the stairs or any other obstacles
throughout your home. If you plan on a second floor or basement
placement, we recommend only the small or modular size Guitar
Habitat® cabinets. Most stairs will not accommodate larger cabinets.
• Be in close proximity to necessary outlets or water sources.
Ensure your cabinet has access to an electrical outlet. If connecting
your habitat directly to your home water supply, ensure that you are in close
proximity to a water source.
PLACEMENT

10 AMERICANMUSICFURNITURE.COM 11 AMERICANMUSICFURNITURE.COM
If you have a dehumidifier, an additional cord will need to be strung through the box.
Your cabinet light connection may be up top. Your cabinet light connection may be in the box.
Once it has been strung through, plug it in the corresponding receptacle in the power supply.
3. After you have plugged in your components, slide and press the cabinets
together. The sections should fit into each other creating one continuous
cabinet.
4. Once the sections are fitted into each other, locate the lag bolt and caps
in the plastic bag. Insert the bolts into the holes on the right section and caps
into the holes in the left section. Screw them together using the provided hex
wrench. (Tip: Use quick-grip clamps to squeeze the two sections together)

12 AMERICANMUSICFURNITURE.COM 13 AMERICANMUSICFURNITURE.COM
5. The sections of your modular cabinet should now be secured together. If your
humidistat controller is unplugged, plug it in at this stage of assembly.
6. Now that your cabinet sections are successfully attached, you can now
reinstall the humidifier, hatch cover, and guitar rails. Simply plug in the humidifier
and place it gently into the humidifier box. Once it is in place, replace the hatch
cover and guitar rails.

14 AMERICANMUSICFURNITURE.COM 15 AMERICANMUSICFURNITURE.COM
7. Once all you have reinstalled all of your components, you are ready to enjoy
your Modular Guitar Habitat®. Enjoy!

16 AMERICANMUSICFURNITURE.COM 17 AMERICANMUSICFURNITURE.COM
When you put your cabinet in place, the door(s) may not be in alignment. This is
due to the fact that your floors may not be level. If this is the case, you will need
to place shims underneath your cabinet’s feet to properly align your cabinet.
1. With the door(s) closed and latched, grab the front two corners of your
cabinet and gently pull one corner forward (toward you).
LEVELING
YOUR CABINET
HOW TO KNOW WHERE TO PLACE SHIMS
2. Pull one corner towards you and gently push the other corner away from you.
If the doors don’t come into alignment or the problem worsens, reverse your
pull/push.
Note - When you have pushed the shim in far enough, the door(s) will align (re: photo in
step number 2). In rare cases you may need a shim on the front and back, but the back
usually is adequate. Single door cabinets level in the same way we’ve described, but align
with the cabinet side rather than another door.
3. After you have aligned the doors, simply place a shim at the rear of the
cabinet for the side you pulled toward yourself.

18 AMERICANMUSICFURNITURE.COM 19 AMERICANMUSICFURNITURE.COM
YOUR HUMIDIFIER
By now you know how important it is to properly humidify your guitars and other
stringed instruments. If you purchased a humidifier, it will be located underneath
the vented hatch cover in your cabinet.
To get started, simply set the digital panel to the desired humidity level (we
recommend 45-50% humidity). A red indicator light on the humidifier controller
notifies you when the reservoir is low/out of water and needs to be refilled.
We recommend that you empty the humidifier tank, and monitor the humidity
level in the cabinet during the summer. If you live in an air-conditioned
environment, the cabinet interior will normally be below 60% humidity. If the
cabinet interior gets above 65% humidity, and your cabinet is not equipped with a
dehumidifier membrane, you can place a box of desiccant in the cabinet to reduce
the humidity. Note that desiccant loses effectiveness as it absorbs more humidity
from the air.
FILLING YOUR
HUMIDIFIER
Each Guitar Habitat®comes standard with a humidifier. You will want to fill it with
distilled water during cold and dry months (i.e. Fall and Winter months). In North
America that would typically be during the months of November through March.
We recommend that you monitor the ambient humidity in the room where you
place your Guitar Habitat® cabinet. Do not put water in the humidifier when the
relative humidity in the room is over 40%.
Below are the quick and easy steps to fill your tank:
1. Remove the front half of your hatch cover that sits over your humidifier.
2. Remove the humidifier lid (it’s the portion that has the circle cut-out).
3. Pour distilled water to the “Max Fill” line of your humidifier.
4. Add a couple of drops of bacteriorstat to inhibit the growth and/or
reproduction of any native bacteria in the water (we reommend Essick Air
Bacteriostatic which can be purchased off Amazon).
5. Replace the humidifier lid and check your humidifier setting
(approximately 45% humidity).
6. Replace the hatch cover.
For more information, guidance, and instructional videos, please visit us at
www.americanmusicfurniture.com/video-content.

20 AMERICANMUSICFURNITURE.COM 21 AMERICANMUSICFURNITURE.COM
USING YOUR CABINET
Placing your guitars in the cabinet is a matter of personal taste. The
maximum number of guitars can be placed in the cabinet by simply lining
them up vertically straight in. The greater the angle of the guitars in the
cabinet, the fewer guitars can be accommodated.
The lower bouts sit on the two cork covered rails at the bottom of the
cabinet. The rails are secured on two wood strips at the bottom of the
cabinet can be moved and repositioned to best fit how you want to position
your guitars.
NECK REST
Guitar necks are secured by
use of our slotted neck rests.
Each cork-lined secures your
instrument and cushions
the necks of your guitars.As
an upgrade option we offer
patented Neck-Tie™ neck
rest that closes the opening
in the front of the cut out.
LED LIGHTING
Cabinet lights are provided
via a strip of LED lights
installed behind the top door
seal. Control of the lights is
via a rheostat and the lighting
is continuously variable.
At the lowest setting,
the lights are turned off.
ADJUSTABLE HINGES
We use 3-way adjustable
“European” style hinges
that can be moved slightly
up/down and in/out to
properly fit the door.
We adjust these at our shop
before shipping, but you may
find a need to adjust them
after the cabinet is in place.

22 AMERICANMUSICFURNITURE.COM 23 AMERICANMUSICFURNITURE.COM
SERVICE & SUPPORT
TROUBLESHOOTING
My cabinet glass has broken and
needs to be replaced.
Your cabinet glass is tempered for
safety so that it breaks into small
pieces that are less likely to cut anyone.
You can order new tempered glass
locally and have it installed. Installation
requires removing the screws from the
glass molding and taking the molding
out. This may be somewhat difficult
since the caulk used in the window
installation acts as an adhesive. The
glass is installed using a non-silicon
caulk. It is critically important that no
silicon caulk be used in the cabinet
since it will off gas and adversely
impact the humidification equipment
and potentially harm your instrument
finishes.
My wick looks dirty or crusty, how
often should I replace it?
Wicks need to be replaced as they get
dirty or have mineral build up on them. If
your wick is getting mold on it, you need
to replace it and make sure that you’re
using a bacteriostat in the water. To
replace the wick, you need to remove
the tank from the Guitar Habitat®. To
take out the tank, remove your guitars,
remove the cork topped rails, and
remove both pieces of the hatch cover.
The humidifiers will have either: (A) a
nine-pin DIN connector and separate
low water refill light on the hatch
cover; or (B) a single plug connector
at the back of the humidifier if the low
water light is located on your cabinet
controller. Whether it’s a one or two
plug system, unplug the plug(s).
Lift the humidifier tank out of the Guitar
Habitat® and clean the water reservoir
section of the tank with soapy water.
DOT NOT get water on the electronics,
and DO NOT pour water over the fan.
Wicks can be washed, reused, or
replaced. Replacement wicks are
available from American Music Furniture
for in packs of 3 for $95.
We have a brief video on our Web site
in the video content section at https://
americanmusicfurniture.com/video-
content/
The humidity level in my cabinet is
over 50% in the summer and I don’t
have a dehumidifier.
Air conditioning in the summer removes
a lot of moisture in the air. However, if
you live where it’s very humid, that may
still not be enough. Your guitars are
typically not going to sustain damage
unless they are stored in excess of
65% humidity. There are some things
you can do to reduce the humidity in
your Guitar Habitat® in the summer.
1. Remove all water from the
humidifier tank. Even with the
humidifier fan turned off, water will
evaporate into the cabinet. In the
summer, you don’t want extra water in
the cabinet.
2. Pick up a box of silica gel desiccant
and put it in your Guitar Habitat®
cabinet. Several types are available
from Amazon.com for under $15.
These are generally adequate for
a few weeks and generally can be
recharged.
3. Place a room dehumidifier in the
room where your Guitar Habitat® is
located. Do not over dehumidify.
The humidity level in my cabinet is
over 50% in the summer and I have
a dehumidifier membrane in my
cabinet.
The dehumidifier membranes have a
typical life of three to five years and
will need occasional replacement
depending on how much they’ve had
to run. You can reduce the stress
on the dehumidifier membrane by
keeping your Guitar Habitat® in
a room kept at no more than 75
degrees Fahrenheit. We have had
customers keep their cabinets in
unairconditioned rooms that are more
than 90 degrees which can damage
the cabinet and the guitars in it.
Can I add an ionic dehumidifier to
my cabinet?
Unfortunately that is not an option.
The ionic membrane dehumidifier
uses a different controller and power
supply than the humidify only Guitar
Habitat® models. It would not be
cost effective or easy to add one
after the humidify only cabinet has
been delivered to you. If you find you
need one, please contact us and we
can help you sell your old cabinet
while we build you a new one with a
dehumidifier in it.
What controls the humidity level in
my cabinet?
The LCD meter in your controller is
NOT controlling the humidity level in
your cabinet. There is a humidistat
in the controller tied to the control
knob(s). The controller is accurate
to plus or minus 5% and controls the
humidity equipment in your cabinet.
We’ve found in testing that these
meters are quite accurate. If you want
to verify the humidity level in your
cabinet, dial the humidity meter down
to zero and then dial it up until the
green light comes on. When the light
comes on, the dial is pointing at your
humidity level.

24 AMERICANMUSICFURNITURE.COM 25 AMERICANMUSICFURNITURE.COM
Is it possible to put mandolins,
violins, ukuleles and other stringed
instruments in my Guitar Habitat®?
Yes it is. We offer inserts that fit in the
guitar openings that are designed for
smaller instruments. These are made
of walnut, cherry, oak or maple and
can be built to fit most any smaller
instrument. They are lined with cork
just like the openings for your guitars.
Humidifier water is pouring out on
my floor:
You have either overfilled the
humidifier tank, or it is leaking. To
remove the tank from the Guitar
Habitat® remove your guitars, remove
the cork topped rails, and remove the
hatch covers. The cover with the refill
light may have connectors that you
need to unplug to disconnect it from
the humidifier tank. Lift the humidifier
tank out of the Guitar Habitat® and
dry the interior of the humidifier box
that the tank has been resting in. Dry
off the outside of the humidifier tank
and take it to your sink. Pour an inch
or so of water in the tank and set it on
a counter for five minutes to see if any
water is leaking. If the tank is leaking,
please return it to us and we’ll send
out a replacement. If the tank is not
leaking, place it back in your Guitar
Habitat® and refill it making sure that
the water does not come higher in the
tank reservoir than the overflow hole.
My humidifier fan is still running
after the cabinet humidity appears
to be higher than my humidifier set
point.
The humidistat is independent of the
controller and is there for reference.
The setting you make with the dial
is what controls the operation of the
humidifier. A variance of a few percent
is not unusual. However, if you have it
set at 50% and it is still running when
your humidistat reads 55%, call for
customer service at (267) 272-2460.
The LCD display on my Guitar
Habitat® controller is blank and not
displaying information.
For new models:
Check to see if the rainbow cable is
properly seated in the top portion of
your controller. An additional place to
check is at the power supply. Remove
the drawer that is on the same side
as your light switch. Once removed,
follow the rainbow cable to check
whether or not it is properly inserted
into the appropriate receptacle.
For older models (controllers without the
AMF logo):
In older models, the controller is battery
operated. If you see a blank LCD screen,
you may need to replace the batteries.
Simply remove the controller from the
column cover by lifting it up and then
gently pull it off the column towards you.
Remove the battery plate covering and
replace the batteries with fresh ones.
Reinstall the battery plate and remount
your controller.
My humidifier fan is running but the
humidity in my cabinet is not going up.
Check to make sure there is water in
your humidifier and that the wick feels
moist. If your water reservoir is empty
and the low water light has not turned
on, contact customer service for a
replacement controller at
(267) 272-2460.
My drawers or Neck-Tie® are stuck
and won’t open or close.
Your Guitar Habitat™ is made from solid
wood and is hand fitted. Solid wood will
swell and contract when humidity goes
up and down (just like your guitars).
If a drawer or Neck Tie® locks up and
won’t work, it may have been exposed
to more humidity that expected. We’ve
seen drawers stick when the cabinet is
located on top of a vent in homes with
central humidification. It’s important
not to force the cabinet components.
Contact us and we’ll walk you through
a fix.
My Guitar Habitat® has sustained
some finish damage.
Your Guitar Habitat® has been finished
with nitrocellulose lacquer and is easy
to repair as long as you have not used
furniture spray with silicon in it. Send us
some photos and we’ll walk you through
our recommended fix. (267)272-2460.

26 AMERICANMUSICFURNITURE.COM 27 AMERICANMUSICFURNITURE.COM
Care of your cabinet is simple. Use a dry
cloth to dust. Polish with a high quality
furniture polish that does NOT have
silicon in it. Do not use Pledge or similar
polishes as they have silicon which is
impossible to remove and will prevent
simple repairs of scratches in the future.
We recommend Guardsman polish, but
any high quality polish without silicon
will do. Lemon oil can be used about
once a year to refresh the finish. Lemon
oil is a solvent, and overuse can damage
a finish, but annual application can keep
the finish smooth and looking new.
If drawers stick, parts warp, or any
electronics fail, contact us at
(267) 272-2460 for assistance.
All electronic components are
warranted for 24 months from the
date of purchase. Wood and cabinetry
components are warranted for 5 years
excluding glass, and damage caused by
misuse.
SERVICE & SUPPORT
CARE & MAINTENANCE

28 AMERICANMUSICFURNITURE.COM
American Music Furniture, LLC
115 N. 5th St.
Perkasie, PA 18944
www.americanmusicfurniture.com | info@americanmuscifurniture.com | 267-272-2460
Table of contents
Other American Music Furniture Indoor Furnishing manuals
Popular Indoor Furnishing manuals by other brands

Argos
Argos PENTON 462/7757 Assembly instructions

Forte
Forte Corel LRCV711LB Assembling Instruction

Dormiente
Dormiente PINAR Assembly instruction

Aprimatic
Aprimatic WI-MATIC ATC300E MET Fitting instructions

Forte
Forte MKRT153 Assembling Instruction

Homelegance
Homelegance Abbeville 1856-1/-3 Assembly instruction

RACK IT PRO
RACK IT PRO 01906 Assembly instructions

Cooper Lighting
Cooper Lighting Shaper 499-RP specification

Moss
Moss LISCIA Assembly instruction

better homes
better homes BH1609239919 owner's manual

Hülsta
Hülsta now! 4133 Assembly instructions

MACMILANO
MACMILANO SHELVIO CAPITAN MCM022003 Series quick start guide