4. Seal head and shaft sleeve (Ref. No.
17) (where applicable) can now be
pulled from shaft.
5. Pry seal seat from adapter.
6. Push seal head from shaft sleeve
(where applicable).
INSTALLATION OF NEW SEAL
The precision
lapped faces on
shaft seal are easily damaged. Handle
your replacement seal carefully.
1. Thoroughly clean all surfaces of seal
seat cavity.
2. Using a clean cloth, wipe shaft and
shaft sleeve (where applicable) and
make certain that they are perfectly
clean.
3. Wet rubber portion of new seal seat
with a light coating of soapy water.
While wearing clean gloves or using a
clean light rag, press seal seat
squarely into adapter recess. Avoid
scratching white ceramic surface. If
seat will not position properly, place
a cardboard washer over polished
surface and use a piece of pipe to
press in, firmly but gently.
4. Dispose of cardboard washer. Check
again to see that polished surface is
free of dirt and all other foreign
particles and that it is has not been
scratched or damaged.
5. Wet inside rubber portion of new
seal head with a light coating of
soapy water. Slide head onto
shaft/shaft sleeve. Slide shaft sleeve
with seal head onto motor shaft
(where applicable). Seal head and
seal seat will meet. Reinstall any
shims which have been removed. (See
“Shim Adjustment” section.)
6. Replace impeller key (where
applicable), and impeller. Replace
impeller seal (where applicable)
before screwing impeller fastener in
place.
7. Reassemble pump.
8. A short “run-in” period may be
necessary to provide completely leak
free seal operation.
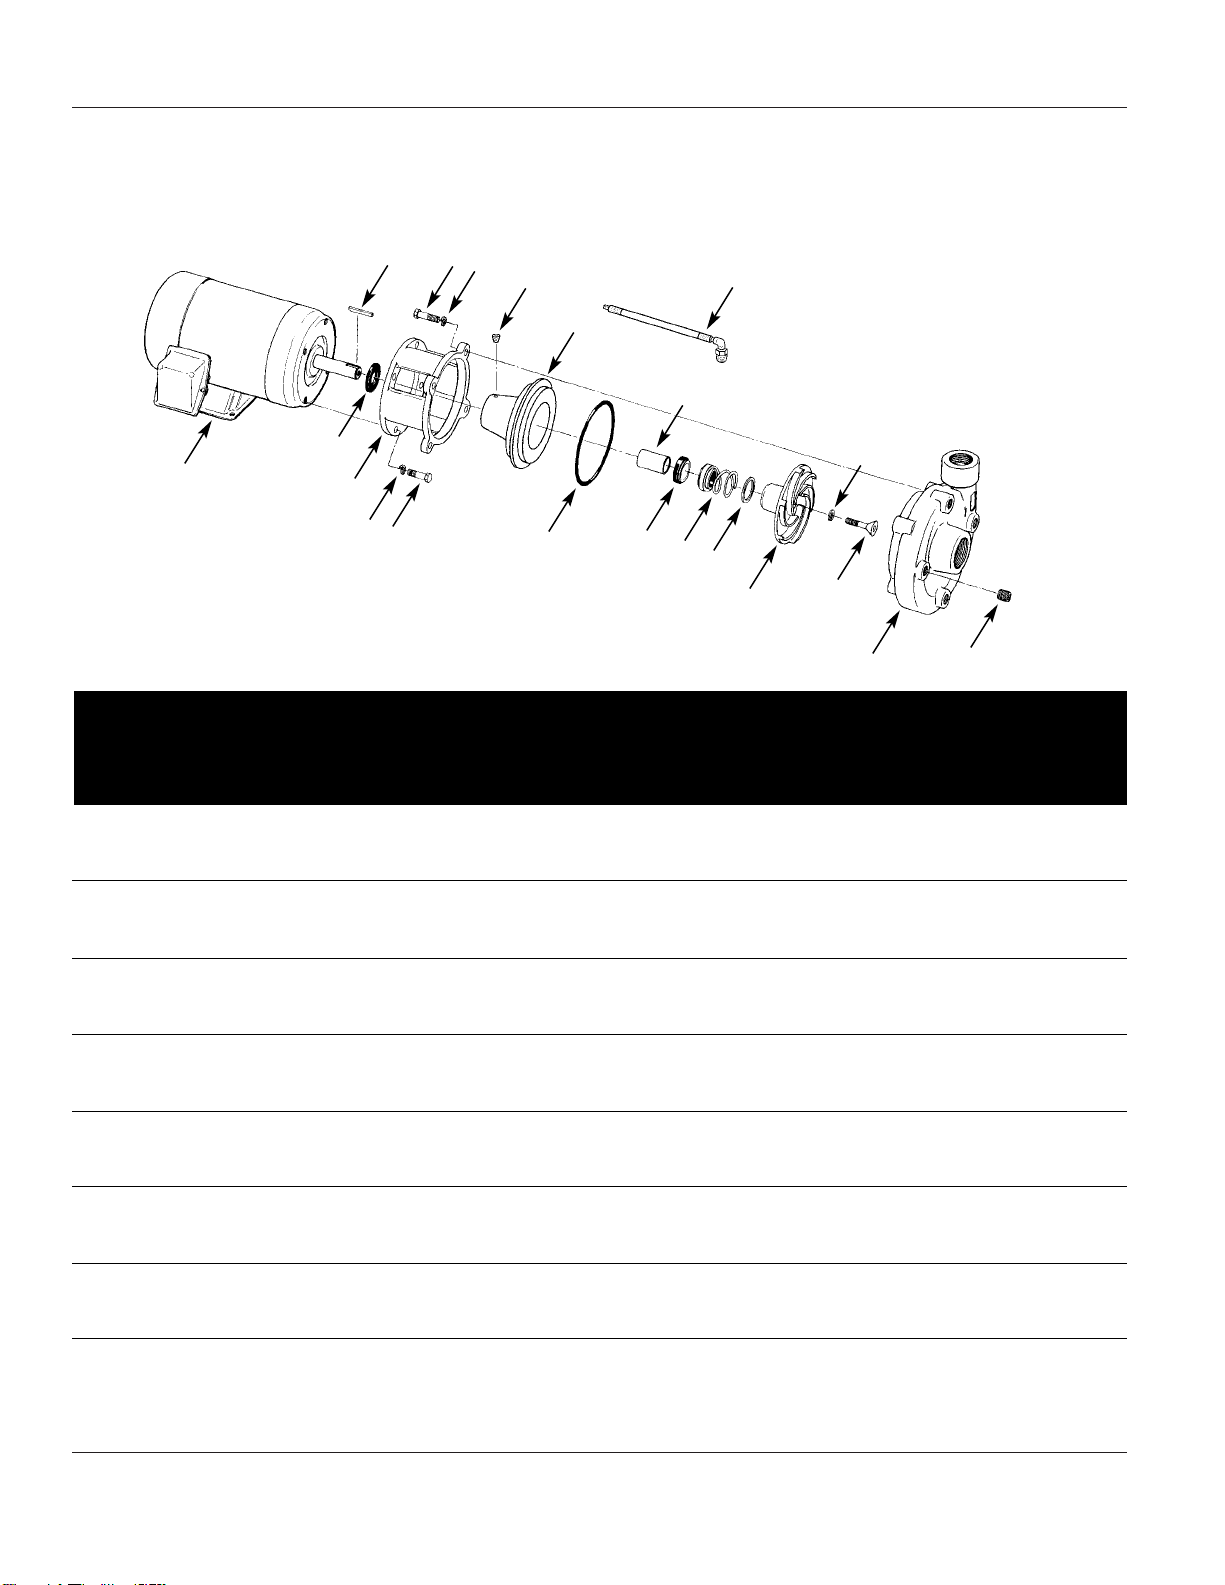
SHIM ADJUSTMENT
When installing a replacement impeller
(Ref. No. 12) or motor (Ref. No. 1), it
may be necessary to adjust the number
of shims (Ref. No. 11) to insure proper
running clearance between impeller
and casing (Ref. No. 14). Proceed as
follows:
NOTE: A proper running clearance is
less than 0.010”.
1. For impeller replacement, add one
0.010” shim in addition to those
removed originally.
2. For motor replacement, add two
0.010” shims in addition to shims
removed during disassembly.
3. Reassemble pump as described in
Steps 6 and 7. (See “Installation of
New Seal” section.)
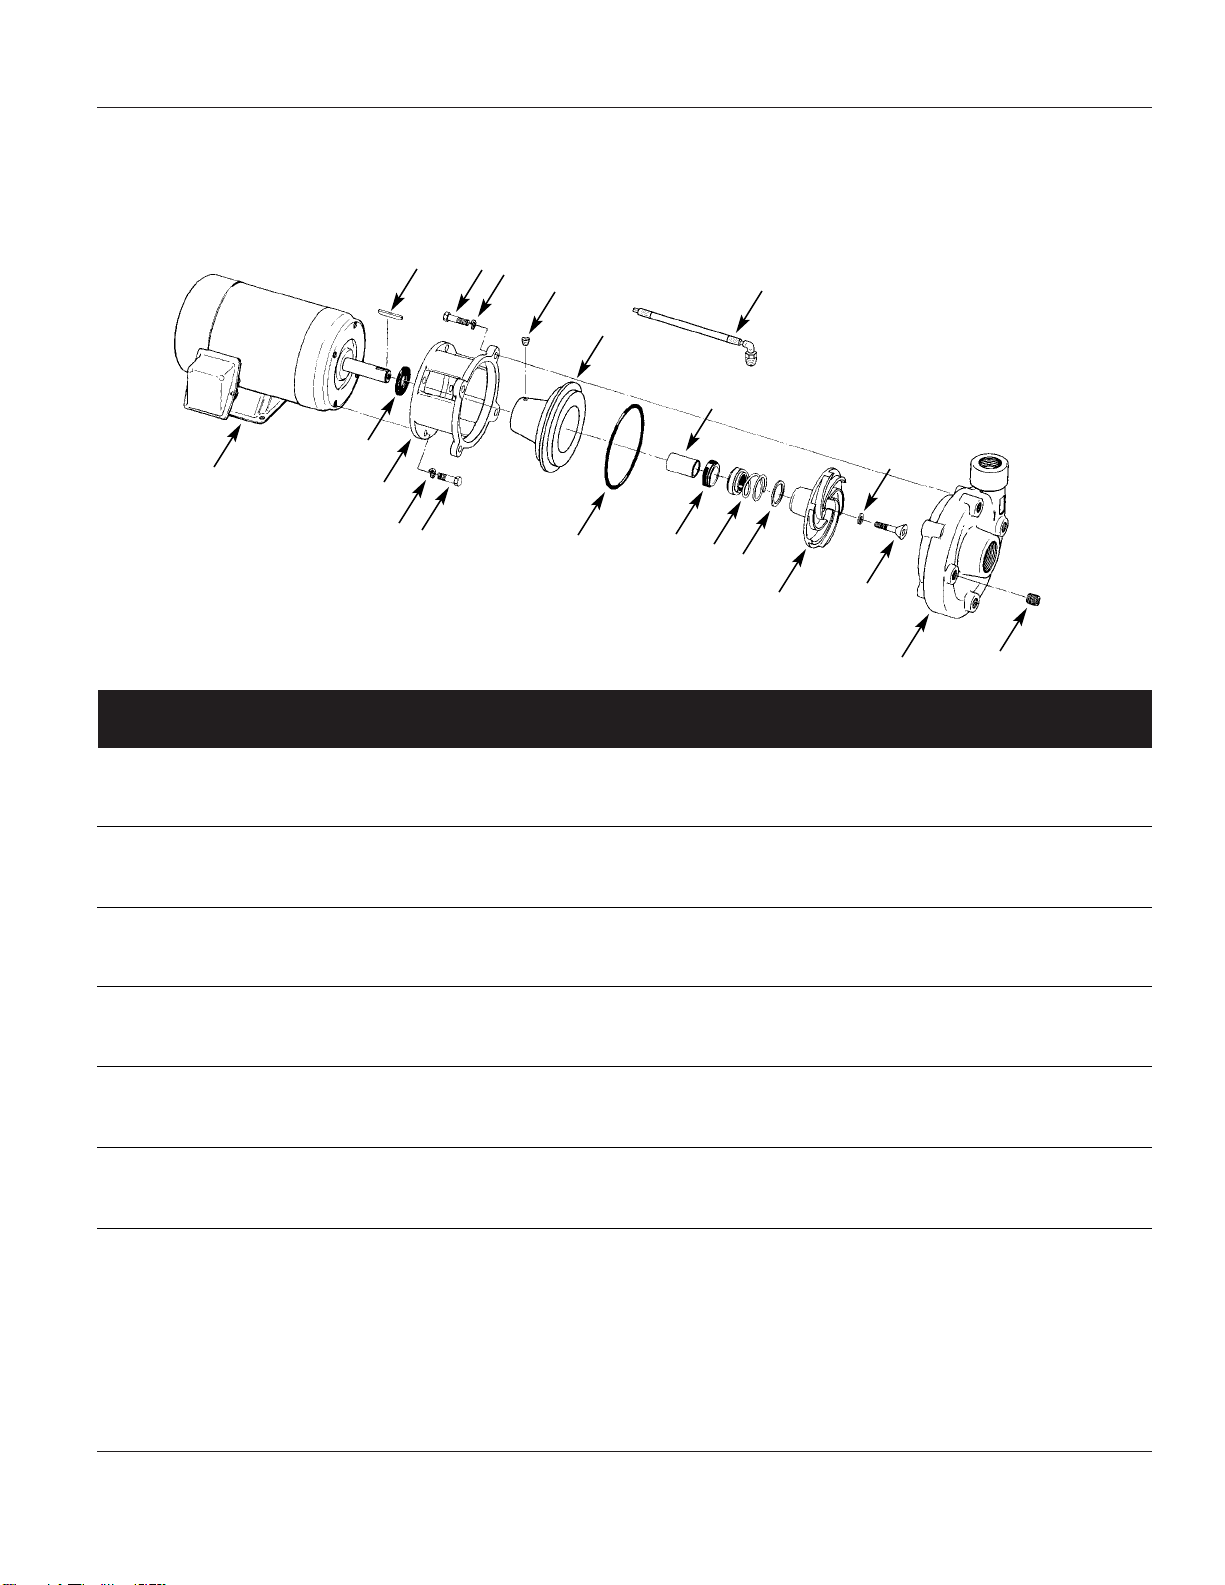
IMPORTANT: Insure that casing is
snugly in place and check shaft to
make sure it is turning freely (rotate
impeller by impeller fastener, Ref. No.
13, with a wrench). If it turns freely,
check to insure that adapter (Ref. No.
3) and casing are fitted “metal to
metal“ where they meet on outside.
If they are not “metal to metal“,
tighten fasteners (Ref. No. 6) and
recheck shaft for free turning.
Tighten carefully, turning shaft while
tightening so that motor bearings are
not damaged in the event that too
many shims were installed. If shaft
seizes before fasteners are completely
tight, disassemble pump and remove
one shim and repeat reassembly.
Specifications Information and
Repair Parts Manual
Centrifugal Pumps
Cast Iron & Bronze Models
3150 thru 315E and
4240 thru 4261
6
Maintenance (Continued)