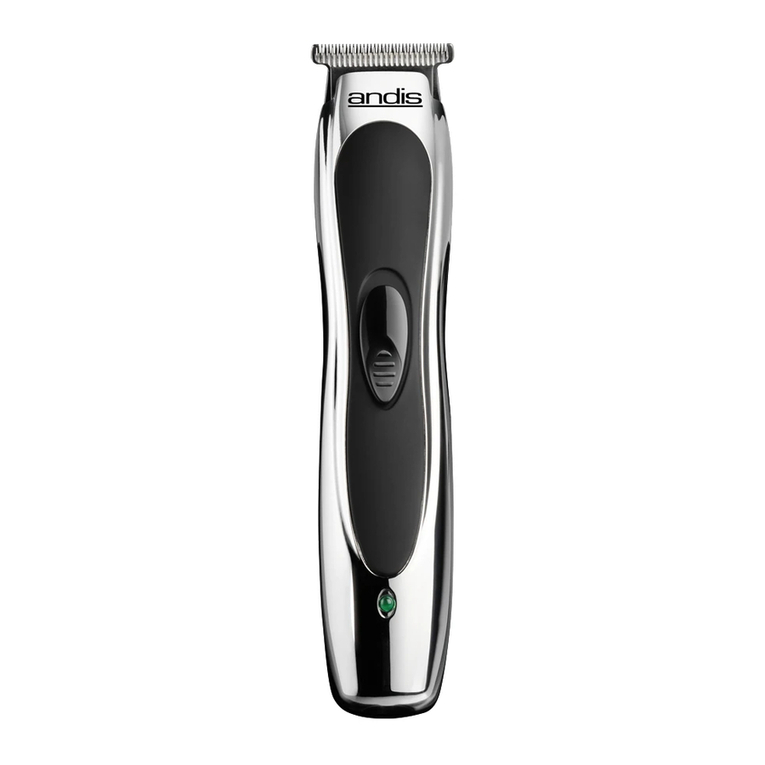
Andis CTB Quick reference guide

USE & CARE INSTRUCTIONS
CTB
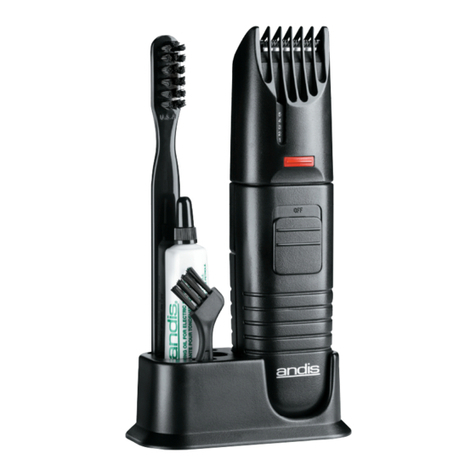
Item pictured may differ from actual product

2
Please read the following instructions before using your
new Andis Trimmer. Give it the care that a ne precision
built instrument deserves and it will give you years of
service.
IMPORTANT
SAFEGUARDS
When using an electrical appliance, basic
precautions should always be followed,
including the following: Read all
instructions before using the Andis
trimmer.
DANGER:To reduce the risk of
electric shock:
1. Do not reach for an appliance that has fallen
into water. Unplug immediately.
2. Do not use while bathing or in a shower.
3. Do not place or store appliance where it can
fall or be pulled into a tub or sink. Do not
place in or drop into water or other liquid.
4. Except when charging, always unplug this
appliance from the electrical outlet
immediately after using.
ENGLISH

3
5. Unplug this appliance before cleaning,
removing or assembling parts.
WARNING:To reduce the risk of
burns, fire, electric shock, or injury to
persons:
1. An appliance should never be left unattended
when plugged in.
2. This appliance is not intended for use by
persons (including children) with reduced
physical, sensory or mental capabilities, or
lack of experience and knowledge, unless
they have been given supervision or
instruction concerning use of the appliance
by a person responsible for their safety.
3. Children should be supervised to ensure
that they do not play with the appliance.
4. Use this appliance only for its intended use
as described in this manual. Do not use
attachments not recommended by Andis.
5. Never operate this appliance if it has a
damaged cord or plug, if it is not working
properly, if it has been dropped or
damaged, or dropped into water. Return the
appliance to an Andis authorized service
station for examination and repair.

4
6. Keep the cord away from heated surfaces.
7. Never drop or insert any object into any opening.
8. Do not use outdoors or operate where
aerosol (spray) products are being used or
where oxygen is being administered.
9. Do not use this appliance with a damaged
or broken blade or comb, as injury to the
skin may occur.
10. Always attach plug to appliance/charger
first, then to outlet. To disconnect, turn all
controls to off position (e.g. “0”) then
remove plug from outlet.
11. Use of a charger not sold by Andis may
result in risk of fire, electric shock, or injury
to person.
12. Do not disassemble charger.Incorrect
reassembly may result in a risk of electric
shock or fire.When repair is required, send or
take it to an Andis authorized service station.
13. The battery in this trimmer is designed to
provide maximum trouble-free life.
However, like all batteries, it will eventually
wear out. Do not attempt to replace battery.
When repair or replacement is required,
send or take it to an Andis authorized
service station.

5
14. Batteries can be harmful to the environment
if disposed of improperly.Many communities
offer recycling or battery collection. Contact
your local government about disposal
practices in your area.
15. Plug adapter cord directly into an AC
outlet. Do not use an extension cord.
16. WARNING: Never touch both terminals on
trimmer with metal objects and/or body
parts, as short circuit may result.Keep away
from children.Failure to comply with these
warnings could result in fire or serious injury.
17. WARNING: During use, do not place or
leave appliance where it may be 1)
damaged by an animal or 2) exposed to
the weather.
18. WARNING: Keep the appliance dry.
19. WARNING: For the purposes of recharging
the battery, only use the detachable supply
unit provided with this appliance.
20. Close supervision is required when this
appliance is used by, on, or near children,
or persons with limited physical, sensory,
or mental capabilities or invalids.
21. Unplug charger before plugging or
unplugging appliance.

6
SAVE THESE
INSTRUCTIONS
THIS PRODUCT INTENDED
FOR PROFESSIONAL USE
OPERATING
INSTRUCTIONS
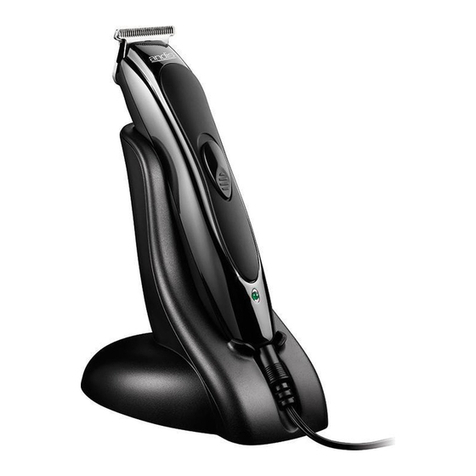
CHARGING TRIMMER USING CHARGING STAND
The AC adapter is intended for use withAndis model CTB
lithium-ion trimmer battery with a rated capacity of 5.0V
1.0A. Remove the trimmer, charging stand and AC adapter
from the carton. Plug the AC adapter into a 120VAC outlet, or
according to your local power standards.Plug the adapter cord
into the receptacle on the back of the charging stand (Figure
A). Place trimmer in the charging stand. The trimmer will
automatically turn off when placed on the charging stand.The
white light on the trimmer will fade in and out while charging
(Figure B).Note that the trimmer can be removed at any time
during the charging cycle without harming the trimmer or
battery. Once the battery is fully charged, the light on the
trimmer will turn solid white.

7
OIL
CLIPPER
INDICATOR
LIGHT
E
J
G
F
H
ARMATURE
PIN
BLADE
YOKE
C
A
D
I
B

8
M
L
N
K
0.10"
LOWER BLADE
UPPER BLADE
The trimmer has not been charged at the factory. Please
charge the trimmer for 2 hours before the first use for
maximum performance.
You can keep the trimmer placed on the charging stand when
not in use.The charging stand will maintain the battery at full
charge.We recommend that the charging stand be unplugged
if the trimmer won’t be used for seven or more days.
FAILURE TO CHARGE
1. Make sure voltage is present at the wall outlet (confirm with
an appliance you know is working).
2. Make sure on/off switch on the trimmer is OFF.
3. Check to make sure adapter cord is plugged firmly into
charging stand.Twist the adapter cord slightly to ensure
good electrical connection.
4. If failure to charge still exists,return trimmer to Andis or an
Andis authorized service station for examination and repair
or replacement.

9
CLIPPER INDICATOR LIGHT STATUS
Running
Battery 25-100% full Solid White
Battery less than 25% full Solid Red
Battery less than 5% full Blinking Red
Charging
Clipper not connected or aligned
correctly in charging stand OFF
Clipper first connects to stand &
starts to charge White Blinks a few
times
Ongoing charging from 0-99% Cycling White
Charging complete/battery full Solid White
TRIMMER INDICATOR LIGHTS
See table for indicator light functions.

10
TRAVEL LOCK FEATURE
This product is equipped with a travel lock feature.To enable
power lock, press power button for longer than 3 seconds.The
white LED will blink 3 times quickly to indicate unit is in travel
lock mode.
WHILE IN TRAVEL LOCK MODE:
-If power button is pressed and released within 1 second,LED
will blink 3 times quickly to indicate unit is in travel lock mode.
-If power button is pressed and released between 1 second and
3 seconds, nothing happens.
-If power button is pressed and held for longer than 3 seconds,
unit will exit travel lock mode and turn on the motor.
USING ATTACHMENT COMBS
(Some models do not have combs and sizes will vary by kit)
Your trimmer may come with 7 attachment combs: 1/16",1/8",
1/4",3/8",1/2",3/4",1". To use, slide front of attachment
comb over the teeth of the blade (Figure C). Snap comb down
over back of blade (Figure C). Use the trimming guide to find
the approximate lengths of cut. Different blade angles in
relation to the skin, thickness and texture of the hair will vary
the cutting length.

11
TRIMMING GUIDE
Description Trimming
Direction
Approximate Length of Cut
Blade set to
shortest cut Blade set to
longest cut
Standard Andis
Blade With hair grain
Against hair grain 1/16” (1.6 mm)
1/32” (0.8 mm) 3/16” (4.8 mm)
1/8” (3.2 mm)
1/16” Attachment
Comb With hair grain
Against hair grain 3/16" (4.8 mm)
3/32" (2.4 mm) 5/16" (7.9 mm)
5/32" (4.0 mm)
1/8” Attachment
Comb With hair grain
Against hair grain 1/4" (6.4 mm)
1/8" (3.2 mm) 3/8" (9.5 mm)
1/4" (6.4 mm)
1/4” Attachment
Comb With hair grain
Against hair grain 3/8" (9.5 mm)
1/4" (6.4 mm) 1/2" (12.7 mm)
3/8" (9.5 mm)
3/8" Attachment
Comb With hair grain
Against hair grain 1/2" (12.7 mm)
3/8" (9.5 mm) 5/8" (15.9 mm)
1/2" (12.7 mm)
1/2" Attachment
Comb With hair grain
Against hair grain 5/8" (15.9 mm)
1/2" (12.7 mm) 7/8" (22.2 mm)
5/8" (15.9 mm)
3/4" Attachment
Comb With hair grain
Against hair grain 7/8" (22.2 mm)
3/4" (19.0 mm) 1-1/8" (28.6 mm)
1" (25.4 mm)
1" Attachment
Comb With hair grain
Against hair grain 1-1/8" (28.6 mm)
1" (25.4 mm) 1-3/8" (34.9 mm)
1-1/4" (31.8 mm)
TRIMMER BLADE ADJUSTMENT
Your Andis adjustable trimmer blade set is easy to adjust.
From coarse to fine cuts,all that is needed is a flick of the
adjustment lever with your thumb.In the upright position, the
blades are set for the finest, or shortest cuts.

12
USER MAINTENANCE
If trimmer is not going to be used for a long period of time,
store in a safe, cool, dry place.Do not wrap adapter cord tightly
around stand. Do not hang the stand by the adapter cord.
The internal mechanism of your trimmer has been
permanently lubricated at the factory. Other than the
recommended maintenance described in this manual, no
other maintenance should be performed, except by Andis
Company or an Andis authorized service station. To contact
Andis directly, please call our Customer Support Team at
1-800-558-9441 or email us at [email protected].
CARE AND SERVICING OF YOUR ANDIS
TRIMMER BLADES
The blades should be oiled before,during,and after each use.If
your trimmer blades leave streaks or slow down,it’s a sure sign
that the blades need oil.The trimmer should be held in the
position shown in Figure D to prevent oil from getting into the
motor.Place a few drops of Andis Clipper Oil on the front and
side of the cutter blades (Figure E).Wipe excess oil off the
blades with a soft dry cloth.Spray lubricants contain insufficient
oil for good lubrication,but are an excellent trimmer coolant.
Discontinue use of broken or nicked blades to prevent injury.
You can clean the excess hair from your blades by using a small
brush or an old toothbrush.To clean the blades we suggest
immersing the blades only into a shallow pan of Andis Blade
Care Plus while the trimmer is running.Any excess hair and dirt
that has accumulated between the blades should come out.
After cleaning,turn your trimmer off,dry the blades with a soft,
dry cloth and start trimming again.

13
REPLACEMENT (REMOVAL) OF BLADE SET
Your trimmer has a preset tension assembly on the blade set.To
remove blade set from your trimmer, remove from charger base.
Turn the trimmer upside down so teeth of blades are facing down.
You may wish to set the trimmer on a flat surface while
performing these operations.Using a phillips type screwdriver,
unscrew the two blade screws (Figure F). Remove blade set from
trimmer.Install new blade set, making sure the blade yoke cradles
the armature pin on trimmer (Figure G).There is no need to adjust
blade tension before use,as tension has been preset at the factory.
Align screw holes of blade set to screw inserts on trimmer
housing. Replace the screws. Before tightening down blade
screws,check alignment of blade set to housing, making sure that
they are parallel.Tighten down screws.

14
REPLACING THE BLADE YOKE
1.Turn the trimmer off.
2. Unscrew the blade screws and remove the blade assembly
from the trimmer assembly (Fig.H)
3. Remove the upper blade/yoke by pulling the lower blade
towards you and away from the lower blade.
4. Place the upper blade/yoke on a flat surface with the yoke
facing upwards.
5. Locate the notches in the blade opposite the teeth and
gently twist the screwdriver clockwise/counterclockwise
between the blade and the yoke.(Fig J)
6. Completely remove the yoke from the upper blade and
clean the surface of the upper blade to remove any debris.
7. Place the new yoke into the mating hole with the groove
facing towards the teeth and press firmly ensuring the
tension spring mates with the groove on the yoke,
alternating from one side to the other until the yoke fully
seats in the upper blade.
8. Set the blade gap of the upper blade to the lower blade to
your preference,taking care that the upper blade does not
overhang, as it can cause damage to skin.(The blades are
gapped at 0.010” from the factory.) (Fig.N)
9. To re-assemble the blade ensure the lower blade holes
align with trimmer blade screw holes and the cam fits
between the yoke arms.
10. Reattach the two blade screws,once again confirming that
the upper blade does not travel over the lower blade.

15
USE GUIDELINES FOR LITHIUM-ION BATTERIES
1.The lithium-ion battery included with your trimmer does not
develop a “memory effect” like a nickel-metal hydride
(NiMH), or nickel cadmium (NiCd) battery.You can return
the trimmer to the charger at any time for a full charge,or
even use the battery before a charge cycle is complete.Like
most rechargeable batteries, lithium-ion batteries perform
best when used frequently.
2. For maximum battery life,store the trimmer in a partially
discharged condition if the unit will be unused for several
months.To discharge the battery, run the trimmer under
normal conditions. Battery should be recharged again
before re-use.
3.Avoid locating the trimmer near heat vents,radiators, or in
direct sunlight. Optimum charging will result where the
temperature is stable.Sudden increases in temperature can
result in the battery receiving less than a full charge.
4. Many factors influence lithium-ion battery life.A battery that
has received heavy use or is more than a year old may not
give the same run-time performance as a new battery pack.
5. New lithium-ion batteries, unused for a period of time, may
not accept a full charge.This is normal and does not
indicate a problem with the battery or charger.The battery
will accept a full charge after several cycles of trimmer use
and recharging.
6. Disconnect the charger or the trimmer from the AC outlet if
extended periods of non-use are anticipated.

16
CORRECT BATTERY DISPOSAL
The product you have purchased contains a rechargeable
battery.The battery is recyclable.Please dispose of this battery
in a responsible manner.Check with your local solid waste
officials for collection facility or the details in your area for
recycling options or proper disposal.
BLADE & TRIMMER REPAIR SERVICE
When the blades of your Andis trimmer become dull after
repeated use,it is advised to purchase a new set of blades
available through your Andis supplier or through anAndis
authorized service station. Some blade sets can be
resharpened - contact Andis Company for information on
resharpening. If you wish your trimmer to be serviced as well,
it should be carefully packed and mailed either Parcel Post
Insured, or U.P.S. to anyAndis authorized service station. To
contact Andis directly, please call our Customer Support
Team at 1-800-558-9441 or email us at [email protected].
CAUTION: Never handle yourAndis trimmer while
you are operating a water faucet,and never hold your
trimmer under a water faucet or in water.There is danger
of electrical shock and damage to your trimmer. Andis
Company will not be responsible in case of injury
due to this carelessness.

17
MANUFACTURER’S 12 MONTH LIMITED WARRANTY
This Andis product is warranted against defective material or workmanship for 12 months
from the date of purchase. All express and implied warranties arising out of and applicable
to the product by virtue of State law shall also be limited to 12 months from the date of
purchase.Any Andis product determined byAndis to be defective in material or workmanship
during the warranty period will be repaired or replaced, at Andis’ sole discretion, without
cost to the consumer for parts and labor. To qualify for this limited warranty, the defective
product must be returned via parcel post insured or U.P.S., with proof of purchase to
Andis, 1800 Renaissance Blvd., Sturtevant, WI 53177 USA. Please include a letter describing
the nature of the problem.
Due to foreign matter sometimes found in hair and for other reasons, clipper blades or the
resharpening of blades are not subject to this limited warranty.Andis will not be responsible
for the replacement, cost of repairs, or alterations made to its products by any other person,
agency or company. Except as stated above,Andis does not provide and expressly disclaims
any implied warranty of merchantability or tness for a particular purpose, or any other
warranty of any kind whatsoever. Under no circumstances will Andis be responsible for
incidental or consequential damages of any type, or for any liability arising out of the use of
unauthorized attachments.Some states may not allow exclusion or limitation of incidental or
consequential damages, so this limitation or exclusion may not apply to you.
Date Purchased ________________________________________
Model _____________________________________________
To nd an Andis Authorized Service Station near you log on to andis.com
or contact our customer service department: 1-800-558-9441
WARNING:
NO WARRANTYIF PURCHASED FROM UNAUTHORIZED SELLERS OF
ANDIS PRODUCTS
To ensure you are receiving an authentic, safe, quality product, you must purchase Andis
products only through authorized sellers. Log on to andis.com or contact our customer
service department at 1-800-558-9441 (U.S.) to review a list of our authorized sellers. These
sellers are approved or certied by our company. If you do not purchase through one of these
companies, we cannot assure the authenticity or condition of any Andis products, nor can
we offer our warranty and related services for any products purchased from an unauthorized
seller.Any such warranty is void and any warranty claim made for a product purchased from
an unauthorized seller will be denied. Any sale or use by these unauthorized sellers of our
products, and the marketing images, logos, trademarks and copyrighted material on our
products, is also unauthorized.

18
ESPAÑOL
Lea las siguientes instrucciones antes de usar su nueva
máquina de acabado Andis. Trate este instrumento de
precisión con el cuidado que se merece y le brindará un
excelente funcionamiento durante años.
PRECAUCIONES
IMPORTANTES
Al utilizar un aparato eléctrico,siempre deben
seguirse las precauciones básicas de seguridad,
entre ellas: Lea todas las instrucciones antes
de utilizar la máquina de acabado Andis.
PELIGRO:Para reducir el riesgo de
descarga eléctrica:
1. Si un aparato se cae al agua, no trate de
sacarlo. Desenchúfelo inmediatamente.
2. Noloutiliceal ducharse o al bañarseenunabañera.
3. No coloque ni guarde el aparato donde sea
posible que se caiga, o alguien pueda jalarlo,
en una bañera o un lavabo.No lo coloque ni
lo deje caer en agua u otro líquido.
4. Salvo cuando lo esté cargando, siempre
desenchufe este aparato del tomacorriente
eléctrico inmediatamente después de
usarlo.

19
5. Desenchufe este aparato antes de limpiar,
desmontar o ensamblar las piezas.
ADVERTENCIA:Para reducir el
riesgo de quemaduras, incendio, descarga
eléctrica o lesiones a personas:
1. Un aparato nunca debe dejarse desatendido
mientras está enchufado.
2. Este aparato no está diseñado para ser usado
por personas (incluidos niños) con capacidades
físicas, sensoriales o mentales reducidas, o sin
la experiencia y el conocimiento necesario para
manipularlo,a menos que lo hagan bajo
supervisión o hayan recibido instrucciones con
respecto al uso del aparato por parte de una
persona responsable de su seguridad.
3. Es necesario supervisar a los niños para
asegurarse de que no jueguen con el aparato.
4. Utilice este aparato exclusivamente para su
uso previsto, tal como se describe en este
manual. No utilice accesorios no
recomendados por Andis.

20
5. Nunca utilice este aparato si su cable
eléctrico o enchufe están dañados, si no
funciona correctamente, si se ha caído o
dañado, o si se ha sumergido en agua.
Devuelva el aparato a un centro de servicio
técnico autorizado de Andis para que lo
revisen y reparen.
6. Mantenga el cable eléctrico lejos de
superficies calientes.
7. Nunca deje caer el aparato ni inserte ningún
objeto en ninguna de sus aberturas.
8. No lo utilice al aire libre,ni donde se estén
usando productos en aerosol (nebulizados) o
donde se esté administrando oxígeno.
9. No utilice este aparato con una cuchilla o
peine dañado o roto, ya que se podrían
producir lesiones en la piel.
10. Conecte siempre primero el enchufe al
aparato/cargador y luego al tomacorriente.
Para desconectarlo, coloque todos los
controles en la posición de apagado (por
ejemplo, “0”) y, a continuación, retire el
enchufe del tomacorriente.
11. El uso de un cargador no comercializado por
Andis puede ocasionar un riesgo de incendio,
descarga eléctrica o lesiones a personas.
Table of contents
Languages:
Other Andis Electric Shaver manuals

Andis
Andis UltraEdge AGC2 User manual

Andis
Andis BTF Quick reference guide

Andis
Andis US-1 Quick reference guide

Andis
Andis TS-1 Quick reference guide

Andis
Andis BTS User manual

Andis
Andis SL3 Quick reference guide

Andis
Andis HSP-1 User manual

Andis
Andis ORL Quick reference guide

Andis
Andis BTF2 User manual

Andis
Andis BTF User manual

Andis
Andis AS-1 User manual

Andis
Andis RBC Installation instructions

Andis
Andis HEADLINER LS2 User manual

Andis
Andis RBC Installation instructions

Andis
Andis TS-2 Quick reference guide

Andis
Andis WDS-1 Quick reference guide

Andis
Andis Headliner 2 Quick reference guide

Andis
Andis RT-1 Installation instructions
Andis
Andis SCX User manual

Andis
Andis AEE 120V User manual