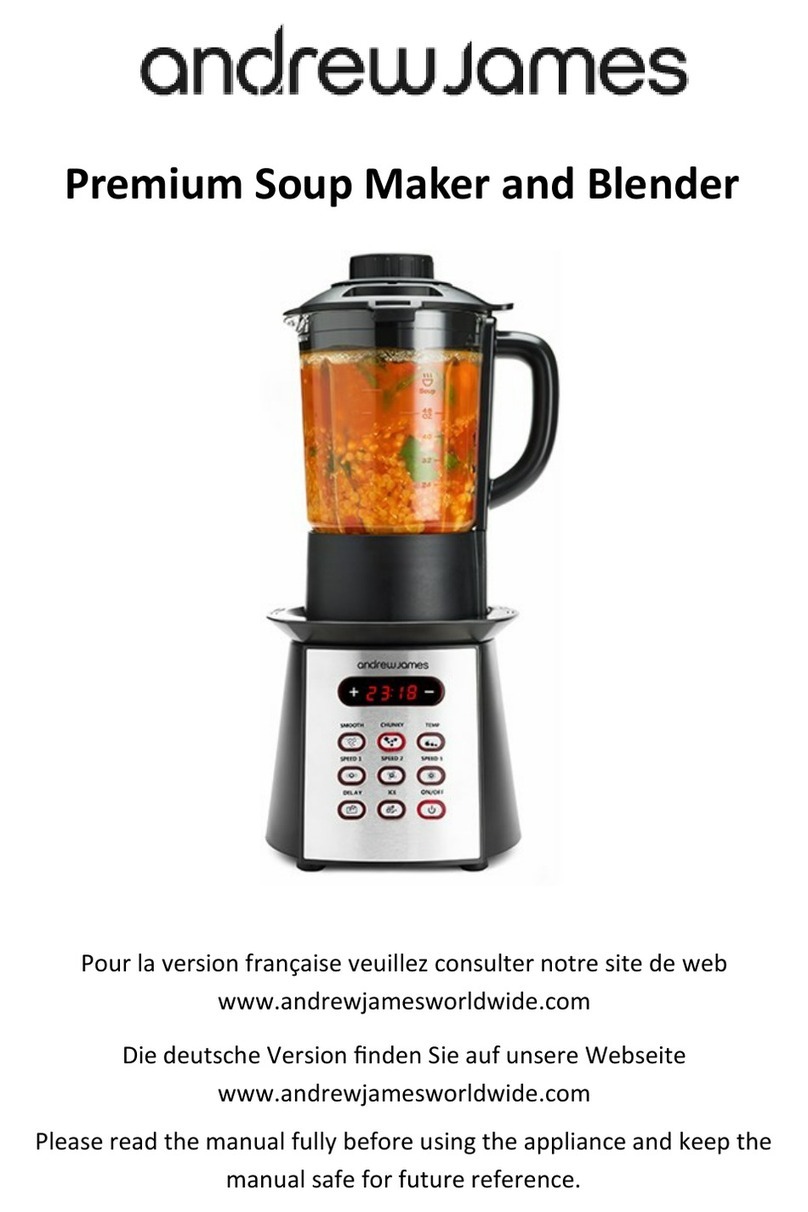
Andrew James Soup Maker & Blender User manual

1
Please read the manual fully before using the appliance and keep the
manual safe for future reference.
Soup Maker & Blender

2
Contents page
General safety instrucons Page 3
Appliance components details Page 6
Before rst me use Page 7
Assembling the appliance
Page 8
Page 9
Page 10
Page 10
Page 11
Page 11
Page 12
Page 12
Page 12
Page 14
Page 15
Page 16
Cleaning Page 17
Suggested recipes Page 19
Troubleshoong Page 33
UK and EU Guarantee Page 35
Electrical informaon Page 35
Disposal of the appliance Page 38
Contact details Page 38

3
General safety instrucons
When using any electrical appliance, basic safety precauons should always be
followed, including:
This appliance can be used by children aged from 8 years and above and
persons with reduced physical, sensory or mental capabilies or lack of
experience and knowledge if they have been given supervision or instrucon
concerning use of the appliance in a safe way and understand the hazards
involved. Children shall not play with the appliance. Cleaning and user
maintenance shall not be made by children unless they are older than 8 and
supervised. Keep the appliance and its cord out of reach of children less
than 8 years old.
Always ensure the voltage on the rang label corresponds to the voltage in
your home.
Check the power cord and plug regularly for any damage. If the cord or the
plug is damaged, it must be replaced by a qualied electrician or a service
repair centre. If in doubt please contact our customer service team.
The appliance is intended for domesc use only. Industrial or commercial
use will void the warranty. The supplier cannot be held responsible for injury
or damage if the appliance has been used for anything other than its
intended use.
Incorrect operaon and use can damage the appliance and cause injury to
the user.
Do not use the appliance if it has been dropped or damaged in any way. If
the unit has been damaged take the unit for examinaon and or repair by an
authorised service agent.
Do not immerse or expose the motor assembly, plug or the power cord in
water or any other liquid for any reason.
If the supply cord is damaged, it must be replaced by the manufacturer or by
someone who is suitably qualied to avoid a potenal hazard.
Do not let the cord hang over the edge of a table or counter. Ensure that the
cord is not in a posion where it can be pulled or tripped over accidentally.
Do not allow the cord to touch hot surfaces and do not place the cord near
hot gas, electric burners or in a heated oven.
Use of an extension cord with this appliance is not recommended. However
if it is necessary to use an extension cord, ensure that the extension cord is
equal to or greater than the power consumpon of the appliance to avoid
overheang of the appliance and extension cord. Do not use any other
appliance on the extension cord. Do not place the extension cord in a
posion where it can be pulled on by children or animals or be tripped over.
Always operate the appliance on a smooth, even and stable surface. Do not
4
place the unit on a hot surface.
Always remove the plug of the appliance safely. Do not pull on the
appliances cord to remove the appliance plug from the electrical socket.
Never handle or operate the appliance with wet hands.
Product safety instrucons
This appliance is to be used with solid or liquid food only.
During and aer cooking, beware of steam that could escape from the cover.
Never use food that is too big for the jug. Always remove any packaging,
aluminum or cling lm that can be aached to food.
Do not use other accessories than those provided with the appliance as it
can damage the appliance.
The stainless steel blades are very sharp. Always handle them with cauon in
order to avoid any risk of injury.
We recommend you use the measuring cap to put food in the soup maker,
never push food in with your ngers, or any other cooking utensil.
Do not use the soup maker without the cover.
If necessary always open the measuring cap slowly and with cauon when
the appliance is mixing very hot liquids. Always keep your hands away from
the cover to avoid any risk of burning from liquids.
Do not touch the appliance jug when it is hot.
Check that every component is correctly installed before starng the blender.
To do so, refer to the installaon secon of this manual.
Always wait for the motor to completely stop moving before removing the
jug from the motor unit or removing the bowl cover.
Do not put the jug, the cover and the measuring cap into the refrigerator, the
freezer or in a dishwasher.
Do not operate the appliance when it is empty.
Always use the appliance on a at dry and level surface.
Do not use the appliance to process very dry or hard food, as this could
damage the blade as well as the motor.
Do not use your appliance to mix hot food. Always let the food cool down
unl it is at a manageable temperature before pung them in the jug.

5
Do not tamper with the security systems of the appliance.
Never leave the appliance working unsupervised.
Do not exceed the maximum levels indicated on the bowl.
Always unplug the cord from the mains in any of the following
circumstances:
-Before aaching any accessories.
-Before washing the appliance.
-If the machine develops a fault.
-If the machine is not going to be used for long period of me.

6
Appliance components details
1.
2. 3.
4.
5. 6.
7.
8.
9.
10. 11. 12. 13.
14. 15. 16.
17.
18. 5. 19. 21.
20.
4.
1. Removable cap 9. Electric socket 17. Grinder cup
2. Jug lid 10. Steam/ Boling funcon 18. Grinder base
3. Magnet inside 11. Soup chucky funcon 19. Food steamer basket
4. Egg boiler aachment 12. Reheat funcon 20. Brush
5. Stainless steel lter 13. Pulse funcon 21. Sponge
6.Magnec safety switch inside 14. Soup smooth funcon
7. Overow protecon sensor 15. ON/OFF
8. An–dry steamer 16. Blend funcon

7
Before rst me use
Unpack the appliance.
Remove any packaging such as plasc bags, cardboard and papers protecng
the blenders various components.
Wash the inside of the jug by hand and rinse it in clean water. Wipe the
outside of the jug with a so, damp cloth.
When cleaning the motor unit, jug and grinder base, always be cauous of
the electrical connecons and do not submerge these parts in water or any
other liquid. Wipe with a damp cloth.
Wash the following components with warm soapy water and rinse it with
clean water:
-Removable cap
-Jug lid
-Egg boiler aachment
-Stainless steel lter
-Grinder cup
-Food steamer basket
Make sure that the components are completely dry before assembling the
appliance.
Please note that the silicone seal may be detached from the stainless steel
lter when unpacking the appliance. Please aach the silicone seal to the
boom of the stainless steel lter before use.
Aenon: Never submerge the jug, the motor unit or the grinder base in water/
liquids or put it in the dishwasher.

8
Assembling the appliance
Detachable cap
Put the cap into the hole located on the cover.
Make sure that the measuring cap is locked before proceeding with the
assembly of the appliance. The lock symbols on the lid need to be facing
towards the back of the appliance in line with the handle for the appliance to
funcon correctly.
Jug
Hold the jug by its handle in your right hand.
Carefully put the jug on the motor unit ensuring that it is securely aached to
the motor unit.
To remove the jug from the motor unit and pour your mix, just push the jug
forward, holding it by the handle as shown in the diagram.
Aenon! If your jug contains hot food, beware of
possible projecons when removing it.
Place the cover over the jug and turn it
clockwise to lock it.
Your appliance can now be used.
Note: The soup maker and blender has a built in
double security system. The appliance will only work
if every part is correctly installed and if the contents
of the jug reaches or covers the overow protecon
sensor the appliance will automacally switch o.
Once the appliance has nished operang, allow me for the measuring jug to cool
down as the unit is ed with a temperature sensor. You can do this by placing ½
pint of lukewarm water in the measuring jug and leave to stand for 10 minutes. DO
NOT use cold water as this could cause thermal shock to the heang element and
damage the heang element.

9
Using your soup maker and blender
10. 11. 12. 13.
14. 15. 16.
Soup chunky (11) Allows you to make soups with small diced vegetables. This
pre-programmed funcon alternates heang and mixing
during a 30 minute period then stops. Please note when
using this funcon please place the mesh lter in the middle
of the jug. If you wish to not blend some ingredients place
Reheat (12) Soup that is prepared in the soup maker can be reheated.
The pre-programmed funcon alternates heang and
mixing during a 10 minute period, then stops.
Pulse (13) Allows you to blend the contents of the unit in short bursts.
Blend (16) The mixing only funcon allows you to make delicious
mousse as well as tasty milkshakes and smoothies. This pre-
programmed funcon mixes for a 3 minute period, then
stops.
Soup smooth (14) This funcon enables you to make soups that are smooth
and creamy. This pre-programmed funcon alternates
heang and mixing during a 20 minute period then stops.
Steam/Boiling (10) With the supplied food steamer basket and egg boiler
aachment you can steam food such as vegetables and boil
eggs.

10
The control panel of the soup maker and blender
1. Standby mode: All lights are on.
2. When using the soup funcon, the machine will beep once indicang that
the blender will automacally move to the next step of the soup making
process.
3. When you select a funcon the machine will beep once, indicang that the
blender will automacally move to the next step of the soup making
process.
4. When the procedure is
nished, it will beep 10
mes and the middle four
lights will be on, as
illustrated In the diagram.
Making soup
To make soup, proceed with the following steps:
1. Plug your appliance into the mains and turn the mains switch on, you will
hear a beep sound to indicate that it is plugged in.
2. Cut your vegetables in 2cm dices, add water or stock. The food (solid or
liquid) must not exceed the maximum mark of the jug, make sure solid food
is fully covered by liquid. Close the cover.
3. Push the On/O buon, you will hear a beep and all the lights on the
command panel will ash.
4. The heang process starts straight aer the cooking is nished. You can stop
this at any me by pressing the buon again corresponding to the opon
you inially choose.
Cauon: High starch food/ ingredients like powder, our, sugar, milk and cream will
burn if it is put in at the beginning of the cooking process. We recommend adding
them aer the compleon of cooking, then use the pulse funcon mix the food/
ingredients for a few seconds.
Noce: You can also make simple compotes such as apple or pear. Add water unl

11
the water minimum mark. Add the apples or pears, peeled and cut, then select the
soup funcon you require.
Making smoothies, milkshakes and mousse
To make a smoothie, proceed with the following steps:
1. Plug your appliance into the mains and turn the mains switch on, you will
hear a beep sound to indicate that it is plugged in.
2. Put the ingredients in the jug according to your recipe. The food placed in
your bowl must not exceed the maximum mark of the jug. Close the cover.
3. Push the On/O buon, you can hear a beep and all the lights on the
command panel will ash.
4. Select the blend funcon, the appliance will beep twice indicang that the
funcon is selected (the selected funcons light will ash on and o).
5. The mixing will start straight away, the working me is pre-programmed at 5
minutes. The appliance will operate the various steps of mixing.
6. Your blender will stop automacally aer the food is mixed, you can also
stop it anyme by pressing the blend buon.
Making crushed ice (Pulse funcon)
To make crushed ice proceed with the following steps:
1. Plug your appliance into the mains and turn the mains switch on, you will
hear a beep sound to indicate that it is plugged in.
2. Put your ice cubes (or other ingredients) in the jug. Close the cover. The ice
must not exceed the maximum mark of the bowl. We recommend you only
crush small amounts of ice for opmal results.
3. Push the On/O buon you can hear a beep and all the lights on the
command panel will ash.
4. Select the pulse funcon and hold it as long as necessary.

12
Grinding food (Pulse funcon)
The soup maker and blender comes with a separate food grinder aachment. To
grind food proceed with the following steps:
Put the food that you would like to grind in the grinder cup ensuring that
there is more than 100g of ingredients in the aachment.
Aach the grinder cup to the grinder base and ensure that the cup is
securely aached to the grinder base by twisng the cup clockwise.
Carefully put the grinder on the motor unit, just li the grinder from the
unit, holding it by the grinder cup.
Plug your appliance into the mains and turn the mains switch on. You will
hear a beep sound to indicate that it is plugged in.
Push the On/O buon, you will hear a beep and all the lights on the
command panel will ash.
Select the pulse funcon and apply pressure throughout the grinding
process and repeat it if necessary.
Examples of food that can be used in the grinder are coee beans, nuts without
shells.
Noce: Do not immerse the grinder base into water or any other liquids.
Making a fruit or vegetable coulis
To make coulis proceed with the following steps:
Plug your appliance into the mains and turn the mains on, you will hear a
beep sound to indicate that the appliance is plugged in.
Put the stainless steel lter into the jug, use of the plasc ridges located
inside the jug to ensure that the 2 extended slots of the lter are securely
xed into the jug—this will help you to insert the lter securely.
Close the cover, which will lock the lter.
Remove the measuring cap from the cover and pour the food to be mixed
into the cover centre hole.

13
5. Push the On/O buon, you will hear a beep and all the lights on the
command panel will blink.
6. Select the blend funcon, the appliance will beep twice indicang that the
funcon is selected. The blend funcons lights will ash.
7. The mixing starts straight away, the working me is pre-programmed at 5
minutes. The appliance will operate various steps of mixing.
8. Your blender will stop automacally aer the food is mixed, you can also
stop it anyme by pushing the blend buon.
9. Pour the mixture out of the blender ensuring that you take care to keep the
lter xed, in order to separate the seeds and skin from the puree.
Making soy milk
To make soy milk proceed with the following steps:
Soak 90g of yellow soy beans for 4-6 hours.
Plug your appliance into the mains and turn the mains switch on, you will
hear a beep sound to indicate that the appliance is plugged in.
Put the stainless steel lter into the jug, with the use of the plasc ridges
located inside the jug ensure that the extended slots of the lter are securely
xed in the jug, this will help you to insert the lter securely.
Close the cover, which will lock the lter.
Remove the measuring cap from the cover and pour the soaked beans as
well as 60cl of water into the cover centre hole.
Push the On/O buon, you can hear a beep and all the lights on the
command panel will ash.
Select the funcon “Chunky soup”. Once the process is over, the soy milk is
ready.
Separate the milk and the beans, by pouring out the soya milk and allow it
cool down before drinking.

14
Note: Soy milk is a high source of protein and is fully suitable for people who are on
a vegetarian diet. Without lactose, it is perfectly suitable for people who are lactose
intolerant. Soy milk can also be processed into a dessert (the texture should be
close to yoghurt) or tofu. Aer making the soy milk, the pulp from ground beans
(called okara) can be taken from the lter and be used to make breads or cakes.
Other uses of the lter
The lter can also be used to make soups with dierent consistencies. For example
a pistou soup:
Put the fresh and dry vegetable outside the lter, some diced potato into the lter
and cover with water up to the Max mark. Use the Soup Chunky funcon to process
and remove the lter before serving: You will get a smooth soup with full pieces of
vegetables. Don’t forget to add a generous spoonful of pesto to spice up your soup.

15
Using the egg boiler aachment
To boil eggs proceed with the following steps:
1. Plug your appliance into the mains and turn the mains switch on, you will
hear a beep sound to indicate that the appliance is plugged in.
2. Put the egg boiler aachment into the jar with the handle facing upwards.
3. Pour water up to the water minimum mark. Put your eggs on to the egg
boiler aachment and close the cover.
4. Push the On/O buon, you can hear a beep and all the lights on the control
panel will ash up.
5. Select the funcon Steam/boiling, the appliance will beep twice indicang
that the funcon is selected. The selected funcon’s light will ash.
6. The cooking funcon will start straight away, the working me is
pre-programmed for 15 minutes and you can stop the appliance anyme
by pressing the Steam/Boiling buon.
7. Recommended cooking mes:
- 4 and a ½ minutes for so-boiled eggs.
- 8 minutes for hard-boiled eggs.
- 4 minutes for quail eggs.

16
Using the food basket
To steam food, proceed with the following steps:
1. Plug your appliance into the mains and turn the mains switch on, you will
hear a beep sound to indicate that it is plugged in.
2. Put the basket into the jar, there are 4 slots in the jug which the basket will
slot into, to secure it in place. Pour water up to the soup minimum/steam
maximum level, put your vegetables in the basket and close the cover.
3. Push the On/O buon; you will hear a beep and all the lights on the
control panel will ash up.
4. Select the Steam funcon, the appliance will beep twice indicang that
the funcon is selected. The selected funcon’s light will ash.
5. The cooking starts straight away, the cooking me is dependent on the
food being steamed for example we recommend you steam vegetables
for around 10 minutes, the working mes are preprogrammed for 15
minutes, but you can stop the appliance anyme by pressing the Steam
buon.
Note:
Please note cooking mes vary depending on the dierent ingredients.
Re-Heat Funcon
To warm up a soup made with the appliance, proceed with the following:
1. Plug your appliance into the mains and turn the mains switch on, you will
hear a beep sound to indicate that it is plugged in.
2. Pour your soup into the jar according to your recipe. The food must not
exceed the maximum mark of the jug. Close the cover.
Note:
If you warm up a soup that was made in the bowl, let the bowl cool down
completely and empty the contents of the bowl and wash it to get rid of
potenal food deposits concentrated at the boom of the jar, pour the soup
back in the bowl again.

17
Push the On/O buon, you will hear a beep sound and all the lights on
the command panel blink.
Select the reheat funcon, the appliance will beep twice indicang that
the funcon is selected. The warm up funcon’s light will ash.
The cooking and the mixing starts straight away, the working me is pre-
programmed for 10 minutes. The appliance will operate various steps of mixing and
cooking.
Your blender will stop automacally aer the food is warmed up, you can also stop
it anyme by pressing the reheat buon.
Cleaning
The jug can be washed using the soup chunky and coarse funcon buons, it will
clean and will rinse itself quickly.
Empty the jug and put some warm water with dishwashing liquid into the
jug.
Use the funcon for a few minutes. For stubborn stains please use the pulse
funcon.
Empty the water and rinse it carefully before next using the blender.
Noce: If the food is stuck. add the juice of 2 lemons into the jar then add water up
to the minimum mark. Select the appliances Soup Chunky or Coarse soup funcon.
The combined acon of heat and lemon juice will help remove the residue. If
necessary repeat again.
Other elements of the appliance
It is easier to proceed to the washing straight aer using the appliance. As it
will be much easier to clean the appliance.
Always unplug your appliance before washing.
The inside of the jug, as well as every accessory can be washed with mild
soapy water with the supplied brush and sponge.
Do not use abrasive sponges or chloride products (bleach).
Do not immerse the motor unit, the jug and grinder base under water/

18
liquids. To clean it, use a so wet cloth.
Never put the jug, the motor unit or grinder base in the dish-washer.
Certain types of food such as carrots or red cabbage can slightly nt the accessories.
To clean them, we recommend you to rub them with some oil and wash them again.
Helpful ps for use
Cut the solid food into 2cm cubes before mixing them.
To get the best result when mixing solid food, process small quanes rather
than mixing everything together at the same me.
When mixing liquids such as soups, smoothies ,milk shakes etc., begin with a
small quanty of liquid and then add lile by lile through the hole in the
cover of the jug, to do so remove the measuring cap from the jug.
To blend solids or thick liquids, use your blender in the pulse mode, to avoid
jamming the blade.

19
Suggested Recipes
Roasted Tomato and Garlic Soup
Preparaon me: 30 mins
1 kg ripe, vine tomatoes
1 head of garlic
1 tbsp. olive oil
1 tsp thyme
1 tsp oregano
1 large onion, diced
300ml vegetable stock
3 tbsp. tomato puree
Salt and pepper to taste
1. Preheat the oven to 200°C. Score a cross in the top of the tomatoes then
place the tomatoes onto a foil lined baking tray. Separate the cloves of garlic
and peel. Scaer the garlic cloves between the tomatoes. Drizzle the
tomatoes and garlic with 1 tbsp. of olive oil and sprinkle with salt and
pepper. Place in the oven and roast for 30minutes unl the tomatoes are
dark and the skins are shriveled.
2. Add the onion, thyme, oregano and tomato puree into the soup maker with
the vegetable stock. Remove the tomatoes and garlic from the baking tray
and add to the soup maker.
3. Put the lid onto the jug and lock into place.
4. Turn the soup maker on. You will here a beep.
5. Select Smooth soup. The beep will signal it has started and the light will
ash on and o.
6. The soup will cook for 30 minutes. A beep will signal the soup maker has
nished.

20
Thai Chicken and Sweet Potato Soup
Preparaon: 15 minutes
1 tsp olive oil
2 garlic cloves
1/2 red chilli, deseeded and chopped
1 tsp easy lemongrass
3 tbsp. red thai curry paste
500ml chicken stock
160ml coconut cream
350g sweet potatoes, peeled and chopped
2 chicken breasts, cut into chunks
1/2 tsp sh sauce
1. Assemble the soup maker with the S/S lter.
2. In a pan fry garlic, chilli, ginger, lemongrass and red curry paste in 1 tsp of
olive oil for 2 minutes to make a Thai spice base.
3. Add chicken stock, Thai spice base, coconut cream, sweet potatoes and chick-
en breast chunks into the soup maker.
4. Lock the lid into place.
5. Turn the soup maker on and press chunky soup. Once the machine has
beeped the soup maker will begin to cook.
6. Once cooking has nished, add the sh sauce then remove S/S lter.
7. Replace the lid and select blend, unl the soup is at the desired consistency.
Table of contents
Other Andrew James Blender manuals

Andrew James
Andrew James AJ000716 User manual

Andrew James
Andrew James Deluxe Blender User manual

Andrew James
Andrew James AJ001280 User manual

Andrew James
Andrew James Retro Blender User manual

Andrew James
Andrew James Nutri-Fit User manual

Andrew James
Andrew James AJ001280 User manual

Andrew James
Andrew James AJ000620 User manual
Popular Blender manuals by other brands

BLACK DECKER
BLACK DECKER BX430J Original instructions

Silvercrest
Silvercrest 360503 2010 operating instructions

BLACK DECKER
BLACK DECKER BXJB1200E Original instructions

O.K.
O.K. OSB 103 user manual

Silvercrest
Silvercrest SSM 550 C1 operating instructions

Vitamix
Vitamix Creations Galaxy Class GC owner's manual