Anthem BLX 200 User manual

BLX 200
BLU-RAY DISC PLAYER
BLX-200(A)_091023:BLX-200(A) 2009-10-26 오 5:52 페이지 1

ENGLISH
2
1. Read these instructions.
2. Keep these instructions.
3. Heed all warnings.
4. Follow all instructions.
5. Do not use this apparatus near water.
6. lean only with dry cloth.
7. Do not block any ventilation openings.
Install in accordance with the manufacturer’s
instructions.
8. Do not install near any heat sources such as radiators,
heat registers, stoves, or other apparatus (including
amplifiers) that produce heat.
9. Do not defeat the safety purpose of the polarized or
grounding-type plug. A polarized plug has two blades
with one wider than the other.
A grounding type plug has two blades and a third
grounding prong. The wide blade or the third prong are
provided for your safety. If the provided plug does not
fit into your outlet, consult an electrician for
replacement of the obsolete outlet.
10. Protect the power cord from being walked on or
pinched particularly at plugs, convenience receptacles,
and the point where they exit from the apparatus.
11. Only use attachments/accessories specified by the
manufacturer.
12. Use only with the cart, stand, tripod, bracket, or table
specified by the manufacturer, or sold with the
apparatus.
When a cart is used, use caution when moving the
cart/apparatus combination to avoid injury from tip-
over.
13. Unplug this apparatus during lightning storms or when
unused for long periods of time.
14. Refer all servicing to qualified service personnel.
Servicing is required when the apparatus has been
damaged in any way, such as power-supply cord or
plug is damaged, liquid has been spilled or objects
have fallen into the apparatus, the apparatus has been
exposed to rain or moisture, does not operate
normally, or has been dropped.
IMPORTANT SAFETY INSTRUCTIONS
ENGLISH
PORTABLE CART WARNING
BLX-200(A)_091023:BLX-200(A) 2009-10-26 오 5:52 페이지 2

3
ENGLISH
Introd ction
READ THIS BEFORE OPERATING YOUR UNIT
: TO REDU E THE RISK OF ELE TRI SHO K,
DO NOT REMOVE OVER (OR BA K). NO USER-
SERVI EABLE PARTS INSIDE. REFER
SERVI ING TO QUALIFIED SERVI E
PERSONNEL.
: TO REDUCE THE RIS OF FIRE OR ELECTRIC SHOC ,
DO NOT EXPOSE THIS APPLIANCE TO RAIN OR MOISTURE.
CAUTION
WARNING
This symbol is intended to alert the user to the
presence of uninsulated "dangerous voltage" within
the product's enclosure that may be of sufficient
magnitude to constitute a risk of electric shock to
persons.
This symbol is intended to alert the user to the
presence of important operating and maintenance
(servicing) instructions in the literature accompanying
the appliance.
FCC INFORMATION (FOR U.S.A.)
This equipment has been tested and found to comply with the limits for a lass B digital device, pursuant to Part 15 of the F
Rules. These limits are designed to provide reasonable protection against harmful interference in a residential installation. This
equipment generates, uses and can radiate radio frequency energy and, if not installed and used in accordance with the
instructions, may cause harmful interference to radio communications. However, there is no guarantee that interference will not
occur in a particular installation. If this equipment does cause harmful interference to radio or television reception, which can be
determined by turning the equipment off and on, the user is encouraged to try to correct the interference by one or more of the
following measures:
• Reorient or relocate the receiving antenna.
• Increase the separation between the equipment and receiver.
• onnect the equipment into an outlet on a circuit different from that to which the receiver is connected.
• onsult the dealer or an experienced radio/TV technician for help.
aution : Any changes or modifications in construction of this device which are not expressly approved by the party responsible
for compliance could void the user’s authority to operate the equipment.
This lass B digital apparatus complies with anadian I ES-003.
et appareil numérique de la lasse B est conforme à la norme NMB-003 du anada.
CAUTION
Invisible laser radiation when the unit is open.
Do not stare into beam.
AUTION : USE OF ANY ONTROLS, ADJUSTMENTS, OR PRO EDURES OTHER THAN THOSE SPE IFIED
HEREIN MAY RESULT IN HAZARDOUS RADIATION EXPOSURE.
CLASS 1
LASER PRODUCT
FOR YOUR SAFETY
Units shipped to the U.S.A and ANADA are designed for operation on 120 V A only.
Safety precaution with use of a polarized A plug.
However, some products may be supplied with a nonpolarized plug.
U.S.A
CANADA
120 V : To prevent electric shock, match wide blade of plug to wide slot, fully insert.
: Pour éviter chocs électriques, introduire la lame la plus large de la fiche dans
la borne correspondante de la prise et pousser jusqu’ au fond.
CAUTION
ATTENTION
To ensure safe operation, the three-pin plug supplied must be inserted only into a standard three-
pin power point which is effectively earthed through the normal household wiring. Extension cords
used with the equipment must be three-core and be correctly wired to provide connection to earth.
Improper extension cords are a major cause of fatalities. The fact that the equipment
operates satisfactorily does not imply that the power point is earthed and that the installation
is completely safe. For your safety, if in any doubt about the effective earthing of the power
point, consult a qualified electrician.
PAN-EUROPEAN UNIFIED VOLTAGE
All units are suitable for use on supplies 220-240 V AC.
EUROPE
220 V
-
240 V
BLX-200(A)_091023:BLX-200(A) 2009-10-26 오 5:52 페이지 3

ENGLISH
4
ENGLISH
PRECAUTIONS
■Moisture condensation
Moisture may form on the lens in the following conditions.
• Immediately after a heater has been turned on.
• In a steamy or very humid room.
• When this unit is moved from a cold place to a warm one.
If moisture forms inside this unit, it may not operate properly.
In this case, turn on the power and wait about one hour for the moisture to evaporate.
■If there is noise interference on the TV while a broadcast is being received.
Depending on the reception condition of the TV, interference may appear on the TV screen while you are watching a TV
broadcast and this unit is left on. This is not a malfunction of this unit or the TV. To watch a TV broadcast, turn off this unit.
■Do not transport this unit with discs left in it.
■Do not place on the component such as amplifier or receiver that generates heat.
If so, the temperature inside this unit rises and malfunction may occur.
• Leave a space around the unit for sufficient ventilation.
• Avoid installation in extremely hot or cold locations, or in an area
that is exposed to direct sunlight or heating equipment.
• Keep the unit free from moisture, water, and dust.
• Do not let foreign objects in the unit.
• The ventilation should not be impeded by covering the ventilation
openings with items, such as newspapers, table-cloths, curtains,
etc.
• No naked flame sources, such as lighted candles, should be placed
on the unit.
• Please be care the environmental aspects of battery disposal.
• The unit shall not be exposed to dripping or splashing for use.
• No objects filled with liquids, such as vases, shall be placed on the
unit.
• Do not let insecticides, benzene, and thinner come in contact with
the set.
• Never disassemble or modify the unit in any way.
■Notes on the AC power cord and the wall outlet.
• The unit is not disconnected from the A power source(mains) as
long as it is connected to the wall outlet, even if the unit has been
turned off.
• To completely disconnect this product from the mains, disconnect
the plug from the wall socket outlet.
• When setting up this product, make sure that the A outlet you are
using is easily accessible.
• Disconnect the plug from the wall outlet when not using the unit for
long periods of time.
CAUTION
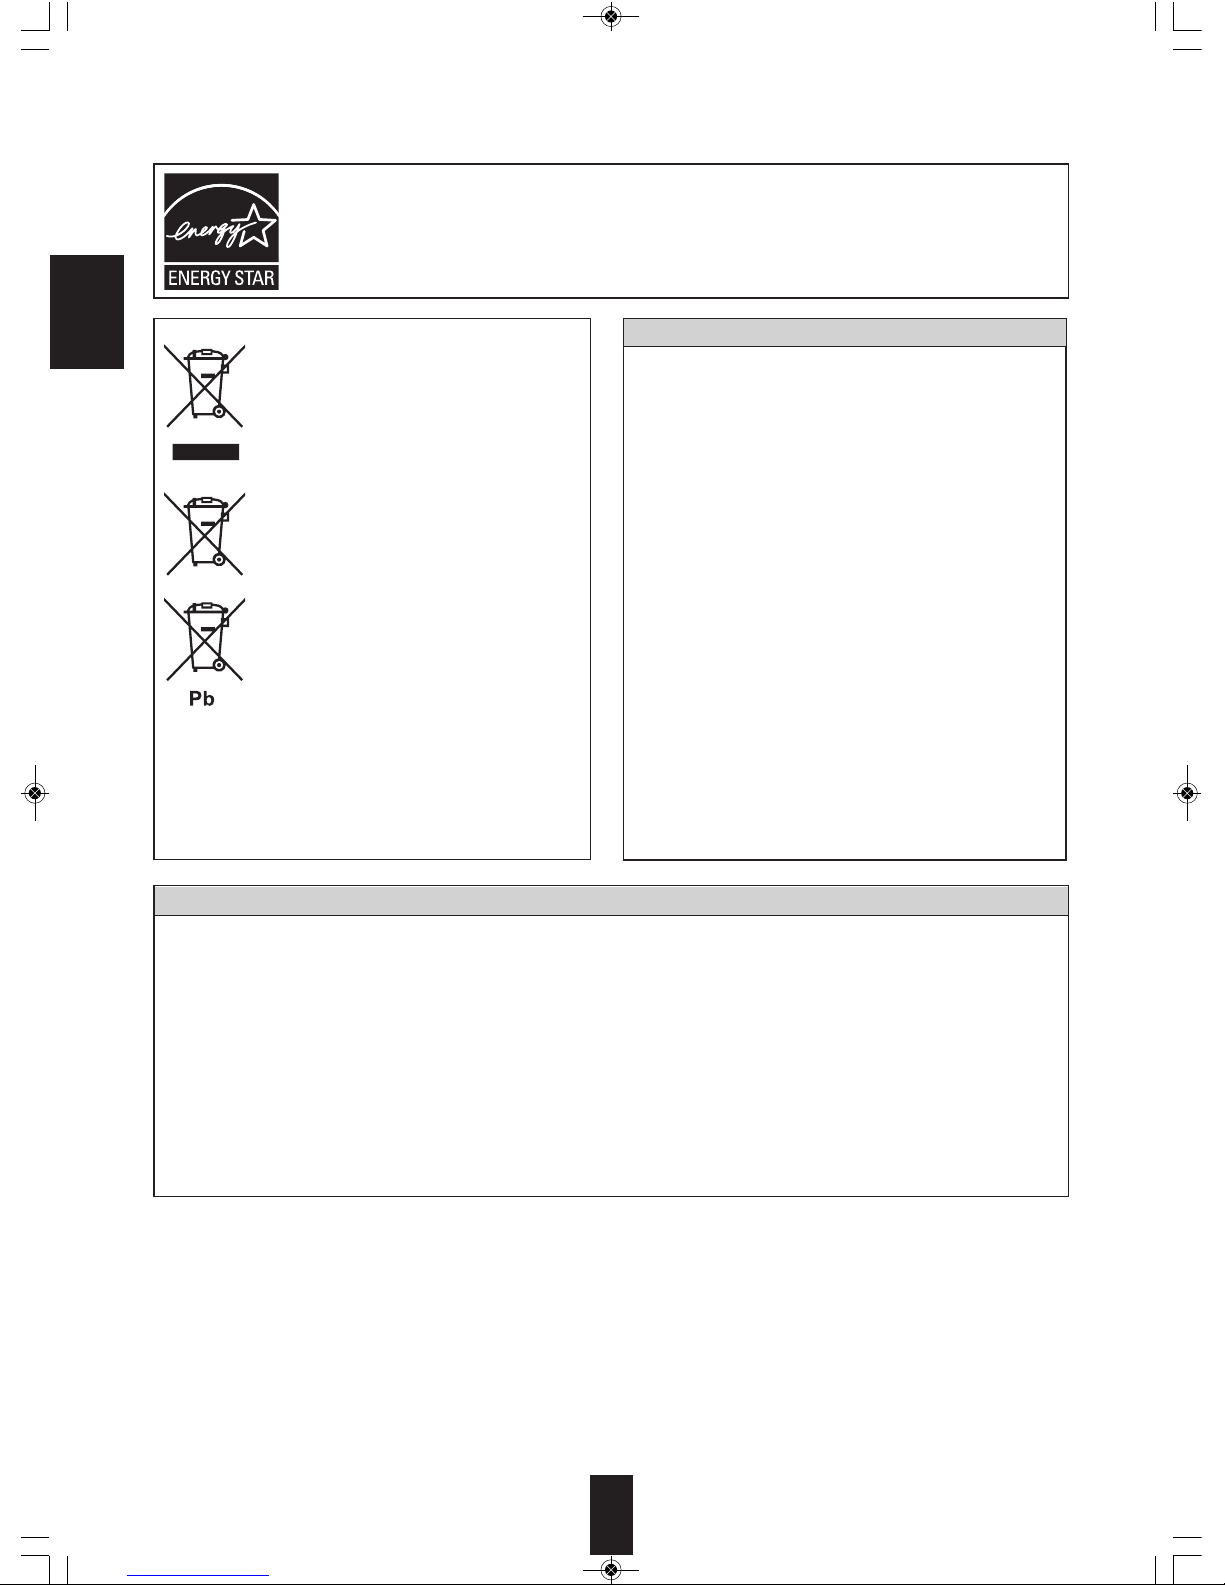
ENERGY STAR®is a U.S. registered mark. As an ENERGY STAR®Partner, Sherwood has determined that this
product meets the ENERGY STAR®guidelines for energ efficienc .
Information for Users on Collection and Disposal of
Old Equipment and used Batteries
These symbols on the products, packaging, and/or
accompanying documents mean that used electrical
and electronic products and batteries should not be
mixed with general household waste. For proper
treatment, recovery and recycling of old products and
used batteries, please take them to applicable
collection points, in accordance with your national
legislation.
By disposing of these products and batteries correctly,
you will help to save valuable resources and prevent
any potential negative effects on human health and the
environment which could otherwise arise from
inappropriate waste handling.
For more information about collection and recycling of
old products and batteries, please contact your local
municipality, your waste diposal service or the point of
sale where you purchased the items.
[Information on Disposal in other Countries outside the
European Union]
These symbols are only valid in the European Union. If
you wish to discard these items, please contact your
local authorities or dealer and ask for the correct
method of diposal.
Note for the battery symbol (bottom two symbol examples):
The sign Pb below the symbol for batteries indicates
that this batteries contains lead.
BLX-200(A)_091023:BLX-200(A) 2009-10-26 오 5:52 페이지 4

5
ENGLISH
• IMPORTANT SAFETY INSTRUCTIONS ................................................................................................... 2
• Introduction
READ THIS BEFORE OPERATING YOUR UNIT ...................................................................................... 3
• System Connections
ONNE TING TO A/V AMPLIFIER OR RE EIVER .................................................................................. 6
ONNE TION TO TV WITH HDMI IN ONNE TOR ............................................................................... 8
ONNE TING TO NETWORK ................................................................................................................... 9
ONNE TING MULTI-ROOM SYSTEM KIT .............................................................................................. 9
• Front Panel Controls .............................................................................................................................. 12
• Remote Controls .................................................................................................................................... 13
REMOTE ONTROL OPERATION RANGE ............................................................................................ 14
LOADING BATTERIES ............................................................................................................................. 14
• Preliminary nowledge About Discs
PLAYABLE DIS TYPES .......................................................................................................................... 15
REGION ODE ......................................................................................................................................... 15
NOTES ON OPYRIGHT ......................................................................................................................... 16
SYMBOL ABOUT INVALID OPERATION ................................................................................................. 16
PLAYABLE FILES ..................................................................................................................................... 16
ARE AND HANDLING OF DIS S .......................................................................................................... 16
• Operations
PLAYING A DIS ...................................................................................................................................... 17
ENJOYING BONUSVIEW OR BD-LIVE .................................................................................................... 23
PLAYING FILES ........................................................................................................................................ 24
• System Settings ..................................................................................................................................... 29
SETTING THE SYSTEM ........................................................................................................................... 30
SETTING THE DISPLAY .......................................................................................................................... 31
SETTING THE AUDIO .............................................................................................................................. 32
SETTING THE LANGUAGE ...................................................................................................................... 33
SETTING THE PARENTAL ONTROL .................................................................................................... 34
SETTING THE NETWORK ....................................................................................................................... 35
• Definition Of Terms ................................................................................................................................ 37
• Troubleshooting Guide .......................................................................................................................... 39
• Specifications .......................................................................................................................................... 40
• License ..................................................................................................................................................... 41
• Limited Warranty ..................................................................................................................................... 45
cONTENTS
BLX-200(A)_091023:BLX-200(A) 2009-10-26 오 5:52 페이지 5

ENGLISH
6
ENGLISH
IR IN
COAXIAL LR Pr/Cr Cb/Pb Y
(COMPOSITE)
VIDEO IN
OPTICAL AUDIO IN
VIDEO IN
TV
Speakers
A/V Amplifier or Receiver
HDMI, COMPONENT, COMPOSITE
FRONT L/R, CENTER, SURROUND L/R, SUBWOOFER, etc.
COMPONENT
VIDEO IN
(MONITOR)
VIDEO OUT SPEAKERS
DIGITAL INs
2 2 3 1 4
5678
System Connections
• Do not connect the A input cord into the A outlet when plugging and unplugging connection cords.
• Since different components often have different terminal names, carefully read the operating instructions of the component
connected.
• Be sure to observe the color coding when connecting audio and video cords.
• The supplied cords are a (stereo) audio cord and a composite video cord. Other cords are commercially-available cords.
cONNEcTING TO A/V AMPLIFIER OR REcEIVER
■Caution :
This Unit
Amplifier
A
r
Do not stack this unit on the amplifier, etc. such as heating equipment.
This could damage this unit and/or the amplifier or could result in
mulfunction.
BLX-200(A)_091023:BLX-200(A) 2009-10-26 오 5:52 페이지 6

7
ENGLISH
■About video/HDMI OUT jacks
• You don’t need to make all kinds of video connections
between components. (e/ g., this unit to A/V amplifier, A/V
amplifier to TV and so on.)
Depending on what kinds of video jacks that A/V amplifier
TV, etc. has, we recommend you to make the same kinds
of video connections between components.
■About audio/HDMI OUT jacks
• You don’t need to make all kinds of audio connections,
too.
onnect this unit to A/V amplifier depending on the audio
input jack that A/V amplifier has.
1. Connecting AUDIO OUTs
• onnect these jacks to the AUDIO IN jacks of BD(DVD,
D, etc.) of your amplifier.
2. Connecting DIGITAL AUDIO OUTs
• onnect either the OPTI AL or the OAXIAL DIGITAL
OUT jack to the corresponding DIGITAL IN jack of your
amplifier. (You don’t need to do both.)
■Notes :
• When your amplifier is not compatible with the digital
signals that are output from this unit, loud noise or no
sound may be heard from the speakers, and it may be
harmful to your ears and damages the speakers. To
prevent it, you should disconnect the DIGITAL OUTs to
your amplifier and make analog audio connection.
• When making the OAXIAL DIGITAL connection, be sure
to use a 75ΩOAXIAL cord, not a conventional AUDIO
cord.
3. Connecting COMPOSITE VIDEO OUT
• onnect this jack to the (composite)VIDEO IN jack of your
amplifier or TV.
4. Connecting COMPONENT VIDEO OUTs
• onnect these jacks to the OMPONENT VIDEO OUT
jacks of your amplifier or TV.
• When making OMPONENT VIDEO connections,
connect “Y” to “Y”, “PB” to “PB” (, “ b”, “B-Y”), “PR” to “PR”
(, “ r”, “R-Y”).
■Notes :
• If the resolutions of the video signals which are output
from the OMPONENT VIDEO OUTs and/or the HDMI
OUT and your TV are not matched, the picture is not
clear, natural or displayed.
To prevent it, you should set the Resolution to one which
the TV can handle. (For details, refer to “SETTING THE
DISPLAY” on page 31.)
• Do not connect the unit to the TV through a V R.
Otherwise the picture may be disturbed due to the copy
protection function.
5. HDMI OUT CONNECTOR
• Refer to “ ONNE TING TO TV WITH HDMI IN
ONNE TOR” on next page.
6. LAN CONNECTOR
• Refer to “ ONNE TING TO NETWORK” on page 9.
7. IR IN JAC
• Refer to “ ONNE TING MULTI-ROOM SYSTEM KIT” on
page 9.
8. AC INPUT CORD
• Plug the cord into a wall A outlet.
Jack type Video resolution
High
quality
Digital
High Definition :
1080/24p, 1080p, 1080i, 720p
Standard Definition :
480p(/576p), 480i(/576i)
Analog
High Definition :
1080i, 720p
Standard Definition :
480p(/576p), 480i(/576i)
Standard
quality
Standard Definition :
480i(/576i)
Jack type
High
quality
Digital
Standard
quality
Analog
BLX-200(A)_091023:BLX-200(A) 2009-10-26 오 5:52 페이지 7

ENGLISH
8
ENGLISH
• If you have a HDMI IN connector equipped TV or projector, etc., connected it to the HDMI OUT connector of this unit using a
commercially available HDMI cord.
The HDMI connection can carry uncompressed digital video and multi-channel (up to 7.1ch) digital audio signals.
• Among the HDMI IN connector equipped TV or projector, etc., some do not support audio output (for examples, projectors).
In such a case, make an audio connection between this unit and A/V amplifier.
• If you have a DVI IN connector epuipped TV or projector, etc., compatible with both DVI and High-bandwidth Digital ontent
Protection (HD P), connect it to the HDMI OUT connector of this unit using a commercially available HDMI-DVI converter
cord.
Since the HDMI-to-DVI connection cannot carry audio signals, you should make an audio connection. (For details on audio
connection, refer to the operating instructions of the DVI IN connector equipped component.)
• If you have a HDMI or DVI connector equipped A/V amplifier, you can connect this unit to TV or projector, etc., through A/V
amplifier. (For details on connection between components, refer to the operating instructions of your amplifier.)
cONNEcTING TO TV WITH HDMI IN cONNEcTOR
■Copyright protection system
• This unit supports HD P (High-bandwidth Digital ontents Protection), technology to protect copyright of digital video signals
against illegal duplication. HD P must also be supported on the components connected to this unit.
If a component incompatible with HD P is connected, the video signals will not be output properly.
• This unit is HDMI Ver. 1.3 compatible.
• HDMI, the HDMI logo and High-Definition Multimedia Interface are trademarks or registered trademarks of HDMI licensing
LL .
■Notes :
• When connecting the HDMI OUT connector to TV or projector, etc., you should set Display and Audio settings correctly. (For
details, refer to “SETTING THE DISPLAY” on page 31 and “SETTING THE AUDIO” on page 32.)
• For stable signal transfer, we recommend using HDMI cords that are a maximum of 5 meters in length.
• Among the components that support HDMI, some components can control other components via the HDMI connector.
However, this unit cannot be controlled by another component via the HDMI connector.
• The audio signals from the HDMI connector (including the sampling frequency and bit length) may be limited by the
component that is connected.
(analog) AUDIO IN
DIGITAL IN
(analog) AUDIO OUT
DIGITAL OUT
DVI and audio connections
DVI
IN
TV, Projector, etc. This unit
HDMI
IN
or
BLX-200(A)_091023:BLX-200(A) 2009-10-26 오 5:52 페이지 8

9
ENGLISH
• You can enjoy a variety of contents with interactive functions by connecting to the internet when playing BD-LIVE compatible
discs.
• onnect the LAN connector of this unit to your internet source.
cONNEcTING TO NETWORK
■Notes :
• After making a broadband internet connection, you should set the communication setting. (For details, refer to “SETTING THE
NETWORK” on page 35.)
• When using a broadband internet connection, a contract with an internet service provider is required. For more information,
contact your nearest internet service provider.
• Refer to the operating instructions of the equipment because the connected equipment and connection method may differ
depending on your internet environment.
• Use a LAN cable/router supporting 10 BASE-T/100 BASE-TX.
• Some LAN cables are easily affected by noise.
We recommend using a shielded type cable.
LAN
Internet Modem PCBroadband router
This unit
• The multi-room system kit(sold separately) is essential for operation from a remote location .
For information on the multi-room system kit, contact the Xantech corporation at 1-800-843-5465 or www.xantech.com.
• IR IN jack allows you to control this unit from other room with the remote control unit.
• To control this unit from other room with the remote control unit, connect the IR IN jack to the output of the connecting block.
■Note :
• Remote operation may become unreliable if the IR receiver is exposed to strong light such as direct sunlight or inverted
fluorescent.
cONNEcTING MULTI-ROOM SYSTEM KIT
This unit
Another room
IR IN
BLX-200(A)_091023:BLX-200(A) 2009-10-26 오 5:52 페이지 9

10
■Video output resolution
• The video output resolution differs depending on the Resolution setting.
(For details, refer to “SETTING THE DISPLAY” on page 31.)
*1: • When the OMPONENT OUTs and the HDMI OUT are connected to your TV, the video signals of 480i(NTS )(or 576i(PAL)) will be output.
*2: • When the HDMI OUT is not connected to your TV and the copy protected DVD Videos are played, the video signals of 480p(or 576p) will be
output.
■Notes :
• If the resolution of video signal to be output from OMPONENT OUTs or HDMI OUT does not match that of your TV, the
picture is not clear, natural or displayed.
Should this happen, first make (composite) video connection between this unit and TV, and select the (composite) VIDEO as
an input source on the TV to display the setting menu, then set the Resolution correctly. (For details on the resolution
acceptible for your TV, refer to its operating instructions.)
• When the HDMI OUT connector is connected to your TV, the TV reports to this unit what resolutions it supports. Therefore, if
you set the Resolution to HDMI Auto, this unit outputs the video signals of the highest resolution acceptable for your TV.
In this case, you cannot select the resolution inacceptable for your TV.
Resolution setting Video OUTs
( omposite) VIDEO OUT OMPONENT OUTs HDMI OUT
HDMI Auto 480i(NTS )(or 576i(PAL)) 1080i*1,*2highest resolution
1080p 480i(NTS )(or 576i(PAL)) 1080i*1,*21080p
1080i 480i(NTS )(or 576i(PAL)) 1080i*1,*21080i
720p 480i(NTS )(or 576i(PAL)) 720p*1,*2720p
480p 480i(NTS )(or 576i(PAL)) 480p(NTS )(or 576p(PAL)) 480p(NTS )(or 576p(PAL))
480i 480i(NTS )(or 576i(PAL)) 480i(NTS )(or 576i(PAL)) 480i(NTS )(or 576i(PAL))
ENGLISH
BLX-200(A)_091023:BLX-200(A) 2009-10-26 오 5:52 페이지 10

11
■Audio output signals
• The audio output differs as follows, depending on the audio format, output jack and Digital Output settings.
(For details, refer to “SETTING THE AUDIO” on page 32.)
• When the Digital Output is set to Off, no digital audio signals will be output from the HDMI OUT or the OPTI AL/ OAXIAL
DIGITAL OUTs.
*1: • When the A/V amplifier does not support HD Audio (Dolby Digital Plus, Dolby TrueHD, DTS-HD High Resolution Audio and DTS-HD Master
Audio) but supports Dolby Digital/DTS, a Dolby Digital or DTS bitstream is output.
• When the A/V amplifier does not support HD Audio and Dolby Digital/DTS but supports multi-channel LP M, up to P M 7.1 H is output.
• When the A/V amplifier does not support LP M at higher sampling frequency, LP M at lower sampling frequency is output.
*2: When the A/V amplifier supports HD Audio, HD Audio is output.
*3: When the P M Downsampling is set to 48 kHz, the audio signal is downsampled to 48 kHz.
Audio format Digital Output setting Digital Analog
HDMI OUT *1OPTI AL/ OAXIAL OUTs AUDIO OUTs
Dolby Digital
Bitstream HD Dolby Digital 5.1 H Dolby Digital 5.1 H
2 H
Bitstream Legacy Dolby Digital 5.1 H Dolby Digital 5.1 H
Bitstream Mixed DTS 5.1 H DTS 5.1 H
P M 7.1 P M 5.1 H P M 2 H
P M 5.1 P M 5.1 H P M 2 H
P M Stereo P M 2 H P M 2 H
Dolby Digital
Plus/ Dolby
TrueHD
Bitstream HD Dolby Digital Plus 7.1 H*2 /
Dolby TrueHD 7.1 H*2P M 2 H*3
2H
Bitstream Legacy Dolby Digital 5.1 H Dolby Digital 5.1 H
Bitstream Mixed DTS 5.1 H DTS 5.1 H
P M 7.1 P M 7.1 H P M 2 H*3
PM 5.1 P M 5.1 H PM 2 H*3
P M Stereo P M 2 H P M 2 H*3
DTS-HD High
Resolution
Audio/DTS-HD
Master Audio
Bitstream HD
DTS-HD High Resolution
Audio 7.1 H*2/DTS-HD Master
Audio 7.1 H*2
P M 2 H
2 H
Bitstream Legacy DTS 5.1 H DTS 5.1 H
Bitstream Mixed DTS 5.1 H DTS 5.1 H
P M 7.1 P M 7.1 H P M 2 H
P M 5.1 P M 5.1 H P M 2 H
P M Stereo P M 2 H P M 2 H
DTS
Bitstream HD DTS 5.1 H DTS 5.1 H
2 H
Bitstream Legacy DTS 5.1 H DTS 5.1 H
Bitstream Mixed DTS 5.1 H DTS 5.1 H
P M 7.1 P M 5.1 H P M 2 H
P M 5.1 P M 5.1 H P M 2 H
P M Stereo P M 2 H P M 2 H
LP M 7.1 H
(48/96 kHz)
Bitstream HD P M 7.1 H P M 2 H*3
2 H
Bitstream Legacy P M 7.1 H P M 2 H*3
Bitstream Mixed DTS 5.1 H DTS 5.1 H
P M 7.1 P M 7.1 H P M 2 H*3
P M 5.1 P M 5.1 H P M 2 H*3
P M Stereo P M 2 H P M 2 H*3
LP M 5.1 H
(192 kHz)
Bitstream HD P M 2 H P M 2 H*3
2 H
Bitstream Legacy P M 2 H P M 2 H*3
Bitstream Mixed DTS 2 H P M 2 H*3
P M 7.1 P M 2 H P M 2 H*3
P M 5.1 P M 2 H P M 2 H*3
P M Stereo P M 2 H P M 2 H*3
LP M 2 H
(48/44.1 kHz)
Bitstream HD P M 2 H P M 2 H
2 H
Bitstream Legacy P M 2 H P M 2 H
Bitstream Mixed DTS 2 H DTS 2 H
P M 7.1 P M 2 H P M 2 H
P M 5.1 P M 2 H P M 2 H
P M Stereo P M 2 H P M 2 H
ENGLISH
BLX-200(A)_091023:BLX-200(A) 2009-10-26 오 5:52 페이지 11

• This connector can be connected to a USB memory device for playback of MP3, WMA or
JPEG files stored on it. (For details, refer to “PLAYING FILES” on page 24.)
• To enjoy BONUSVIEW and BD-LIVE functions, you can connect a USB memory device
(minimum 1GB capacity (2GB or more recommended)) supporting FAT 32 and USB 2.0
High Speed (480 Mbit/s) to this connector, too. (For details, refer to “ENJOYING
BONUSVUEW OR BD-LIVE” on page 23.)
■Notes :
• The 2GB USB memory device is supplied with.
• Before connecting a USB memory device, open the cover.
• Do not use a USB extension cable when connecting a USB memory device to this
connector.
• After playback of files or Virtual Package/BD-LIVE data, remove the USB memory device in
the stop mode or the standby mode.
ENGLISH
12
ENGLISH
■FLUORESCENT DISPLAY
Media indicators REPEAT indicatorsSound recording system indicators
HDMI indicator
Resolutiion indicators
Title/chapter/track number, playing time, operating information, etc.
RANDOM indicator
■USB CONNECTOR
Front Panel Controls
1. POWER ON/STANDBY button
2. POWER ON/STANDBY indicator
3. OPEN/ LOSE( ) button
4. PLAY/PAUSE(▶
■■
) button
5. STOP(■) button
6. FORWARD/BA KWARD SKIP(▶▶
■
/
■
◀◀) buttons
7. DIS TRAY
8. REMOTE SENSOR
9. FLUORES ENT DISPLAY
For details, see below.
10. USB connector
For details, see below.
12107
89 3456
BLX-200(A)_091023:BLX-200(A) 2009-10-26 오 5:52 페이지 12

13
■Note :
• You can use the OLOR buttons to select the items on some BD menus.
STANDBY button
GO TO button
URSOR UP/DOWN/LEFT/RIGHT,
OK buttons
SUBTITLE button
AUDIO button
POWER ON button
NUMERI buttons
REPEAT button
STOP(■) button
REPEAT A-B button
RETURN button
PLAY/PAUSE(▶/
■■
) button
FORWARD/BA KWARD
SEAR H(▶▶ /◀◀) buttons
POP UP MENU button
SLOW( ) button
STEP( ) button
LEAR button
HOME MENU button
OLOR buttons (RED(A), GREEN(B),
YELLOW( ), BLUE(D))
ANGLE button
RANDOM button
OPEN/ LOSE ( ) button
PIP button
DISPLAY button
FORWARD/BA KWARD
SKIP(▶▶
■ /■■
◀◀) buttons
LED
DIMMER button
DIS MENU button
ENGLISH
Remote Controls
BLX-200(A)_091023:BLX-200(A) 2009-10-26 오 5:52 페이지 13

14
ENGLISHENGLISH
LOADING BATTERIES
REMOTE cONTROL OPERATION RANGE
• Use the remote control within a range of about 7 meters
(23 feet) and angles of up to 30 degrees aiming at the
remote sensor.
• Remove the batteries when they are not used for a long
time.
• Do not use the rechargeable batteries (Ni- d type).
1. Remove the cover. 2. Load two batteries (“AAA” size, 1.5V) matching
the polarity.
BLX-200(A)_091023:BLX-200(A) 2009-10-26 오 5:52 페이지 14

15
Preliminary Knowledge Abo t Discs
PLAYABLE DISc TYPES REGION cODE
This unit supports the following discs.
Exampls of playable discs :
• Only BD-RE/-R, DVD-R/-RW and D-R/-RW discs
recorded with UDF or ISO9660 format can be played
back.
• This unit supports Ver 2.0 BD-ROM, Ver 3.0 BD-RE and
Ver 2.0 BD-R.
■Notes :
• Unfinalized BD-RE/-R, DVD-R/-RW and D-R/-RW discs
can not be played back.
• Some 8 cm BD-REs/8 cm BD-Rs cannot be played on this
unit.
• When a BD-Java title is played, loading may take longer
than a normal title, or some functions may perform slowly.
■Unplayable discs
• Since this unit cannot support disc types, formats and file
types not listed above, do not play such discs.
• Some BD-RE/BD-R, DVD-RWs/DVD-Rs or D-Rs/ D-
RWs cannot be played due to incomplete disc finalization,
recording quality or physical condition of the disc,
characteristics of recording device or authoring software,
etc.
See the operating instructions supplied with your recording
device for more information.
■Color system format
• Depending on the countries, this unit conforms to either
the NTS color system for U.S.A, anada, etc. or the PAL
for Europe, Australia, hina, etc.
BD-ROM
BD-RE/BD-R
Type Logo Playable format/mode
BDMV, AVCHD
DVD-Video
DVD-Video, AVCHD
DVD-Video, AVCHD
Audio CD (CD-DA)
Audio CD (CD-DA), MP3,
WMA, JPEG, AVI, WMV
Audio CD (CD-DA), MP3,
WMA, JPEG, AVI, WMV
• Blu-ray Disc player and BD-ROM or DVD Video discs are
assigned region codes according to the region in which
they are sold. If the region codes do not match, the disc
will not play.
ENGLISH
Blu-ray Disc
Region ode Area
A
North America, entral America, South
America, Korea, Japan, Taiwan, Hong
Kong and South East Asia
B
Europe, Greenland, French territories,
Middle East, Africa, Australia and New
Zealand
India, hina, Russia, entral and South
Asia
A, B and All areas
DVD Region
ode Area
1 North America
2Europe, Japan, Middle East, Egypt,
South Africa, Greenland
3Taiwan, Korea, the Philippines,
Indonesia, Hong Kong
4
Mexico, South America, entral
America, Australia, New Zealand, Pacific
Islands, aribbean
5Russia, Eastern Europe, India, most of
Africa, North Korea, Mongolia
6 hina
ALL All areas
U.S.A. Europe
BDs
DVDs
BLX-200(A)_091023:BLX-200(A) 2009-10-26 오 5:52 페이지 15

ENGLISH
16
ENGLISH
cARE AND HANDLING OF DIScS
PLAYABLE FILES
• haracters except "A~Z", "a~z", "0~9", " - " may be not
displayed.
• This unit supports multi-session discs. Some multi-
session discs may take a long time to load and some
may not be loaded at all.
■Notes :
• For some files, it may not be possible to use certain
functions during playback.
• It may not be possible to play some files, even if they
have the extension of a file playable on this player.
• Files protected by DRM (Digital Rights Management)
cannot be played.
■MP3 (“.mp3”)
• Sampling frequency : 44.1 kHz, 48 kHz.
• Bit rate : Up to 320 kbps.
• Fixed bit-rate files are recommended. Variable bit-rate
(VBR) files are playable, but playing time may be
displayed incorrectly.
• ID3 Tag is not available.
• MP3i and MP3 Pro are not available.
■WMA (“.wma”)
• Sampling frequency : 44.1 kHz, 48 kHz.
• Bit rate : Up to 192 kbps.
• WMA Tag is not available.
• In handling a disc, hold it carefully
with edges.
• Do not stick paper or write
anything on the printed surface.
• Fingermarks and dust on the
recorded surface should be
carefully wiped off with a soft cloth.
Wipe straight from the inside to the
outside of the disc.
• Always keep the discs in their
cases after use to protect them
from dust and scratches.
• Do not use a cracked, deformed, or repaired disc.
These discs are easily broken and may cause serious
personal injury and apparatus malfunction.
■Notes:
• Because the temperature inside this unit is very high, in
case of no further playback of disc, unload the disc to
prevent the high temperature from deforming the disc.
• Do not expose discs to direct sunlight, high humidity or
high temperature for a long time.
• When loading or unloading a disc in the disc tray, always
place it with the printed side up.
SYMBOL ABOUT INVALID OPERATION
NOTES ON cOPYRIGHT
• When you press a button, if the unit does not accept its
operation, appears on the TV screen.
Operations are occasionally unacceptable even if is
not displayed.
※Invalid operation may occur as expected if :
• The region codes of the unit is different from that of the
disc and playback will not be allowed.
• The parental control works.
(For details, refer to "SETTING THE PARENTAL
ONTROL" on page 34.)
• BD/DVD Video operations and functions may be
different from the explanations in this manual and some
operations may be prohibited due to disc
manufacturer’s settings.
• Audio-visual material may consist of copyrighted works
which must not be recorded without the authority of the
owner of the copyright. Refer to relevant laws in your
country.
• This product incorporates copyright protection
technology that is protected by U.S. patents and other
intellectual property rights. Use of this copyright
protection technology must be authorized by
Macrovision, and is intended for home and other limited
viewing uses only unless otherwise authorized by
Macrovision. Reverse engineering or disassembly is
prohibited.
■JPEG (“.jpg”, “.jpeg”)
• Maximum resolution : 4,272x2,848 pixels.
• JPEG format images stored in progressive format cannot
be played back.
■AVI (“.avi”)
• Playable codec : Xvid
• Maximum size of image : 1920 x 1080@30 fps
■WMV (“.wmv”)
• Playable codec : WMV9
• Maximum size of image : 1920 x 1080@30 fps
BLX-200(A)_091023:BLX-200(A) 2009-10-26 오 5:52 페이지 16

17
1. Turn the power on.
Operations
• Each time the POWER ON/STANDBY button on the
front panel is pressed, the unit is turned on to enter the
operating mode (the POWER ON/STANDBY indicator
lights up blue) or off to enter the standby mode(the
POWER ON/STANDBY indicator lights up amber).
• On the remote control, press the POWER ON button to
enter the operating mode or press the STANDBY
button to enter the standby mode.
• In the standby mode, the unit is connected to the A
mains and a small amount of current is retained to
support operational readiness.
• When the Optical Disc Autoplay is set to On (default
setting), playback will automatically start. (For details,
refer to “Optical Disc Autoplay” on page 30.)
Should this happen, ignore the step 3.
• Then playback will start.
• For some discs, the menu may be displayed first.
Example :
JPEG file
Video file
System Settings
Loaded disc
Music file
ENGLISH
PLAYING A DISc
■Before starting playback
• First set this unit as desired for optimum performance, doing the system setting procedures. (For details, refer to "System
Settings" on page 29.)
• Usable discs and files for each operation/function are referred to by the icons :
2. Open the disc tray to load a disc with the printed
side up.
3. Press the URSOR UP/DOWN buttons to select
the disc, then press the OK button. (When the
Optical Disc Autoplay is se to Off.)
• 8 cm(3 inch) discs can be loaded on the inside circle of
the tray, too.
• Depending on the disc types, it may take times to read
the loaded disc.
• Then the main menu will be displayed on the TV
screen.
means AVI and WMV files.
BLX-200(A)_091023:BLX-200(A) 2009-10-26 오 5:52 페이지 17

Rapid playback
ENGLISH
18
ENGLISH
■In case of use of the NUMERIC buttons on the
remote control
• When selecting “3” :
• When selecting “10” :
• When selecting “21” :
• Playback of the selected item starts.
• When the selected item contains the subitems, repeat
the above step until the preferred item is selected.
• Depending on the disc, the contents of the menu and
the way to operate differ.
• When the STOP(■) button is pressed during playback
of BD Video, DVD Video or AV HD discs, the point at
which the disc was stopped is stored in the memory.
(RESUME function : “Stop” mode.)
• Press the PLAY/PAUSE (▶/
■■
) button again, then
playback will resume from this point. When the
STOP(■) button is pressed again, the RESUME
function will be canceled and it enters “FullStop” mode.
■Note :
• For some BD Video discs which support Java
applications, the RESUME function will not work.
• To select the preferred item, press the URSOR buttons
and press the OK button or press the NUMERI buttons.
To start playback from the menu
• Each time the SLOW( ) button is pressed, you can
play back the disc slowly at 3 step speed.
→Slow x 1/2 →Slow x 1/4 →Slow x 1/8
• To return to normal playback, press the PLAY/PAUSE
(▶/
■■
) button.
Slow playback
To stop playback
• Each time the STEP( ) button is pressed, the disc is
advanced by one frame.
• To return to normal playback, press the PLAY/PAUSE
(▶/
■■
) button.
• During playback,
Frame advance playback
• Each time the button is pressed, a chaper/track is
skipped.
• When the BA KWARD SKIP(
■
◀◀) button is pressed
once midway through a chapter/track, playback returns to
the beginning of that chapter/track. When it is pressed
again, a chapter/track is skipped.
To skip ahead or back
• During playback, you can play back disc at various
speeds.
• Each time the button is pressed, the disc is advanced or
reversed fast at 7 step speeds.
→Fast x 2 →x 4 →x 8 →x 16 →x 32 →x 64 →x128
• To return to normal playback, press the PLAY/PAUSE
(▶/
■■
) button.
• Then the unit will be in the “Pause” mode.
• To return to normal playback mode, press this button
again.
To pause playback
To skip
back
To reverse To advance
To skip
ahead
BLX-200(A)_091023:BLX-200(A) 2009-10-26 오 5:52 페이지 18

19
ENGLISH
Goto Title : / 30 (current:1) : Title search
Goto Time : : : /2:24:12( urrent:0:15:50):Time search
• During playback,
• Then the disc information is displayed on the TV screen.
Example : During playback of D
• To turn off the information, press this button.
• Depending on the disc types, the disc information differs.
Displaying disc information
Playing the desired section of disc
1. During playback, press the GO TO button.
• Then the search mode is displayed on the TV screen for
several seconds.
• Each time this button is pressed, the search mode is
changed depending on the disc types as follows :
3. Press the OK button.
• Then playback will start from the selected section.
■Notes:
• If the disc does not contain the number you entered,
search playback will not work.
• Depending on the disc, search playback will not work or
may work differently.
I
Goto hapter : / 16 (current: 2) : hapter search
I
I
Goto Track : / 11 (current: 1) : Track search
I
↓
↓
→
↓
2. At the desired search mode, enter the number to
be played, pressing the NUMERI buttons.
■When entering title, chapter, track number
Examples :
For “3” :
For “11” :
■When entering the elapsed time
You can play a disc from the desired by specifying the
elapsed time from the beginning of the current title/disc.
Examples :
For “3 min. 15 sec.” :
For “1 hour. 59 min. 35 sec.” :
■When clearing the numbers entered
• Press the URSOR LEFT/RIGHT buttons to select the
number to be cleared, then press the LEAR button.
• Then the selected number will be cleared.
Track : 1 / 11
0 : 00 : 23
CD-DA 0 : 06 : 46 Off Off Play
Disc type urrent track/total track number Repeat
playback mode
Elapsed time of
the current track
Proceeding bar Random
playback mode
Total playing time
of the current track
Playback
mode
Off
BLX-200(A)_091023:BLX-200(A) 2009-10-26 오 5:52 페이지 19

ENGLISH
20
ENGLISH
• You can play a current title, chapter, disc or track
repeatedly.
• During playback of the desired chapter/track, press the
REPEAT button.
• Each time this button is pressed, the repeat mode
changes depending on the disc types as follows :
→Repeat Off : Repeat mode off (normal playback)
↓
Repeat Title : Title repeat
↓
Repeat hapter : hapter repeat
→Repeat Off : Repeat mode off (normal playback)
↓
Repeat All : Entire disc repeat
↓
Repeat Track : Track repeat
■Note :
• For some BD Video discs which support Java
applications, the repeat playback will not work.
Playing repeatedly
• You can paly the tracks in random order.
• During playback, press the RANDOM button.
• Each time this button is pressed, the random mode
changes as follows :
Random Off : Random mode off (normal playback)
↕
Random On : Random playback
The tracks on the disc are played back in
random order.
Many of BD Video and DVD Video disc contains disc
menu, top menu or pop-up menu which guides you
through the available functions in the disc.
■Note :
• ontents of menus and corresponding menu operations
may vary among discs. (For details, refer to the disc
manual.)
■Using the disc menu.
Playing in random order
Playing a specific section repeatedly
Operations using disc menu, top menu,
and Pop-up menu
1. During playback at the beginning of the section,
press the REPEAT A-B button.
• Then “Repeat A-” is displayed on the TV screen.
2. At the end of the section, press the REPEAT A-B
button again.
2. Press the URSOR buttons to select the desired
item, then press the OK button.
• Then “Repeat A-B” is displayed and the section between
points A and B is played back repeatedly.
• To return to normal playback, press the REPEAT A-B
button repeatedly until “Repeat Off” is displayed.
■Note :
• For some BD Video discs which support Java applications,
the REPEAT A-B function will not work.
• You can play a specific section within a title or track
repeatedly.
1. During playback, press the disc menu.
• Then the disc menu is displayed on the TV screen if
present on the disc.
• Then the selected item is played back.
BLX-200(A)_091023:BLX-200(A) 2009-10-26 오 5:52 페이지 20
Table of contents