Kogan KABRP3DWFIA User manual

KABRP3DWFIA
USER MANUAL

Contents
Safety Notice and Important .........................................1
Using Remote & Battery.............................................4
Using Discs........................................................ 5
Panel Description...................................................6
Remote Control Description......................................... 7
Device Connection Description...................................... 8
Setup – customizing setting in the main menu........................ 12
System.............................................................................12
Language............................................................................13
Play.................................................................................14
Security..............................................................................15
Network..............................................................................16
TV...................................................................................18
Video processing......................................................................20
Audio output..........................................................................21
Speaker setup........................................................................22
Post processing.......................................................................23
Software version......................................................................23
Playing – Advanced Playing Operation............................... 24
Using screen control menu.............................................................24
Using OSD menu..................................................................... 25
BD-Live..............................................................................25
Media Player – Special operation of data discs and USB playing........27
Troubleshooting.................................................... 29
Technical Specifications............................................ 32

1
Safety Noticesand ImportantInformation
Warning
To avoid fire and electric shock, do not expose the device to rain or moisture.
To avoid electric shock, do not open the shell; only Kogan service technicians are to perform repairs.
Please have the power cord replaced only at the Kogan service center.
Prevent the battery or the device installed with battery from overheating, such as in sunlight, fire or similar
heat sources.
Caution
The laser apparatus in the player is harmful to eyes. Do not open the shell because the laser beam
of the Blu-ray Disc/DVD player is harmful to eyes.
Only ask qualified personnel to repair the player.
The device is classified as category I laser product, the sign of which is printed on the back of the player.
Notice
•The player operates at AC 110V-240V, 50Hz/60Hz.
•Keep the player away from water and moisture, and do not put any containers with liquid (e.g. vase) on
the player.
•Install the player properly and ensure that it is possible to pull out the AC power line from the outlet
immediately in case of failure.
Description of function that requires network connection (the “function” hereinafter)
•You agree with all terms and conditions (including but not limited to the terms and conditions in the
websites and contents of third party suppliers) of using this function.
•Using this function is also subject to the service of your network supplier and its terms, as well as your
network environment.
Category I
laser product

2
Safety Noticesand Important Information
Notice
The player complies with the limit regulation on using connection cable within 3m in EMC directive.
Placement
•Please put the player in a ventilated place to avoid heat accumulating in the player.
•Do not put the player on soft surfaces such as carpet to avoid blocking the vents.
•Do not install the player in a narrow space (e.g. bookshelf or similar place).
•Do not place the player near heat sources, irradiated by direct sunlight, with too much dust or
mechanical impact.
•Do not place the player outdoors, or in a vehicle or boat.
•If the player is carried from cold place to warm place, or placed in moist room, the lens in the player may
have moisture accumulated. If this happens, the player may not work normally. In this case, please take
out the disc, disconnect the power supply and set aside for half an hour until the moisture dries.
•The player should be installed on a horizontal position instead of an inclined position.
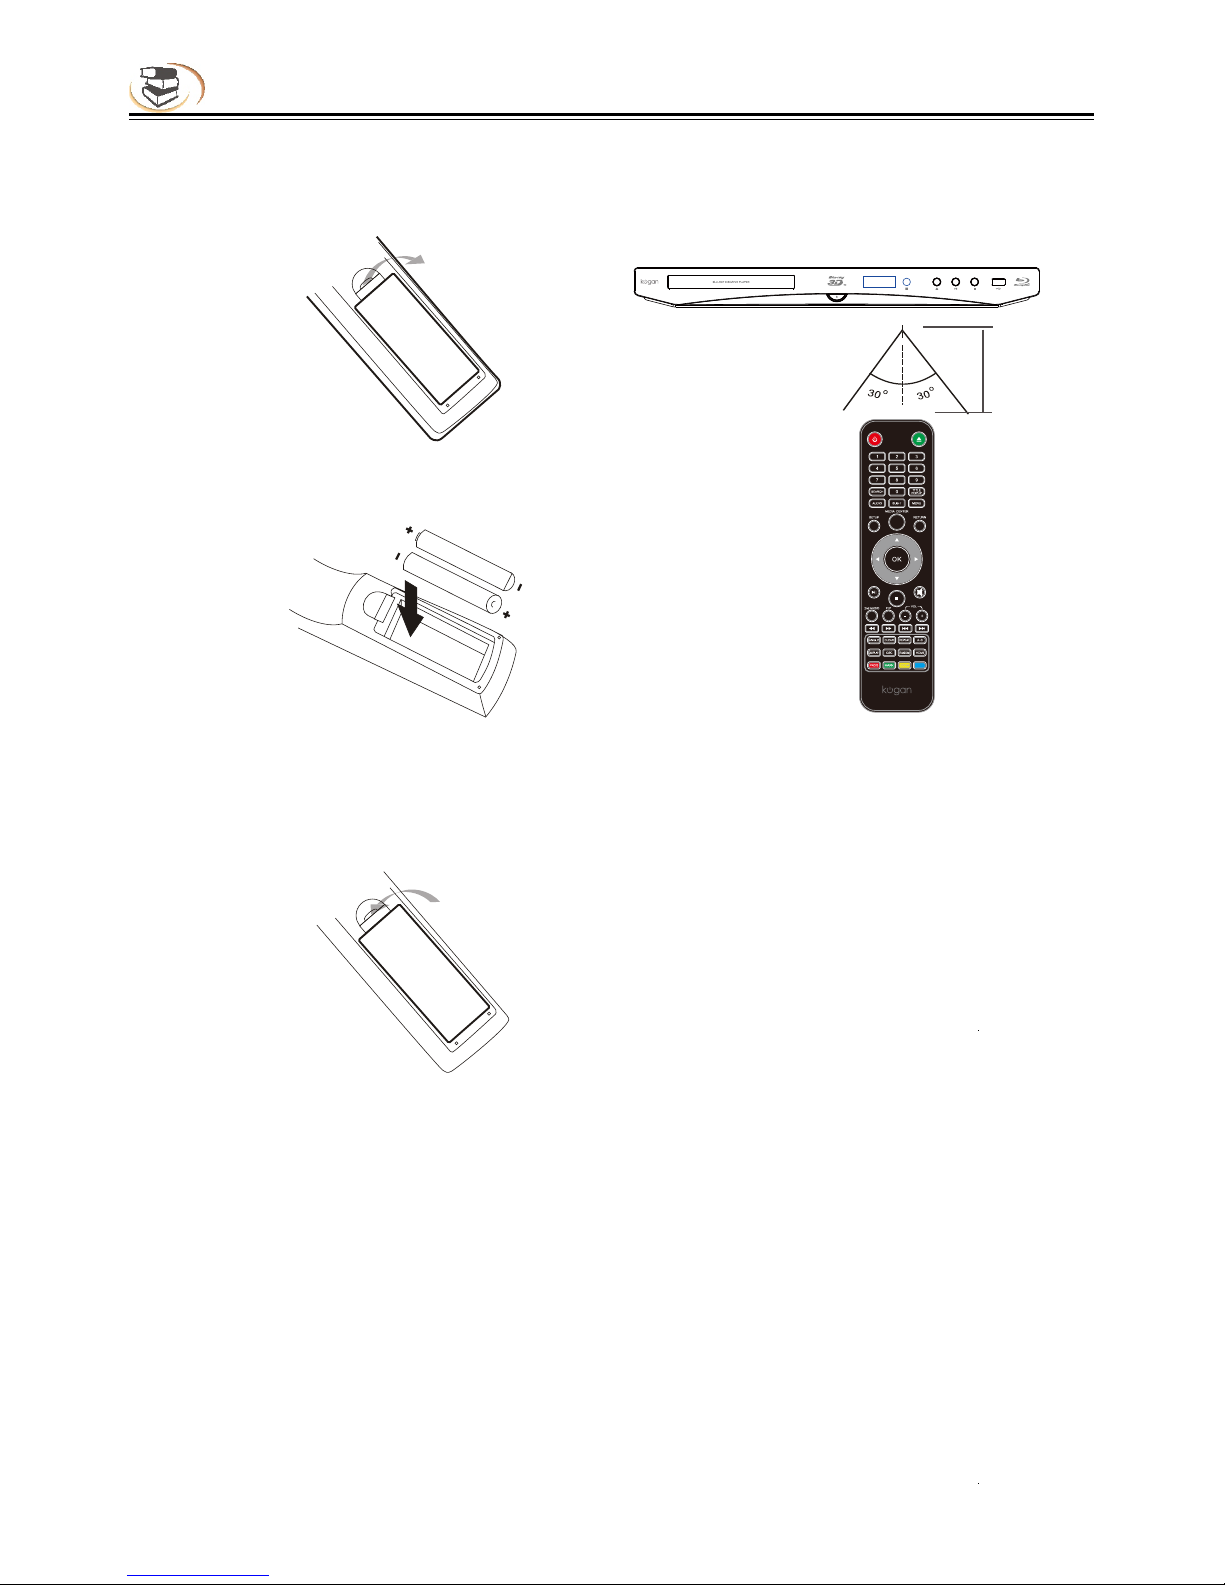
•The player should be installed and operated at least 20cm away from your body (including limbs: hands,
wrists, feet and ankles).
•Do not place any heavy or unstable objects on the player.
•Do not place any object other than discs on the disc tray, or the player or the object will be damaged.
•When you move the player, please take out all discs or else theymay be damaged.
•When you move the player, please pull out the AC power line and other cables from the player.
Power supply
•As long as the power line of the player is still connected to the wall outlet, the AC power supply of the
player is still connected even if the power supply is turned off.
•If you won’t use the player for a long time, please disconnect the power line of the player from the wall outlet.
•Please hold the plug instead of the power line (main power supply).
•Please follow the notice below to avoid AC power line damaged. If the power line is damaged, do not use
it, or else it may cause electric shock or fire.
•Do not clip the AC power line between the player and wall, bookshelf, etc.
•Do not put any heavy object on the AC power line or pull the power line.
Adjusting volume
When you listen to any material with low input level or no audio signal, do not turn up the volume, or else
it may hurt your hearing or damage the speaker when it plays to peak level.
Cleaning
Please wipe the shell, panel and controller with soft cloth. Do not use any sandpaper, polishing powder
or solution (e.g. alcohol, gasoline).
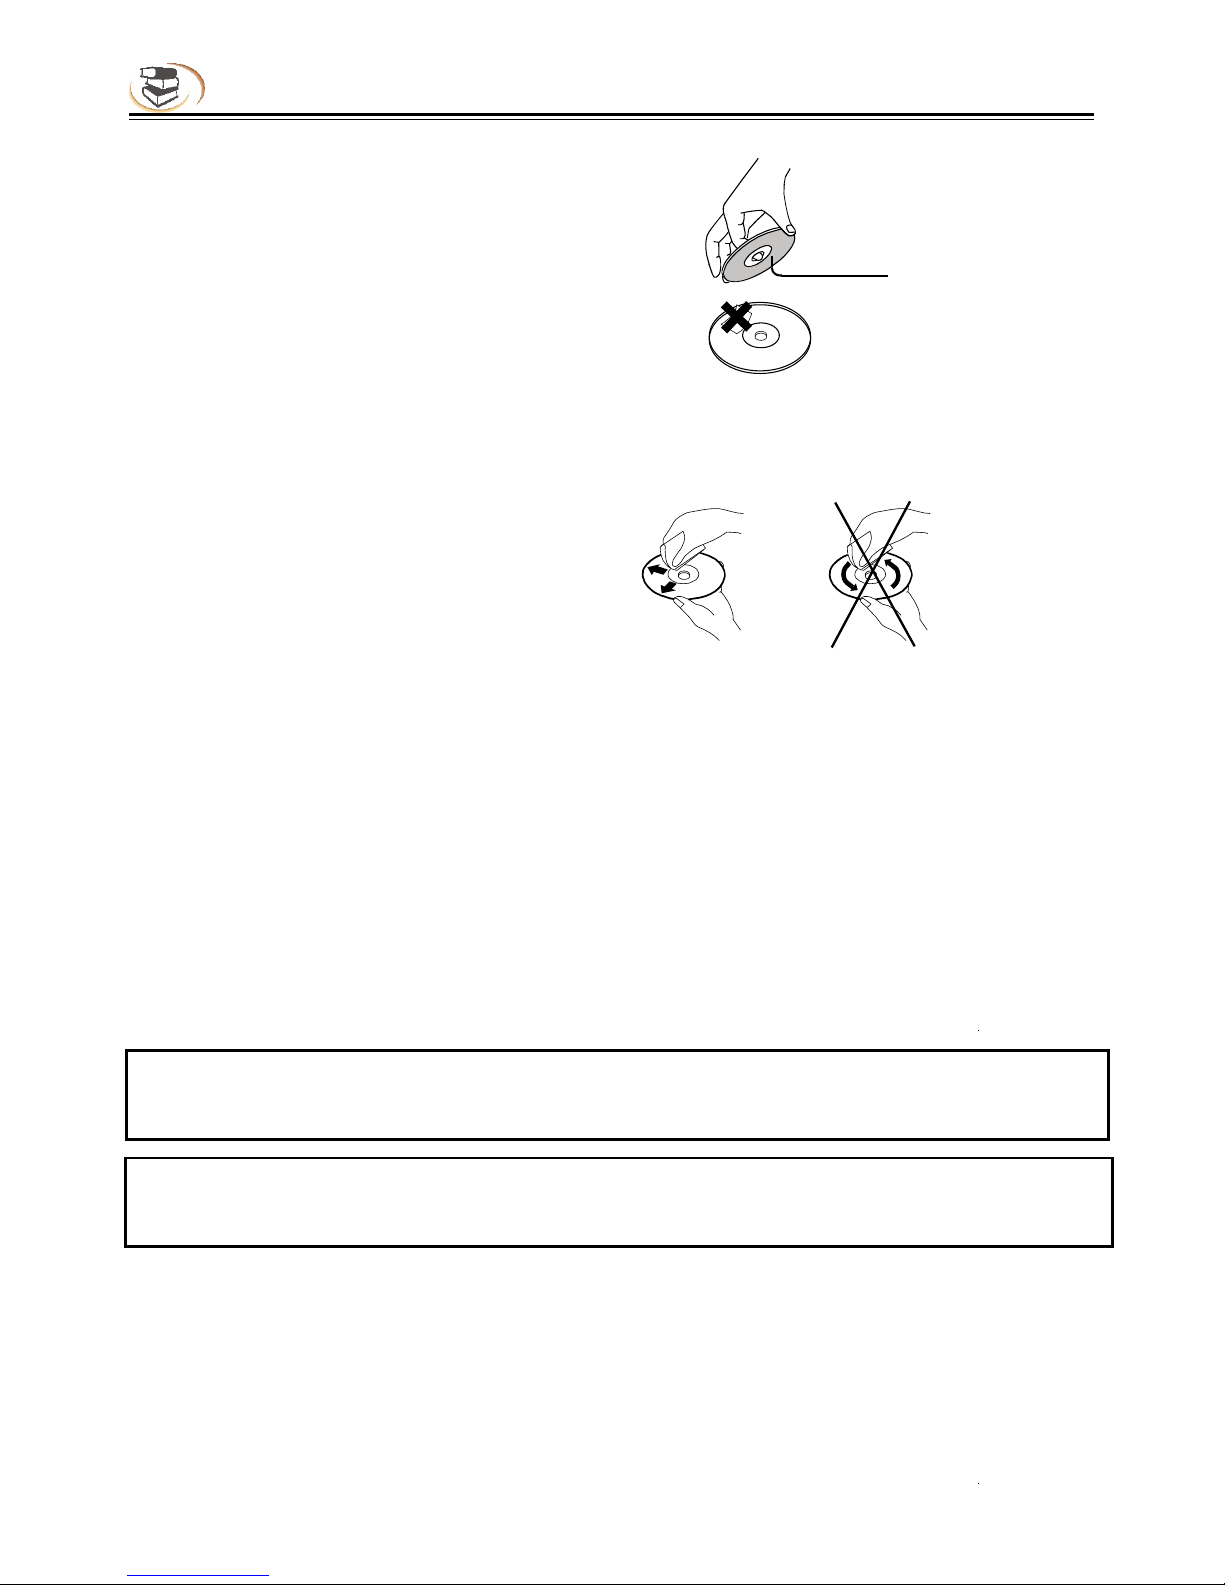
Cleaning disc, disc/lens cleanser
Do not use a cleaning disc or disc/lens cleanser (including wet or spray), or else it may damage the device.
Notice for replacing parts
If the player is repaired, the removed parts may be collected for recycling.
Connecting to HDMI OUT port
Improper operation may damage HDMI out port and the connection. Please follow the notice below.
•Check the shape of the port and connector, and then align and connect to the HDMI port and HDMI
connector in the rear side of the player. Make sure that the connector isn’t upside-down or inclined.
•When you move the player, please pull out the HDMI cable first.
•When you connect or pull out the HDMI cable, please hold the HDMI connector steady. Do not twist or

3
Safety Notice and Importance
Importance
Note: The player can keep still video image or OSD image on the TV screen for long time, but it
may damage the TV screen permanently. Plasma and projection TV are easily affected.
insert the HDMI connector into the HDMI port by force.

4
Using Remote & Battery
Installing the battery
1.Open the battery cover.
2.Insert the battery (R03, AAA).
Align the +/- polarity of the battery to the
sign in the slot.
3.Put on the battery cover.
Notice for remote control operation
•Do not put the remote control of the player in strong light, or else the remote control malfunctions or in
disorder.
•Do not drop the remote control or impact other objects, or else the remote may be damaged.
•Do not put the remote control near the places with high temperature or moisture, or else it will oxidize the
components and rust the metal parts quickly.
•Do not disassemble the remote control; please ask qualified personnel for maintenance.
•If the remote control isn’t sensitive or the effective range reduces significantly, please replace the
batteries, and do not mix new and old batteries.
•Check whether the battery liquid leaks regularly; if yes, clean the battery slot before replacing new
batteries, or else the metal splicing erodes and rusts easily, causing remote control invalid.
•Effective range of the remote control: 7m from the front end of the remote control.
•Angle: 30° in front of the remote control.
OPEN
CLOSE
Using remote control
Aim the remote control at the receiver on the panel
and then operate.
About 7m

5
Using Discs
Holding the disc:
Do not touch the playing side of the disc.
Do not stick paper or adhesive tape on the playing side
of the disc.
Cleaning the disc:
The fingerprint and dirt on the disc surface may affect the audio and video quality. Use soft
cloth to wipe the disc from the center outwards.
Disc storage:
If the dirt can’t be cleaned with soft cloth, please wipe with wet cloth, and then use dry cloth.
Do not use any solvents, e.g. thinner, gasoline solvent and detergent on market, or else the disc may be
damaged.
Do not store the disc in direct sunlight or near a heat source.
Do not put the discs vertically in the case, or else the discs may be bent.
The User’s Manual describes the basic specifications of the DVD player. Certain DVD discs may have
special requirements or limitation and may be not compatible with this player. Please refer to the disc
description.
Prompt:
Kogan may upgrade the product continuously. If the actual operation is different from the
Manual, please refer to the actual function of the player.
Prompt:
If the player won’t be used for a long time, please put a disc in the machine to avoid affecting the
performance of the laser head.
About the User’s Manual:

6
Panel Description
1 2 8
3 4 5 6 7
Parts and operation guide
Front panel
Rear panel
5.Eject/Insert
6. Play/Pause
7. Stop
8. USB interface
Connect USB device to this interface.
1.Disc tray
2.Remote receiver
3.Power(ON/OFF/Standby)
Turn on/off the player or set to standby mode.
4.LED
10.Right Front Channel Output
11.Right Surround Channel Output
12.Subwoofer Output
13.Composite Video Output
14.Audio Output (R)
15.Audio Output (L)
16.HDMI Output
17.Digital Audio Output (Optical)
18.LAN Input
19.USB Input
1 2 3 4 5 6 7 8
9 10 11 12 13 14 15 16 17 18 19
1.Rear Left Surround Channel Output
2.Left Front Channel Output
3.Left Surround Channel Output
4.Center Channel Output
5.Component Y Output
6.Component Pb Output
7.Component Pr Output
8.Digital Audio Output (Coaxial)
9.Rear Right Surround Channel Output

7
Remote Control Description
Remote control
While playing, press the following buttons to operate.
1. Power: turn on/off the player.
2. 0~9: select and enter numbers.
3. Search: select the search time, chapter, etc. Method: press the
Search button to enter the interface, press the Left/Right
key to select time or chapter and press OK to enter
desired node; press the Up/Down key to enter numbers
directly and press OK to confirm and go to search node.
4. Audio: select audio language or channel.
5. Subtitle: select subtitle language.
6. Setup: display setup menu.
7. Media center: access media center.
8. OK: confirm.
9. Play/Pause: press once to pause, and press it again to resume
normal playing.
10. Stop: stop playing.
11. 2nd Audio: ON/OFF the secord audio language.
12. PIP: ON/OFF a picture-in-picture window.
13. Fast rewind: fast rewind by 1×, 2×, 3×, 4×, 5×.
Fast forward: fast forward by 1×, 2×, 3×, 4×, 5×.
14. Angle: Select different angle what you want.
15. Clear: clear error.
16. Display: display the information while playing.
17. Osc: access more options while playing.
18. Program/red button: program playing desired tracks.
19. Bookmark/green button: mark the disc being played; press it to
set bookmark, or press and hold it to pop up the bookmark list.
20. Eject/Insert: eject/insert the disc tray.
21. Title Popup: enter or exit disc menu.
22. Menu: access the main menu of the video disc.
23. Return: return to previous menu.
24. Direction: direction keys.
25. Mute: mute or cancel mute.
26. VOL+: turn up the volume.
VOL-: turn down the volume.
27. Prev.: go to previous chapter/track, or chapter start of DVD
Next: go to next chapter/track.
28. A-B: while playing, press it once to select the starting point, press
it again to select the ending point and repeat playing the
selected segment.
29. Repeat: repeat playing title, chapter, track or disc.
30. HDMI: The HDMI Button function: To switch the resolution of the
video output, you may press it to switch into 480I/P ,576I/P,
720P,1080I,1080P.
Remark: Please switch into 1080P when play the 3D video files; but
when connected with the regular TV or CVBS output, you shall switch
into 480I/P or 576I/P
31. Random: Random playback
32. Blue button: has the function of blue button.
33. Zoom/yellow button: zooming image.
1
2
3
4
7
8
9
11
12
13
14
15
6
5
10
16
17
18
19
20
21
22
23
24
25
26
27
28
29
30
31
32
33

8
Device Connection Description
TV
Video and component input
Connecting 5.1 channel analog input amplifier
Audio/video
connection cable
Component
connection cable
Audio/video input Component input
VIDEO R L Y Pb Pr

9
Device Connection Description
Coaxial and fiber connection
Audio connect cable
R L
Coaxial cable
Fiber cable
Coaxial Fiber
Connecting two-channel analog input amplifier
Audio input

10
Device Connection Description
HDMI connection
HDMI Connection
HDMI IN
HDMI OUT
TV
Network connection
WAN 1 2 LAN 3 4
Internet
Broadband Internet connection
Broadband Router/Modem
Wired Network

11
Device Connection Description
Network connection
Internet 1 2 LAN 3 4
WiFi
USB input
Internet
Broadband Internet connection
Wireless Router/Access Point
Wireless LAN

12
Setup – customizing setting in the main menu
Specific setting method and description
Menu Submenu Item Setting and description
ON
Enable screen saver. If there is no operation in
Fifteen minutes while playing, the screen saver
will be activated. Player will also enter standby
mode if there is no operation in Fifteen minutes.
OFF
Disable this function
ON
Enable auto-play. When a disc is inserted, the
player will read and play automatically.
OFF
General System
Screen saver
(prevent screen burn)
Disc Auto Playback
Disc
The upgrade program is saved in the disc. When
the auto-upgrade function is set to “OFF”, you
need to select the upgrade option manually after
inserting the disc.
USB
The upgrade program is saved in USB disk.
Network
Connect the network cable to the NIC interface
Upgrade
(software update)
Load Default
(restore default settings)
Select this option and press [OK], and the
following dialog box appears:
Press or to select [OK], and press it to restore
all the settings to default, or select [Cancel] to exit
the dialog box.
Reset
Do you want to load default
OK Cancel
ON
When this function is enabled, the player is in
standby, and the device connected through HDMI
is also in standby.
OFF
This function is disabled.
CEC
ON
Enable: upgrade automatically after disc is
inserted.
OFF
This function is disabled.
Disc auto-upgrade

13
Setup – customizing setting in the main menu
Specific setting method and description
Menu Submenu Item Setting and description
English, French, Spanish,Portuguese..........
English, French, Chinese, Spanish....... more
English, French, Chinese, Spanish.......more, Off
If the desired language isn’t in the list, select
“More” to get more options.
Select “OFF” if subtitle isn’t required.
General System
Language
disk can be used to save BD-J data.
BUDA setup (setting the storage media of
BUDA info)
USB: A USB disk is used as storage media, and a
USB disk is required (please note that HDD can’t
be used as the storage media of BUDA info: the
USB disk for BUDA info must be in FAT 32 format)
OSD
(set OSD language)
Menu
(set menu language)
Audio
(set audio language)
Subtitle
(set subtitle language)
ON
Enable PIP function.
The PIP function of certain BD discs allows the
Play
back
PIP MARK
Select this function and press [OK], to show “Easy
Setup Wizard” on the screen. Please follow the
prompt to operate.
Easy setup
(initial setup)
BUDA info (release the storage space of BUDA
info)
When playing BD-J or BD-LIVE disc, if the
storage space is insufficient, please select
[Format] and press [OK] to clear the BUDA info in
the USB disk to release the space and the USB
BUDA
(for BD-J disc playing)
and make sure that the network connection is
normal.
Upgrade
(software update)
ON
OFF
Closed Caption
Angle mark ON
Playing multi-angle discs, you can choose
different scenes.
OFF

14
Setup – customizing setting in the main menu
Specific setting method and description
Menu Submenu Item Setting and description
General Play
back
PIP MARK
ON
Enable secondary audio.
The secondary audio function of certain BD discs
allows playing the primary and secondary audio
simultaneously. When the sign of secondary
audio is enabled, the player will automatically
check whether the disc contains secondary audio
and notify the user by showing this sign.
OFF
Disable this function.
Secondary audio mark
Select this function to memorize the playing of
disc.
(The functionality of this depends on the disc.
Certain discs may be incompatible.)
ON
Enable memory playing. When this function is
enabled, the player can memorize the playing
progress of six discs. When the discs are inserted
next time, a dialog box will pop up and ask you
whether press [Return] to play from the start of
the disc, or press [OK] to resume playing from the
point stopped last time, and the memorized points
will be cleared automatically after power off.
OFF
Disable this function.
Last Memory
PBC on/off
PBC
OFF
Disable this function.
Secondary
screen
Primary screen
player plays primary screen and secondary screen
simultaneously. Generally, the primary video is
displayed in full screen, and the secondary video
is displayed in window. When the PIP is enabled,
the player will recognize whether the disc contains
secondary video and notifying the user by showing
this sign.

15
Setup – customizing setting in the main menu
Specific setting method and description
Menu Submenu Item Setting and description
Press [0]-[9] to enter current password, and the
following dialog box appears if the password is
valid:
Press [0]-[9] to enter a new password (twice)
and then exit above dialog box automatically.
The initial password is 0000.
Select this function and press [OK], the screen
shows the dialog box below and asks you to enter
the password. Refer to previous page for
password setting.
Press [0]-[9] to enter current password, and the
following dialog box appears if the password is
valid:
Use [ ]/[ ] to select the rating (see the Table
below for description), and press [OK] to exit the
dialog box.
General
Change password
Parental control
(allow selecting playing
content according to
disc rating and filtering
improper content for
children)
Security
Change password
Please enter current password
Change password
New password
Parental control
Enter password:
<
•
Select level: OFF
Kid safe
G
Parental control
Select this function and press [OK] and the screen
shows the dialog box below:

16
Setup – customizing setting in the main menu
Specific setting method and description
Menu Submenu Item Setting and description
Motion Picture Association of Film
Ratings
Select this function and press [OK], the screen
shows the dialog box below and asks you to enter
the password, the setting of which is described in
previous page.
Press [0]-[9] to enter current password, and the
following dialog box appears if the password is
valid:
Use [ ]/[ ] to select the country, and press [OK]
to exit the dialog box.
Enable or disable the network function. Certain
functions of the player such as BD-LIVE are
available only when the network is connected.
Enable
Disable
Select the mode of network access
Ethernet (select this option if the network is
connected through cable)
Wireless network
(select this option if the network
is connected through wireless NIC; in this case,
General
Country Code
(select country code,
and make sure that the
user only can watch the
content allowed in local
region)
Internet connection
Interface
Security
Network
(Based
on the
actual
model
function
shall
prevail.)
Off Description
Kid
safe
Suitable for children
G Suitable for all ages
PG Watch under parent guide
PG-13 Children younger than 13 watch under
parente guid
PGR Parent guide is required
R Watch under parent guide if younger than 17
NC-17 Prohibit watching if younger than 17
Adult For adults only
Country & region
Enter the password
•
<
<
Country & region
Select country: UK.
U.S.
U.S. Minor Outlying Islands
Parental control
(allow selecting playing
content according to
disc rating and filtering
the content improper for
children)

17
Setup – customizing setting in the main menu
Specific setting method and description
Menu Submenu Item Setting and description
General
Interface
Information
Connection test
IP setting
Network
(Based
on the
actual
model
function
shall
prevail.)
the USB interface in the rear side of the player
must be inserted with a wireless NIC with Ralink
307× chip).
To change the network access mode, please
disconnect the current network connection first.
Display the network information, such as interface,
IP address, etc.
Test whether the network is connected
successfully. If the network setting is changed,
please check whether the network setting is
proper in this option.
Network OK (connected successfully)
Network error (connection failed; please reset)
Network OK, proxy error (network is connected
successfully, but the proxy setting has error;
please reset the proxy)
Set the IP address accordingly in either mode
below
Auto (obtain IP address automatically)
Manual (set IP address manually, and opensthe
dialog box below)
Press [ ]/[ ] to select the setting item, press
[] to clear original settings, and then press
number keys to input the network information;
after that, press [OK] to save the settings, which
will take effect immediately; while setting, press
[Return] to exit the dialog box.
Network information
Interface Ethernet
Address type Manual
IP address
Subnet mask
Default gateway
DNS1
DNS2
If wireless network access is selected, it requires
configuration.
Search
Search available wireless network around, and
the results are shown on the screen as below;
Wireless setting

18
Setup – customizing setting in the main menu
Specific setting method and description
Menu Submenu Item Setting and description
General
Display
Wireless setting
Proxy setting
TV Screen
(set the aspect ratio
matching the connected
TV set)
Network
(Based
on the
actual
model
function
shall
prevail.)
TV
[
BD-LIVE connection Set the access authority of BD-Live content.
(allow all BD-Live discs connecting to
network)
(only register BD-Live discs
are allowed to connect to network )
(forbid all BD-Live discs connecting to
network)
Select the proxy server to connect to network
Disable (do not use proxy server to connect to the
network)
Enable (connect to the network with proxy server)
Proxy host (set the host of the proxy server)
Proxy port (set the port of the proxy server)
When connected to 16:9 TV, select:
16:9 full screen
In this mode, if the aspect ratio of the disc is 4:3,
the output signal of the player will be stretched to
16:9 full screen.
16:9 normal
In this mode, if the aspect ratio of the disc is 4:3,
you can select accordingly
Press [ ]/[ ] to select wireless network, press
OK] and a dialog box appears on the screen for
you to enter password; if the option of “Security”
is “None”, it doesn’t require password and you
can select [Next] directly; for other options, please
enter the password of the wireless network, then
press [Next] and press [OK] to complete wireless
setting.
If the connection fails, the signal may be too weak.
Network name Security Signal intensity
Recorder None
TP-LINK… None
Test WEP
DLNA Enable
Enable PC browsing function, and play video,
music and pictures in PC.
Disable
Permitted
Partial Permitted
Prohibited
Table of contents
Other Kogan Blu-ray Player manuals

Kogan
Kogan KABRP3D4KUA User manual

Kogan
Kogan KABRP3D4KUA User manual

Kogan
Kogan KABRP21WFIAA User manual

Kogan
Kogan KGNBD2A User manual

Kogan
Kogan KABRP21WFIA User manual

Kogan
Kogan KABRP21X3DB User manual

Kogan
Kogan KGNBD2VBA User manual

Kogan
Kogan KABRP21X3DAA User manual

Kogan
Kogan KABRP21SLMA User manual

Kogan
Kogan KABRP21SLMB User manual