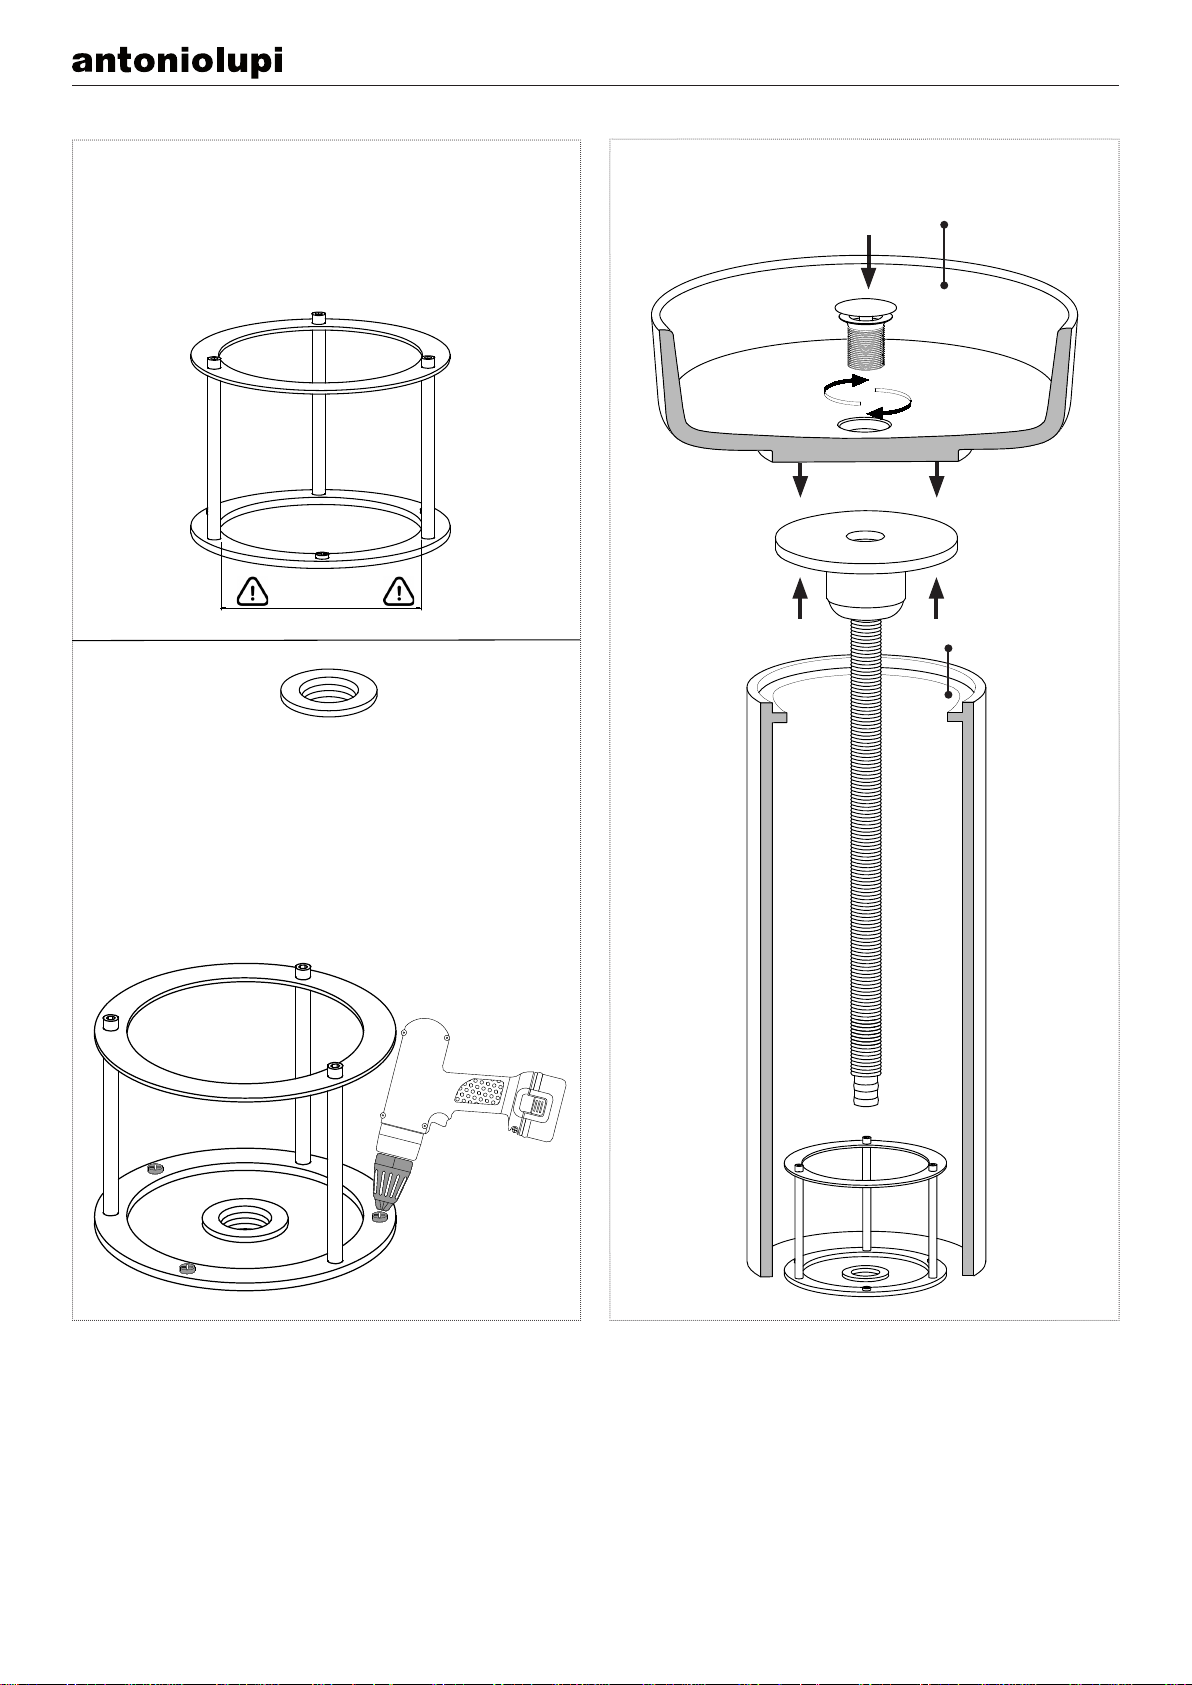
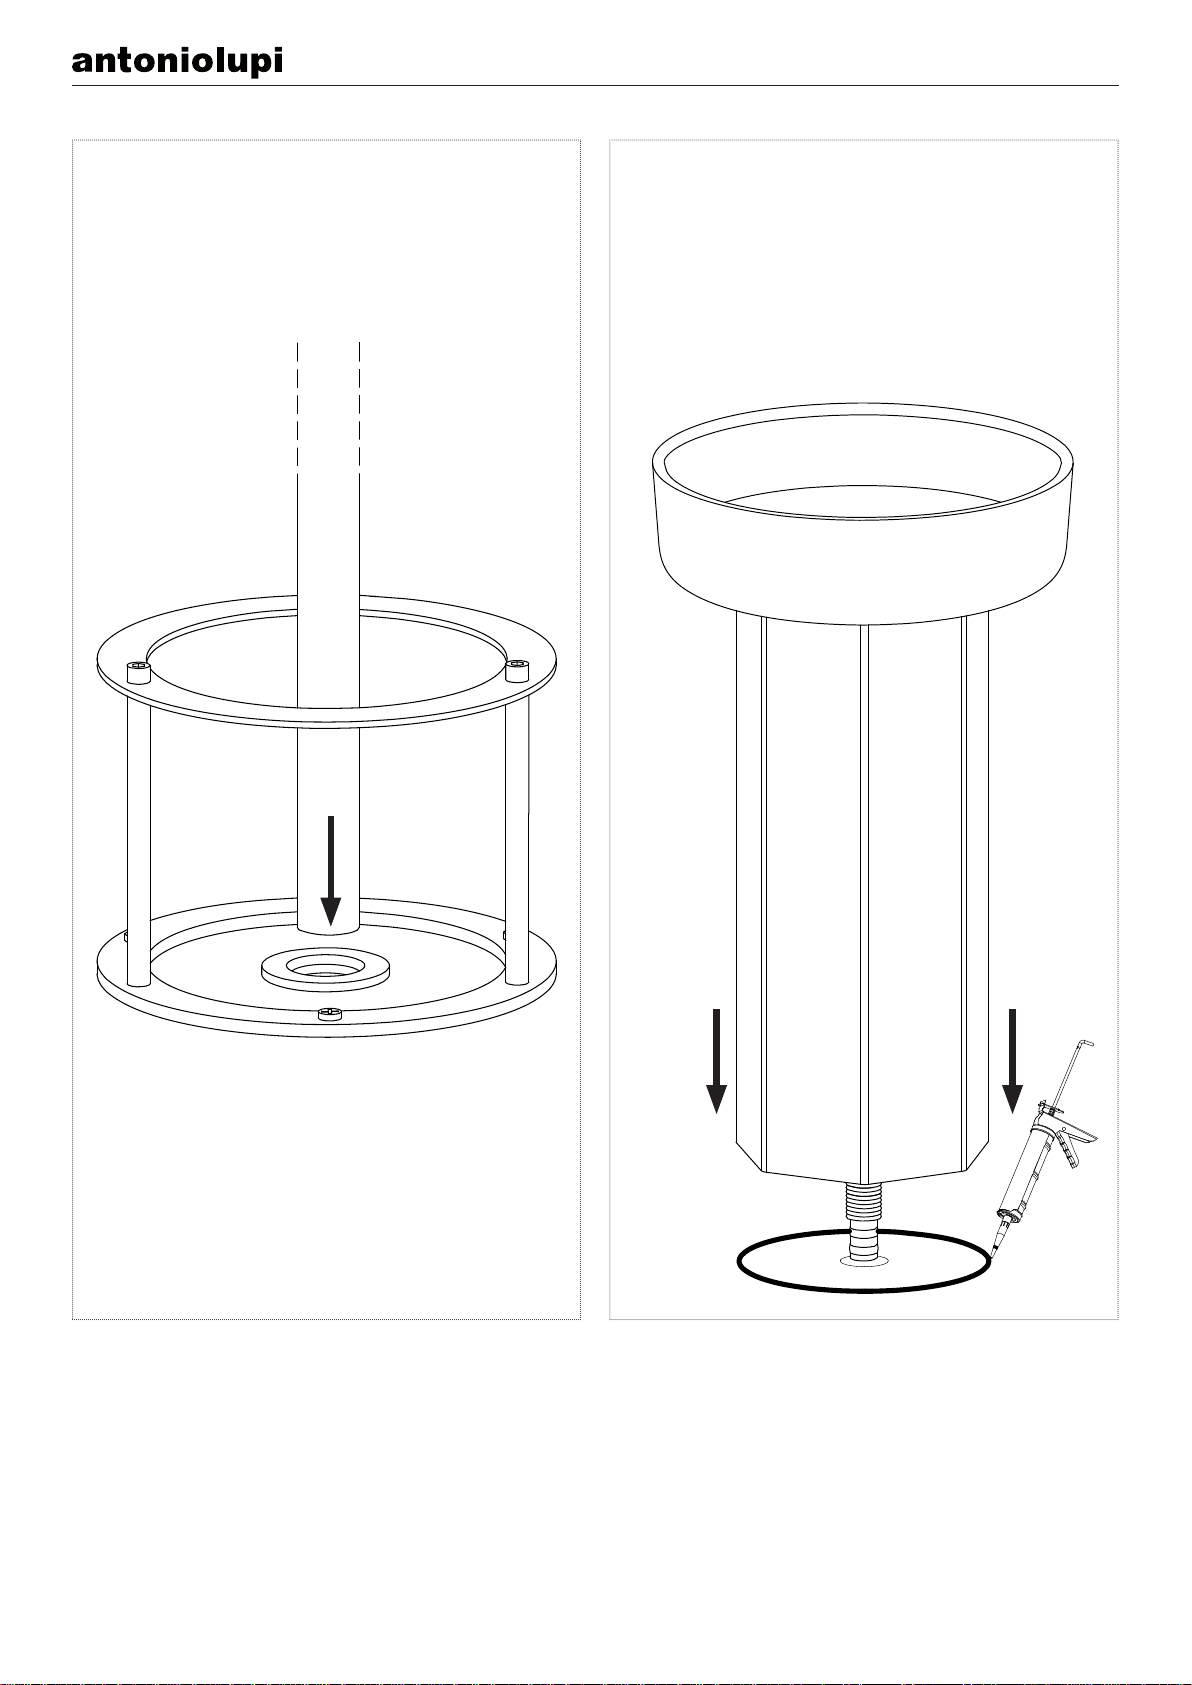
antoniolupi Carlo Colombo e Andrea Lupi OPALE User manual
Popular Outdoor Fountain manuals by other brands

Profi-pumpe
Profi-pumpe FELS-ZAUBER operating instructions

Hasley Taylor
Hasley Taylor 2501A owner's manual

Sunnydaze Decor
Sunnydaze Decor XSS-578 Assembly instructions

Campania International
Campania International Bibendum FT-400 Assembly instructions

Elkay
Elkay FLEXI-GUARD EFHA8 1M Series Installation, care & use manual

S.R.Smith
S.R.Smith Color Light Stream 2CLSLBK instructions

Hozelock Cyprio
Hozelock Cyprio Cascade 1500 Installation and operating instructions

Campania International
Campania International Juliet Fountain quick start guide

Alpine
Alpine WIN732 quick start guide

Campania International
Campania International FT-320 Assembly instructions

Kelkay
Kelkay Easy Fountain Rustic Windmill instructions

Alpine
Alpine WIN258 manual

GardenWize
GardenWize SWGSL230 quick start guide

EasyPro
EasyPro Tranquil Décor HBB39 installation instructions

Campania International
Campania International Girona FT-102A Assembly instructions

Campania International
Campania International FT-271 quick start guide

Campania International
Campania International Bilbao GFRCFT-1111 Assembly instructions

Campania International
Campania International Westover manual