APart-Audio OVO5P User manual

INFO@APART-AUDIO.COM
1
MANUAL
OVO5P

WWW.APART-AUDIO.COM
2
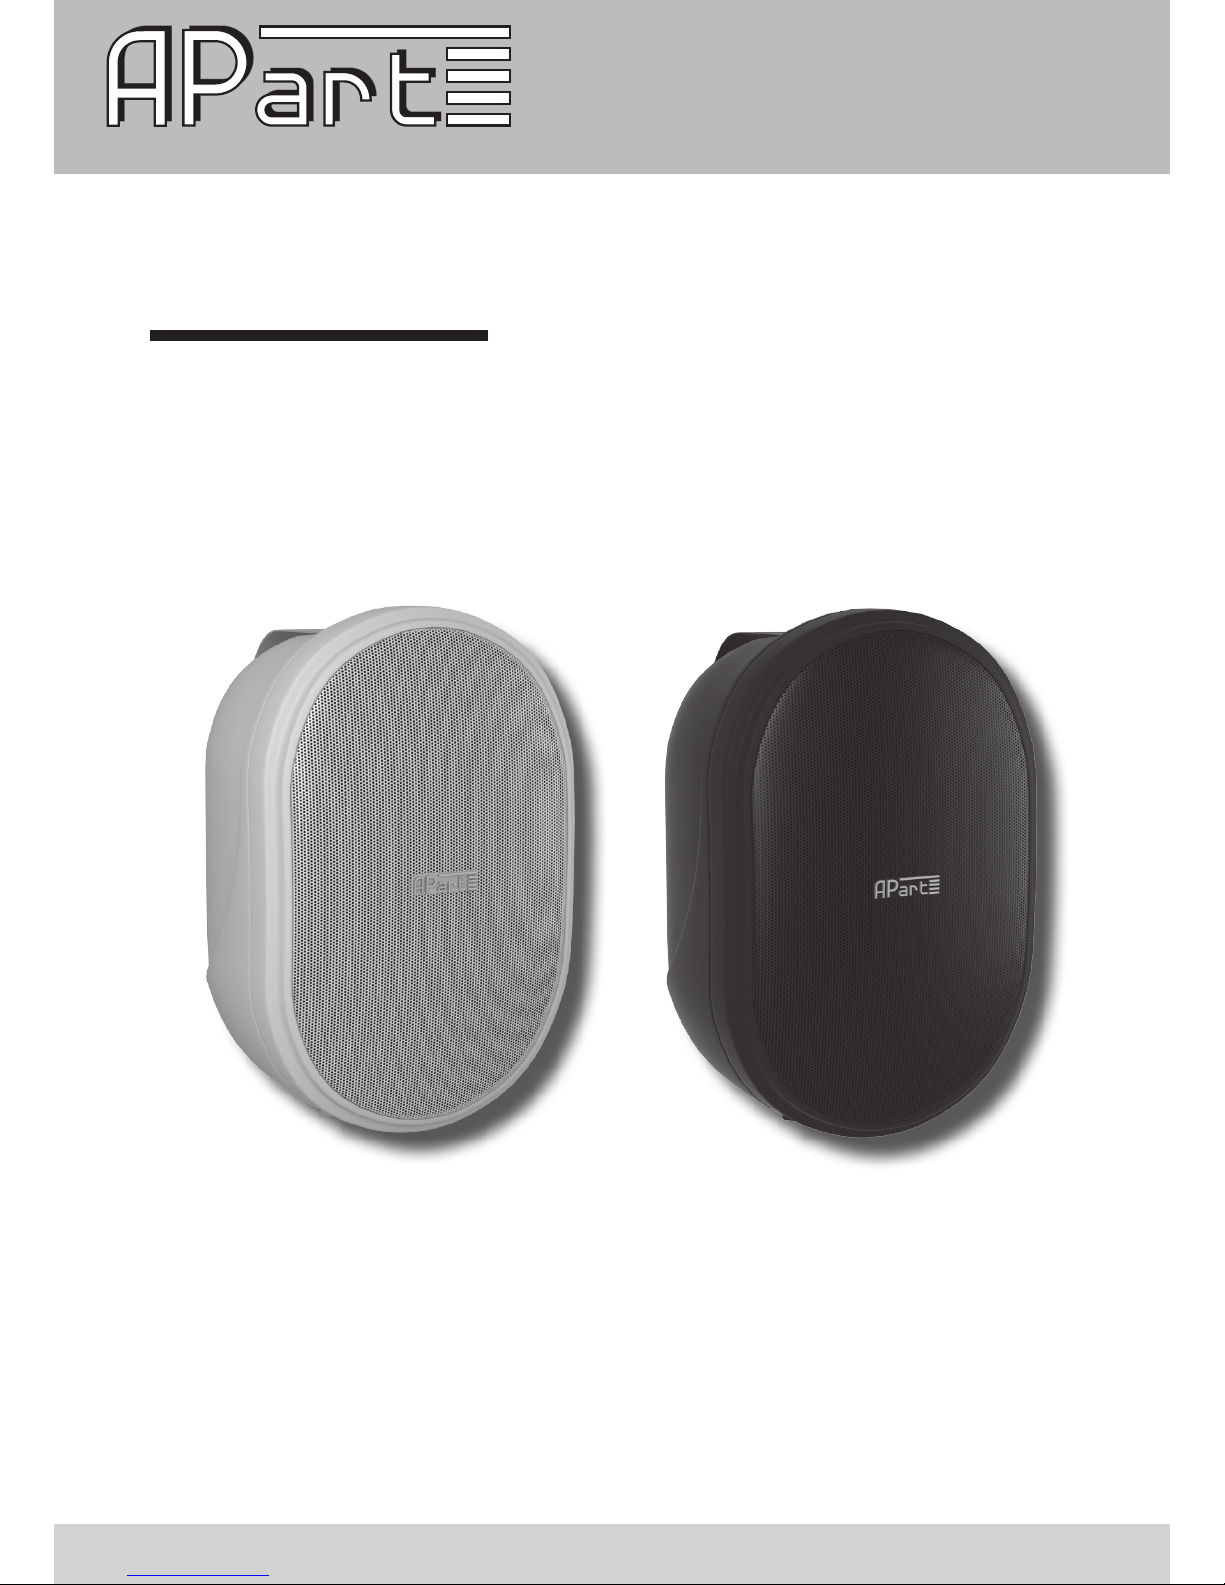
Thank you for buying the Apart OVO5P speaker set.
We have put great care and effort in the design in order to guarantee the highest
possible sound quality. Please read this manual before using the product.
This manual provides you with the information necessary to ensure a seamless
installation and the best possible sound quality. The speaker set consists of an
active speaker (left channel) and a passive slave speaker (right channel).
The amplifiers for both channels are incorporated in the left speaker.
The cabinets are equipped with a sturdy metal speaker bracket for easy installation
at various possible angles.
For indoor use only! These speakers are not magnetically shielded, so use them
only in combination with modern flat screen televisions or monitors.
Introduction
• Please check the packing for any kind of damage upon reception of the goods.
If the packing is damaged, please contact your dealer before opening it.
• !!!! Danger!!!! Exposure to high sound pressure levels may cause permanent
hearing loss. Hearing loss induced by exposure to high sound pressure levels
will vary from individual to individual, but nearly everyone will lose some hearing
when exposed for a sufficient amount of time. Therefore it is recommended that
all persons exposed to equipment capable of producing high sound pressure
levels, such as this amplifier, wear sufficient ear protection while installing or
operating this unit.
• Read all documentation before operating your equipment.
• Keep all documentation for future reference.
• Keep the carton and packing material, even if the equipment has arrived in good
condition.
• Should you ever need to send the unit back, use only the original factory packing.
• Do not spill water or other liquids on or into the unit.
• Make sure power outlets are conform to the power requirements listed on the
back of the unit.
• Do not use the unit if the electrical power cord is frayed or broken.
• Do not connect the inputs/outputs of amplifiers or consoles to any other voltage
source, such as batteries, mains sources or power supplies, regardless of whether
the amplifier or console is turned on or OFF.
• Power down and disconnect units from mains voltage before making
connections.
Safety precaution

INFO@APART-AUDIO.COM
3
• Do not use the unit near stoves, heat registers, radiators, or other heat producing
devices.
• Do not remove the cover. Removing the cover will expose you to potentially
dangerous volt¬ages.
• Do not drive the inputs with a signal level higher than that required to drive
equipment to full output.
• Do not run the output of any amplifier back into another input.
• In case of malfunction, this device should be serviced by qualified service
personnel only.
• For indoor use only! Do not expose the speaker to high humidity levels and/or
high ambient temperatures.
• Avoid exposure to direct sunlight. Long term exposure to high UV radiation may
cause color changes over time.
• Excellent musical quality, crystal clear voice reproduction, high sound level output
• Active speaker that consists of an active and passive speaker
• 2 x 20W output power.
• Ideally suited for AV monitor applications requiring modest sound pressure levels.
• 2 way bass reflex speaker with 5 ¼ inch woofer and 1 inch soft dome tweeter.
• Molded ABS cabinet.
• Painted metal speaker brackets with various possible installing angles.
• All connections and controls are positioned at the backside of the active (left
channel) speaker. The right speaker is connected via a normal speaker cable.
This cable is connected at the rear of the active (left) speaker.
• Easy installation, even in room corners thanks to flexible mounting brackets
(included)
• Can also be placed freestanding
• Separate bass and treble tone controls.
• Volume control.
• Stereo RCA/Cinch input for unbalanced line level signals.
• Stereo minijack input with increased sensitivity, compatible with portable MP3
players, laptop…
• Power LED and accurate clip indicator LEDs.
• Improved thermal design, built for long term use.
• Indoor use only
Features and benefits

WWW.APART-AUDIO.COM
4
The speakers are equipped with custom made painted metal brackets for easy
wall mounting. These brackets allow the speakers to rotate vertically as well as
horizontally, so the speaker can be installed at various possible angles. Use screws
and wall plugs adapted to the material of the wall. A special plastic wedge is
included to enable you to mount the speakers parallel to the wall. Without the
wedge, the speakers can be mounted under various downward vertical angles.
Mounting the speaker
vertical use of the speakerhorizontal use of the speaker
increased inclination

INFO@APART-AUDIO.COM
5
Input sensitivity / impedance RCA stereo: 500 mV, 10 KΩ
Mini-jack: 150 mV, 2.7 KΩ
Tone control Bass: +/- 12 dB at 80 Hz
Treble: +/- 12 dB at 12 KHz
System performance 2 x 20 Watts RMS
Frequency range 50 Hz - 20 KHz
THD < 0.03% at full power -6 dB
S/N ratio > 90 dB
Channel separation 70 dB
AC supply voltage 230 VAC +10%, 50-60 Hz
Max power consumption 50 VA
Idle power consumption 10 VA
System setup 2-way bass reflex speaker
5¼ inch coated paper woofer
1 inch soft dome tweeter
ABS molded cabinet
Dimensions 260x160x180 mm (HxWxD)
Weight (pair) 5.3 Kg net
Shipping weight 6.7 Kg / giftbox
Included accessories speaker, brackets, manual, power
cord, speaker wire
Specifications

WWW.APART-AUDIO.COM
6
Rear panel layout: connections and sound settings
1
2
7
8
9
10
11
12
3
4
5
6
1. AC inlet socket: connect the included power cord here. AC voltage is 230
VAC/50 Hz.
2. Power on/off switch: flip the switch to power the speaker on or off.
3. Right speaker output: connect the speaker wire for the right speaker here. Mind
the polarity. Red = positive, black = negative. The right channel speaker has
the same speaker connector.
4. Left RCA input for line level signals.
5. Right RCA input for line level signals.
6. 3.2 mm minijack input for headphone outs from MP3 players or computers.
7. Treble tone control. Center position = neutral, to the left = less treble, to the
right = more treble.
8. Bass tone control. Center position = neutral, to the left = less bass, to the right
= more bass.
9. Volume knob. Turn clockwise to increase the volume.
10.Power LED: lights up green when the powercord is connected to a working AC
outlet and the power switch is turned on.
11.Clip LED R: this red LED lights up when the right channel is overloaded.
Reduce the volume (9) so that the clip LED does not light up during use.
12.Clip LED L: this red LED lights up when the left channel is overloaded.
Reduce the volume (9) so that the clip LED does not light up during use.

INFO@APART-AUDIO.COM
7
Technical drawing with measurements
APart-Audio warrants this product to be free of defects in material and workmanship
for a period of one year for parts and for a period of one year for labor from the
date of original end-user purchase. This warranty is valid only for the original end-
user and cannot be transferred.
During the warranty period APart-Audio or one of its authorized service partners
shall either repair or replace any product, free of charge, that proves to be
defective on inspection by APart-Audio or its authorized service representative.
This warranty does not include, damages or product faults due to abuse, misuse or
faulty installation.
Right speaker terminal: connect the right speaker output from the active speaker to
this terminal. Mind the polarity. Connect red terminal from the active speaker to the
red terminal from the slave (right speaker), black to black, using standard speaker
wire. Minimum wire surface = 0.5 mm² for lengths up to 10 meters.
Warranty info

WWW.APART-AUDIO.COM
8
ANY SUGGESTION?
They are well appreciated and eventually rewarded!
Send your ideas or suggestions to
developed by
Audioprof nv
Industriepark Brechtsebaan 8 bus 1
2900 Schoten
Belgium
Company names, product names, and names of formats etc. are the trademarks or registered trade-
marks of their respective owners.
© 2011 APart-Audio specifications subject to change without notice.
Table of contents