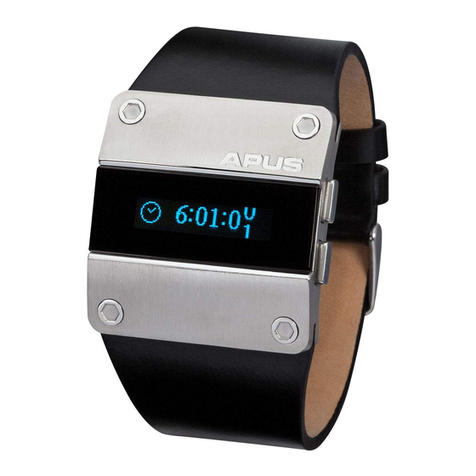
APUS Alpha User manual

1
BEDIENUNGSANLEITUNG / SERVICEHEFT
USER’S GUIDE / SERVICE BOOKLET
MODE D‘EMPLOI / CARNET DE SERVICE
INSTRUCCIONES / LIBERETA DE SERVICIO
LIBRETTO DI ISTRUZIONI / LIBRETTO DI SERVIZIO

2 3
Herzlichen Glückwunsch zum Kauf dieser APUS-Uhr. Vor dem
Verwenden der Uhr lesen Sie diese Bedienungsanleitung gründlich
durch, um richtige Bedienung zu gewährleisten. Nach dem Lesen der
Anleitung legen Sie sie immer an einer sicheren Stelle zum zukünftigen
Nachschlagen ab.
Thank you for your purchase of this APUS watch. Before using the
watch, read this instruction manual carefully to ensure correct use. After
reading, be sure to store this manual in a safe place should it be needed
for future reference.
Merci pour avoir acheté cette montre APUS. Avant d’utiliser la montre,
lisez ce mode d’emploi attentivement pour assurez un utilisation correc-
te. Après l’avoir lu, assurez-vous de conserver ce mode d’emploi dans un
endroit sûr car vous pourriez en avoir besoin de nouveau dans le futur.
Gracias por la compra de este reloj APUS. Antes de usar el reloj, lea aten-
tamente este manual de instrucciones para asegurar un uso correcto.
Después de leer este manual, asegure de guardarlo en un lugar seguro
para futuras consultas.
Grazie per avere acquistato questo orologio APUS. Prima di usarlo le rac-
comandiamo di leggere con attenzione questo manuale d’uso in modo
da procedere nel modo corretto. Dopo la lettura le raccomandiamo di
conservarlo a portata di mano per qualsiasi riferimento futuro.
WICHTIGE INFORMATIONEN
• Niemals die Druckknöpfe/Krone betätigen oder die Zeit einstellen,
wenn sich die Uhr unter Wasser befindet oder naß ist. Nachdem die
Uhr Salzwasser ausgesetzt war, müssen Uhrengehäuse und Armband
gründlich in Süßwasser abgespült werden.
• Kein Dampfbad und keine Sauna. Nehmen Sie bitte Ihre APUS Uhr
nicht mit ins Dampfbad oder in die Sauna. Die dort herrschende
extreme Hitze in Kombination mit Feuchtigkeit kann dazu führen, daß
Ihre Uhr nicht mehr richtig wasserdicht ist.
IMPORTANT TO KNOW
• When the watch is underwater or wet, never use the pushers/bezels,
or set the time. Watch cases and metal bracelets should be rinsed
thoroughly in fresh water after being in salt water.
• No hot tub/sauna. Please do not take your APUS watch into the hot
tub/sauna. The combination of extreme heat and water may cause
your watch to lose some of its water-resistance.
IL EST IMPORTANT DE SAVOIR
• Lorsque la montre est immergée, il ne faut jamais utiliser les boutons
ou la lunette, ou régler la montre. Le Boîtier de la montre ainsi que le
bracelet doivent être entièrement rincés à l’eau douce après contact
avec l’eau de mer.
• Pas de Sauna/Hammam. Prière de ne pas porter votre montre APUS
dans un Sauna ou Hammam. La chaleur élevée combinée à l’eau peut
provoquer un manque d‘étanchéité.

4 5
IMPORTANTE
• No utilice nunca los botones ni ajuste la hora cuando el reloj está
húmedo o bajo el agua. Si ha expuesto el reloj al agua salada debe
enjuagar las carcasas y las correas de metal con agua fría.
• Ni sauna ni baño caliente. No se ponga el reloj APUS cuando tome
un baño caliente o una sauna. La combinación del agua con un calor
extremo puede reducir la resistencia al agua que presenta el reloj.
INFORMAZIONI IMPORTANTI
• Quando l’orologio è sott’acqua o bagnato non utilizzare mai pulsanti
/corone né impostare l’ora. Si consiglia di sciacquare con acqua di rubi
netto cassa e bracciale dell’orologio nel caso in cui siano stati immersi
in acqua salata.
• Evitare bagni caldi/sauna. Non indossate il vostro orologio APUS in
bagni caldi o sauna. La combinazione di calore elevato e acqua potreb
be causare al vostro orologio perdita di capacità di impermeabilità.
ALPHA

6 7
BETA
DEUTSCH
Im Normalbetrieb ist das Display deaktiviert. Um die Zeitanzeige zu
aktivieren (Stunden, Minuten, Sekunden), drücken Sie bitte A oder B.
NORMALE ZEITANZEIGE
01. Wenn das Display aktiviert ist, drücken Sie A, um in einen anderen
Modus zu wechseln. Die Reihenfolge der Modi ist: Zeit, Kalender,
Alarm 1, Alarm 2, Stoppuhr / Countdown, 2. Zeitzone.
02. Drücken Sie B, um das akustische Stundensignal zu deaktivieren.
UHRZEIT EINSTELLEN
01. In der normalen Zeitanzeige können Sie durch drücken von A (für 3
Sekunden) in den Stellmodus wechseln. Die Stunde wird jetzt hervor
gehoben sein.
02. Drücken Sie nun B, um die Uhr eine Stunde vorzustellen, halten Sie B
gedrückt um den Schnellvorlauf zu aktivieren.
03. Drücken Sie A, um zur nächsten Einheit zu wechseln.
04. Die Einstellsequenz lautet: Stunden, Minuten, Sekunden, 12/24h
Format.
05. Nachdem das Stundenformat (12/24) gewählt wurde, drücken Sie A,
um den Stellmodus zu verlassen.
Hinweis: In allen Stellmodi wird nach 8 Sekunden ohne Knopfdruck die
aktuelle Einstellung gespeichert und die Uhr kehrt in den Uhrzeitmodus
zurück.

8 9
KALENDER EINSTELLEN
01. Drücken Sie A, um in den Kalendermodus zu wechseln.
02. Drücken Sie A, für mindestens 3 Sekunden um in den Einstellmodus
zu wechseln. Das Jahr wird nun hervorgehoben sein.
03. Drücken Sie B, um die Jahreszahl zu erhöhen, halten Sie B für einen
schnellen Vorlauf gedrückt.
04. Drücken Sie A, um zur nächsten Einstellung zu wechseln.
05. Die Einstellungssequenz lautet: Jahr, Monat, Datum.
Hinweis: Der Wochentag wird automatisch eingestellt, wenn Sie den
Einstellungsmodus verlassen.
ALARM MODUS
01. Drücken Sie A, um in den Modus für den 1. Alarm zu wechseln.
Drücken Sie nochmal auf A, um in den Modus für den
2. Alarm zu wechseln.
02. Drücken Sie B, um den Alarm ein oder auszuschalten.
03. Drücken Sie A, für 3 Sekunden um den Einstellmodus zu aktivieren,
die Stunde wird hervorgehoben sein.
STOPPUHR / COUNTDOWN MODUS
01. Drücken Sie A, um in den Stoppuhrmodus zu wechseln. Drücken
Sie B, um die Stoppuhr zu starten und erneut B, um sie wieder
anzuhalten.
02. Drücken Sie A und halten Sie A für 3 Sekunden gedrückt, um den
Einstellungsmodus für den Countdown zu aktivieren, die Stunde
wird hervorgehoben sein.
EINSTELLEN DER 2. ZEITZONE
01. Drücken Sie A, um zur 2. Zeitzone zu wechseln.
02. Drücken Sie A für 3 Sekunden, um den Einstellmodus zu aktivieren,
die Stunde wird hervorgehoben sein.
ENGLISH
The display is normally turned off. To activate the normal time display
(hour, minute, second), please press either A or B.
NORMAL TIME DISPLAY
06. When the display is activated, press A to change mode. Mode
sequence is, time, calendar, alarm 1, alarm 2, timer /countdown,
time zone 2.
07. Press B to toggle chime on/off.
TIME SETTING
03. In normal time display, press and hold A for 3 seconds to enter
setting mode; hour will be highlighted.
04. Press B to advance digit; press and hold B for fast advance.
05. Press A to set and advance to next setting value.
06. Setting sequence is hour, minute, second, 12/24 hour format.
07. After 12/24 hour format has been selected, press A to exit setting
mode. Note: In any setting mode, if no pusher is operated for 8

10 11
seconds, settings will be saved and the display will return to the
normal time display.
CALENDAR SETTING
01. Press A to change to calendar mode.
02. Press and hold A for 3 seconds to enter setting mode; year will be
highlighted.
03. Press B to advance digit; press and hold B for fast advance.
04. Press A to set and advance to next setting value.
05. Setting sequence is year, month, date.
Note: Weekday is automatically updated upon exiting the setting
mode.
ALARM MODE
03. Press A to change to alarm 1 mode. Press A again to change to
alarm 2. mode.
04. Press B to toggle alarm on/off.
05. Press and hold A for 3 seconds to enter setting mode; hour will be
highlighted.
TIMER / COUNTDOWN MODE
03. Press A to change to timer mode. Press B to Start the timer.
04. Press and hold A for 3 seconds to enter the setting mode for the
countdown; hour will be highlighted..
TIME ZONE 2 SETTING
06. Press A to change to time zone 2.
07. Press and hold A for 3 seconds to enter setting mode; hour will be
highlighted.
FRANCAIS
En fonctionnement normal, l‘écran est éteint. Pour activer l‘affichage
de l‘heure (heures, minutes, secondes), appuyez sur A ou B.
AFFICHAGE NORMAL DE L‘HEURE
01. Si l‘écran est allumé, appuyez sur A pour passer à un autre mode.
La séquence des modes est : heure, date,
alarme 1, alarme 2, chronomètre / compte à rebours,
2 fuseaux horaires.
02. Appuyez sur B pour désactiver le signal sonore toutes les heures.
REGLER L´HEURE
01. Lors de l´affichage normal du temps, vous pouvez en appuyant
simplement sur A (pendant 3 secondes) passer dans le mode de
réglage. L‘heure sera maintenant mise en évidence.
02. Maintenant, appuyez sur B pour avancer l‘horloge d‘une heure,
appuyez sur B pour activer le réglage rapide des heures.
03. Appuyez sur A pour passer à l‘unité suivante.
04. La séquence de réglage : heures, minutes, secondes, format 12/24h.
05. Après le format de l‘heure (12/24) a été sélectionné, appuyez sur A
pour quitter le mode de réglage.

12 13
Note: Dans tous les modes, le réglage en cours est enregistré au bout
de 8 secondes sans appuyer sur un bouton et l´heure revient au réglage
de départ.
REGLAGE DU CALENDRIER
01. Appuyez sur A pour passer au mode calendrier.
02. Appuyez sur A au moins 3 secondes pour activer le mode réglage.
L´année est mise en évidence.
03. Appuyez sur B pour régler l´année, maintenez appuyer sur B pour
activer le réglage rapide.
04. Appuyez sur A pour passer au mode suivant.
05. La séquence de réglage : année, mois, date.
Note : Le jour de la semaine est affiché automatiquement quand
vous quittez le mode de réglage.
MODE ALARME
01. Appuyez sur A pour changer la première alarme. Appuyez de
nouveau sur A pour changer la deuxième alarme.
02. Appuyez sur B pour arrêter l‘alarme ou la désactiver.
03. Appuyez sur A pendant 3 secondes pour activer le mode de réglage,
l‘heure sera mise en évidence.
MODE CHRONOMETRE / COMPTE A REBOURS
01. Appuyez sur A pour passer en mode chronomètre. Appuyez sur B
pour démarrer le chronomètre et à nouveau sur B pour l´arrêter.
02. Appuyez sur A et maintenez A pendant 3 secondes pour activer
le mode de réglage du compte à rebours. Les heures sont mises en
évidence.
REGLAGE DU 2e FUSEAU HORAIRE
01. Appuyez sur A pour changer le 2e fuseau horaire.
02. Appuyez sur A pendant 3 secondes pour activer le mode de réglage,
l‘heure sera mise en évidence.
ITALIANO
Durante l’uso normale il display non è attivato. Per attivare la segnalazio-
ne dell’ora (ore, minuti, secondi), La preghiamo di calcare A o B.
SEGNALAZIONE ORARIO NORMALE
08. Quando il display è attivato, prema A, per entrare in un altro pro
gramma. La sequenza die programmi è: ora, calendario, allarme 1,
allarme 2, cronometro/countdown, 2. fuso orario.
09. Calchi B per disattivare il segnale orario acustico.
REGOLARE L’ORARIO
08. Nella segnalazione normale dell’orario può, calcando A (per 3 secon
di) cambiare nel modo regolazione. Adesso l’ora verrà
messa in risalto.
09. Adesso calchi B, per mettere l’orologio un ora in avanti, lasci B calca
to per attivare il modo d’avanzamento veloce.
10. Calchi A per cambiare nella prossima unità.

14 15
11. La sequenza di programmazione è: ore, minuti, secondi, formato
12/24h.
12. Dopo che il formato orario (12/24) è stato selezionato, calchi A, per
uscire dal programma di regolazione.
Avvertimento: In tutti i programmi di regolazione, dopo 8 secondi
senza premere il pulsante, le impostazioni attuali vengono memoriz
zate e l’orologio ritorna nel programma orario.
REGOLARE IL CALENDARIO
08. Calchi A per entrare nel programma calendario.
09. Calchi A per almeno 3 secondi per entrare nel programma di regola
mento. Ora l’anno sarà in risalto.
10. Calchi B per aumentare la somma degli anni, per un avanzamento
veloce tenga B calcato.
11. Calchi A per arrivare alle prossime impostazioni.
12. La sequenza d’impostazione è: anno, mese, data.
Avvertimento: Il giorno della settimana viene regolato automatica
mente quando esce dal programma regolamento.
ALLARME
04. Calchi A per entrare nel programma del 1. allarme. Calchi ancora A
per cambiare nel programma per il 2. allarme.
05. Calchi B per accendere o spegnere l’allarme.
06. Calchi A per 3 secondi per attivare il programma delle impostazioni,
l’ora sarà in risalto.
CRONOMETRO/ PROGRAMMA COUNTDOWN
06. Calchi A per entrare nel programma cronometro. Calchi B per dare
il via al cronometro ed ancora B per fermarlo.
07. Calchi A e tenga A calcato per 3 secondi per attivare il programma
di regolamento per il countdown, l’ora sarà in risalto.
REGOLAMENTO DEL 2. FUSO ORARIO
05. Calchi A per cambiare nel 2. fuso orario.
06. Calchi A per 3 secondi per attivare il programma di regolamento,
l’ora verrà messa in risalto.
ESPAÑOL
La pantalla está deactivada en el modo normal. Por favor, pulse A o B
para activar la pantalla (horas, minutos, segundos).
INDICADOR DE HORA NORMAL
01. Si la pantalla está activada, pulse A para cambiar en otro modo. El
orden de los modos es: tiempo, calendario, alarma 1, alarma 2,
cronómetro / cuenta atrás, segundo huso horario.
02. Pulse B para desactivar la señal horaria acústica.
AJUSTAR LA HORA
01. En el modo del indicador de hora normal, se puede cambiar en el
modo de ajustes pulsando A (para 3 segundos). Entonces, la hora
está marcada.

16 17
03. Pulse A para 3 segundos para activar el modo de ajustes. La hora
está marcada.
MODO DE CRONÓMETRO/ CUENTA ATRÁS
01. Pulse A para cambiar en el modo de cronómetro. Pulse B para iniciar
el cronómetro y vuelva a pulsar B para detenerlo.
02. Pulse A y siga pulsándolo para 3 segundos para activar el modo de
ajustes de la cuenta atrás. La hora está marcada.
AJUSTAR EL SEGUNDO HUSO HORARIO
01. Pulse A para cambiar en el modo del segundo huso horario.
02. Pulse A para 3 segundos para activar el modo de ajustes. La hora
está marcada.
02. Ahora pulse B para adelantar la hora. Siga pulsando B para activar
el avance rápido.
03. Pulse A para cambiar a la siguiente unidad.
04. La secuencia de los ajuste es: horas, minutos, segundos, formato
12/24h.
08. Después de haber elegido el formato de hora (12/24), pulse A para
salir del modo de ajustes.
Indicación: Los ajustes actuales se guardan después de 8 segundos
sin pulsar nigún botón en todos los modos de ajustes y el reloj vuelve
al indicacor de hora normal.
AJUSTAR EL CALENDARIO
01. Pulse A para cambiar en el modo de calendario.
02. Pulse A por lo menos para 3 segundos para cambiar en el modo de
ajustes. El año está marcado.
03. Pulse B para avanzar el año y siga pulsando B para activar el avance
rápido.
04. Pulse A para cambiar en el modo del siguiente ajuste.
05. La secuencia de ajustes es: año, mes, fecha.
Indicación: El día de la semana se guardará automáticamente
cuando sale del modo de ajustes.
MODO DE ALARMA
01. Pulse A para cambiar en el modo de la alarma 1. Vuelva a pulsar A
para cambiar en el modo de la alarma 2.
02. Pulse B para poner o apagar la alarma.

18 19
ZETAGAMMA

20 21
EPSILIONDELTA

22 23
TIME SETTING
After pressing button A to display the time, press button B to enter the
setting mode. The „hour“ will start to flash.
Now press button A to set the hours, once the hours have been set,
press button B to reach the minute setting. The minutes will start to
flash. Press the button A to set the minutes.
Continue pressing button B to reach: Seconds, Months, the Date, the
current year and the the 12/24h format. AM / PM stands for the 12h
format, whereas „24 Hr“ stands for the 24h format.
FRANCAIS
AFFICHAGE NORMAL DE L‘HEURE
Pressez le bouton A. Ensuite les heures et les minutes sont affichés. En
pressant le bouton A encore une fois, la date est affichée et si vous
pressez le bouton A pour la troisième fois, les secondes sont affichées.
REGLER L´HEURE
En pressant le bouton A vous activez l’idication de l’heure.
Ensuite pressez le bouton B pour quelques secondes. Alors, l’idication
de l’heure clignote. Vous pouvez régler les heures avec le bouton A.
Lorsque l’indication de l’heure est réglée correctement, pressez le bouton
B et l’indication des minutes commence à clignoter. Maintenant, réglez
les minutes.
DEUTSCH
ZEITANZEIGE
Drücken Sie Taste A, es werden Stunden und Minuten angezeigt, durch
erneuten Druck der Taste wird das Datum angezeigt, durch erneuten
Druck werden die Sekunden angezeigt.
ZEIT EINSTELLEN
Aktivieren Sie durch Drücken von Taste A die Zeitanzeige.
Drücken Sie nun Taste B für einige Sekunden. Die Stundenanzeige blinkt
nun, stellen sie mit Taste A die Stunden ein. Sind die Stunden korrekt
eingestellt, drücken Sie Taste B und die Minutenanzeige beginnt zu
blinken, stellen Sie nun die Minute nein.
Wiederholen Sie die Prozedur um die Monate, das Datum und das Jahr
zu stellen.
Nachdem Sie das Jahr gestellt haben, haben Sie die Möglichkeit
zwischen dem 12 oder 24h Modus zu wechseln. “12Hr” für das 12h
Format, “24Hr” für das 24h Format.
ENGLISH
TIME DISPLAY
Press button A to display the time, pressing it again will display the date
and the seconds.

24 25
Répétez cette procédure pour le réglage des mois, de la date et de l’an.
Après le réglage de l’an, vous avez l’option de choisir entre le mode
de 12 heures ou de 24 heures: “12Hr” pour le mode de 12 heures et
“24Hr” pour le mode de 24 heures.
ESPAÑOL
INDICADOR DE HORA NORMAL
Pulse el botón A y se indican las horas y los minutos. Pulsándolo otra vez
se indica la fecha. Volviendo a pulsar el botón A se indican los segundos.
AJUSTAR LA HORA
Active la indicación de la hora pulsando el botón A. Después pulse el
botón B durante unos segundos. La indicación de la hora está parpa-
deando. Ajuste ahora las horas con el botón A. Cuando las horas estén
ajustadas correctamente, pulse el botón B y la indicación de los minutos
empieza a parpadear. Ahora ajuste los minutos.
Repita ese proceso para ajustar los meses, la fecha y el año.
Después de haber ajustado el año, tiene la opción de elegir entre el
modo de 12 o 24 horas. “12Hr” para el modo de 12 horas, “24Hr” para
el modo de 24 horas.
THETA

26 27
FRANCAIS
AFFICHAGE NORMAL DE L‘HEURE
Activez l’indication de l’heure en touchant le bouton.
REGLER L´HEURE
Activez l’indication de l’heure en touchant le bouton. Appuyez sur le
bouton pour cinq secondes pour activer le mode de réglage. Ensuite
appuyez sur le bouton pour régler l’heure. Appuyez sur le bouton pour
cinq secondes pour changer le mode de réglage. Vous pouvez main-
tenant régler les minutes en appuyant sur le bouton. Après le réglage
des minutes, ne appuyez pas sur le bouton pour cinq secondes pour
rentrer à l’indication de l’heure. La montre est alors réglée.
ESPAÑOL
INDICADOR DE HORA NORMAL
Active la indicación de la hora pulsando el botón del reloj.
AJUSTAR LA HORA
Active la indicación de la hora pulsando el botón pantalla
Pulse el botón por cinco segundos para activar el modo de ajuste.
Después, pulse el botón para ajustar la hora. Pulse el botón por cinco
segundos para cambiar al modo de ajuste de los minutos. Ahora puede
ajustar los minutos pulsando el botón. Después del ajuste de los minu-
tos, no pulse el botón por cinco segundos para volver a la indicación de
DEUTSCH
ZEITANZEIGE
Anzeige von Stunden und Minuten. Drücken Sie den Knopf um die An-
zeige zu aktivieren, die Zeit wird angezeigt. Wenn die Zeitanzeige aktiv
ist, drücken Sie den Knopf für einige Sekunden, die Stundenanzeige
beginnt zu blinken, lassen Sie den Knopf los.
ZEIT EINSTELLEN
Drücken Sie nun den Knopf um die Stunde einzustellen, ist die Stunde
eingestellt, drücken Sie den Knopf für 3s nicht, die Minute beginnt zu
blinken. Lassen Sie nun den Knopf los. Stellen Sie nun die Minute durch
Drücken des Knopfes, ist die Minute gestellt, lassen Sie den Knopf los.
ENGLISH
TIME DISPLAY
Displays Hours and Minutes.
TIME SETTING
Press the button to activate the time display. Once the time display is
active, press the button for a few seconds to enter t he setting mode.
The hours will begin to flash , let go of the button. In the setting mode,
press the button to set the hour. Once the hours have been set, let go of
the button for a few seconds, the minutes will beginn to flash. Press the
button to set the minutes, once they have been set, let go of the button.

28 29
IOTA
la hora. Ahora, el reloj está ajustado.
DEUTSCH
FUNKTIONEN
Horizontale und Vertikale Zeit- und Datumsanzeige, nach der Uhrzeit
werden bis zu 10 programmierbare Zeichen eingeblendet.
ZEITANZEIGE
Drücken Sie Knopf A um das Display zu aktivieren, die Uhrzeit wird für
einige Sekunden angezeigt, danach werden die einprogrammierten
Zeichen für ca. 10 Sekunden eingeblendet. Drücken Sie Knopf A erneut
um das Datum einzublenden. Um zwischen Horizontaler und Vertikaler
Anzeigerichtung umzuschalten, drücken Sie zuerst Knopf A um die
Anzeige zu aktivieren, drücken Sie danach Knopf B für ca. 3s – die
Anzeigerichtung wird nun umgeschaltet.
ZEIT EINSTELLEN
Drücken Sie Knopf A um die Anzeige zu aktivieren. Drücken Sie Knopf B
für einige Sekunden um in den Stellmodus zu wechseln. Die 12h / 24h
Option wird angezeigt, wechseln Sie zwischen 12 / 24h Modus durch
Drücken des Knopfes A. Drücken Sie Knopf B um in den Stunden-
stellmodus zu wechseln, drücken Sie nun Knopf A um die Stunde zu
stellen. Drücken Sie Knopf B um in den Minutenstellmodus zu wechseln,
drücken Sie Knopf A um die Minuten zu stellen. Drücken Sie nun die
Knöpfe A und B um das Datum und den Monat einzustellen. Um die

30 31
Zeichenanzeige zu programmieren, drücken Sie Knopf A um das Display
zu aktivieren, drücken Sie nun Knopf A erneut um zur Datumsanzeige
zu wechseln. Drücken Sie nun Knopf B für drei Sekunden um in den
Stellmodus für die Zeichenanzeige zu wechseln. Drücken Sie Knopf A um
das aktuelle Zeichen einzustellen, drücken Sie Knopf B um zum nächsten
Zeichen zu wechseln.
ENGLISH
FEATURES
Horizontal or vertical time and date display, display up to 10 preset
letters after the time has been displayed.
TIME DISPLAY
Press button A to activate the display, the time will be displayed, for a
few seconds, the preset letters will scroll through afterwards (for about
10s). Press button A again to display the date. To switch between vertical
and horizontal display mode: activate the display by pressing button A,
then press down button B for 3s.
TIME SETTING
Press button A to activate the display. Press and hold button B to activate
the setting mode. The 12Hr / 24Hr option will flash. Press button B to
toggle between 12Hr / 24Hr display mode. Press button B to switch to
Hour setting. Press button A to set the hours, after that press button B
to switch to minutes, press the button A to set the minutes. Continue
to press button B to adjust date and month. To set the preset letters,
activate the display by pressing button A, and press it again to enter
the date display. Now press and hold button B for 3 seconds. You will
now enter the pre-et letters setting mode. Press button A to adjust the
current letter. Press button B to toggle to the next letter. Press button A
to adjust the letter.
FRANCAIS
LES PARTICULARITES
Indication du temps horizontale et vertical, date, indication de jusqu’à 10
caractères après indication du temps.
AFFICHAGE NORMAL DE L‘HEURE
Appuyez sur bouton A pour activer l’écran. Le temps sera indiqué pour
quelques seconds, après les caractères préréglés seront indiqués succes-
sivement (pour environ 10 secondes). Appuyez sur bouton A encore une
fois pour l’indication de la date. Pour changer d’indication horizontale et
verticale: activez l’écran en appuyant sur le bouton A, ensuite appuyez
sur bouton B pour trois secondes.
REGLER L´HEURE
Appuyez sur le bouton A pour activer l’écran. Appuyez sur le bouton B
et continuez de l’appuyer pour activer le mode de réglage. L’indication
12h/24h clignotera. Appuyez sur le bouton B pour changer le mode
12h/24h. Appuyez sur le bouton B pour changer au réglage de l’heure.

32 33
Appuyez sur le bouton A pour régler l’heure, ensuite appuyez sur le
bouton B pour changer aux minutes, appuyez le bouton A pour régler
les minutes. Continuez d’appuyer sur le bouton B pour régler la date et
le mois. Pour régler les caractères préréglés activez l’écran en appuyant
sur le bouton A et appuyez sur le bouton A encore une fois pour régler
la date. Maintenant, appuyez sur le bouton B et continuez de l’appuyez
pour trois secondes et ensuite vous changerez le mode pour régler les
caractère préréglés. Appuyez sur le bouton A pour régler le caractère
actuel. Appuyez sur le bouton B pour voir le caractère suivant. Appuyez
sur le bouton A pour régler le caractère.
ESPAÑOL
LAS CARACTERISTICAS
Indicación del tiempo horizontal y vertical, fecha, indicación de hasta 10
caracteres después de la indicación del tiempo.
INDICADOR DE HORA NORMAL
Pulse botón A para activar la pantalla. El tiempo será indicado por unos
segundos, después los caracteres predeterminados serán indicados
sucesivamente (por unos 10 segundos). Pulse botón A otra vez para ver
la indicación de la fecha. Para cambiar la indicación horizontal y vertical:
active la pantalla pulsando botón A, después pulse botón B por tres
segundos.
AJUSTAR LA HORA
Pulse botón A para activar la pantalla. Pulse botón B et siga pulsán-
dolo para activar el modo de ajuste. La indicación 12h/24h está
parpadeando.Pulse botón B para cambar el modo 12h/24h. Pulse botón
B para ajustar la hora. Pulse botón A para ajustar la hora, después pulse
botón B para cambar a los minutos, pulse botón A para ajustar los minu-
tos. Siga pulsando botón B para ajustar la fecha y el mes. Para ajustar los
caracteres predeterminados active la pantalla pulsando botón A y pulse
botón A otra vez ajustar la fecha. Ahora, pulse botón B y siga pulsándolo
por tres segundos y después podrá ajustar los caracteres predetermina-
dos. Pulse botón A para ajustar el carácter actual. Pulse botón B para ver
el carácter siguiente. Pulse botón A para ajustar el carácter.

34 35
DEUTSCH
DAS TOUCHFELD DER UHR IST GESPERRT, UM ES ZU
ENTSPERREN FÜHREN SIE DIE FOLGENDEN SCHRITTE DURCH
01. Drücken Sie den “Light” Sensor für eine Sekunde.
02. Wischen Sie mit dem Finger im Kreis um das Display
bis Sie einen Piepton hören.
03. Das “T” symbol wird im Display erscheinen sobald
die Uhr entsperrt ist.
Wenn Sie den Bildschrim für 10 Sekunden nicht berühren,
wird er automatisch wieder gesperrt.
DIE UHR HAT DIE FOLGENDEN FUNKTIONEN:
01. Zeitanzeige
02. 2. Zeitzone
03. Weckzeit
04. Chronograph / Stoppuhr
05. Countdown Funktion
BENUTZUNG DER FUNKTIONEN
Um zwischen den Modi zu wechseln, entsperren Sie die Uhr und drü-
cken Sie auf “Mode”. Um Einstellungen vorzunehmen wischen Sie von
“Start/Stop” zu “Set/Reset” und wieder zurück. Um die Zeit einzustellen,
drücken Sie im Uhrzeitmodus für einige Sekunden auf “Set/Reset”.
KAPPA

36 37
ENGLISH
THE WATCH IS LOCKED, TO UNLOCK IT FOLLOW THESE
INSTRUCTIONS
01. Press the light sensor for 1 sec.
02. lide your finger around the watch until set/reset sensor, you will hear
a beep.
03. The „T“ symbol on the screen will indicate the watch has been
unlocked.
If the screen is untouched for 10 seconds, the watch will automatically
lock again.
THE WATCH FEATURES FIVE MODES
01. Time Display
02. Dual Time / World Time
03. Alarm
04. Chronograph
05. Timer / Countdown
USING THE WATCH
To change the display mode unlock the watch and then press the mode
sensor. To adjust slide from Start / Stop to Set / Reset and back.
To set the time touch “Set/Reset” while being in the time display mode.
FRANCAIS
LA MONTRE EST VERROUILLÉE. POUR DÉVERROUILLER LA
MONTRE, SUIVEZ CES INSTRUCTIONS
01. Appuyez sur le capteur de luminosité pour une seconde.
02. Klj
03. Le caractère « T » sur l’écran indique que la montre est déverrouillée.
Si vous ne touchez pas l’écran pour 10 secondes, la montre sera automa-
tiquement verrouillée.
LA MONTRE A CINQ MODES
01. Indication du temps
02. Temps international
03. Alarme
04. Chronographe
05. Compte à rebours
L’UTILISATION DE LA MONTRE
Pour changer le mode, déverrouillez la montre et ensuite appuyez sur
le capteur de mode. Pour régler mouvez votre doigt de Start/Stop à
Set/Reset.

38 39
ITALIANO
L’OROLOGIO È BLOCCATO. PER SBLOCCARLO SEGUIRE
LE SEGUENTI ISTRUZIONI
01. Premere sul sensore LIGHT per secondi.
02. Far scivolare il dito fino al sensore SET / RESET (si sentirà un bip).
03. Il simbolo T segnala che l’orologio è sbloccato.
Se lo schermo non viene toccato per 10 secondi l’orologio si blocca
automaticamente. Per maggiori dettagli, si consiglia di consultare il
libretto d’istruzioni.
L’OROLOGIO HA CINQUE MODALITÀ / FUNZIONI DI DISPLAY
01. Ora normale
02. Ora internazionale
03. Sveglia
04. Cronografo
05. Timer
Cambio di modalità / funzione di display
Il cambio di funzione/modalità si effettua dopo aver sbloccato l’orologio
e premendo sul sensore MODE per 1 sec.
Per regolare l’impostazione della modalità attivata far scivolare il dito dal
sensore START/STOP al sensore SET/RESET e viceversa.
ESPAÑOL
EL RELOJ ESTÁ BLOQUEADO. PARA DESBLOQUEAR EL RELOJ,
SIGA LAS INSTRUCCIONES SIGUIENTES
01. Pulse el sensor de luz por un segundo.
02. Klj
03. En la pantalla el carácter “T” indica que el reloj está desbloqueado.
Si no toca la pantalla por 10 segundos, el reloj será automáticamente
bloqueado.
EL RELOJ TIENE CINCO MODOS
01. Indicación del tiempo
02. Tiempo internacional
03. Alarma
04. Cronógrafo
05. Cuenta atrás
UTILIZACIÓN DEL RELOJ
Para cambar el modo, desbloquee el reloj y después pulse el sensor de
modo. Para ajustar mueva su dedo de Start/Stop a Set/reset y atrás.
Other manuals for Alpha
1
This manual suits for next models
8
Table of contents
Other APUS Watch manuals