Aqua Sound WMA30 Operating and safety instructions

1
NL Instellen + Installeren
2
EN
Setup + Installation
12
WiFi-Audio versterker
WiFi-Audio amplifier
•
WMA30

2
Inhoud
Checklist alle onderdelen 3
Instellen:
•WiFi-Audio versterker toevoegen aan
uw huisnetwerk (2.4 GHz) 4
•WiFi-Audio versterker via LAN toevoegen
aan uw huisnetwerk 8
Aansluiten externe bron (AUX) 9
Resetten WiFi-Audio versterker 10
Welke App’s kunt u gebruiken 10
Installeren van de WiFi-Audio versterker 11
www.aquasound.eu - info@aquasound.eu

3
Checklist onderdelen
Dank u wel voor de aankoop van dit AquaSound product. De WiFi-Audio versterker is een
geavanceerd (draadloos) Wi-Fi audio systeem voor keuken, badkamer of elke andere ruimte in huis.
De onderstaande onderdelen vindt u in de verpakking:
Digitale WiFi-Audio versterker/ontvanger (1x) 230V/24V adapter (1x) Speakersnoer 3,5 meter (2x), indien er ook
speakers zijn geleverd.
RCA mini-jack kabel (1x)
Specificaties:
Model: WMA30
Vermogen: 30W (2x 15W RMS)
Wi-Fi: IEEE801.11 b/g/n (2,4G)
LAN: Single 10/100M, RJ45
Audio input: Analoog 3,5 mm (mini-jack)
Protocols: AirPlay, DLNA, UPnP, Spotify Connect, Qplay
Decoding: Tot 24bit/192kHz
Muziek formaten: FLAC/MP3/AAC/AAC+/ALAC/APE/WAV
Adapter: AC 230V (24v /3,5A)
Impedance: 8 Ohm
Frequentie bereik: 20 Hz – 20kHz
Afmetingen (l x b x h): 100 x 800 x 22 mm
Gewicht: 0,4kg

4
WiFi-Audio versterker toevoegen aan uw huisnetwerk
WiFi-Audio versterker toevoegen aan uw draadloze huisnetwerk (2.4 GHz)
Onderstaande stappen dient u eenmaal uit te voeren. De WiFi-Audio versterker is dan permanent met
uw huisnetwerk verbonden.
•Zorg ervoor dat de WiFi-Audio versterker op een locatie staat waar een goede Wi-Fi
verbinding gewaarborgd is.
•Voeg de WiFi-Audio versterker eerst toe aan uw draadloze huisnetwerk, alvorens u tot inbouw
overgaat.
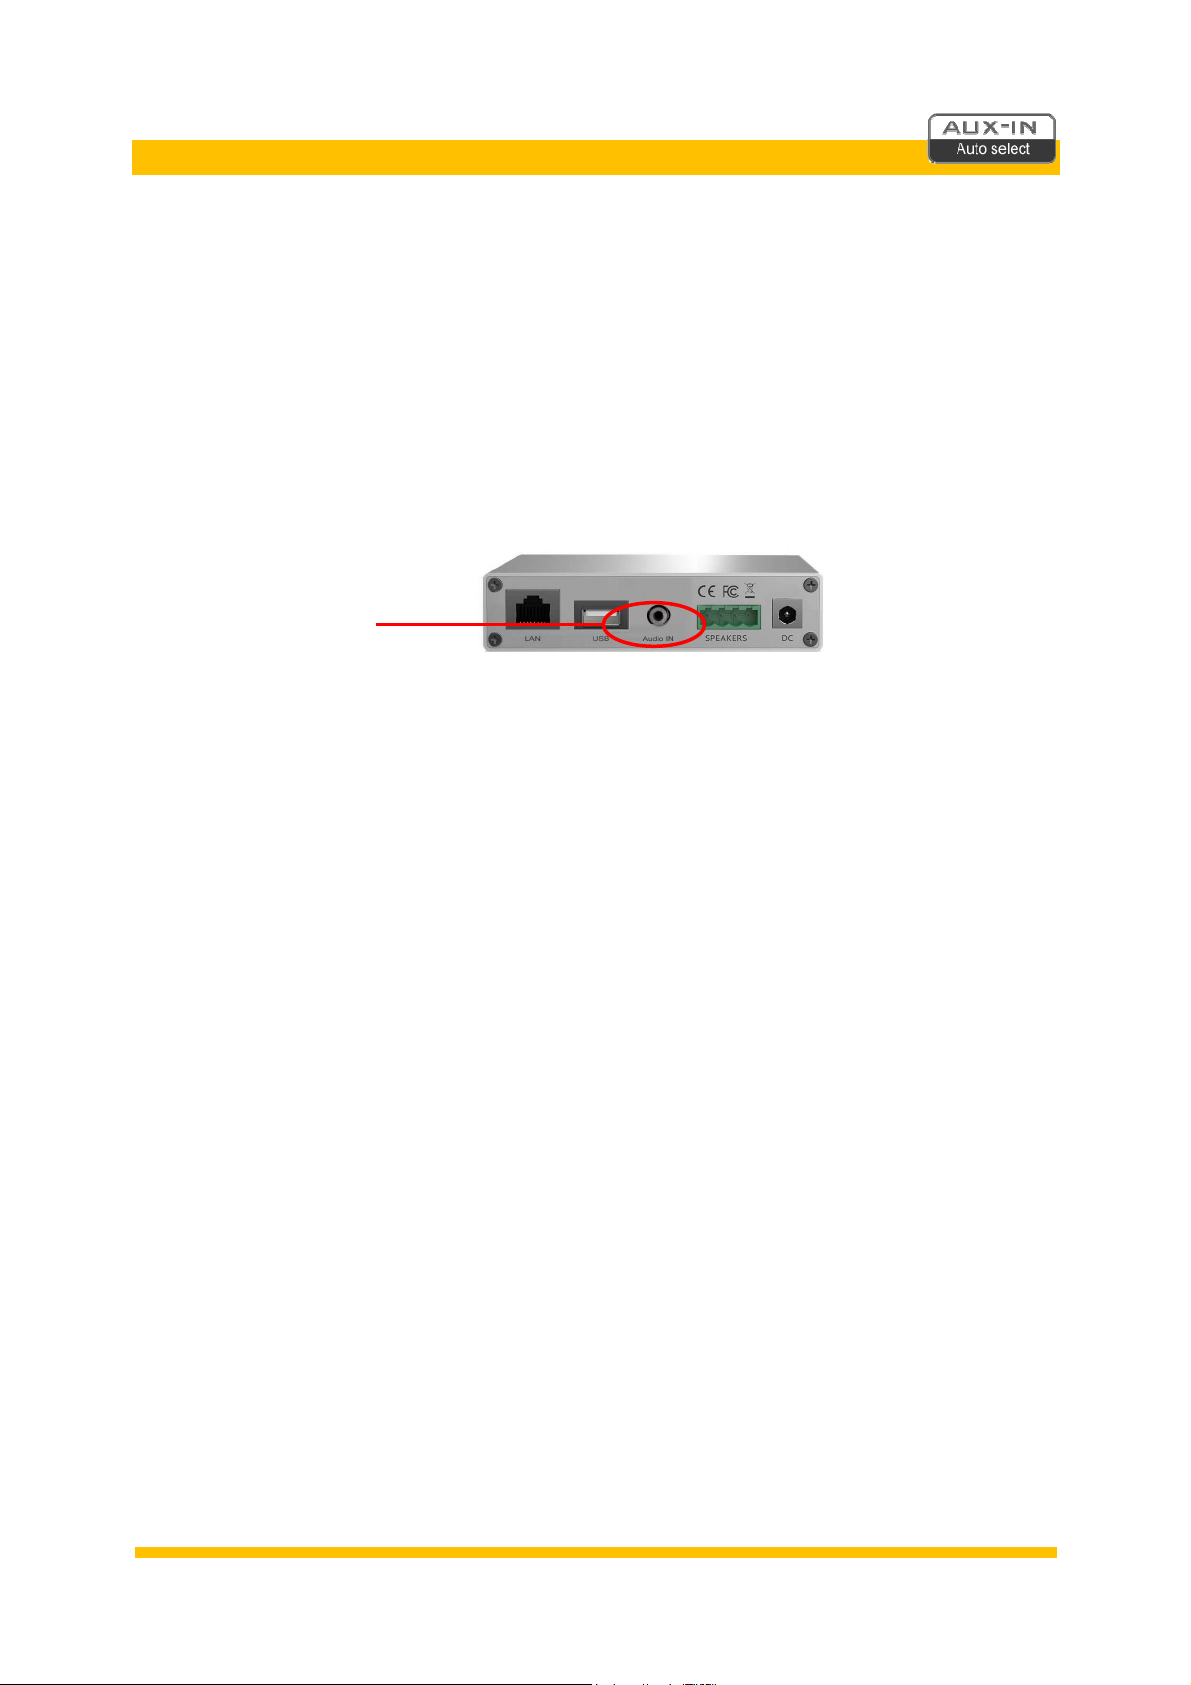
•Sluit ook 1 of 2 speakers aan, zodat u makkelijker door het instel-proces geleid wordt (tbv
stembegeleiding).
1 Download nu de Muzo Player* App via Google Play of Apple’s App-store,
maar open de App nog niet.
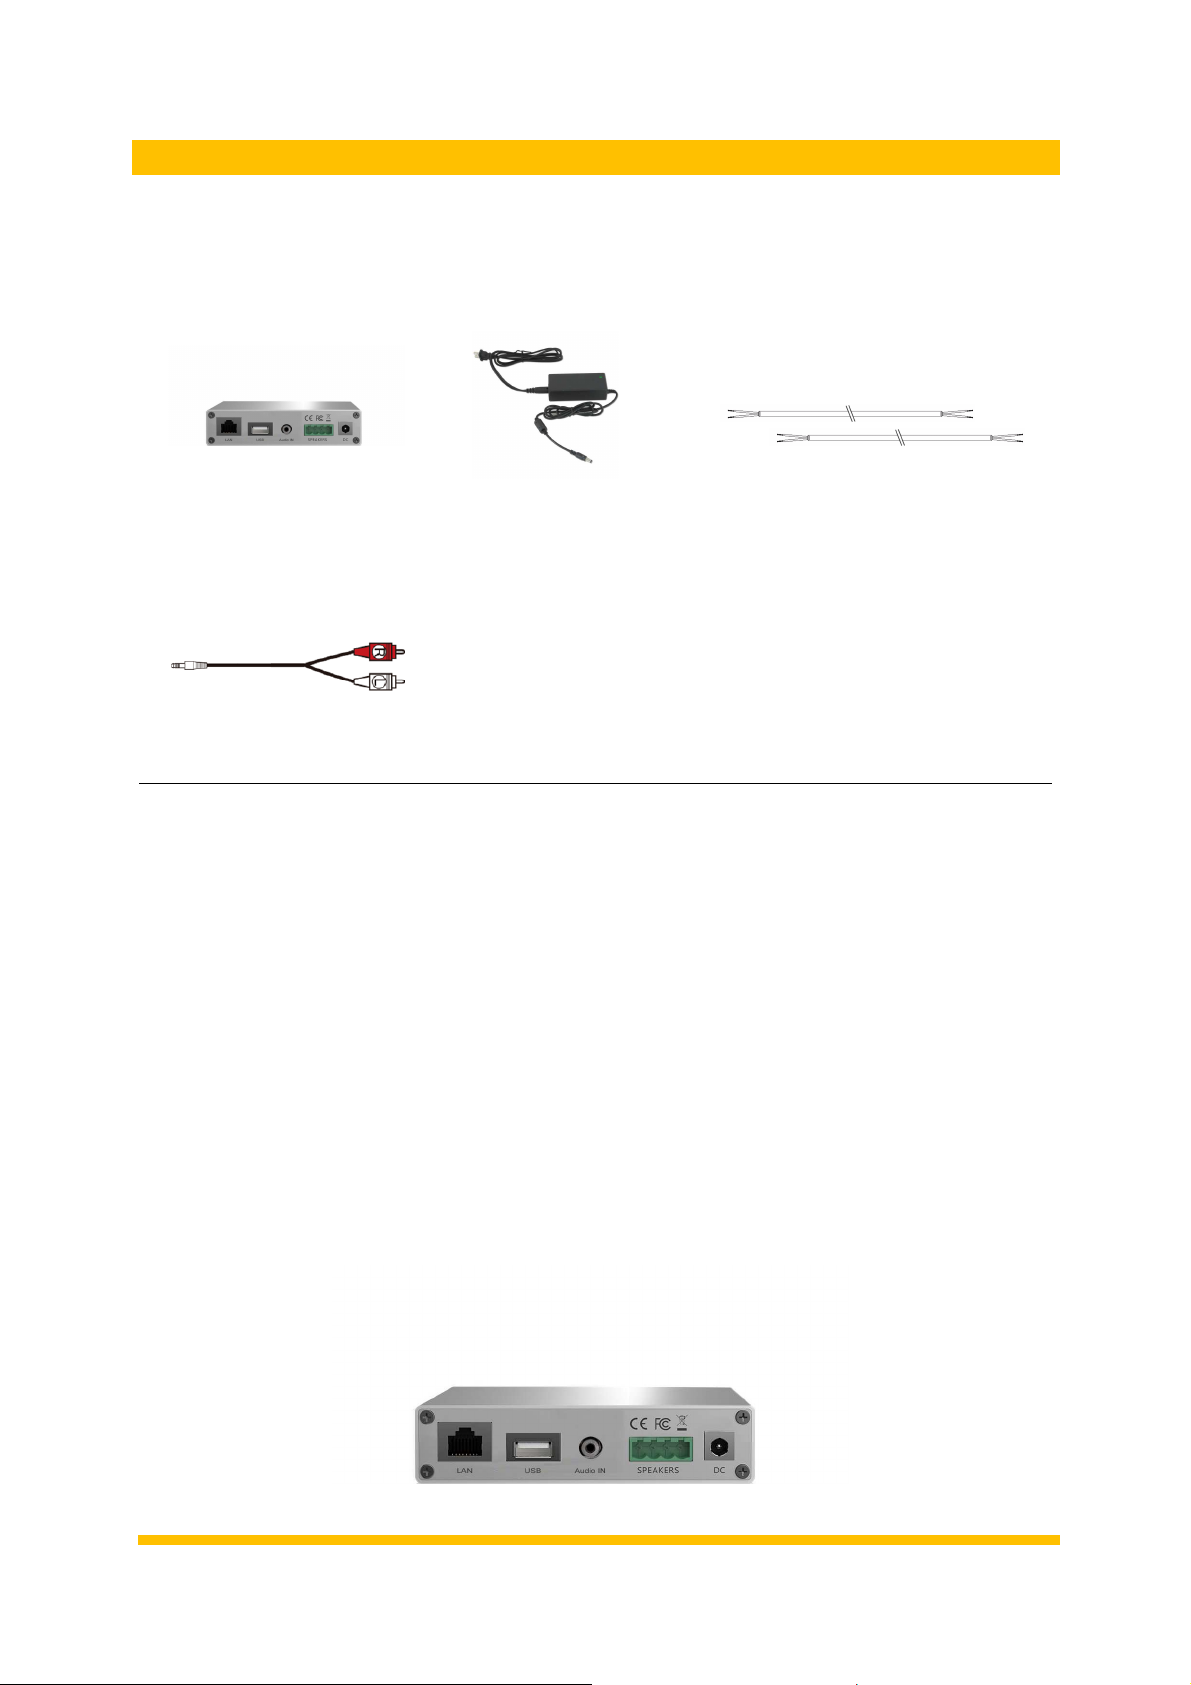
2 Sluit de Wi-Fi-Audio versterker aan op de stroom. Wacht nu 45 seconden.
3 Neem uw mobiele telefoon of tablet ter hand en zet de 3G/4G UIT.
4 Ga nu eerst naar de Wi-Fi instellingen in uw mobiele telefoon of tablet.
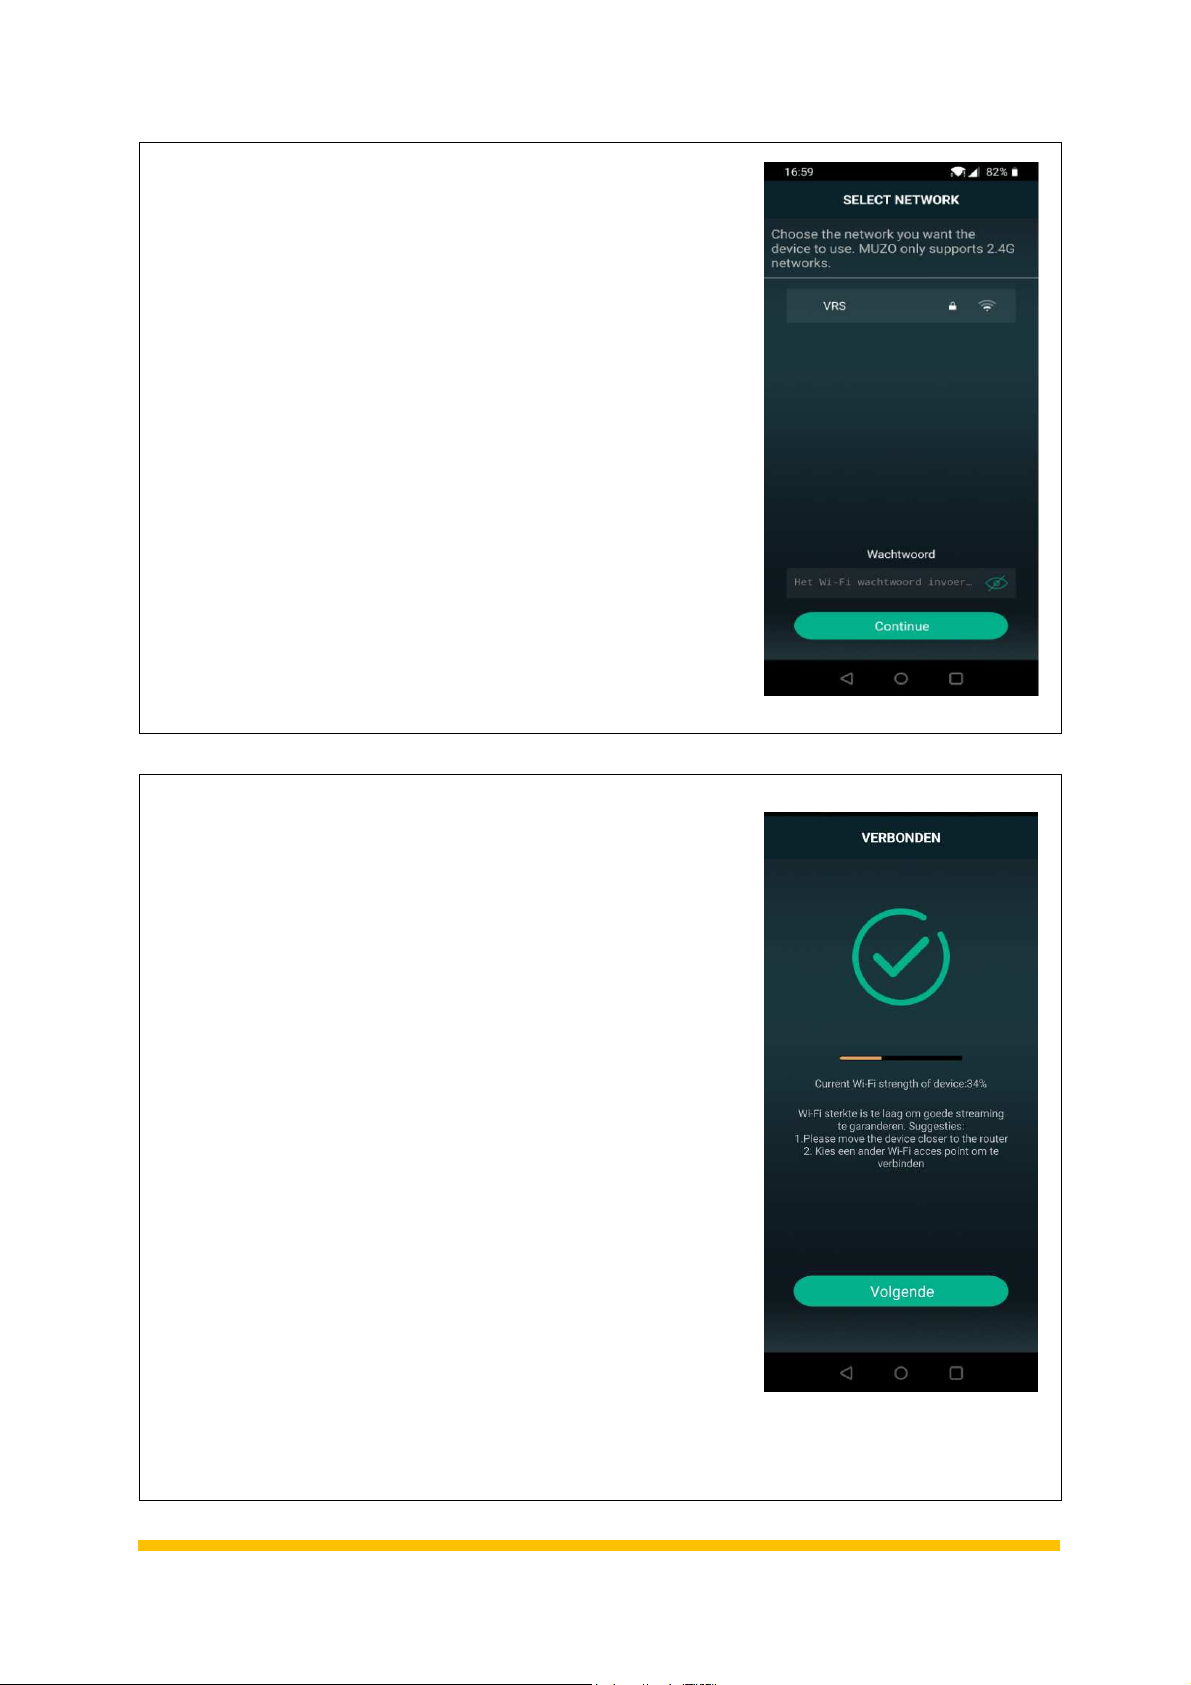
5 Zoek het Wi-Fi netwerk “SoundSystem” of “WiFi Speaker” en verbind ermee.
Als dat is gelukt ziet u staan ‘Verbonden, geen internet’ (dit is juist). U hoort een stem die zegt
‘you are now connected to the speaker’.
(Als een Password wordt gevraagd toets dan: 88888888)
6 Start nu de Muzo Player App op.
7 De App zal de WiFi-Audio versterker nu vinden, de melding
‘Found 1 device’ verschijnt.
8 Druk ‘Apparaat Toevoegen’ (Indien gevraagd, kies voor
‘Muzo Cobblestone’)

5
9 Nu verschijnt er een lijst met Wi-Fi netwerken (Routers).
Kies dat netwerk waarmee u de WiFi-Audio versterker
wenst te koppelen.
10 Toets het Password in van uw huisnetwerk, kies volgende.
11 Als de koppeling is gelukt ziet u het scherm ‘Verbonden’ en
u hoort u de stem zeggen ‘Connected to your Wi-Fi network’
12 Kies volgende.

6
13 Nu kunt u een naam kiezen uit de lijst van bechikbare
namen, of kies ‘Personaliseren’ en bedenk zelf een
naam.
14 Druk nu rechtsboven ‘>’ (pijltje naar rechts) om de
instellingen te bevestigen.
U komt nu in de apparaatlijst, het instellen is klaar.
•Selecteer een apparaat of swipe naar links en rechts om in de
Verschillende schermen te komen.
<< >>

7
De WiFi-Audio versterker is nu permanent in uw huisnetwerk opgenomen.
•Zet de 3G/4G weer aan op uw mobiele telefoon/tablet.
•Nu mag uw mobiele telefoon/tablet weer met uw Wi-Fi huisnetwerk (2.4 Ghz) verbonden
worden.
Apple gebruikers:
•Stream via de AirPlay functie van uw mobiele telefoon.
•Stream via de Muzo App op uw mobiele telefoon of tablet.
•Stream rechtstreeks vanuit Spotify (Spotify Premium account vereist).
Android gebruikers:
•Stream via de Muzo APP op uw mobiele telefoon.
•Stream rechtstreeks vanuit Spotify (Spotify Premium account vereist).
AquaSound N-Joy gebruikers:
•Stream vanuit de N-Joy controller rechtstreeks naar de WiFi-Audio versterker.
Zorg ervoor dat de WiFi-Audio versterker op een locatie staat waar een goede Wi-Fi verbinding
gewaarborgd is.

8
WiFi-Audio versterker via LAN toevoegen aan uw huisnetwerk
Het is ook mogelijk om de versterker met een LAN-kabel (niet meegeleverd) in uw huisnetwerk op te
nemen. In dit geval zijn er verder geen instellingen nodig en kunt u de WiFi-Audio versterker direct
gebruiken met de Muzo Player App of middels de Airplay functie van Apple.
LAN aansluiting

9
Aansluiten externe bron:
Op de versterker is een Aux-In (Line In / Audio In) voorzien. Hier kunt u bijvoorbeeld een TV op
aansluiten. Het geluid van de TV zal dan te horen zijn via de speakers die zijn aangesloten op deze
versterker. De AUX-In kan op 2 manieren geactiveerd worden.
Line-In (Aux-In)
Handmatige Aux:
De versterker kan via de Muzo Player App op Aux-In (Line-In) gezet worden. Het geluid van een
apparaat (bv TV) welke is aangesloten op de Line-In zal nu via de speakers van de versterker te horen
zijn.
AUTO-AUX
De Auto-Aux wordt geactiveerd nadat u een muziekstream pauzeert. Na 7-8 seconde schakelt de
versterker automatisch om naar Aux-In. Start u weer een stream, dan zal de versterker automatisch
omschakelen en de stream ten gehore brengen.

10
Welke App’s kunt u gebruiken:
Er zijn meerdere App’s beschikbaar via Google Play of Apple’s App-store. Kies de App waar u het
prettigst mee kunt werken.
•Muzo Player
•Smart Sonix
•4Stream
Resetten van de WiFi-Audio versterker:
Om de WiFi-Audio versterker te resetten, houdt u de WPS-toets minimaal 10 seconde in. Na zo’n 10
seconde hoort u de stem bevestigen dat de reset is geslaagd, u hoort ‘restore to factory settings’.

11
Installeren van de WiFi-Audio versterker en speakers:
Als het apparaat correct is toegevoegd aan uw huisnetwerk dan kunt u ‘m inbouwen. Houd rekening
met de volgende punten om de versterker juist te plaatsen:
•De WiFi-Audio versterker mag achter het verlaagde plafond geplaatst worden (via het
speakergat), mits er voldoende Wi-Fi bereik is.
•De ruimte (achter het plafond) moet minimaal 75 mm zijn.
•Achter het plafond dient een stopcontact aanwezig te zijn.
•Indien u een LAN-kabel achter uw plafond heeft gelegd, steek deze dan in de RJ45
aansluiting.
Speakers installeren:
1 Gebruik de mal om het gat in het plafond te bepalen en zaag/snijd deze uit.
2 Plaats de speaker in het gat. Met een schroevendraaier kunt u de 4 schroeven aandraaien.
Hierdoor zullen de haken (achterzijde) omklappen en de speaker vastzetten. Gebruik een
schroevendraaien en geen schroefmachine.

12
Contents
Checklist all parts 13
Set up:
•Add the WiFi-Audio amplifier to
your home network (2.4 GHz) 14
•Add the WiFi-Audio amplifier via LAN to
your home network 18
Connecting external source (AUX) 19
Reset WiFi-Audio amplifier 20
Which apps can you use? 20
Installing the WiFi-Audio amplifier 21
www.aquasound.eu - info@aquasound.eu

13
Checklist all parts
Thank you for purchasing this AquaSound product. The WiFi-Audio amplifier is an
advanced (wireless) Wi-Fi audio system for kitchen, bathroom or any other room in the house. You will
find the following parts in the package:
Digital WiFi-Audio amplifier/receiver (1x) 230V/24V adapter (1x) Speaker cord 3,5 meters (2x), if speakers
are also supplied.
RCA mini-jack cable (1x)
Specifications:
Model: WMA30
Power: 30W (2x 15W RMS)
Wi-Fi: IEEE801.11 b/g/n (2,4G)
LAN: Single 10/100M, RJ45
Compatible: AirPlay, DLNA, UPnP, Spotify Connect, Qplay
Decoding: Up to 24bit/192kHz
Music formats: FLAC/MP3/AAC/AAC+/ALAC/APE/WAV
Adapter: AC 230V (24v /3,5A)
Impedance: 8 Ohm
Frequency range: 20 Hz – 20kHz
Dimensions (l x b x h): 100 x 800 x 22 mm
Weight: 0,4kg

14
Add the WiFi-Audio amplifier to your home network
Add WiFi-Audio amplifier to your home network (2.4 GHz)
You need to complete the steps below only once. The WiFi-Audio amplifier is then permanently
connected to your home network.
•Make sure that the WiFi-Audio amplifier is in a location where a good Wi-Fi connection is
guaranteed.
•Add the WiFi-Audio amplifier to your wireless home network before you proceed with
installation of the device (for instance behind a ceiling).
•Connect 1 or 2 speakers, making it easier for you to be guided through the set-up process (via
voice guidance).
1 Download the Muzo Player* App via Google Play or Apple’sApp store,
but do not yet open the app.
2 Connect the WiFi-Audio amplifier to the plugged in power adapter. Now wait 45 seconds.
3 Take your mobile phone or tablet and turn the 3G / 4G OFF.
4 First go to the Wi-Fi settings in your mobile phone or tablet.
5 Search for and connect to the Wi-Fi network named “SoundSystem” or “WiFi Speaker”.
If successful, you will see "Connected, no internet" (this is correct). You will hear a voice
saying ‘you are now connected to the speaker’.
(If a Password is requested then enter: 88888888)
6 Next start the Muzo Player app.
7 The app will now find the WiFi-Audio amplifier, the notification
"Found 1 device" appears.
8 Press "Add device" (If requested, choose
"Muzo Cobblestone")

15
9 A list of Wi-Fi networks (Routers) now appears.
Choose the network with which you want to connect
the WiFi-Audio amplifier.
10 Enter the password of your home network, then choose next.
11 If the connection is successful, you will see the
"Connected" screen and you will hear a voice say
‘Connected to your Wi-Fi network’
12 Choose ‘Next’.

16
13 Now you can choose a name from the list of available
names in the list or choose “Personalize” and create
a new name yourself.
14 Now press ">" in the top right of the screen
(the arrow to the right) to confirm the settings.
You are now in the device list, the set-up is complete.
•Select a device or swipe left and right to enter
the different screens
<< >>

17
The WiFi-Audio amplifier is now permanently included in your home network.
•Switch on the 3G / 4G on your mobile phone / tablet.
•Now your mobile phone / tablet can be connected to your Wi-Fi home network (2.4 GHz)
again.
Apple users:
•Stream via the AirPlay function of your mobile phone.
•Stream via the Muzo App on your mobile phone or tablet.
•Stream directly from Spotify (Spotify Premium account required).
Android users:
•Stream via the Muzo App on your mobile phone or tablet.
•Stream directly from Spotify (Spotify Premium account required).
AquaSound N-Joy users:
•Stream directly from the N-Joy controller to the WiFi-Audio amplifier.
Make sure the WiFi-Audio amplifier is in a location where a good Wi-Fi connection is
guaranteed.

18
Add the WiFi-Audio amplifier to your home network via LAN
It is also possible to add the amplifier to your home network with a LAN cable (not included). In this
case, no further settings are required and you can use the WiFi-Audio amplifier directly with the Muzo
Player app or through Apple's Airplay function.
LAN connection

19
Connecting an external source:
An Aux-In (Line In) is provided on the amplifier. You can connect a to TV, for example. The sound from
the TV will then be heard through the speakers connected with this amplifier. The AUX-In can be
activated in 2 ways.
Line-In (Aux-In)
Manual Aux:
The amplifier can be set to Aux-In (Line-In) via the Muzo Player app. The sound from a device (e.g.
TV) connected to the Line-In will now be heard through the speakers of the amplifier.
AUTO-AUX
The Auto-Aux is activated after you pause the active music stream. After 7-8 seconds the amplifier
automatically switches to Aux-In. If you start a stream again, the amplifier will automatically switch over
and play the stream.

20
Which apps can you use:
There are several apps available through Google Play or Apple’s App Store. Choose the app that
works best for you.
•Muzo Player
•Smart Sonix
•4Stream
Resetting the WiFi-Audio amplifier:
To reset the WiFi-Audio amplifier, hold the WPS key for at least 10 seconds. After about 10 seconds
you hear a voice confirming that the reset was successful, you will hear ‘restore to factory settings’.
Table of contents
Languages:
Other Aqua Sound Amplifier manuals
Popular Amplifier manuals by other brands

Krell Industries
Krell Industries EVOLUTION TWO MONAURAL PREAMPLIFIER Owner's reference

VINCENT
VINCENT PHO-112 Instructions for use

WhitakerAudio
WhitakerAudio JC Whitaker 20 W Stereo Integrated Audio... manual

Musical Paradise
Musical Paradise MP-301 MK2 Quick setup guide

JL Audio
JL Audio Stealthbox SB-GM-C7CP2 installation guide

Parasound
Parasound NewClassic Model 2250 owner's guide