25.5"
48"
23"
7"
18.5"
6☎
US 1-866-877-6637 |
☎
CAN 1-866-766-3426 |www.aquascapeinc.com
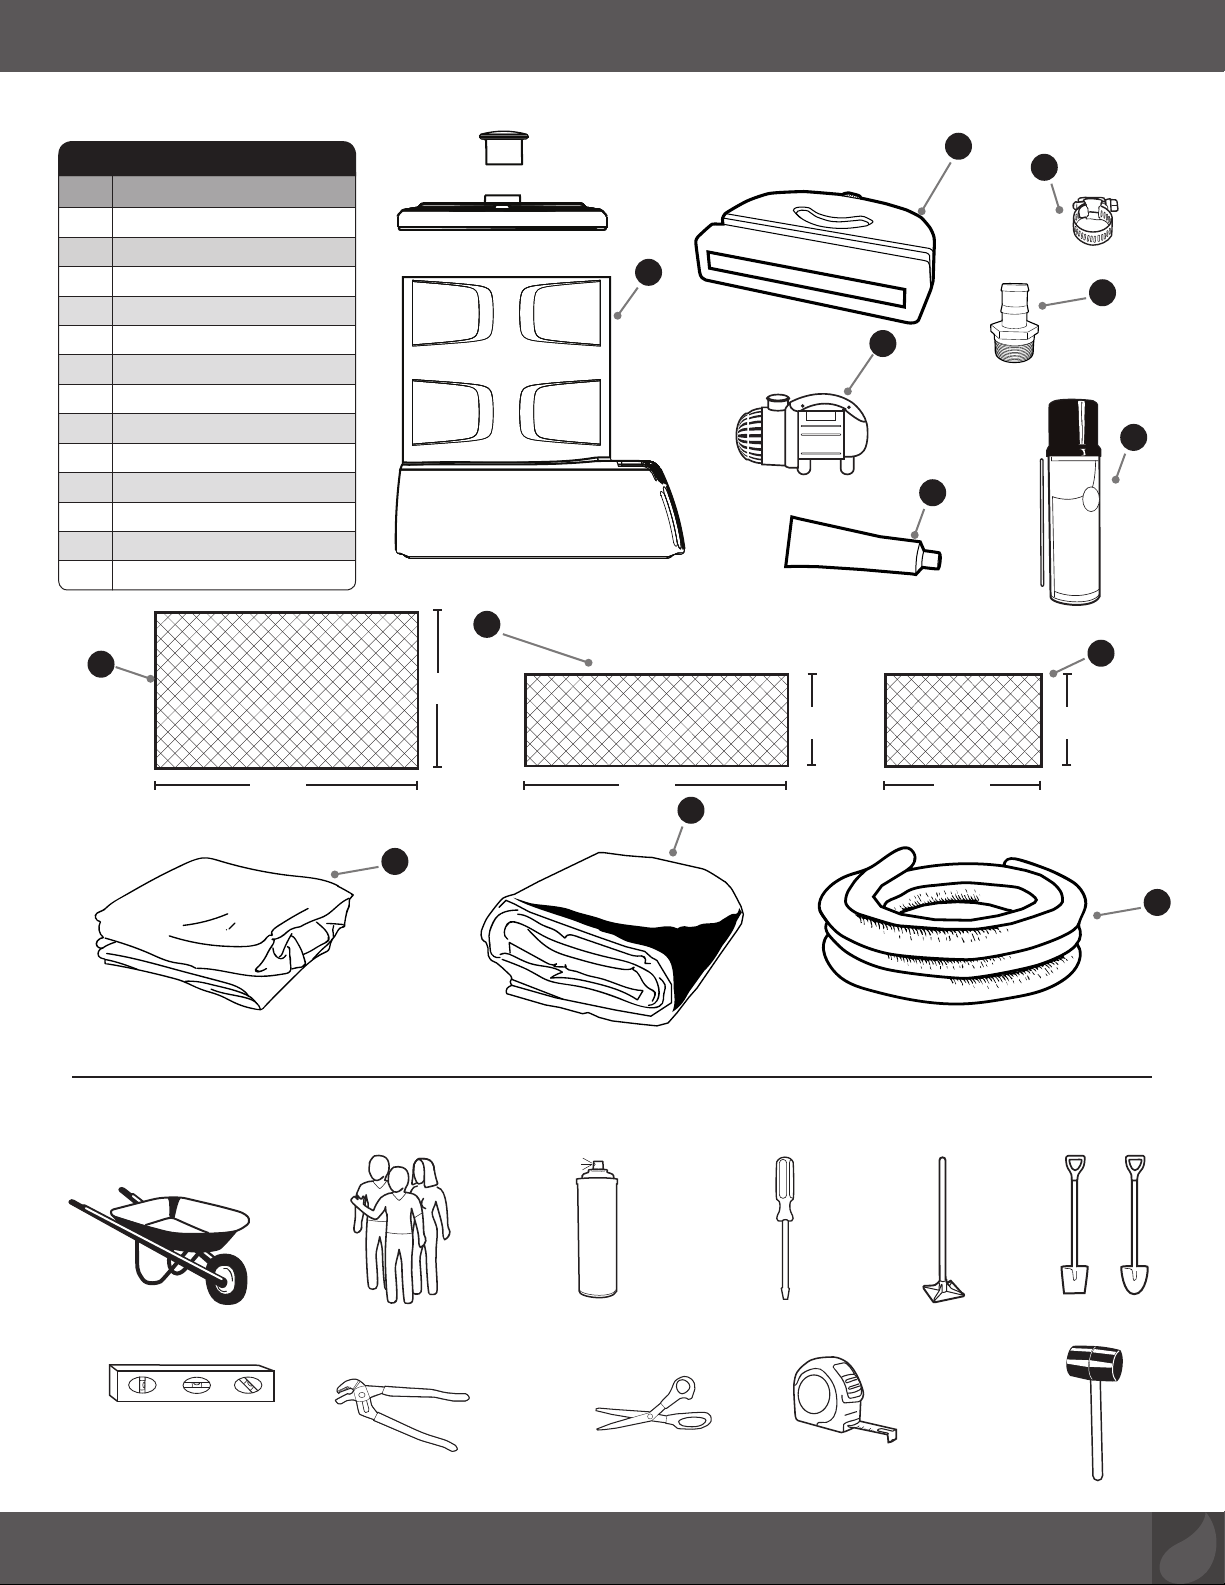
STEP 4
PLACE PONDLESS VAULT AND AQUABLOX®
• Lay out the AquaBlox® and the Pondless Vault in desired
location. The AquaBlox® should be placed side by side
with the wider panel face down. Place the AquaBlox® over
the front edge of the Pondless®Waterfall Vault.
• Use a can of brightly colored, highly visible spray paint to
outline the shape around the Pondless®Waterfall Vault
and AquaBlox®.This will help mark out the area to be
excavated.
STEP 5
EXCAVATE YOUR WATERFALL BASIN
• Remove vault and AquaBlox
®
and begin to excavate
approximately 18.5”depth. Once 18.5” depth has been
reached, excavate area for vault, an extra 7” down. Please
note an additional 6” of excavation is recommended per
side of the basin to allow for: AquaBlox®dimensions,
sufficient backfill material and compaction required during
backfilling.
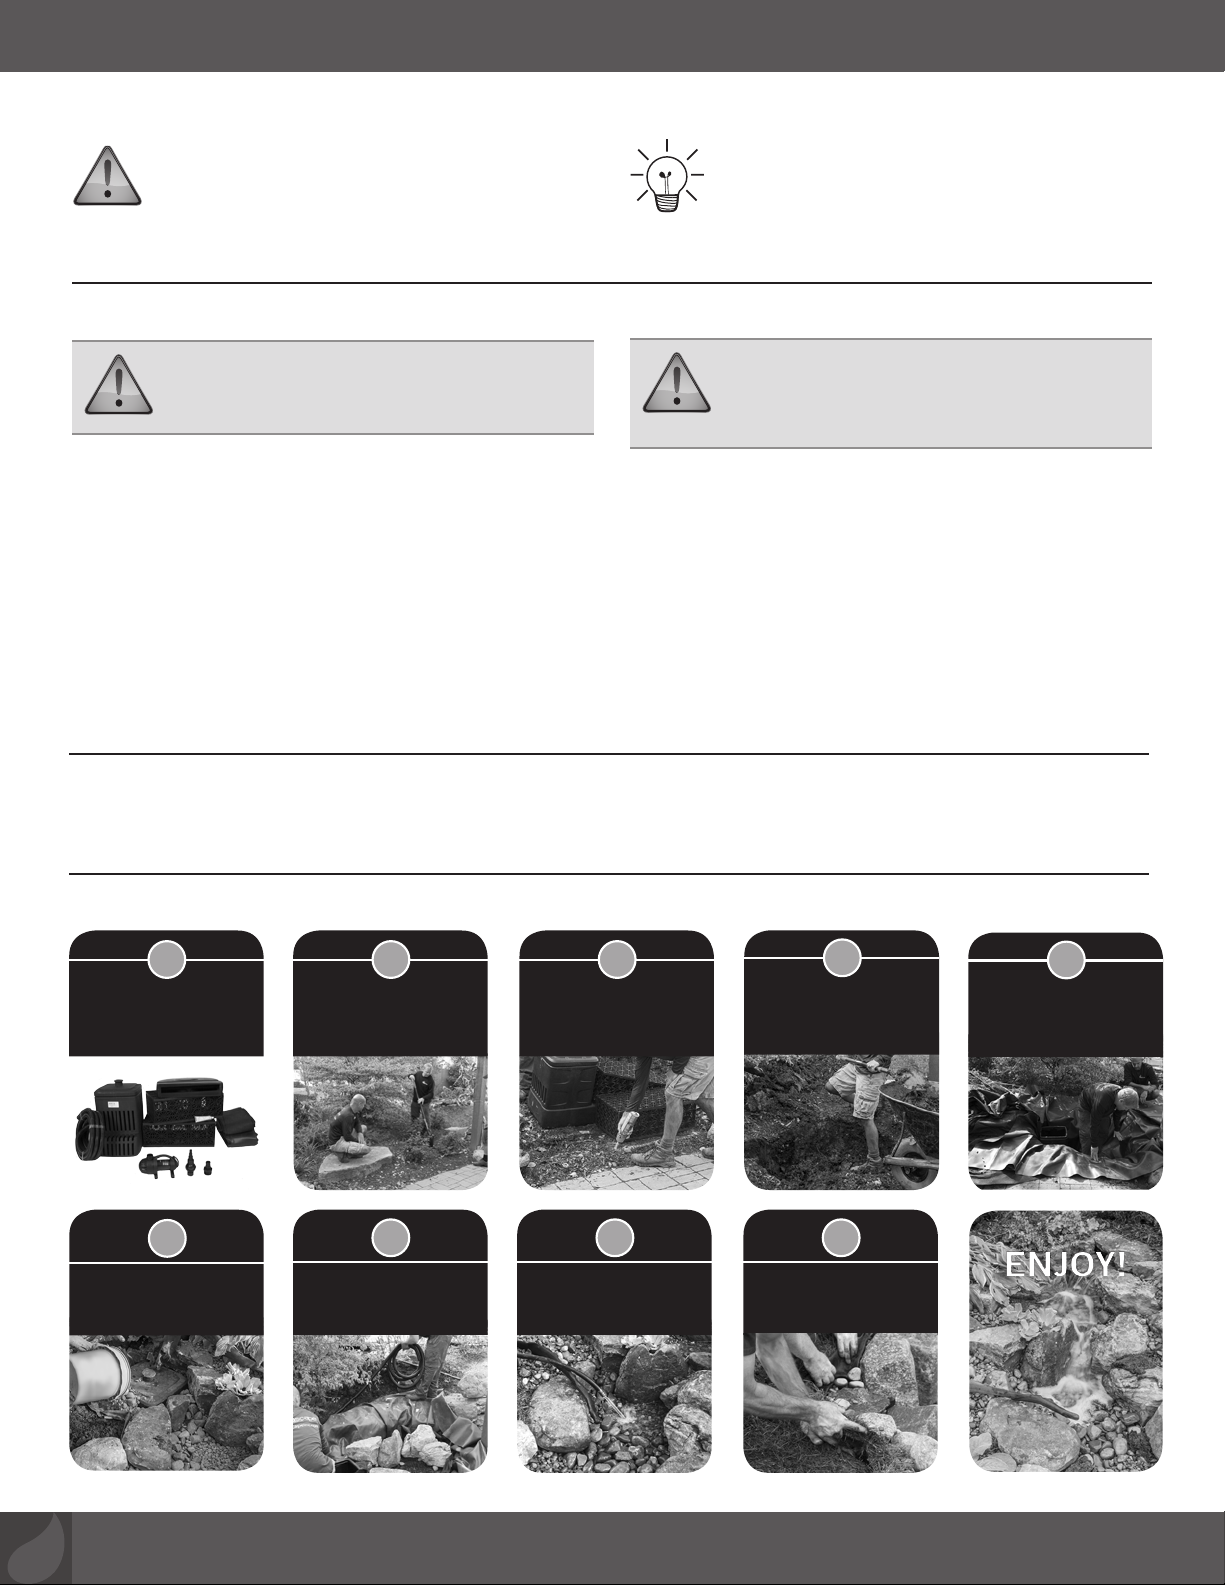
STEP 6
LEVEL BASIN AND TAMP SOIL
• One of the most important
parts of the excavation is
getting the basin level. Use
a tamper to compact soil.
Put a level on the bottom of
the basin to make sure the
basin is level from side to
side and front to back. The
base of the excavation should
be smooth soil, flat and free
of lumps and debris. Add
compactable material such as
sand, if existing soil conditions
do not meet requirements
listed above. If compactable
material was used, double
check to make sure your
basin is still level before
proceeding. Use a tamper
for the area where the
Pondless®Waterfall Vault
sits also. This area should
be as close to level as possible.
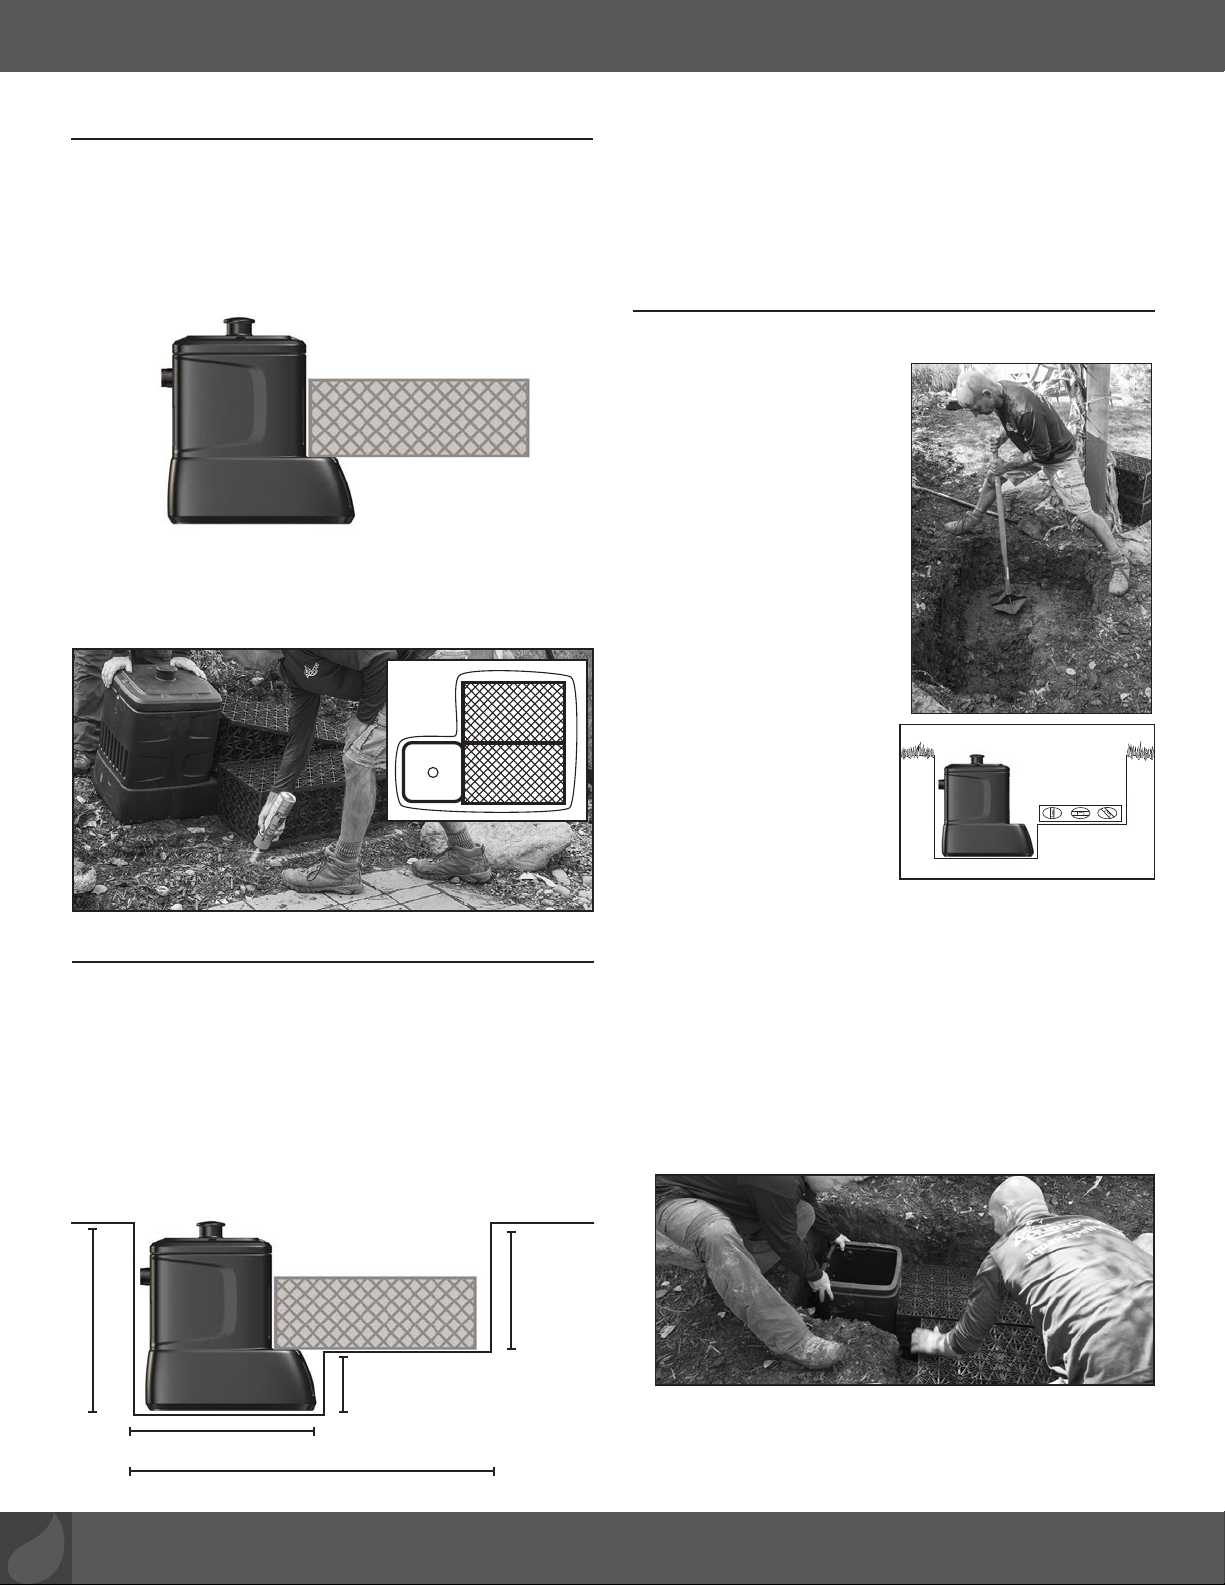
• Check the size and depth of the excavation by placing
the Pondless®Waterfall Vault and AquaBlox®into the
excavated area.
• The AquaBlox®should sit level on the front ledge of
the Pondless®Waterfall Vault, as well as line up level to
the side of the vault. There should be approximately 6”
between the AquaBlox®and the sides of your basin. This
is to allow for sufficient backfill material and compaction
required during backfilling.
• Digging can be labor intensive, so pace yourself and get
some friends to help.
• Excess soil can be used to create elevation for the
waterfall and stream or as soil for the berm around the
waterfall.