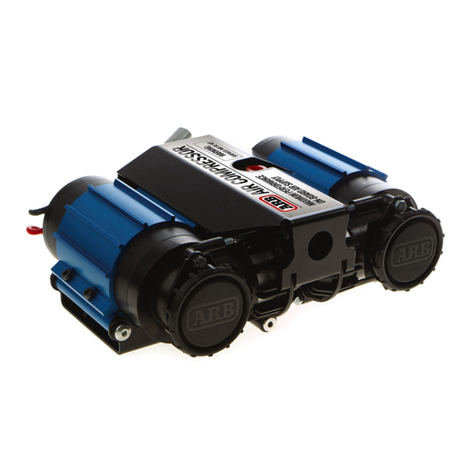
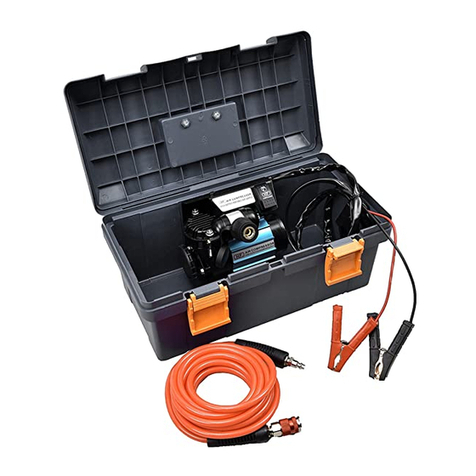
ARB CKMTP12 User manual

CKMTP12
Part No. 2102MTP12
Revision Date 02/06/11
Copyright © 2011 by ARB Corporation Limited

No liability is assumed for damages resulting in the use of the information contained herein.
ARB Air Locker Air Operated Locking Differentials, ARB Air Locker Air Activation System
and Air Locker are trademarks of ARB Corporation Limited.
Other product names used herein are for identification purposes only and may be trademarks of their respective owners.
12V Model CKMPT12 is certified compliant to EN 55014.1 (AS/NZS CISPR 14.1) and meets or
surpasses the following Australian and European directives.
- 2004/108/EC – EMC directive
ARB 4x4 ACCESSORIES
Corporate Head Office
42-44 Garden St Tel: +61 (3) 9761 6622
Kilsyth, Victoria Fax: +61 (3) 9761 6807
AUSTRALIA
3137
www.arb.com.au

1
Table of Contents :
1 Introduction 2
1.1 Features Of The CKMTP12 Portable Compressor 2
1.2 What Is Included 3
1.3 Specifications Of The CKMTP12 Portable Compressor 4
2 Safe Air Compressor Operation 5
2.1 Safety Precautions 5
2.2 Connecting For Use 7
2.3 Tyre Filling 9
2.4 Air Powered Tools 10
2.5 Keeping The Carry Case Organised 11
2.6 Understanding The Built-In Protection Devices 12
3 Service & Maintenance 13
3.1 Air Filter Service 13
3.2 Fuse And Wiring Loom Replacement 14
3.3 Draining Moisture From The Air Tank 14
4 Parts List 15
4.1 Exploded Diagram 15
4.2 Itemized Parts List 16

1 Introduction
2
IMPORTANT :
To get the safest and most effective service from this portable
air compressor, please read this guide in its entirety before
attempting to use the compressor.
1.1 Features Of The CKMTP12 Portable Compressor
The ARB CKMTP12 portable air compressor is a compact sized yet high
performance compressed air source that is intended for rapid inflation of large
tyres and operation of most air powered tools rated up to 85LPM [3CFM] @
600kPa [90PSI].
The ARB CKMTP12 is a world class recreational product designed and built to
commercial / industrial standards boasting the following features:
•Ultra compact twin motor, dual cylinder design makes this the highest
flowing portable compressor of its size on the market at 174LPM [6.16CFM]
•Integrated aluminium air tank and pressure switch regulates pressure
between 930kPa [135PSI] and 1030kPa [150PSI] suited to most air
powered tools.
•Mounted in a waterproof carry case constructed from a durable impact
resistant polymer. The carry case has convenient compartments for storing
the air hose and other compressor accessories.
•Ducted IP55 sealed brushed DC cooling fan and anodized aluminium motor
mounting brackets effectively dissipate heat from the motors, heads and
electronics allowing for a 100% duty cycle (under room temperature
conditions).
•Engineered, built and individually dyno-tested in Australia from local and
important components.
•Fully serviceable and all replacement parts available.
•Constructed primarily of light weight, high strength engineering grade
materials, including military and aerospace standard components.
•Hard-anodized cylinder bores and PTFE (Teflon) impregnated carbon fiber
piston seals for reduced friction and maximum trouble free life.
•Built with sealed components for moisture and dust resistance.
•Motors are 100% ball bearing equipped, and feature a unique linear brush
pre-load system for extra long life, low heat and quiet operation throughout
the life of the unit.
•Compressor pistons are equipped with high shock rated roller bearing.
•High density and high flow washable sintered bronze air filter element.
•Motors are thermal cut-out protected against damage caused by extreme
temperature use.

1 Introduction
3
•Pressure switch and relay equipped electrical system prevents run-on when
not filling, or any damage to compressor or hoses as a result of the
pressure generated from a kinked air line.
•Illuminated isolating switch is easy to see at night, and protects the user
from hazardous sparking when connecting the alligator clips to the battery
terminals.
•Equipped with dual heavy duty Maxi-Fuses for professional in-line circuit
protection and true circuit redundancy in case of a fault.
•Over-pressure safety valve equipped as a back-up protection from either
pressure switch failure, thermal over pressure generated in a hot vehicle
(i.e., no need to drain pressure when finished use.), or accidental
connection to an external high pressure source.
1.2 What Is Included
Below is a detailed list of items included with this kit:
•Fully assembled and performance tested air compressor and air tank
mounted into a water proof carry case.
•Canvas compartment for storing air hose and compressor accessories.
•OEM quality illuminated compressor isolating switch.
•High quality wiring loom with automotive grade alligator clamp type battery
contacts, and a pressure switch driven automotive relay control circuit.
•Two splash resistant air filters with washable high-flow sintered bronze filter
cartridges.
•6 meter [20 ft] long high quality abrasion and heat resistant air hose with
male to female couplings.
•Hose couplings are specially designed corrosion resistant, one-handed
(push-lock) quick connect type to suit US industrial standard air fittings
(Ref: compatible types Section 1.3).
•Air blow gun with US industrial standard male air fitting.
•Inflation accessories kit including high-flow tyre filler attachment (US
industrial standard) with integral stop-valve, a Schrader valve to US
industrial standard adaptor, and extra nozzle attachments for inflating items
such as sports balls, air mattresses, etc.

1 Introduction
4
1.3 Specifications Of The CKMTP12 Portable Compressor
GENERAL SPECS METRIC IMPERIAL
SUPPLY VOLTAGE 12 Volts DC 12 Volts DC
MAX CURRENT DRAW (each motor) 34.3 Amps @ 1030 kPa 34.3 Amps @ 150 PSI
MAX CURRENT DRAW (total) 68.6 Amps @ 1030 kPa 68.6 Amps @ 150 PSI
FUSE RATING (each motor) 40 Amps 40 Amps
RELAY RATING (each motor) 40 Amps 40 Amps
WEIGHT (total kit) 15 kgs 33 lbs
DIMENSIONS -LENGTH 478 mm 18.8 inches
-WIDTH 355 mm 14.0 inches
-HEIGHT 186 mm 7.3 inches
DUTY CYCLE @ 22°C [72°F] 100 % 60 mins. per hour
PRESSURE SWITCH CLOSED < 930 kPa < 135 PSI
PRESSURE SWITCH OPEN > 1030 kPa > 150 PSI
SAFETY VALVE PRESSURE > 1240 kPa > 180 PSI
MOTOR THERMAL CUT-OUT 115 degrees C 239 degrees F
MAX. AMBIENT TEMPERATURE 100 degrees C 212 degrees F
SPECS @ NO LOAD METRIC @ 0 kPa IMPERIAL @ 0 PSI
CURRENT DRAW 28.4 Amps 28.4 Amps
AIR FLOW RATE 174.4 L/min. 6.16 CFM
SPECS @ TYRE PRESSURE METRIC @ 200 kPa IMPERIAL @ 29 PSI
CURRENT DRAW 50.4 Amps 50.4 Amps
AIR FLOW RATE 131.8 L/min. 4.68 CFM
NOTE: The specifications above were recorded under laboratory
conditions at 22°C [72°F].
EXTERNAL CONNECTIONS SPECS
AIR INTAKE THREADS (female) 1/4-18 NPSC (parallel pipe thread)
AIR FILTER THREAD (male) 1/4-18 NPT (tapered pipe thread)
PRESSURE SWITCH THREAD 1/4-18 NPT (tapered pipe thread)
SAFETY VALVE PORT THREAD 1/8 BSPP (parallel pipe thread)
MANIFOLD OUTLET THREAD 1/4-18 NPT (tapered pipe thread)
STAINLESS BRAIDED HOSES JIC-4 [AN-4]
AIR COUPLING FITTING TYPE ‘US Industrial Standard’
(international equivalent standards) ISO 6150 B
Rectus series 23/24/1400
Tema series 1400
Legris series 23
DYNAQUIP D3
CEJN 310
US.MIL.C 4109
Norma / AFNOR: NF.E49.053
Parker series 30-¼” and 20-¼”
Aignep 220
Hansen series 3000
Norgren series 237
Gromelle series 600
WARRANTY
This ARB Air Compressor is designed to provide many years of trouble free recreational use, and is
warranted to be free from manufacturing defects for two (2) years from the date of purchase.

2 Safe Air Compressor Operation
5
2.1 Safety Precautions
Please carefully read and always abide by each of the following points when
using a portable air compressor.
HINT : Place a mark inside each of the Fsymbols to ensure
you have read and understood all of the safety precautions.
2.1.1 Electrical Safety
FNever make connections to the battery with the compressor isolating switch
turned ‘ON’ as the resulting sparking at the battery terminals could pose a
fire hazard.
2.1.2 Compressed Air Safety
FWear suitable protective equipment (e.g., glasses, face shields, etc.) to
control the risk of injury due to projectile particles.
FNever point the hose at anyone and always see that bystanders are out of
the line of air flow.
FNever attempt to stop or slow the flow of compressed air using direct
exposure to skin.
NOTE : Normal textile clothing does not protect the skin
against the risk of air embolism posed by exposure
to compressed air.
NOTE : An air embolism is a serious condition of the blood
stream which may result in severe injury or death.
FFor the same reason as above, never use compressed air to clean clothing,
hair or body.
FDisconnecting hoses or other accessories from a compressed air system
can result in projectiles. To avoid projectiles either hold the item being
disconnected securely or switch off the compressor and evacuate all
compressed air from the system.
FIf using compressed air accessories (e.g., extension or replacement hoses,
or pneumatic devices like air tools) other than genuine ARB, avoid the
danger of spontaneous disconnection by using only products with hose
fittings that conform to one of the international standards listed in the
specifications (ref: Section 1.3).

2 Safe Air Compressor Operation
6
FIf using extension or replacement hoses other than genuine ARB hoses,
use only sound strong hose with secure couplings and connections having
a high temperature rating and a maximum pressure rating of over 1380 kPa
[200 PSI].
FAir hoses should be securely held to prevent whipping.
FCompressed air contains contaminants which makes it unsuitable for use in
air-supplied respiratory protective devices such as spray painting masks.
Only use compressed air with such devices when appropriately filtered
through approved filtration equipment.
2.1.3 Pressure Vessel Safety
FThe ARB CKMTP12 contains two mechanical pressure relief valves that will
bleed of pressure the system above 1100kPa [160PSI].
FThe air tank contains compressed air and could result in an explosion if
punctured. Avoid impacting the air tank with anything that could cause a
puncture.
FIf the air tank is damaged in any way it should be replaced immediately.
2.1.4 High Temperature Safety
FThe compressor, hoses and fittings may become hot after an extended
period of use. Caution must be exercised to avoid handling the hot
surfaces.

2 Safe Air Compressor Operation
7
2.2 Connecting For Use
•Position the compressor on a sturdy flat surface before opening the box.
•Unlock and open the box using the two latches.
•Make sure that the switch is in the ‘OFF’ position by pressing down on the
top of the switch rocker.
•Uncoil the power lead and connect the positive (+) alligator clamp
(RED handle) directly to the positive (+) terminal of the vehicle’s 12 volt
battery.
•Connect the negative (-) alligator clamp (BLACK handle) directly to the
negative (-) terminal of the vehicle’s 12 volt battery.
NOTE : The switch should now be illuminated telling you that the
compressor has been connected to power. But the
compressor will not start until the switch rocker is pressed
on the bottom.
•Attach the air hose to the compressor by inserting the male end of the hose
into the hose coupling on the compressor and simply pressing inward until
the coupling sleeve clicks forward. The sleeve of the coupling does not
need to be pulled back by hand at all.
•Attach the compressed air accessory to the opposite end of the hose in the
same way.
•Press the bottom of the rocker switch down to start the compressor and
pressurize the air tank and hose.
•The compressor will automatically stop when the pressure in the system
reaches the pre-set pressure switch 'OFF pressure' of 1030kPa [150PSI].

2 Safe Air Compressor Operation
8
NOTE : Once compressed air has been expelled through the attached
device (e.g., tyre filler, air tool, etc.) and the pressure in the
system reduces the pre-set pressure switch 'ON pressure' of
930kPa [135PSI] then the compressor will automatically start
running again.
IMPORTANT :
When accessories such as the hose are connected to the
compressor they will contain compressed air. As such care
must be taken when they are disconnected from the
compressor to avoid projectiles.
•To disconnect the air hose from the compressor, press down on the hose
coupling release flange with your thumb while securely hold the hose grip
as shown.

2 Safe Air Compressor Operation
9
2.3 Tyre Filling
•With the compressor connected and switched on as described in Section
2.2, connect the ARB tyre filler (supplied) to the air hose coupling by
inserting it into the coupling and simply pressing inward until the coupling
sleeve clicks forward. The sleeve of the coupling does not need to be
pulled back by hand at all.
NOTE : ARB’s tyre filler attachment is equipped with a
stop valve. Air will not pass through the tyre filler
attachment until it is connected to a tyre valve.
NOTE : To get maximum performance out of the compressor and
to avoid depleting your vehicle's battery it is highly
recommended to leave the vehicle running at idle.
•Attach the ARB tyre filler to any standard tyre valve by depressing the lever
on the filler and then pushing the filler onto the tyre valve until a good seal
is made.
NOTE : Once air has passed through the filler and the pressure in
the air tank reduces the compressor should automatically
start.
•To keep air flowing without holding the filler simply release the lever on the
filler while still holding the filler onto the tyre valve and then let go of the
filler.
•To stop filling and remove the filler from the valve depress the lever on the
filler and pull the filler away from the tyre valve.
NOTE : Periodically disconnect the filler and check the tyre
pressure with an automotive tyre pressure gauge.
IMPORTANT :
Do not fill your tyres over the manufacturer’s
specified maximum pressure rating.

2 Safe Air Compressor Operation
10
2.4 Air Powered Tools
In addition to tyre inflation the ARB CKMPT12 is suitable for operating most air
powered tools, some of which are shown below.
•With the compressor connected and switched on as described in Section
2.2, connect the air tool to the air hose coupling by inserting it into the
coupling and simply pressing inward until the coupling sleeve clicks
forward. The sleeve of the coupling does not need to be pulled back by
hand at all.
•The ARB CKMTP12 will continuously run air tools which require up to
85LPM [3CFM] @ 600kPa [90PSI]. For maximum power output from your
air tool allow the compressor to fill the air tank to maximum pressure before
operating and in between uses.

2 Safe Air Compressor Operation
11
2.5 Keeping The Carry Case Organised
The ARB CKMTP12 packs a lot of gear into a purpose built carry case.
The compressor carry case has been designed with designated storage
compartments for the accessories to help keep things organised. The wiring
loom has also been configured with the black wire longer than the red to allow
it to pack away as neatly as possible. The picture below shows the intended
layout for organising the carry case in the most effective way.
Keep the inflation
accessories, spare
fuses, etc. in this pocket
Wiring loom is coiled
in an counter-
clockwise direction
Coiled u
p
the air hose
A
ir blow
g
un
Black alligator clamp
has a longer wire and
fits next to air tank
Fuse holders fit
neatly in this space
Red alligator clamp
fits next to air tank

2 Safe Air Compressor Operation
12
2.6 Understanding The Built-In Protection Devices
This compressor has been equipped with both THERMAL and OVER
PRESSURE protection devices in the interests of personal safety and to protect
the unit from unnecessary internal damage.
NOTE : Never disable or modify any of the compressor’s built-in
protection devices.
2.6.1 Thermal Cutout Switch
The process of compressing air is a natural generator of heat. This heat
generation is increased accordingly by increasing the compressed air flow rate
or increasing the pressure level of the air flow.
The large DC electric motor inside the compressor is also a source of heat
which increases with the amount of work being done by it.
The compressor has been designed to naturally disperse this heat into the air
around it, however, the ambient temperature outside will have an effect on
how fast this heat can be dispersed. If excessive levels of heat are allowed to
build up inside the compressor the unit may be put at risk of internal damage.
For this reason an internal electric switch has been designed into the back of
each motor which will simply turn the compressor off if the temperature
approaches a dangerous level, and will automatically reset and turn the
compressor back on once the unit has cooled down to a safe temperature.
This off time may last anywhere from just a few minutes up to half an hour
depending on conditions around the compressor.
2.6.2 Over Pressure Safety Valve
This compressor is equipped with a pressure operated electric switch which
has been factory set to turn off the compressor at a safe level of pressure, and
then turn it back on again once the pressure has been exhausted down to a
lower level. Should this switch fail for any reason the compressor is capable of
producing pressure well beyond its safe shut off limit.
A compressor which has reached its safe pressure maximum that has been
left in direct sun or inside a hot vehicle may build up additional pressure past
the safe working level.
Connecting your compressor up to any air system which might already contain
a residual pressure that is higher than the compressor’s safe pressure limit
may raise the internal pressure of the compressor past the safe pressure limit.
This compressor is equipped with a mechanical over pressure safety valve
which has been factory set to bleed off to atmosphere any excessive pressure
build up (i.e., from any of the situations above) before it can pose any personal
danger or cause damage to compressor components.

3 Service & Maintenance
13
3.1 Air Filter Service
The ARB CKMPT12 comes factory fitted with high density, high flow, sintered
bronze air filters to protect the compressor components, and any accessories
that might be used with the compressor, from damage caused by the ingress
of dirt and fine dust particles. The filter element is removable and cleanable
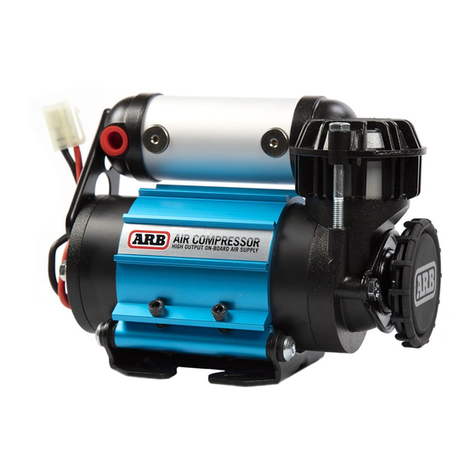
and should provide for years of continuous service.
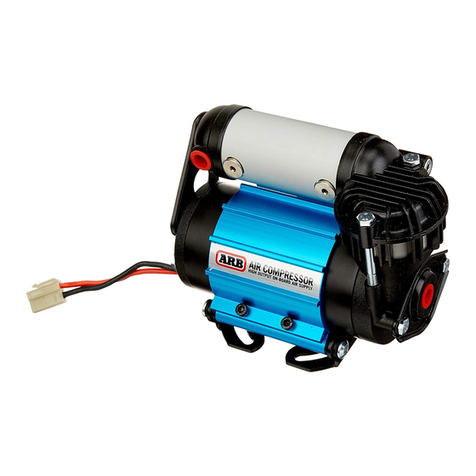
Follow the steps below to disassemble, clean and re-assemble the air filter.
•Unscrew the air filters from the compressor.
•Remove the air filter cover from the air filter base by applying slight prying
pressure under the fingers of the cover.
•Remove the filter element disk.
•Vigorously wash the element in a solution of hot soapy water.
•Rinse the element in pure hot water.
•Dry thoroughly.
•Insert the element back into the air filter base making sure that the flattest
face of the disk faces toward the filter base.
•Snap the air filter cover back onto the base and rotate the cover into the
desired position.
•Install the air filters back into the compressor.
FILTER ELEMENT
COVER
FILTER BASE

3 Service & Maintenance
14
3.2 Fuse And Wiring Loom Replacement
The CKMTP12 supply wiring loom is connected to the compressor by a sealed
high current rated connector. Should the loom or battery clamps be damaged
and need replacement the supply loom can simply be unplugged and
replaced.
The supply wiring loom contains two inline fuses near the
battery end of the positive (+, RED) wire providing
independent circuit protection for each motor. If either of the
fuses requires replacing, they can be removed by opening the
black rubber fuse housing cover and pulling straight outward
on the fuse until it slides free of the fuse block. The fuse
should only be replaced with a fuse of the same type (maxi
blade type) and of the same amp rating (40A) or less.
3.3 Draining Moisture From The Air Tank
After prolonged compressor use moisture can accumulate in the air tank and
as a result the air tank should be drained after approximately 10-20 hours of
compressor run time. The air tank can be drained as follows:
•With the compressor connected and switched on as described in Section
2.2, connect the air blow gun to the air hose.
•Lift the compressor carry case off the ground by the handle, leaving the lid
open.
•Operate the blow gun with the nozzle pointing towards the ground and
away from people. Press the blow gun trigger and the accumulated
moisture in the air tank will be expelled through the blow gun.

4 Parts List
15
CKMTP12 Portable Compressor Kit – Exploded Parts Diagram

4 Parts List
16
CKMTP12 Portable Compressor Kit Specs:
ITEM # QTY DESCRIPTION PART # NOTES
01 1 CARRY CASE 270104 Voltage
12 V DC
02 1 HOSE ASSEMBLY, TANK INPUT 170305 Current Draw
No-Load
28.4A
03 1 SCREW (COUNTERSUNK M6 x 16) 200715
Load
50.4A
04 1 TWIN COMPRESSOR MOUNT ASSEMBLY 320108 Air Flow
174.4L/min @ 0kPa [6.16CFM @ 0psi]
05 2 BOLT (M6 x 60mm) 200703
131.8L/min @ 200kPa [4.68CFM @ 29psi]
06 2 FLAT WASHER 6151046 Total Weight
15kg [33lbs]
07 2 O-RING (BS010V75) 160242 Size
186mm x 478mm x 355mm (H,L,W)
08 1 MANIFOLD CAP (1/4” NPT) 320214
[7.3” x 18.8” x 14”]
09 1 ADAPTER (1/4" NPT TO JIC-4) 170631 Outlet
Hose coupling, US std female
10 2 COMPRESSOR ASSEMBLY CKM01 Pressure Switch
Open
1030kPa [150psi]
11 2 AIR FILTER BASE 320501B 1
Closed
930kPa [135psi]
12 2 AIR FILTER ELEMENT (DISK TYPE) 290503 1 Safety Valve
Open @ > ~1240kPa [180 PSI]
13 2 AIR FILTER COVER 320501A 1
14 8 BOLT (M6 x 12mm) 200702
15 2 AIR FILTER FLANGE (1/4” NPT) 320212 Notes:
16 2 O-RING (BS029N70) 160250 2
17 3 O-RING (BS031N70) 160241
18 1 COUPLER MANIFOLD 320227
19 1 PRESSURE SWITCH (1/4” NPT) CO35 1 AIR FILTER BASE (11) & COVER (13) available
20 1 COVER ASSEMBLY, CKMTP 320109 3 only in AIR FILTER ASSY #320501 which also
21 1 SWITCH BRACKET, CKMTP 320230 includes the element.
22 1 HOSE COUPLING (US STD FEMALE) 170403
23 1 SWITCH (12V) 180209 2 Complete set of CKM series O-ring seals is available
1 SWITCH COVER (ARB COMPRESSOR) 180212 as O-ring Service Kit #320301. (Order two for CKMTP12)
24 1 CARRY CASE POCKET 270105
25 1 HOSE ASSEMBLY, TANK OUTPUT 170306 3 Cover assembly is preassembled with the relays, fan and
26 1 AIR TANK 171501 wiring loom.
*1 INFLATION ACCESSORY KIT (US STD) 171303
*1 HOSE ASSEMBLY (US STD) 171301
*1 AIR BLOW GUN 171309
*1 WIRING LOOM (CKMP12 SUPPLY) 180412
*1 WIRING LOOM (CKMP12 SWITCH) 180413
* Not illustrated in exploded view.
Table of contents
Other ARB Air Compressor manuals
Popular Air Compressor manuals by other brands

CEVIK PRO
CEVIK PRO Pro24xt manual

Briggs & Stratton
Briggs & Stratton 74002 Operator's manual

Briggs & Stratton
Briggs & Stratton Pro series Operator's manual

Carrier
Carrier 5F/H Series Installation, Start-Up and Service Instructions

Compressed Air Systems
Compressed Air Systems 7.5hp owner's manual

Bauer Kompressoren
Bauer Kompressoren Profi-Line CAPITANO 140-B operating manual

DeWalt
DeWalt DXCMH1608WB-CA instruction manual

RIDGID
RIDGID OF45175A Operator's manual

Bostitch
Bostitch CAP2041ST-OL Operation and maintenance manual

Parkside
Parkside PKO 270 A1 Operation and safety notes

Danfoss
Danfoss VZH052 Series manual

Haussmann Xpert
Haussmann Xpert 56655000 Instruction manual and safety instructions