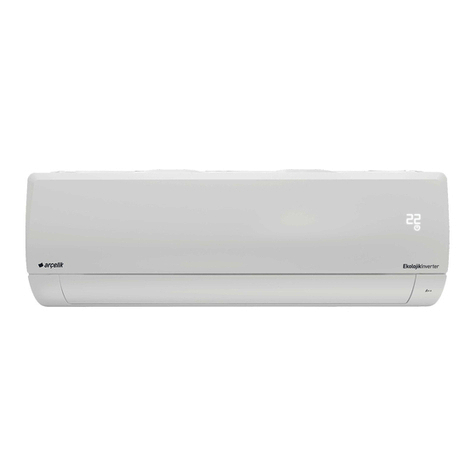
arcelik 09565 User manual

09565
12565
18565
24565
Document Number 5401490969 Rev.:
Air Conditioner
User Manual

Please readthis guide first!
User guide ensure the quick and safe use of the product.
Symbols and Remarks
The following symbols areused in theuser guide:
Important information or useful usage tips.
Warning against health and property risks.
Warning against electric shock.
Warning against flammable material.
Dear Customer,
We'd like you to achieve the optimal efficiency from our product, which has been
manufactured in modern facilitieswith meticulous qualitycontrols.
For this purpose, pleasefully read theuser guide before using the product and
keep the guide as areference source. If you turn the product over to another
person, providethis guide along with the product.
Please read theuser guide before installing and operating theproduct.
Always observethe applicable safety instructions.
Keep the user guide within easy reach for futureuse.
Please read any other documents provided with theproduct.
Keep in mind that this user guide mayapplyto several product models.
The guide clearlyindicates any variations of different models.
This product is an air conditioner designed for heating and cooling purposes.
This product was manufactured in environmentally friendly facilities without any harmful
impact on the environment.
Complies WEEE Regulations.

CONTENT
______________
1 The A/C 4 )
General Appearance ......................... 4
Indoor Unit .................................... 4
Operation status indicator display ............ 4
Outdoor Unit .................................. 5
Wireless remote controller .................... 6
Technical specifications...................... 7
2 Important safety instructions 8
General safety ................................ 8
Batteries ...................................... 9
Intended use ................................ 9
Child safety ................................... 10
Compliance with WEEE regulations and
waste disposal ............................... 10
Disposing of the package..................... 10
Practical and useful tips ..................... 10
3 Installation 11
Appropriate place for installation ..............12
Power connection .............................12
Mounting the remote controller bracket
on the wall ....................................13
First use .......................................13
Transportation of the product..................13
4 Preparation 14
Tips for power -saving ..........................
14
Inserting the batteries .........................15
Operation method ............................15
Points totake into consideration when using your
remote control .................................15
5 Operating the product 16
Turning the A/C on............................ 16
Operating modes............................. 16
Mode selection ............................... 16
Cooling the room............................. 16
Rapid cooling function ....................... 16
Heating the room............................. 17
Rapid heating function ...................... 17
Auto-operation mode......................... 18
Dehumidifying mode.......................... 18
Fan mode..................................... 18
Fan speed adjustment........................ 19
Temperature adjustment / Roomtemperature
control ....................................... 19
Directing the vertical air flow ................... 19
Directing the horizontal air flow................ 20
One-touch soft air ............................ 20
Information display ........................... 20
Display on/off ................................. 20
lonfresh air cleaning function ................. 20
lonizer aoto-cleaning function ................ 21
Power-saving function ....................... 21
Silent mode function ......................... 22
Setting the clock .............................. 22
Sleep mode function .......................... 23
Auto Power On/Off function .................. 23
Automatic start ................................ 25
Operating the A/C withthe remote control 25
Test operation mode.......................... 25
6 HomeWhiz function 26
HomeWhiz setup and user account settings...26
Using the A/C on more than one smart device 27
Deleting HomeWhiz settings.................. 27
HomeWhiz Troubleshooting .................. 27
Wireless network module features ............ 27
7 Maintenance and cleaning 28
Cleaning the air filter .......................... 29
Cleaning the 3M filter ..........................29
8 Troubleshooting 30
9 Consumer services 31
Customer Satisfaction Policy ................. 31
....

1 Your A/C
Overview
Indoor Unit
İ
1- Air Intake
Air filter
Front panel
Signal receiver
Hidden indicator
Manual operation button
Ionizer
Air Deflector (Horizontal Vane)
Air Outlet
3M filter
2-
3-
4-
5-
6-
7-
8-
9-
10-
Operation status indicator display
1
2
3
4
5
1- Digital Display
2- On/Off Button
3- Timer
4- Defrosting & Preheating
5- Wireless
4
10
3
1
2
6
4
5
8
9
7

Outdoor unit
1- Indoor-Outdoor Unit Piping Connection Valves
2- Air Intake Vent
3- Air Outlet Vent
5

As the control temperature
sensor detects temperatures
in a wide range, the ambient
temperature displayed on the
controller can be misleading.
Wireless remote controller
Rapid Cooling/Heating Function: Increases/Decreases
the indoor temperature in a short time.
Control
Panel Display
Screen Description
%
Soft Air: Directs the direct incoming air flow up or down.
Energy Control Cooling Function:Activates the energy-
saving mode. This mode consists of three steps.
Silent function: Decreases the outdoor unit volume.
Indoor Fan Speed It adjusts the fan speed.
Temperature Adjustment: Regulates the room
temperature during cooling and heating.Fahrenheit
Celcius Switch: Pressing the "Sleep" and "Timer" buttons
at the same time for 10 seconds will enable the switch.
On/Off: Switches On/Off the A/C.
Cooling Mode: Cools the environment.
Auto-operation Mode: Heats or cools according to the
set temperature.
Dehumidifying mode: Removes the humidity in the
environment.
Fan Mode: Provides air circulation in the environment.
Heating Mode: Heats the environment.
Air flow direction: Sets the air flow direction vertically.
Air flow direction: Sets the air flow direction horizontally.
Ionizer:It removes microscopic particles by ionizing the
environment. Removes bad odours.
Cleaning:Removes moisture that occurs in the indoor unit.
Sleep Function: Prevents your room from cooling
down or warming up extremely during sleep.
Turns on the air conditioner at the set
time.
Turns off the air conditioner at the
set time.
Cancels all time settings.
Enters the clock setting section of the controller when the
"Timer" button ( ) is pressed and held for 3 seconds.
Ambient Temperature is displayed on the controller display when
the "Confirm" button is pressed and held for 3 seconds.
Switches the display on the air conditioner on/off when the
"Sleep" button ( ) is pressed and held for 3 seconds.
Confirms the settings for the timer and clock.
Control
Panel
LCD
Display
Signal Transmitter
Adjustment:
Timer On:
Timer Off:
Timer Cancel:

*
**
7
1260
3.81 / 4.13
13648
Specifications
In order to increase the product quality, the technical specifications may be
changed without prior notice.
Figures in this manual are schematic and may not exactly match the product.
The values provided with the appliance or its accompanying documents are
laboratory readings in accordance with the respective standards. These values may
differ depending on the use and ambient conditions.
EER and COP values are energy efficiency ratios and are calculated according to
TS EN 14511 measurement standards.
Cooling: Indoor Temperature 27°C DB, 19°C WB / Outdoor: 35°C DB, 24°C WB
Heating: Indoor Temperature 20°C DB, 15°C WB / Outdoor: 7°C DB, 6°C WB
SEER and SCOP values are seasonal energy efficiency ratios and are calculated
according to TS EN 14825 measurement standards.
Catalogue data are energy consumption values provided as per standard test
result. Actual energy consumption may vary as per the conditions that the applianc-
es are used.
DB: Dry bulb temperature, WB: Wet bulb temperature

General safety
2 Important safety instructions
8
This section includes the safety instructions
necessary to prevent the risk of personal
injury or material damage. Failure to observe
these instructions shall void any and all
warranties.
Avoid exposure to the air flow on your
body for a long period of time.
Set the product to the best tempera-
ture as per the ambient conditions and
the health conditions.
Do not drink water drained from the
appliance. Otherwise, you may face
serious health problems.
Do not operate the product in non-ven-
tilated areas for a long period of time.
Ventilate the environment while
operating the product together with
other appliances such as stoves, etc.
Wait for 3 minutes to operate the
product after turning it off. The fuse in
your installation may blow.
Do not operate your product for a long
time if the humidity is too high or if a
door or a window is open.
Plug the product in a grounded
electrical installation protected by a
fuse conforming to the values specified
in the “Technical Specifications” chart.
Always have an authorized electrician
install the grounding equipment for
operation either with or without
transformer. Our company shall not be
responsible for the damages that shall
be incurred due to using the product
without grounding according to local
regulations.
Make sure that the mains voltage is
proper for the product.
Use a delayed-type (C-type) automatic
fuse according to the product model.
Do not damage the cooling circuit
where refrigerant circulates through the
product, using cutting or piercing tools.
The refrigerant gas that may spray out
in case of puncturing in the gas
channels of the heat exchanger, upper
surface coatings on pipe extensions
may cause skin irritation and eye
injuries.
Do not cover or block the air inlet-out-
let vents and outdoor unit with any
object while the product is operating.
Do not spray flammable or cooling
gases directly to the product.
Do not insert your hand or any other
object into the air inlet-outlet vents on
the indoor and outdoor units while the
product is operating.
Internal fans can cause serious injuries.
Do not open up the front panel while it
is being operated. Do not touch the
Neo Plasma filter, if present in the
product.
If the product leaks refrigerant, open
the windows to ventilate the room and
call the Authorized Service.
Shut off the gas flow and turn off the
A/C in case of a flammable gas leak in
the environment of the product. Do not
operate the A/C again without ventilat-
ing the environment properly.
Do not place heating devices near the
product and the power cable. Exces-
sive heat from these devices can cause
melting of the plastic parts of the
product.
De-energise using the automatic fuse
during power outages or in the event of
a storm. Failure to comply with this
instruction may cause fire or electrocu-
tion.
Make sure that the power cable or its
plug (if any) is not detached or broken.
Failure to comply with this instruction
may cause electric shock or damage
to the product.
Do not touch, operate, repair the A/C
with wet hands. Failure to comply with
this instruction may cause electric
shock or damage to the product.
If power cord is damaged, do not
operate the product. Contact the
authorized service.
Do not pull and strain the power cord
of the product. Any damage to the
cord may cause an electric shock.

Batteries
Intended Use
9
The flammable R32 type refrigerant is
used in the device. There is a risk of fire
if refrigerant leaks and is exposed to an
external source of ignition.
Keep the power cable away from heat
sources .
Do not place any objects on the power
cable
If the product shall not be used for a
long time, disconnect it from power
from the fuse.
Contact the Authorized Service if the
product gets wet in any way.
Avoid contact of the electrical
components with water. If case of
contact of the electrical components of
the product with water, switch off the
product and call the Authorized Service.
If case of a strange sound, smoke or
smell coming from the product, turn off
the product from the fuse box and call
the Authorized Service.
During installation, maintenance,
cleaning and repair work, make sure
that the power is cut off from the fuse.
Installation and repair should always be
performed by Authorized Service.
Manufacturer shall not be held
responsible for damages caused by
operations performed by unauthorized
persons.
Do not expose people, animals or
plants to hot or cold air blown by the
A/C.
Make sure that only the parts specified
in the service parts list are used. Do not
modify the device. Failure to do so may
result in death, serious injuries or
damage to the product.
If the A/C is left under water in cases
like flood, contact the authorized
service. Failure to do so may cause
explosions or fire.
Do not place any items on the A/C. This
may cause failure of the product.
For interior cleaning of the product,
contact an authorized service or the
dealer from whom you have purchased
the product. Detergents shall not be
used as they cause corrosion and
damage to the surface.
There shall be no obstructions in front
of all essential ventilation openings.
Do not expose batteries to direct
sunlight, fire, etc. factors
or excessive heat.
Do not use old and new batteries
together.
Replace the depleted batteries only with
batteries of the same model, value and
specification. Do not use rechargeable
batteries.
Dispose the depleted batteries in
accordance with local laws and
regulations. In this way, you contribute
to the prevention of potential damages
to the environment and human health.
Do not use the remote control if the
batteries have leaked. If leaked liquid
gets on your skin or clothing, wash with
plenty of clean water.
Do not swallow any liquid leaking from
the batteries. If swallowed, contact the
nearest health institution.
This product is intended for interior
operation.
The product's service life is 10 years.
This is the period for which the spare
parts required for the operation of this
product as defined is provided by the
manufacturer.
This product is not intended to be used
by people with physical, sensory and
mental disabilities (including children) or
those who have not adequate
experience and knowledge regarding its
use, unless they are under the
supervision of a person responsible for
their safety or who shall provide the
instructions required for the operation of
the product.
Do not use the product for purposes
other than cooling your environment
(e.g. protection of delicate devices,
food, pets, plants and art works). This
product is not special cooling system, it
is a consumer-type A/C. Such
operations may damage these items.

Child safety
Compliance with AEEE
regulations and Waste Disposal
Disposing of the package
Practical and useful tips
10
Electrical products are dangerous for
children. Keep children away from the
product while it is operated and do
not let them to play with the product.
Pay attention to temperature levels of
the rooms where small children and
elderly persons are present.
The packaging materials are
dangerous for children. Keep
packaging materials away from
children.
Make sure that children do not climb
on the air conditioner's outdoor unit
and hit it. This can lead to death or
damage to the product.
The package of the product is made of
recyclable materials. Dispose it of by
classifying as per the waste instructions.
Do not dispose it of with normal
domestic waste.
Do not cool your room excessively.
This is not good for your health, and it
causes excessive power consumption.
Prevent direct sunlight to the room
while the A/C is operated, keep
curtains and blinds closed.
Adjust the orientation of the product's
vertical and horizontal air deflector so that
the room temperature and airflow are
homogeneously distributed throughout
the room.
Use of air curtains in large rooms
where doors are kept open
continuously such as cafeterias and
confectioneries shall reduce the power
consumption and shall allow you to
achieve better efficiency while using the
product. In such a case, the
environment reaches the desired
temperature more quickly.
Keep doors and windows closed as
much as possible to keep cool and
warm air in the room.
Clean the washable dust filter regularly
at the start and end of the season.
Clogging in the washable dust filter
reduces airflow, cooling and
dehumidification performances. If the
washable dust filter is not cleaned
regularly, the cooling-heating capacity
will be reduced and some of the
electricity used will be wasted.
As the windows are kept closed during
the operation of the product, ventilate
the room by opening windows at
regular intervals.
If the product will not be operated for a
long time, run it in fan mode for 2-3
hours, this will remove the moisture
inside your product. Shut it off from the
fuse.
Since the air conditioner will dry the air
in the room while it is operating in
heating mode, products that humidify
the ambient air can be used in
combination with the air conditioner.
Disposal of refrigerant and oil and
disassembly of other parts shall be
performed as per the relevant local and
national legislation.
Do not disassemble the system on your
own. Disassembly of the systems and
other operations with the refrigerant, oil
and components shall be performed by
the authorized service as per the
relevant local and national legislation.
This product does not contain the
dangerous and prohibited materials
indicated in "Waste Electrical and
Electronic Equipment Control
Regulation" published by Ministry of
Environment and Urbanisation of
Republic of Turkey. Complies WEEE
Regulations. This product was manufac-
tured from recyclable and reusable high
quality parts and materials. Therefore,
do not dispose of this product with
other domestic wastes at the end of its
service life. Take it to a collection point
for electrical and electronic equipment.
You can ask your local administration
about these collection points.
You can help protect the environment
and natural resources by delivering the
used products for recycling. Before
disposing of the product, cut off the
plug from the cord for the safety of the
children.

3 Installation
11
Please contact the nearest Authorized
Service for the installation of the product.
Check if the electrical installation and water
drain is proper before calling the authorized
service to have the product ready for
operation. If not, call an electrician and
plumber to arrange the utilities as
necessary.
Installation and power connections
shall be made by an Authorized
service. Manufacturer shall not be held
responsible for damages caused by
operations performed by unauthorized
persons.
Installation shall be performed as per
the local standards and you shall follow
the National Electrical NFPA 70/ANSI
C1- -1003 standard if no local standard
is available.
It is customer's responsibility to prepare
the location the product shall be placed
on and also have power and waste
water installation prepared.
Cable connection between indoor and
outdoor unit shall be rendered safe and
secure and it shall follow a suitable
route that it shall not be pulled away
from cable terminal blocks by any load.
Improper connection may cause
generation of heat or fire.
Install the panel and cover of the control
box securely.
Do not place the product in the vicinity
of areas with explosion or fire risk.
Failure to do so may cause explosions
or fire.
Do not mix any gas or air into the
system other than the refrigerant used
in the system. If air enters the refrigerant
system, it can cause very high
pressures, which can result in personal
injuries or equipment malfunction.
Use packed materials such as screws,
nails or batteries carefully after
installation or repair. Otherwise, these
may cause serious injuries.
Attach the condensation drain hose so
that it can easily drain water. If this shall
be neglected, it may cause the product
to malfunction.
When installing or repairing the air
conditioner, be sure to check for
refrigerant leakage.
Do not contact if leakage is present. It
may cause product malfunction.
Check for any damage on the product
before installing it. Do not have the
product installed if it is damaged.
Damaged products cause a risk for your
safety.
Anyone working on the cooling circuit
shall have a valid certificate issued by
the competent authority, which certifies
their competence to work on the
refrigerant acknowledged by the
industry.
Service work shall only be carried out as
recommended by the manufacturer.
Maintenance and repair, which requires
the support of other workers with
different expertise, shall be carried out
under the supervision of a person
qualified in the use of flammable
refrigerants.
The device shall be stored in a
well-ventilated place suitable for the size
specified for operation.
The devices shall be stored in such a
way that there are no continuous open
flames
(e.g. a working gas appliance) and
ignition sources (e.g. a working electric
heater).
The device shall be stored in such a
way that it cannot be mechanically
damaged.

Right place for installation
Power connection
12
Do not place the product on an
improper surface or at a point with risk
of falling. This may result in death,
serious injuries or damage to the
product.
Install the product on a secure and flat
surface in environments with no risk of
freezing.
Ensure that the installation area shall
not deteriorate in the course of time.
Do not install the product on a location
where noise from the outdoor unit and
hot air may disturb or even damage
the neighbours.
Do not install the product on a location
where it will be exposed to direct wind
blowing from the sea (salt spray).
The indoor unit shall not be mounted
on objects, such as LCD, TV unit that
may be damaged in case of water
leakage.
Do not use a damaged power cord,
plug or an outlet. Failure to comply
with this instruction may cause fire or
electrocution.
The contact clearance of the main fuse
and switches shall be at least 3 mm.
Do not connect the grounding wire to
gas pipes, lightning rod or grounding
connection of a phone. Failure to
comply with this instruction may cause
electric shock or damage to the
product.
Damaged power cord of the product
shall be replaced by Authorized
Service.
If the product is malfunctioning, it must
not be operated without being
repaired! There is a risk of electrocu-
tion!
Plug the product in a grounded electrical
installation protected by an automatic
fuse conforming to the values specified in
the “Technical Specifications” chart. Our
company shall not be responsible for the
damages that shall be incurred due to
using the product without grounding
according to local regulations.
The connection must conform to national
regulations.
The fuse of the product shall be easily
accessible after installation.
Voltage and allowed automatic fuse
protection are specified on the “Technical
Specifications” section. If the amperage
value of the automatic fuse in your
household does not match the values
indicated in the “Technical Specifications”
chart, have an automatic fuse with proper
amperage value installed by a qualified
electrician.
The specified voltage must match your
mains voltage.
Do not use extension or multi sockets in
power connection. Replace the cord if it
is scratched, peeled, worn or broken.
Failure to comply with this instruction may
cause electric shock or damage to the
product.

First Use
Before using the product, make sure that
the preparations are made in accordance
with the instructions in the "Important safety
instructions" and "Installation" sections.
Transportation of the Product
If you need to move the product to another
location, contact the Authorized Service Center.
Mounting the remote controller
bracket on the wall
To protect the remote control, do not mount
the bracket on a location under direct sunlight.
2.
3. Put the remote controller into the remote
controller bracket
You can fix the controller bracket on
the wall by attaching the guide strip to
the back of the controller bracket.
13
Mount it in a safe and easily accessible
location.
Mount the controller bracket with 2 screws
using a screwdriver.
Be careful when you are unpacking and
installing the product. Otherwise, you may
be seriously injured or cause damage to the
product.
The device shall be transported by at least
two persons or with the a forklift. Otherwise,
it may cause injuries.

What to do for energy saving
4 Preparation
14
Make sure that the capacity of the air
conditioner is suitable for the room
you want to use. If the cooling
capacity of an air conditioner
is smaller than the requirement of the
room, the A/C cannot provide
efficient cooling and the compressor
shall be kept active continuously and
energy consumption will increase as
a result.
If the air conditioner has a cooling
capacity greater than the room
requirement, it will cool the room very
quickly and turn the compressor off
and on frequently. This will increase
the energy consumption of your A/C.
Furthermore, since the higher
capacity air conditioners have a
higher sound level, the noise in the
room which is smaller than the air
conditioning capacity will disturb you.
The heat insulation of the room where
you use the air conditioner increases
your comfort and reduces your
energy consumption. Therefore, it is
important to insulate the heat
loss-gain points of the room properly.
In addition, doors and windows of the
room shall be closed during the use
of the A/C. If it is necessary to keep
the doors open (in places such as
shops
and stores), devices such as air
curtains that prevent the flow of hot
or cold air from outside shall be used.
The use of blinds, curtains or shades
during the hours when the sun
directly enters the windows prevents
an increase in the energy
consumption of the air conditioner.
Where the outdoor unit is under
direct sunlight, protection from direct
sunlight by awning, shade, etc.
(provided that the airflow of the
outdoor unit is not obstructed)
prevents increased energy
consumption.
It is important that the installation
instructions of indoor and outdoor
units during installation are observed.
In particular, the air inlet and outlet
vents of the units and the blowing
vents shall be free of objests that may
block the air flow.
Setting the air conditioner to a
temperature lower than the tempera-
ture you need will increase your
energy consumption and reduce the
comfort effect. You can use the air
conditioner at more suitable tempera-
tures according to your needs
instead of using the lowest/highest
temperature settings continuously.
Clean the air conditioner dust trap
filters at regular intervals. Clogging of
the filters over time will prevent airflow
thus preventing you from getting the
performance you expect from the air
conditioner. This will also constrain
the air conditioner to increase energy
consumption.
It is very important to clean the heat
exchangers in the indoor and outdoor
units of the air conditioner. Contami-
nation or clogging of the heat
exchangers will cause the air condi-
tioner to operate harder to achieve
the desired cooling/heating perfor-
mance, thus increasing its energy
consumption. For this reason, we
recommend that you have the air
conditioner serviced at least once a
year. (Annual maintenance is not
covered by the warranty.)
You can reduce energy consumption
by using the programming feature of
the air conditioner. You can turn off
the air conditioner when you are not
using the room and turn it on again
when you will use it.
We recommend adjusting the air
direction air deflector so that it does not
disturb the occupants of the room.
Using the "Chaos Swing" feature will
help you achieve a more even air
distribution within the room.

Inserting the batteries Points to take into consideration
when using your remote control
If the display of the remote control
disappears, reinstall the batteries.
To operate the air conditioner, point the
remote control towards the receiver to
the right of the front panel of the air
conditioner.
Operation method
15
Open the battery compartment cover
of the remote control in the direction
of the arrow. Insert two AAA 1.5 V
batteries into their slots, making sure
the (+) and (-) directions are correct,
and reattach the cover.
When using the remote control,
point it towards the signal receiver on
the air conditioner.
Make sure that there are no obstacles
between the remote control and the air
conditioning receiver.
If the air conditioner does not beep
when you press the remote control
buttons, that means that no signal is
received. Press the button once more.
Don't let the remote controller fall down.
Do not place the remote control in a
location where it will receive direct
sunlight or near a device that emits heat.
Do not install rechargeable batteries in
the remote control whose shape, size
and performance differ from standard
batteries. If you do not operate the air
conditioner for a long time, remove the
batteries from the remote control.
The remote control may operate
other electronic devices if pointed.
Point the remote control towards the
signal receiver of the air conditioner.
For proper operating conditions,
clean the signal transmitter and
receiver using a soft cloth.

Depending on the set temperature,
the air conditioner operates
automatically in heating or cooling
mode. The air conditioner is used to
automatically control the fan speed
and temperature by detecting the
room temperature.
Dehumidifying mode (Nem Al / )
It is used to reduce humidity without
the overcooling of the environment
where the temperature is relatively low
but the humidity is high.
Fan mode (Fan / )
It circulates the air without changing
the room temperature.
Press the "Mode" button on the
remote control. Each time you
press the button, the mode will
change and switch to Auto
Operation, Dehumidification,
and Fan modes respectively.
Select one of the operating modes.
5 Operating the product
Turning the A/C on
1.
1.
2.
3.
Operating modes
The air conditioner can be operated in
5 different operating modes.
Cooling mode (Soğutuyor)
It is used to provide cooling at desired
temperature and conditions.
Auto-operation mode (Otomatik/ )
Heating mode (Isıtıyor)
It is used to provide heating at desired
temperature and conditions.
Mode selection
Cooling of the room (Soğutuyor)
Cools the room with comfortable air current.
Controller display A/C indicator
4.
Rapid cooling function
Allows the room to cool rapidly.
To operate the product, press the " "
button.
16
If the automatic fuse of the A/C is off,
switch it on.
Direct the remote controller to the
Operation status display on the
indoor unit and press the " " button
on the controller. The operating
status indicator display on the front
panel illuminates and a warning signal
comes from the air conditioner.
Select the desired mode using the
remote control.
Auto-operation mode
Dehumidifying mode
Fan mode
Use the " " buttons on the controller
to set the room temperature and the
" " button to adjust the fan
speed.
To operate the product, press the " "
button
Press the “Cool” button ( ) to switch
to cooling mode.
"Cooling" symbol will be displayed on
the screen.
Press the " " buttons until you reach
the desired temperature. Each time you
press the button, the set room
temperature will increase or decrease
by 1° C. - The temperature range is
between 18° and 30° C.
You can change the desired fan speed.
See “Fan speed adjustment"
Set the temperature value on the
remote control display to a value below
the room temperature.
If the A/C operates continuously for a
long time in cooling mode, condensa-
tion may form on the front panel and
the horizontal flaps.

To operate the product, press the
" " button.
Press the “heat” button ( ) to
switch to heating mode.
The C symbol will be displayed on
the screen.
What does rapid cooling do?
Controller display
Controller display
Controller display
A/C indicator
A/C indicator
4.
,
4.
, ,
Heating of the room (Isıtıyor)
4.
Rapid heating function
Allows the room to heat rapidly.
3.
A/C indicator
17
Heats the room with comfortable air current.
Press the “Cool” button ( ) to
switch to cooling mode.
Press the " " button to switch
to rapid cooling function.
The “ ” symbol will be
displayed on the screen.
To cancel the rapid cooling function,
simply press one of these buttons:
"Fast", "Silent", "Energy Control"
,"Cool", "Heat" and
"Mode". With the quick rapid function
cancelled, the A/C will continue to
operate at the highest fan speed
(except silent and power-saving,
). To change the speed, see
“Fan speed adjustment"
The A/C brings the temperature setting
to 18°C in 30 min. at a very high fan
speed while operating in cooling
mode, allowing the room temperature
to drop rapidly.
Hızlı soğutma fonksiyonu özellikle sıcak
yaz günlerinde oda sıcaklığını kısa
sürede düșürmek için kullanılır.
The rapid cooling function is not used
in heating mode.
This function may not be included or
not work on some products.
Press the " " buttons until you reach
the desired temperature. Each time
you press the button, the set room
temperature will increase or decrease
by 1° C.
- The temperature range is between
16° and 30° C.
You can change the desired fan speed
as well. See “Fan speed adjustment"
Set the temperature value on the
remote control display to a value
above the room temperature.
When the air conditioner is in heating
mode, adjust the horizontal air deflector
angle to the lowest position for more
efficient heating.
When the air conditioner is in heating
mode, the indoor fan continues to
operate for a while after the ambient
temperature has reached the desired
value. At this point, the air blown by
the air conditioner may feel warm. If
you feel the indoor temperature is
getting lower, we recommend that you
set the temperature on the controller
to a higher value.
To operate the product, press the " "
button.
Press the “heat” button ( ) to switch
to heating mode.
Press the "Fast" button to switch to
rapid cooling function.
The " " symbol will be displayed on
the screen.
To cancel the rapid heating function,
simply press one of these buttons:
"Fast", "Silent",
"Energy Control", "Cool", "Heat" and
"Mode". With the quick rapid function
cancelled, the A/C will continue to
operate at the highest fan speed
(except silent, ). To change the
speed, see “Fan speed adjustment"

Dehumidifying mode ( )
1.
2.
Controller display
Controller display A/C INDICATOR
What does rapid heating do?
1.
2.
Controller display A/C indicator
Auto-operation mode ( )
3.
Fan Mode ( )
It circulates the air without changing
the room temperature.
18
The A/C brings the temperature setting
to 30°C in 30 min. at a very high fan
speed while operating in heating mode,
allowing the room temperature to
increase rapidly.
If you feel the indoor temperature is
getting lower, we recommend that you
set the temperature on the controller to
a higher value.
In this mode, excess moisture is
absorbed from high humidity
environments and mold growth is
prevented. This mode automatically
adjusts the ambient temperature to keep
the humidity at the optimum point during
operation.
To operate the product, press the " "
button.
Press the " " button until the unit runs
in dehumidifying mode. The " " symbol
and "Dehumidifying" text will be
displayed.
In this mode, the air conditioner detects
the room temperature and adjusts to the
best condition to remove moisture
based on the room temperature. The set
temperature is not displayed on the
remote control in this case.
During the hygienic dehumidification
function, it is automatically adjusted
according to the algorithm that meets
the current room temperature and keeps
the room condition healthy and
comfortable even during seasons with
high humidity.
The indications on the A/C display may
differ.
To operate the product, press the
" " button.
Press the “Mode” button until the
unit runs in fan mode. The " "
symbol and "Fan" text will be
displayed.
The rapid heating function is used to
quickly increase room temperature,
especially on cold winter days.
The rapid heating function is not used in
cooling mode.
This function may not be included or not
work on some products.
Depending on the set temperature on
the controller, the air conditioner
operates automatically in heating or
cooling mode. The air conditioner is
used to automatically control the fan
speed and temperature by detecting the
room temperature.
To operate the product, press the " "
button.
Press the "Mode" button until the unit
runs in auotomatic mode. The " "
symbol and "Automatic" text will be
displayed.
Press the " " buttons until you reach the
desired set temperature. Each time you
press the button, the set room tempera-
ture will increase or decrease by 1° C.
- The temperature range is between 18°
and 30° C. You can change the desired
fan speed as well. See “Fan speed
adjustment"
Set the temperature value on the
remote control display to a value above
or below the room temperature.
When the air conditioner is in heating
mode, adjust the horizontal air deflector
angle to the lowest position for more
efficient heating.
When the air conditioner is in heating
mode, the indoor fan continues to
operate for a while after the ambient
temperature has reached the desired
value. At this point, the air blown by the
air conditioner may feel warm.
A/C indicator

Always use the remote control to
adjust the direction of the horizontal air
deflector. Manual adjustment of the
horizontal air deflector may damage the
product.
The horizontal air deflector will also close
when the air conditioner is turned off.
Following the free air deflector movement,
pressing the "Oitel " button ( ) lets
the vertical air deflector remain in its last
position.
To operate the product, press the
" " button.
Press Vertical ( ) to select the
air deflector
The symbol " " will appear on the
display and the horizontal air deflector will
start to move to the set air deflector angle
range.
3.
Fan speed adjustment
Symbol Definition
Low fan speed
Medium-Low fan speed
Medium fan speed
High-Mediumfan speed
High fan speed
Chaos Swing (Natural air
current effect)
Temperature adjustment /
Room temperature control
1.
Cooling mode:
Heating mode:
Directing the vertical air flow
Symbol Definition
1. Level air deflector angle
2. Level air deflector angle
3. Level air deflector angle
4. Level air deflector angle
5. Level air deflector angle
6. Level air deflector angle
Free air deflector movement
Horizontal air deflector moves
automatically between 1.and 6. level.
Controller display
19
You can change the desired fan
speed. See “Fan speed adjustment"
In this mode, the air conditioner
outdoor unit compressor does not
operate.
It sends the indoor air back to the
outside environment. Circulates the air.
If the set temperature is lower than the
room temperature, the unit will not
operate in heating mode. Increase the
set temperature value.
Press the " " and " " buttons to set the
desired air flow rate.
While in Chaos Svving mode, the fan
speed automatically switches between
medium or low fan speed according to
the ambient temperature.
The options may vary depending on
the product function or may not work.
If the set temperature is higher than
the room temperature, the unit will not
operate in cooling mode. Decrease
the set temperature value.
You can adjust the desired room
temperature easily.Press the " "
buttons to adjust your desired room
temperature.
: Each time you press the button the
temperature will increase by 1° C.
: Each time you press the button the
temperature will decrease by 1° C.

Directing The Horizontal Air Flow
Symbol Definition
1. Level air deflector angle
2. Level air deflector angle
3. Level air deflector angle
4. Level air deflector angle
5. Level air deflector angle
Automatically controls the air deflector
angle between 1. and 3. level.
Automatically controls the air deflector
angle between 3. and 5. level.
1.
Free air deflector movement: Vertical
air deflector moves automatically
between 1. and 5. level.
Display On/Off ( )
lonfresh air cleaning function
One-touch soft air ( )
( )
Press and hold the "Sleep" button ( ) for 3
sec. to switch the air conditioning indicator
on and off.
This function may not be supported
depending on the model.
It removes microscopic particles by ionizing
the environment.
To start lonfresh air cleaning function
press the "Ion/Cleaning" button ( ).
The Ionfresh air cleaning function is
combined with the Ionizer air cleaning.
Sequencing is as shown in the table.
Ionizer
Auto-clean
Turn off Ionizer
Turn off Auto-clean
Controller display
2. To switch off the Ionfresh air purge function,
press the Ion/Cleaning button ( ) until the
"lonizer" symbol in the control display goes out.
Info Display (Instantaneous
Power Consumption and Ambient
Temperature Display ( )
Controller display
Controller display Controller display
20
Controller display A/C indicator
To operate the product, press the " "
button.
Press the " " button to select the fan
air deflector angle. The " " symbol will
appear
on the display and the vertical
will start to move to the set
air deflector angle
range.
If the "Confirm" button ( ) is pressed
and hold for 3 seconds, the instanta-
neous energy consumption (kW) will be
displayed on the indoor unit display and
the actual room temperature will be
displayed on the control screen.
The unit of the 1.2 value shown on the
A/C display as an example, is "kW",
and equivalent to 1200 Watt.
Depending on the location of the
wireless remote control in the room,
the room temperature value may vary.
Always use the remote control to
adjust the direction of the vertical
air deflector. Manual adjustment of the
vertical air deflector may damage the
product.
This function may not be included or
not work on some products
Following the free air deflector movement,
pressing the "Yatay" button ( )
lets the vertical air def lector remain in
its last position.
When the " " button is pressed, it
easily adjusts the air flow at two
different angles to deflect the directly
incoming wind.
.
button
This manual suits for next models
3
Table of contents
Other arcelik Air Conditioner manuals
Popular Air Conditioner manuals by other brands

LG
LG MultiV Series installation manual

Pioneer
Pioneer FAB Series installation manual

Mitsubishi Electric
Mitsubishi Electric Mr.Slim MSZ-A24NA operating instructions

Daikin
Daikin FFQ09Q2VJU Operation manual

LG
LG I27TTC owner's manual

Mitsubishi Electric
Mitsubishi Electric MSZ-GE25VA operating instructions

Bestron
Bestron AAC6000 instruction manual

Frigidaire
Frigidaire FAZ12ES2A installation instructions

Challenge
Challenge MPPHA-05CRN1-QB6 instruction manual

Gree
Gree E-TAC Installation and operation instructions

Mitsubishi Electric
Mitsubishi Electric Mr. Slim PUZ-M200YKA2.UK Service manual

Whynter
Whynter ARC-12SDH instruction manual