2.4 Connection : the audio-visual output (AV Out)
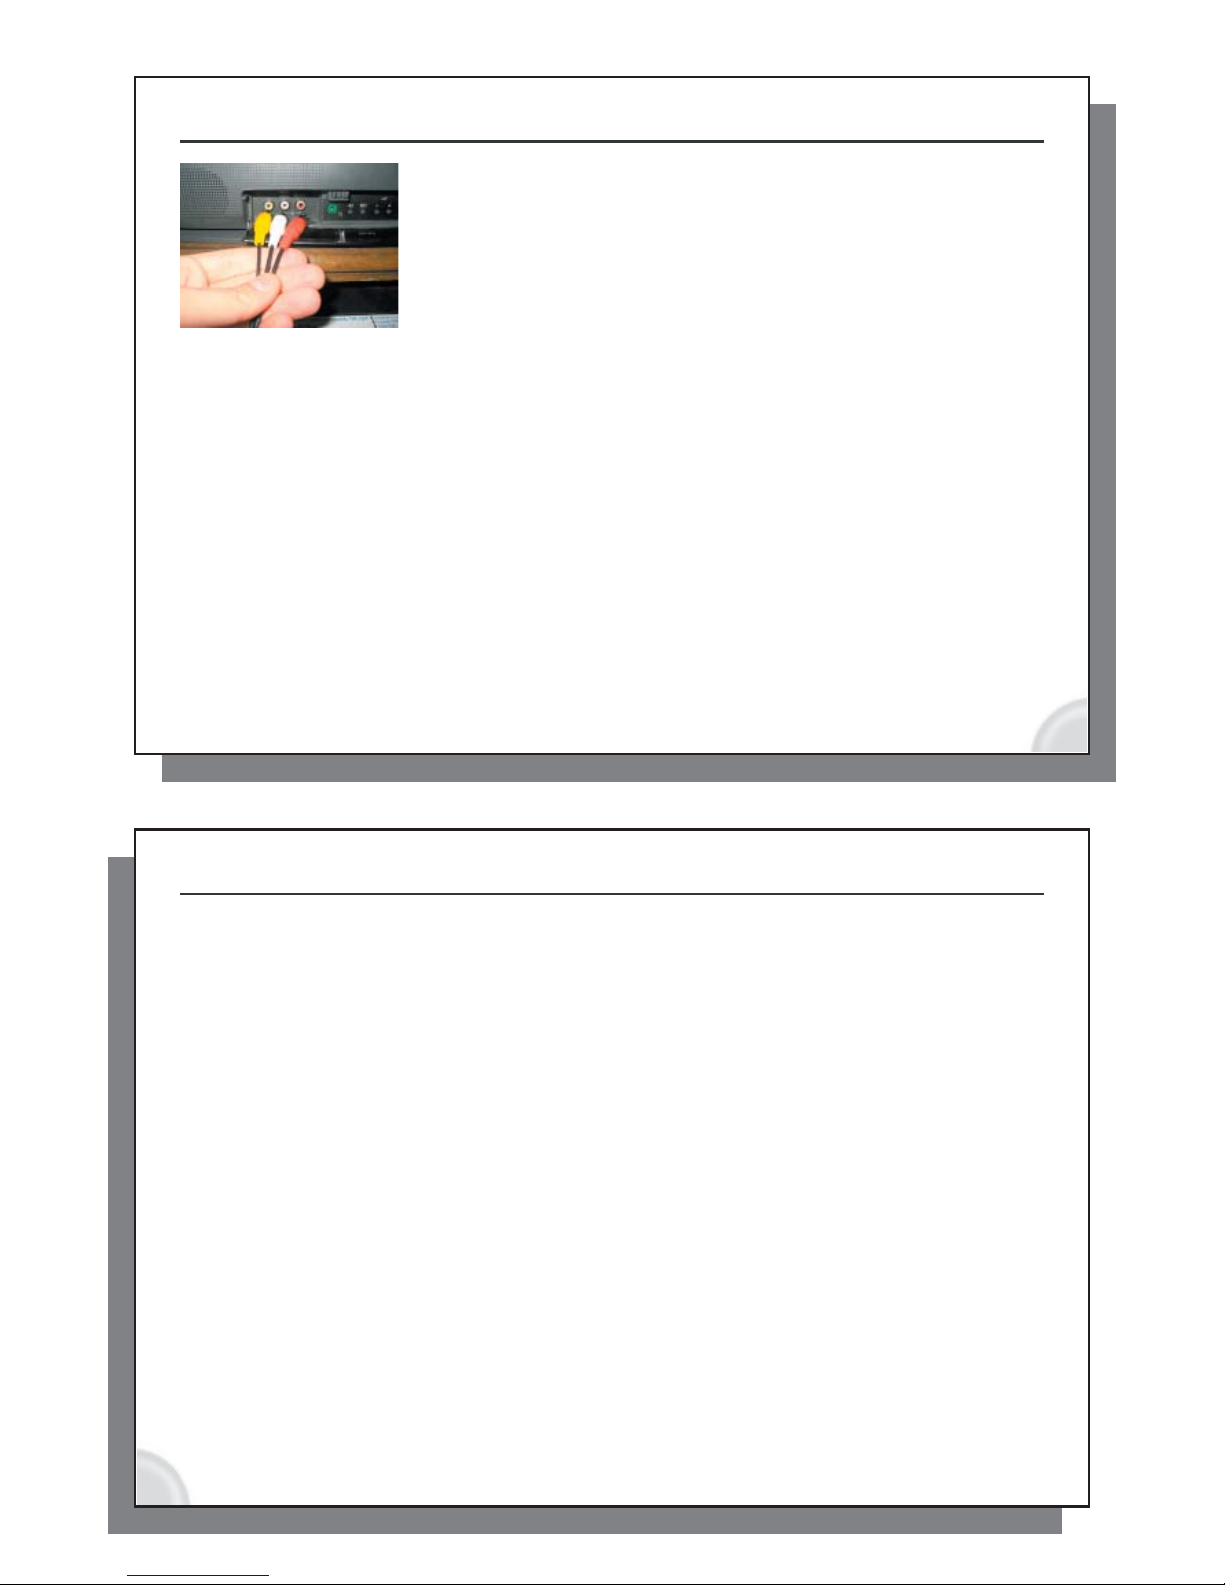
To be able to view photos and videos on your television, use the set of three
plugs (red, white, yellow) that are labeled AV OUT. These are your audio and
video cables to plug into your television’s auxiliary inputs (could be on the back
or front of your television).
North America: Plug the Yellow connector into your television’s Video Input, the
Red into your television’s right audio input, and the White into your television’s
left audio input. If your television does not support Stereo sound (it has only one
audio input), plug just the Red cable into the audio input of your television.
Europe: If connecting to the SCART connector on the back of the television, use the included SCART
IN block. Connect the three colored AV OUT cables to the SCART IN block and then plug that into your
television. If connecting to the front of your television, simply plug the colored AV OUT cables directly into
those front jacks.
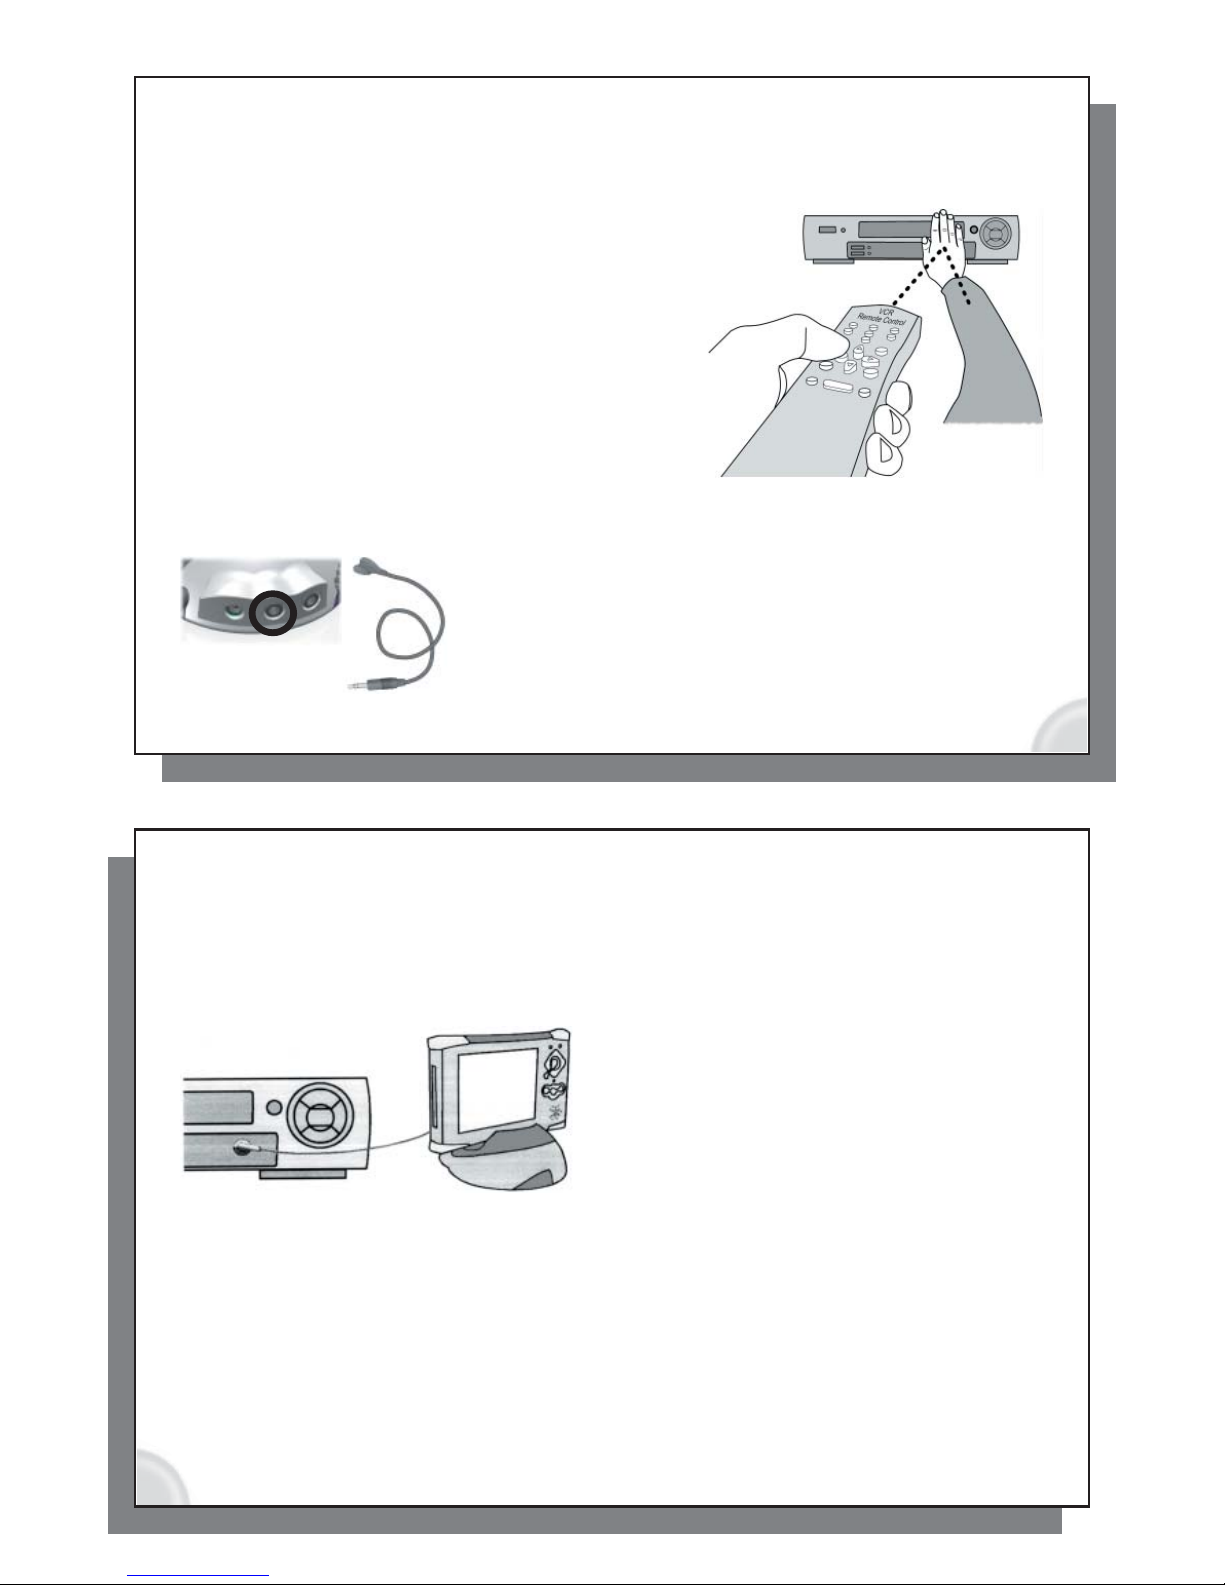
TEST IT: Test now to see if you made the correct connections.
• With the device in the cradle, play one of the sample video files.
• Hold down on the TV/LCD buttonfor 3 seconds (Switch to external video).
• The screen on your AV should go black.
• You should see the video now playing on your television.
• If not, switch your television to auxiliary input (often called L1 or L2 just below channel 1)
• Europe: If you don’t see the video, check to make sure you used the SCART IN block.
9
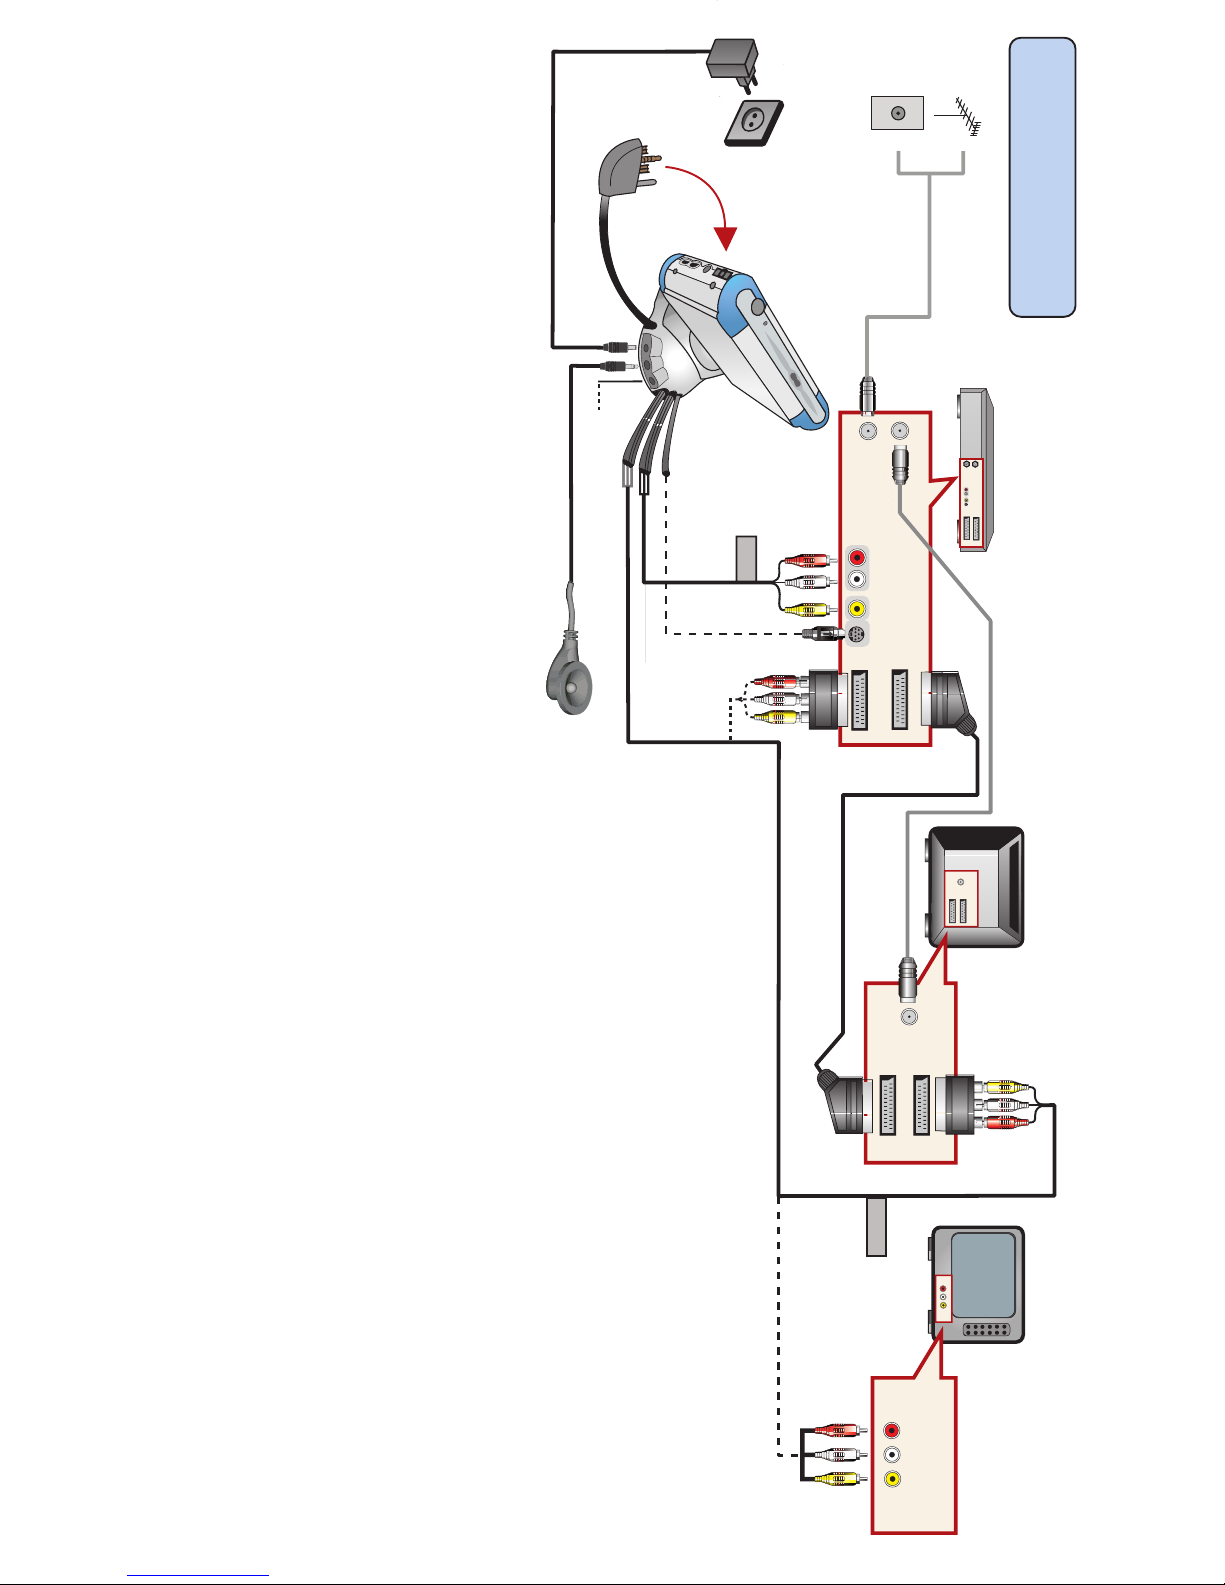
2.5 Connection : the audio-visual input (AV In)
If you want to be able to record from your television or another video device into your Archos AV device, you will have
to send the video and audio signals into it. You will use the three cables labeled AV IN.
North America: You will most likely get your video and audio signals from your Cable box, Satellite receiver box, or
VCR (newer large screen TVs often have video and audio outputs on the back that can also be used). Connect the
AV IN cable’s yellow connector to the yellow Video Out jack on your cable box, satellite box, or VCR, or TV. See the
diagram that most nearly resembles your television set up. Now connect the Red and White cables to the cable box,
satellite box, VCR, or TV’s Red and White Audio Out jacks. What ever is going out of the cable box, satellite box, or
VCR to your television, is now also going to your AV400 device.
Europe: If your cable box, video cassette recorder, or satellite receiver has audio-visual outputs (red, white, yellow),
then plug the three AV IN cables into those connections. If your cable box, video cassette recorder, or satellite receiver
has an extra SCART output, then connect the TV Cradle’s red, white, and yellow AV IN cables into the included OUT
SCART block (Attention: the IN and OUT SCART connectors look very similar) and then plug it into your device’s extra
SCART output. If you have neither the audio-visual outputs nor an extra SCART output, see the next section.
TEST IT: Verify that you made the correct connections
• Turn on your cable box, satellite box, or video cassette recorder (VCR).
• Make sure you see a good clear television image.
• Select the icon on the AV screen called VideoCorder.
• The pre-recording screen should now show the same image on the built-in screen.
•
Press the ON/ENTER button
to record what is showing on the screen (or use the Archos remote control).
• North America: If you do not see an image (or see the message ‘No Signal’), check that you connected
the yellow cable of the AV IN to the video output of your cable box, satellite receiver, or VCR.
• Europe:
If you are using a SCART output on your video cassette recorder and you do not see the image on the
Archos device’s screen (or you see the message ‘No Signal’), check the manual of your video cassette recorder to
make sure that the SCART connection that you plugged into is capable of video and audio output, not just input.
10