Aristo HKE 9 X User manual

DE EN IT
Deutsch, 7English, 11Italiano, 15
FR ES NL
Français, 19 Español, 23 Nederlands, 27
PT RU
Português, 31!"##$%&, 35
HKE 9 X
HKE 6 X
Betriebsanleitung
Instructions for use
Istruzioni per l’uso
Mode d’emploi
Instrucciones de uso
Gebruiksaanwijzingen
Instruções de uso
!"#$%&'()* +,
-'#+.&/$/())

2

3

4

5

6

Deutsch
7
DE
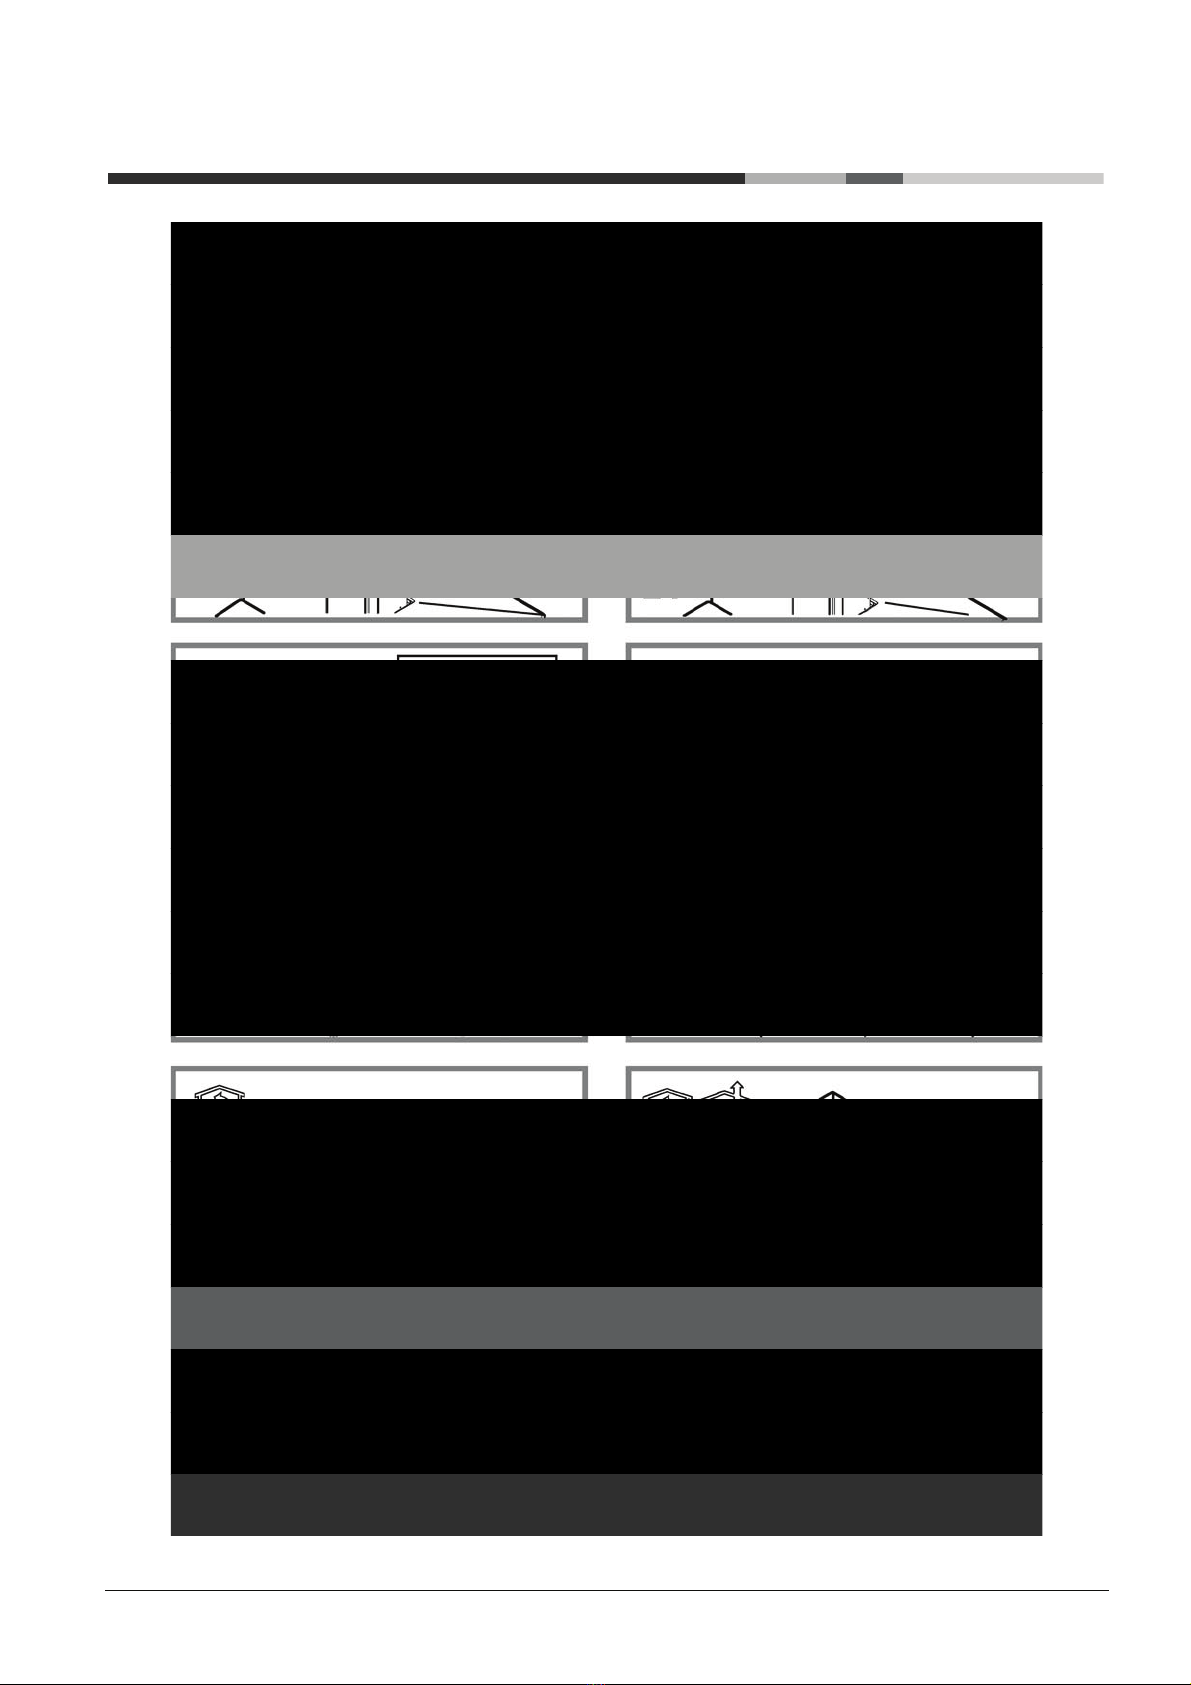
Der Dunstabzugshaube kann von der aesthetischen Seite her ander sein
als die Zeichnungen die in diesem Bedienungsanleitung geschrieben sind.
Die Bedienungsanleitungen , die Wartung und die Installation sind aber
gleich.
! Es ist wichtig diese Bedienungsanleitung zu behalten um sie in jedem
Moment nachzuschlagen. Im Fall von Verkaufen, Abtretung oder Umziehen,
versichern Sie sich bitte dass Sie mit dem Produkt zusammen bleibt.
! Die Bedienungsanleitungen richtig lesen: es gibt wichtige Informationen
ueber die Installation, Benutzen und Sicherheit.
! Keine elektrische oder mechanische Aenderungen auf dem Produkt oder
auf die Fluchtleitungen machen.
ALLGEMEINE SICHERHEIT
Der Abstand zwischen der Abstellfläche auf dem Kochfeld und der Unterseite
der Dunstabzugshaube darf 50cm im Fall von elektrischen Kochfeldern und
65cm im Fall von Gas- oder kombinierten Herden nicht unterschreiten.
Wenn die Installationsanweisungen des Gaskochgeräts einen größeren Abstand
vorgeben, ist dieser zu berücksichtigen.
Die Abzugshaube ist mit Dübeln ausgestattet, die für die meisten Wände/Decken
geeignet sind. Trotzdem sollte ein qualifizierter Techniker hinzugezogen werden,
der entscheidet, ob die Materialien für die jeweilige Wand/Decke geeignet sind.
Außerdem muß die Wand/Decke das Gewicht der Abzugshaube tragen muss.
Achtung! Das Gerät nicht an das Stromnetz anschließen, solange die
Installation noch nicht abgeschlossen ist.
Vor Beginn sämtlicher Reinigungs- oder Wartungsarbeiten muss das Gerät
durch Ziehen des Steckers oder Betätigen des Hauptschalters der Wohnung
vom Stromnetz getrennt werden.
Bei allen Installations- und Instandhaltungsarbeiten immer Schutzhandschuhe
tragen.
Kinder nicht mit dem Gerät spielen lassen.
Erwachsene und Kinder dürfen nie unbeaufsichtigt das Gerät betreiben,
– wenn sie körperlich oder geistig dazu nicht in der Lage sind,
– oder wenn ihnen Wissen und Erfahrung fehlen, das Gerät richtig und sicher zu
bedienen.
Die Dunstabzugshaube niemals ohne korrekt montiertes Gitter in Betrieb setzen!
Die Dunstabzugshaube darf NIEMALS als Abstellfläche verwendet werden,
sofern dies nicht ausdrücklich angegeben wird.
Der Raum muss über eine hinreichende Belüftung verfügen, wenn die
Dunstabzugshaube mit anderen gas- oder brennstoffbetriebenen Geräten
gleichzeitig verwendet wird.
Bei gleichzeitigem Betrieb der Dunstabzugshaube im Abluftbetrieb und
Feuerstätten darf im Aufstellraum der Feuerstätte der Unterdruck nicht größer
als 4 Pa (4 x 10⁻⁵ bar) sein.
Die angesaugte Luft darf nicht in Rohre geleitet werden, die für die Ableitung der
Abgase von gas- oder brennstoffbetriebenen Geräten genutzt werden.
Es ist strengstens verboten, unter der Haube mit offener Flamme zu kochen.
Eine offene Flamme beschädigt die Filter und kann Brände verursachen, daher
ist dies in jedem Fall zu vermeiden.
Das Frittieren muss unter Aufsicht erfolgen, um zu vermeiden, dass das
überhitzte Öl Feuer fängt.
Zugängliche Teile können beim Gebrauch mit Kochgeräten heiss werden.
In Bezug auf technische und Sicherheitsmaßnahmen für die Ableitung der Abluft
sind die Vorschriften der zuständigen örtlichen Behörden strengstens
einzuhalten.
Die Haube muss regelmäßig innen und außen gereinigt werden (MINDESTENS
EINMAL IM MONAT, diesbezüglich sind in jedem Fall die ausdrücklichen
Angaben in der Wartungsanleitung dieses Handbuchs zu beachten).
Eine Nichtbeachtung der Vorschriften zur Reinigung der Haube sowie zur
Auswechselung und Reinigung der Filter führt zu Brandgefahr.
Um das Risiko eines Stromschlages zu vermeiden, darf die
Dunstabzugshaube ohne richtig eingesetzte Lampen nicht betrieben
werden.
Es wird keinerlei Haftung übernommen für Fehler, Schäden oder Brände des
Gerätes, die durch Nichteinhaltung der in diesem Handbuch aufgeführten
Anweisungen verschuldet wurden.
ELEKTRISCHER ANSCHLUSS
Die Netzspannung muss der Spannung entsprechen, die auf dem
Betriebsdatenschild im Innern der Haube angegeben ist. Sofern die Haube einen
Netzstecker hat, ist dieser an zugänglicher Stelle an eine den geltenden
Vorschriften entsprechende Steckdose auch nach der Montage anzuschließen.
Bei einer Haube ohne Stecker (direkter Netzanschluss) oder falls der Stecker
nicht zugänglich ist, ist ein normgerechter zweipoliger Schalter auch nach der
Montage anzubringen, der unter Umständen der Überspannung Kategorie III
entsprechend den Installationsregeln ein vollständiges Trennen vom Netz
garantiert.
Hinweis! Vor der Inbetriebnahme muss sichergestellt sein, dass die
Netzversorgung (Steckdose) ordnungsgemäß montiert wurde.
Austausch des Netzkabels
Die Dunstabzugshaube ist mit einem Spezial-Netzkabel ausgestattet; sollte das
Kabel beschädigt werden, muss beim Kundendienst Ersatz angefordert werden.
ABLEITUNG DER ABLUFT
(bei Abluftversionen)
Die Dunstabzugshaube an Abluftrohre und Wandabluftauslass mit dem selben
Durchmesser wie der Luftausgang verbinden (Anschlussflansch).
Die Benutzung von Rohren und Wandabluftauslass mit geringerem
Durchmesser, verursacht eine Verringerung der Abluftleistung und eine
drastische Zunahme der Geraeuschentwicklung.
Jegliche Verantwortung diesbezueglich wird daher abgelenkt
! Eine möglichst kurze Leitung verwenden.
! Eine Leitung mit einer möglichst geringen Anzahl von Krümmungen
verwenden (max. Winkel der Krümmung: 90°).
! Starke Änderungen des Leitungsdurchmessers sind zu vermeiden.
! Die Innenfläche der Leitung muss so glatt wie möglich sein.
! Das Material der Leitung muss von den Normen zugelassen sein.
! Jegliche Verantwortung wird von der Firma abgelehnt, sollten diese Normen
nicht respektiert werden.
UMLUFT- ODER ABLUFTBETRIEB ?
!Ihre Haube wird als Abzugshaube geliefert.
Um die Abzugshaube in der Umluftversion verwenden zu können, braucht
der AKTIVKOHLE-FILTERSYSTEM installiert zu werden.
Stellen Sie in den ersten Seiten dieser Gebrauchsanleitung fest, ob das
AKTIVKOHLE-FILTERSYSTEM mitgeliefert oder separat erhältlich ist.
Anmerkung: Wenn das Aktivkohle-Filtersystem mitgeliefert wird, kann es
schon in der Haube installiert worden sein.
Die Informationen über den Umbau der Abzugshaube in Umlufthaube sind
in dieser Gebrauchsanleitung enthalten.
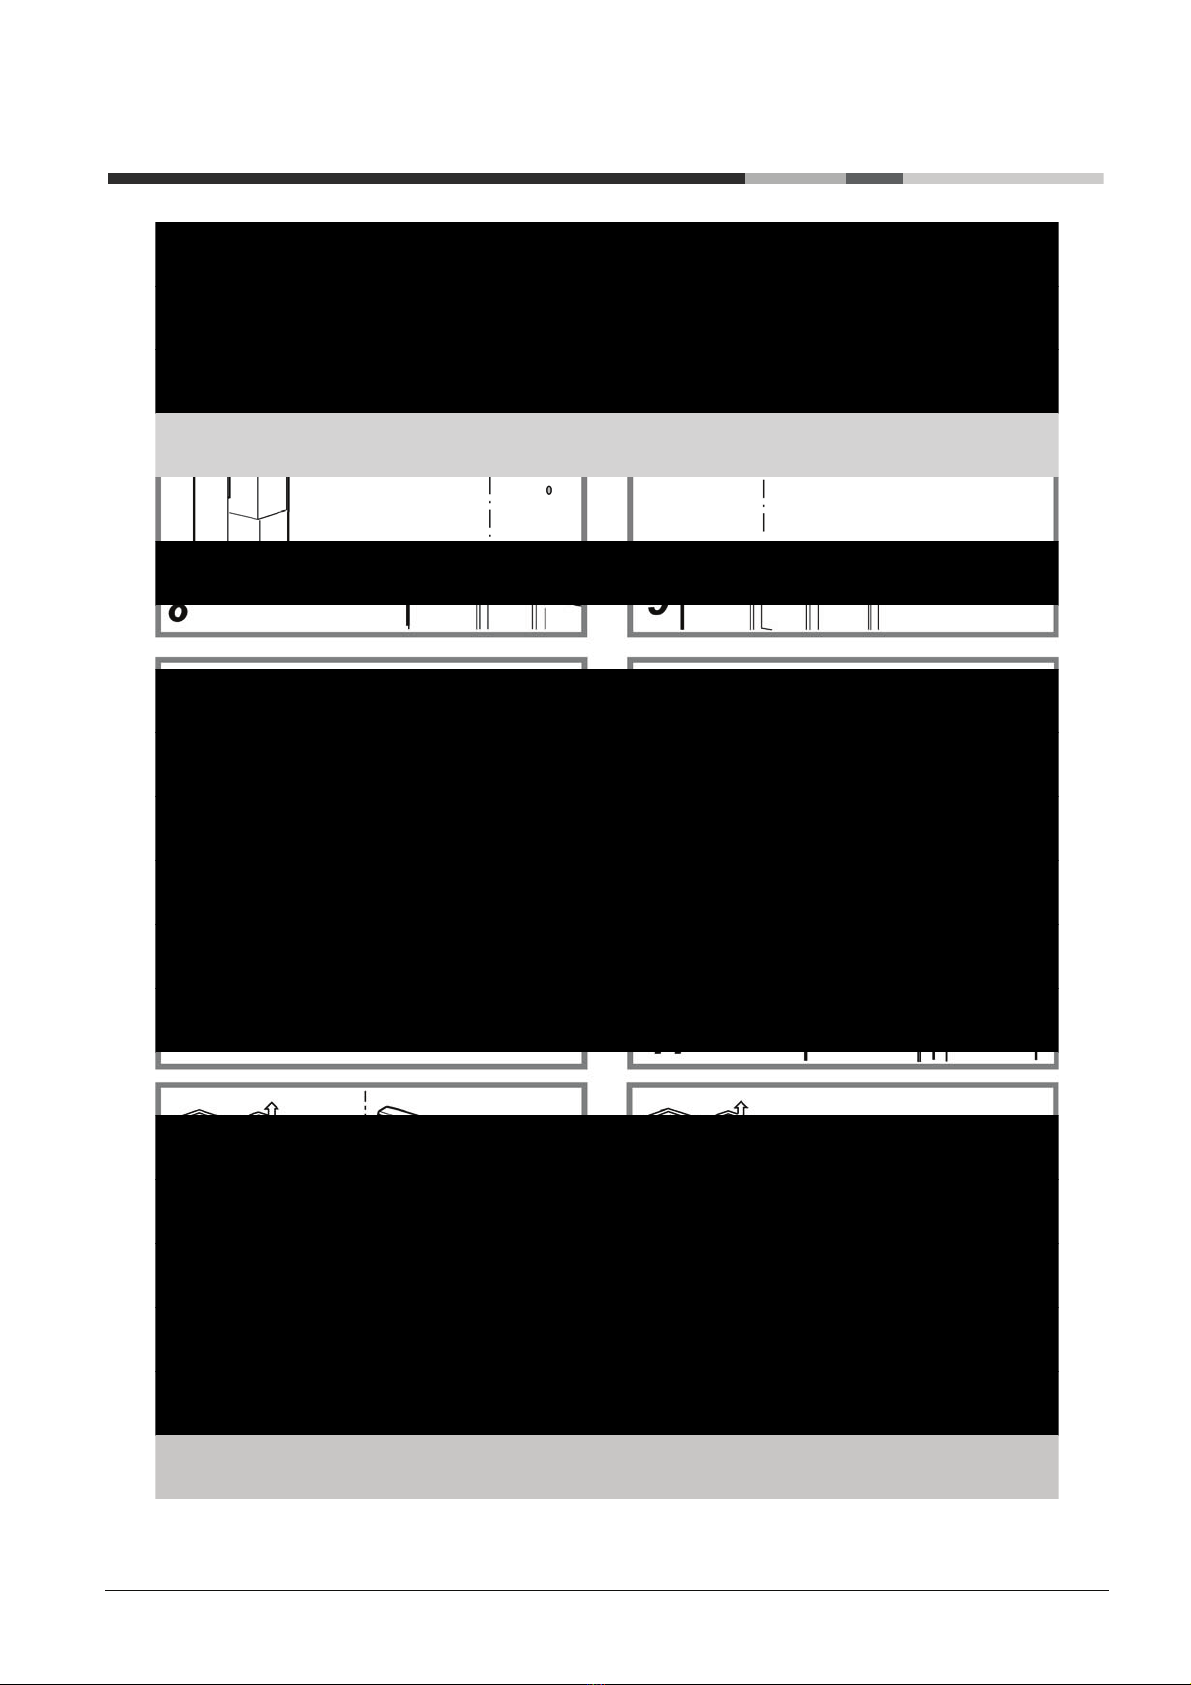
Abluftbetrieb
Die Luft wird mit Hilfe eines an den Abluftstutzen anzubringenden Rohres ins
Freie geleitet.
Das Abluftrohr wird hierbei nicht geliefert und soll separat angekauft werden.
Das Abluftrohr muß denselben Durchmesser wie der Abluftstutzen aufweisen.
Das Abluftrohr muß muß in waagrechter Lage leicht nach oben geneigt sein (ca.
10%), damit die Luft ungehindert ins Freie abgeleitet werden kann.
Note. Sollte die Dunstabzugshaube mit Aktiv-kohlefilter versehen sein, so muß
dieser entfernt werden.
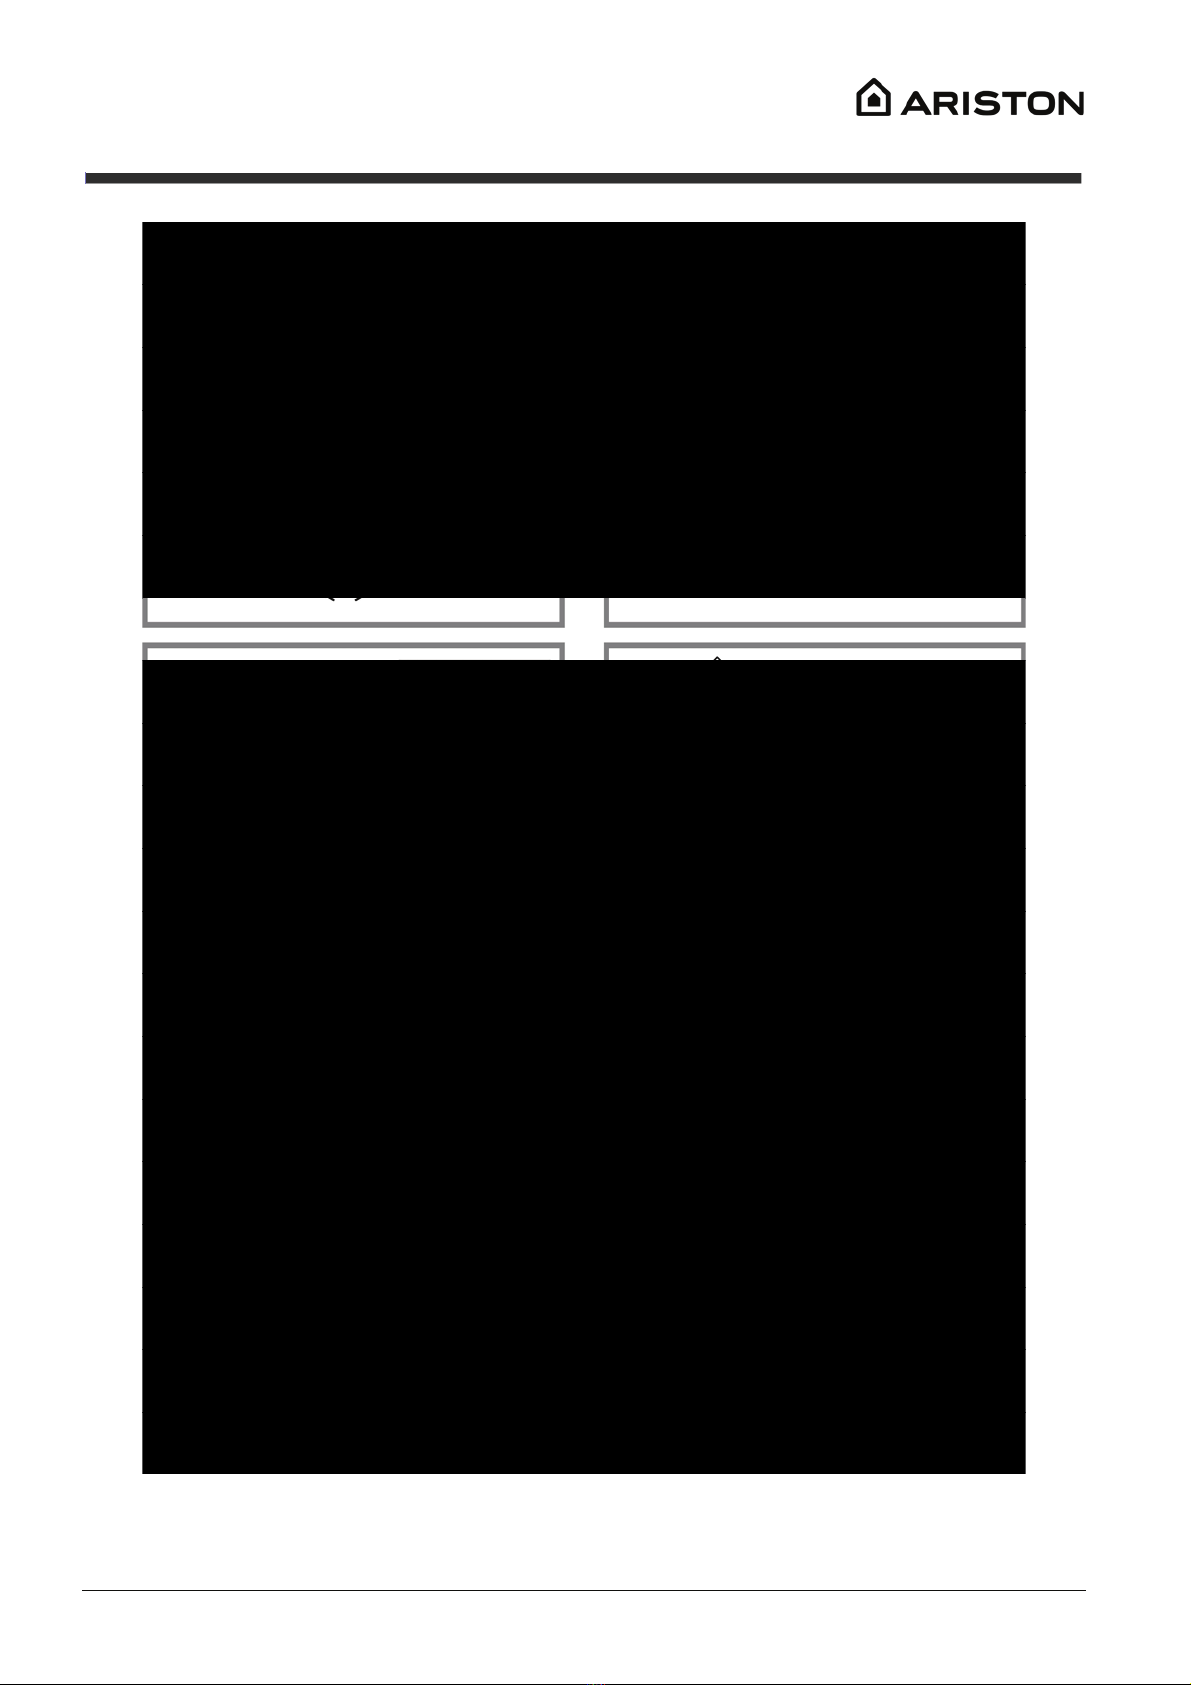
Umluftbetrieb
Es ist ein Aktiv-Kohlefilter zu benutzen, der bei Ihrem Fachhändler erhältlich ist.
Der Aktiv-Kohlefilter reinigt die angesaugte Luft von Fettpartikeln und
Kochdünsten bevor diese durch das obere Gitter in die Küche zurückströmt.

8
DE
BEDIENELEMENTE
Zur Auswahl der Funktionen der Haube genügt es, die Tasten zu berühren.
T1. ON/OFF Beleuchtung
T2. Reduzierung der Motorgeschwindigkeit
Bei Betätigung der Taste "T2" wird die Motorgeschwindigkeit von der 4.
Intensiven Geschwindigkeitsstufe zur 1. Geschwindigkeitsstufe reduziert.
Bei Betätigung der Taste "T2" während des Betriebes in der 1.
Geschwindigkeitsstufe schaltet sich die Haube auf AUS ein.
T3. Erhöhung der Motorgeschwindigkeit
Bei Betätigung der Taste T3 schaltet sich die Haube von AUS auf die 1.
Geschwindigkeitsstufe ein.
Bei Betätigung der Taste (Haube EIN) schaltet sich die
Motorgeschwindigkeit von der Geschwindigkeitsstufe 1 zur
Intensivgeschwindigkeit (zeitgesteuert) ein.
Geschwindigkeitsstufe 1 Led L1
Geschwindigkeitsstufe 2 Led L1+L2
Geschwindigkeitsstufe 3 Led L1+L2+L3
Intensivgeschwindigkeit (zeitgesteuert) Led L1+L2+L3+L4 blinkend
Anmerkung: die Geschwindigkeitsstufe 4 (zeitgesteuerte
Intensivgeschwindigkeit) bleibt 5 Minuten lang ein, dann schaltet sich die
Haube in die Geschwindigkeitsstufe 2 automatisch um.
T4. Timer
Die Schaltuhr aktiviert sich, wenn die Taste T4 gedrückt wird. Nach Ablauf
der Zeit schaltet sich die Haube ab.
Der Timer ist so geteilt:
Geschwindigkeitsstufe 1 - 20 Minuten (Led L1 blinkend)
Geschwindigkeitsstufe 2 - 15 Minuten (Led L2 blinkend)
Geschwindigkeitsstufe 3 - 10 Minuten (Led L3 blinkend)
Intensivgeschwindigkeit - 5 Minuten (Led L4 blinkend)
Wenn die Taste T2 während des Betriebs des Timers betätigt wird, schaltet
die Haube die Timer-Betriebsart ab und reduziert die Geschwindigkeit.
Wird die Taste T3 betätigt, schaltet die Haube die Timer-Betriebsart und
erhöht die Geschwindigkeit
Wird die Taste T4 betätigt, schaltet die Haube die Timer-Betriebsart und die
eingestellte Geschwindigkeit bleibt erhalten.
T5. Filtersättigungsanzeige – Kontrolle und Einstellung:
Siehe Bedienungsanleitungen in den folgenden Absätzen
T6. EIN/AUS Absaugmotor: durch die Taste T6 schaltet sich die Haube von
jeder Geschwindigkeitsstufe aus.
Durch die Taste T6 schaltet sich die ausgeschaltete Haube in die
Geschwindigkeitsstufe 1 ein.
Fettfiltersättigungsanzeige
Nach 40 Betriebsstunden startet die Led L1 zu blinken.
Startet die Led zu blinken, dann ist der Fettfilter zu ersetzen.
Um die Filtersättigungsanzeige zu löschen, die Taste T5 5” lang gedrückt halten.
(Haube EIN).
Ein Signalton ertönt und die Led L1 schaltet sich ab.
Aktivkohlefiltersättigungsanzeige
Nach 160 Betriebsstunden startet die Led L2 zu blinken.
Startet die Led zu blinken, dann ist der Aktivkohlefilter zu ersetzen.
Um die Filtersättigungsanzeige zu löschen, die Taste T5 5” lang gedrückt halten.
(Haube EIN).
Ein Signalton ertönt und die Led L2 schaltet sich ab.
Bei gleichzeitiger Anzeige des Fettfilters und des Kohlefilters wird die Leds L1
und L2 abwechselnd blinken.
Für den Reset führen Sie den oben beschriebenen Vorgang zweimal durch.
Das erst Mal wird die Aktivkohlefilteranzeige rückgesetzt. Das zweite Mal wird
die Fettfilteranzeige rückgesetzt.
Bei der Standard-Betriebsart ist die Aktivkohlefilteranzeige nicht aktiv.
Bei der Umluftversion muss die Aktivkohlefilteranzeige aktiviert werden.
Aktivkohlefilteranzeige aktivieren:
Die Haube auf OFF stellen und die Taste T5 5” lang gedrückt halten.
Nachdem die Taste betätigt worden ist, leuchten sich die Leds für die
Filtersättigungsanzeige auf, die aktiv sind.
Ein Signalton ertönt und die Led L2 wird 2" lang blinken.
Die Leds L1 und L2 bleiben für ca. 2" lang eingeschaltet, bevor die Haube auf
OFF gestellt wird.
Aktivkohlefilteranzeige deaktivieren:
Die Haube auf OFF stellen und die Taste T5 5” lang gedrückt halten.
Nachdem die Taste betätigt worden ist, leuchten sich die Leds für die
Filtersättigungsanzeige auf, die aktiv sind.
Ein Signalton ertönt und die Led L2 schaltet sich ab.
Die Led L1 bleibt für ca. 2" lang eingeschaltet, bevor die Haube auf OFF gestellt
wird.

9
DE
WARTUNG
Hinweis ! Vor jeder Reinigung und Pflege ist die Dunstabzugshaube durch
Ziehen des Netzsteckers oder Ausschalten der Sicherung stromlos zu
machen.
Reinigung
Die Dunstabzugshaube muss sowohl innen als auch außen häufig gereinigt
werden (etwa in denselben Intervallen, wie die Wartung der Fettfilter). Zur
Reinigung ein mit flüssigem Neutralreiniger getränktes Tuch verwenden. Keine
Produkte verwenden, die Scheuermittel enthalten.
KEINEN ALKOHOL VERWENDEN!
Achtung: Nichtbeachtung dieser Anweisungen zur Reinigung des Gerätes und
zum Wechsel bzw. zur Reinigung der Filter kann zum Brand führen. Diese
Anweisungen sind unbedingt zu beachten!
Der Hersteller übernimmt keine Haftung für irgendwelche Schäden am Motor
oder Brandschäden, die auf eine unsachgemäße Wartung oder Nichteinhaltung
der oben angeführten Sicherheitsvorschriften zurückzuführen sind.
Wartung der Fettfilter
Diese dienen dazu, die Fettpartikel, die beim Kochen frei werden, zu
binden.
Dieser muss einmal monatlich gewaschen werden (oder wenn das
Sättigungsanzeigesystem der Filter – sofern bei dem jeweiligen Modell
vorgesehen – dies anzeigt). Das kann mit einem milden Waschmittel von Hand,
oder in der Spülmaschine bei niedriger Temperatur und einem Kurzspülgang
erfolgen. Der Metallfettfilter kann bei der Reinigung in der Spülmaschine
verfärben, was seine Filtermerkmale jedoch in keiner Weise beeinträchtigt.
Zwecks Demontage der Fettfilter den Aushakgriff ziehen.
Wartung des Aktivkohlefilters
Dieser Filter bindet die unangenehmen Gerüche, die beim Kochen
entstehen.
Je nach der Benetzungsdauer des Herdes und der Häfigkeit der Reinigung des
Fettfilters tritt nach einer mehr oder weniger langen Benutzungsdauer die
Sättigung des Aktivkohlefilters auf. Auf jeden Fall muß der Filtereinsatz
mindestens alle 4 Monate (oder wenn das Sättigungsanzeigesystem der Filter –
sofern bei dem jeweiligen Modell vorgesehen – diese Notwendigkeit anzeigt)
ausgewechselt werden.
Er kann NICHT gereinigt oder erneut aktiviert werden.
Montage
Den Aktivkohlefilter zuerst von hinten auf der metallischen Feder der Saugkappe
anhaengen, dann von vorne mit den zwei Knoepfen.
Demontage
Den Aktivkohlefilter entnehmen, in dem man die Knoepfe die an der Saugkappe
fixiert sind auf 90° dreht.
Ersetzen der Lampen
Das Gerät vom Stromnetz nehmen.
Hinweis: Vor Berühren der Lampen sich vergewissern, dass sie abgekühlt sind.
1. Die Lampenabdeckung mit Hilfe eines kleinen Schlitzschraubenziehers oder
ähnlichem entfernen.
2. Die defekte Lampe auswechseln.
Ausschließlich Halogenlampen zu m12V -20W max - G4 verwenden und
darauf achten, diese nicht mit den Händen zu berühren.
3. Die Lampenabdeckung wieder schließen (Schnappverschluss).

10
DE
ENTSORGUNG
In Übereinstimmung mit den Anforderungen der Europäischen Richtlinie
2002/96/EG über Elektro- und Elektronik-Altgeräte (WEEE) ist vorliegendes
Gerät mit einer Kennzeichnung versehen.
Sie leisten einen positiven Beitrag für den Schutz der Umwelt und die
Gesundheit des Menschen, wenn Sie dieses Gerät einer gesonderten
Abfallsammlung zuführen. Im unsortierten Siedlungsmüll könnte ein solches
Gerät durch unsachgemäße Entsorgung negative Konsequenzen nach sich
ziehen.
Auf dem Produkt oder der beiliegenden Produktdokumentation ist folgendes
Symbol einer durchgestrichenen Abfalltonne abgebildet. Es weist darauf
hin, dass eine Entsorgung im normalen Haushaltsabfall nicht zulässig ist.
Entsorgen Sie dieses Produkt im Recyclinghof mit einer getrennten Sammlung
für Elektro- und Elektronikgeräte. Die Entsorgung muss gemäß den örtlichen
Bestimmungen zur Abfallbeseitigung erfolgen.
Bitte wenden Sie sich an die zuständigen Behörden Ihrer Gemeindeverwaltung,
an den lokalen Recyclinghof für Haushaltsmüll oder an den Händler, bei dem Sie
dieses Gerät erworben haben, um weitere Informationen über Behandlung,
Verwertung und Wiederverwendung dieses Produkts zu erhalten.
BETRIEBSSTÖRUNGEN
Wenn etwas nicht zu funktionieren scheint, folgende Kontrollen durchführen,
bevor der Kundendienst gerufen wird:
• Wenn die Abzugshaube nicht funktioniert:
Prüfen, ob:
- ein Stromausfall vorliegt.
- eine Geschwindigkeit gewählt wurde.
• Wenn die Leistung der Abzugshaube mangelhaft ist:
Prüfen, ob:
- die gewählte Motorgeschwindigkeit für die freigesetzte Menge an Rauch
und Dämpfen ausreicht.
- die Küche ausreichend belüftet ist, um eine Luftansaugung zuzulassen.
- der Kohlefilter verbraucht ist (bei Umluftversion).
• Wenn sich die Haube im Laufe des normalen Betriebs selbst ausgeschaltet
hat.
Prüfen, ob:
- ein Stromausfall vorliegt.
- die allpolige Trennvorrichtung ausgelöst wurde.
Die Dunstabzugshaube oder die Bedienungselemente funktionieren nicht: Für
mindestens 5 Sekunden die Stromversorgung der Dunstabzugshaube unter-
brechen und dann die Haube erneut einschalten. Kann die Störung nicht
behoben werden, kontaktieren Sie bitte den Kundendienst.
TECHNISCHE DATEN
Modell HKE 6 X
Höhe 74-119,6 cm
Breite 59,8 cm
Tiefe 52,3 cm
Bruttogewicht 19,6 Kg
Stromentnahme insgesamt 355 W
Stromentnahme Motor 1x315 W
Stromentnahme Lampen 2x20 W (G4 - 12V)
Ø des Abluftrohrs 15 cm
Modell HKE 9 X
Höhe 74-119,6 cm
Breite 89,8 cm
Tiefe 52,3 cm
Bruttogewicht 23,9 Kg
Stromentnahme insgesamt 355 W
Stromentnahme Motor 1x315 W
Stromentnahme Lampen 2x20 W (G4 - 12V)
Ø des Abluftrohrs 15 cm
Dieses Gerät wurde gemäß folgender Richtlinien entworfen:
• Niederspannungsrichtlinie 2006/95/EC (12-12-2006)
• “EMV”-Richtlinie 2004/108/EC (15-12-2004)
Teile, die nicht zum Lieferumfang des Produkts gehören

English
11
EN
The hood can look different to that illustrated in the drawings in this
booklet. The instructions for use, maintenance and installation, however,
remain the same.
! It is important to conserve this booklet for consultation at any moment. In
the case of sale, cession or move, make sure it is together with the product.
! Read the instructions carefully: there is important information about
installation, use and safety.
! Do not carry out electrical or mechanical variations on the product or on the
discharge conduits.
GENERAL SAFETY
The minimum distance between the supporting surface for the cooking
equipment on the hob and the lowest part of the range hood must be not less
than 50cm from electric cookers and 65cm from gas or mixed cookers.
If the instructions for installation for the gas hob specify a greater distance, this
must be adhered to.
Expansion wall plugs are provided to secure the hood to most types of
walls/ceilings. However, a qualified technician must verify suitability of the
materials in accordance with the type of wall/ceiling. The wall/ceiling must be
strong enough to take the weight of the hood. Do not tile, grout or silicone this
appliance to the wall. Surface mounting only.
WARNING! Do not connect the appliance to the mains until the installation is
fully complete.
Before any cleaning or maintenance operation, disconnect hood from the mains
by removing the plug or disconnecting the mains electrical supply.
Always wear work gloves for all installation and maintenance operations.
The appliance is not intended for use by children or persons with impaired
physical, sensorial or mental faculties, or if lacking in experience or knowledge,
unless they are under supervision or have been trained in the use of the
appliance by a person responsible for their safety.
This appliance is designed to be operated by adults, children should be
monitored to ensure that they do not play with the appliance.
This appliance is designed to be operated by adults. Children should not be
allowed to tamper with the controls or play with the appliance.
Never use the hood without effectively mounted grating!
The hood must NEVER be used as a support surface unless specifically
indicated.
The premises where the appliance is installed must be sufficiently ventilated,
when the kitchen hood is used together with other gas combustion devices or
other fuels.
The ducting system for this appliance must not be connected to any existing
ventilation system which is being used for any other purpose such as discharging
exhaust fumes from appliances burning gas or other fuels.
The flaming of foods beneath the hood itself is severely prohibited.
The use of exposed flames is detrimental to the filters and may cause a fire risk,
and must therefore be avoided in all circumstances.
Any frying must be done with care in order to make sure that the oil does not
overheat and ignite.
Accessible parts of the hood may became hot when used with cooking
applicance.
With regards to the technical and safety measures to be adopted for fume
discharging it is important to closely follow the regulations provided by the local
authorities.
The hood must be regularly cleaned on both the inside and outside (AT LEAST
ONCE A MONTH).
This must be completed in accordance with the maintenance instructions
provided in this manual). Failure to follow the instructions provided in this user
guide regarding the cleaning of the hood and filters will lead to the risk of fires.
Do not use or leave the hood without the lamp correctly mounted due to the
possible risk of electric shocks.
We will not accept any responsibility for any faults, damage or fires caused to the
appliance as a result of the non-observance of the instructions included in this
manual.
ELECTRICAL CONNECTION
The mains power supply must correspond to the rating indicated on the plate
situated inside the hood. If provided with a plug connect the hood to a socket in
compliance with current regulations and positioned in an accessible area, after
installation. If it not fitted with a plug (direct mains connection) or if the plug is not
located in an accessible area, after installation, apply a double pole switch in
accordance with standards which assures the complete disconnection of the
mains under conditions relating to over-current category III, in accordance with
installation instructions.
Warning! Before re-connecting the hood circuit to the mains supply and
checking the efficient function, always check that the mains cable is correctly
assembled.
Replacing the power cable
The hood is provided with a special power cable ; if the cable is damaged,
request a new one from Technical Service.
AIR VENT
(for the suction versions)
Connect the hood and discharge holes on the walls with a diameter equivalent to
the air outlet (connection flange).
Using the tubes and discharge holes on walls with smaller dimensions will cause
a diminution of the suction performance and a drastic increase in noise.
Any responsibility in the matter is therefore declined.
! Use a duct of the minimum indispensible length.
! Use a duct with as few elbows as possible (maximum elbow angle: 90°).
! Avoid drastic changes in the duct cross-section.
! Use a duct with an as smooth as possible inside.
! The duct must be made of certified material.
!The company declines any responsibility whenever these regulations are
not respected.
FILTERING OR DUCTING ?
!Your cooker hood is ready to be used in suction version.
To use the hood in filtering version the special ACCESSORY KIT must be
installed.
Check on the first pages of this manual if the ACCESSORY KIT is furnished
or must be bought separately.
Note: If furnished, in certain cases, the additional activated carbon filtering
system may be installed on the hood.
Information about the conversion of the hood from suction version to filtering
version is present in this manual.
Ducting version
In this case the fumes are conveyed outside of the building by means of a
special pipe connected with the connection ring located on top of the hood.
Attention! The exhausting pipe is not supplied and must be purchased apart.
Diameter of the exhausting pipe must be equal to that of the connection ring.
In the horizontal runs the exhausting pipe must be slightly slanted (about 10°)
and directed upwards to vent the air easily from the room to the outside.
Attention! If the hood is supplied with active charcoal filter, then it must be
removed.
Filter version
One active charcoal filter is needed for this and can be obtained from your usual
retailer.
The filter removes the grease and smells from the extracted air before sending it
back into the room through the upper outlet grid.

12
EN
CONTROLS
To select the functions of the hood just touch the commands.
T1. Lights ON/OFF
T2. Speed decrease
Press "T2" button to decrease the speed from 4 (intensive) to 1.
Press "T2" button during operation at speed 1, the hood sets to OFF.
T3. Speed increase
Press T3 button and the hood sets from OFF to speed 1.
Press the button (hood is ON) to increase the the speed of the motor from
speed 1 to the intensive speed (timed).
Speed 1 LED L1
Speed 2 LED L1+L2
Speed 3 LED L1+L2+L3
Intensive speed (timed) LED L1+L2+L3+L4 flashing
Note: Speed 4 (intensive timed) remains activated for 5 minutes, after
which the hood sets speed 2 automatically
T4. Speed timing
Speed timing is activated by pressing T4 button, when timing is up the hood
switches off.
Timing is divided as follows:
Speed 1 - 20 minutes (LED L1 flashing)
Speed 2 - 15 minutes (LED L2 flashing)
Speed 3 - 10 minutes (LED L3 flashing)
Intensive speed - 5 minuts (LED L4 flashing)
During timed operation press T2 button and the hood quits the timed mode
and decreases the speed.
Press T3 button and the hood quits the timed mode and increases the
speed.
Press T4 button and the hood quits the timed mode maintaining the set
speed.
T5. Filter saturation signal button – Control and Configuration:
See relevant instructions in the following paragraphs.
T6. ON/OFF Suction motor: When hood is on, it switches off at any speed by
pressing button T6.
When the hood is off, it switches on at Speed 1 by pressing button T6.
Grease filter signal
After 40 hours of operation LED L1 flashes.
When such signal appears, carry out grease filter maintenance.
To reset the signal, keep T5 button pressed for 5”. (hood is ON).
The hood gives out a "BEEP" and LED L1 stops flashing.
Charcoal filter signal
After 160 hours of operation LED L2 flashes.
When such signal appears, carry out charcoal filter maintenance.
To reset the signal, keep T5 button pressed for 5”. (hood is ON).
The hood gives out a "BEEP" and LED L2 stops flashing.
In case of contemporaneous signalling of both filters, LEDs L1 and L2 flash
alternatively.
To reset, carry out the procedure described above for 2 times.
The first time it resets the charcoal filter signal, the second time it resets the
grease filter signal.
The charcoal filter signal is not active in the standard mode.
In case the hood is used in filter version it is necessary to enable the charcoal
filter signal.
Activating charcoal filter signal:
Set the hood to OFF and press T5 button for 5”.
Once the button has been pressed, the LEDs related to the filter signals currently
active light up.
The hood gives out a "BEEP" and LED L2 flashes for 2".
LEDs L1 and L2 remain on for about 2" before the hood goes back to OFF.
Deactivating charcoal filter signal:
Set the hood to OFF and press T5 button for 5”.
Once the button has been pressed, the LEDs related to the filter signals currently
active light up.
The hood gives out a "BEEP" and LED L2 switches off.
LED L1 remain on for about 2" before the hood goes back to OFF.

13
EN
MAINTENANCE
ATTENTION! Before performing any maintenance operation, isolate the hood
from the electrical supply by switching off at the connector and removing the
connector fuse.
Or if the appliance has been connected through a plug and socket, then the plug
must be removed from the socket.
Cleaning
The cooker hood should be cleaned regularly (at least with the same frequency
with which you carry out maintenance of the fat filters) internally and externally.
Clean using the cloth dampened with neutral liquid detergent. Do not use
abrasive products. DO NOT USE ALCOHOL!
WARNING: Failure to carry out the basic cleaning recommendations of the
cooker hood and replacement of the filters may cause fire risks.
Therefore, we recommend oserving these instructions.
The manufacturer declines all responsibility for any damage to the motor or any
fire damage linked to inappropriate maintenance or failure to observe the above
safety recommendations.
Maintenance of the anti-grease filters
Traps cooking grease particles.
This must be cleaned once a month (or when the filter saturation indication
system – if envisaged on the model in possession – indicates this necessity)
using non aggressive detergents, either by hand or in the dishwasher, which
must be set to a low temperature and a short cycle.
When washed in a dishwasher, the grease filter may discolour slightly, but this
does not affect its filtering capacity.
To remove the grease filter, pull the spring release handle.
Maintenance of the charcoal filter
It absorbs unpleasant odours caused by cooking.
The saturation of the charcoal filter occurs after more or less prolonged use,
depending on the type of cooking and the regularity of cleaning of the grease
filter.
In any case it is necessary to replace the cartridge at least every four mounths
(or when the filter saturation indication system – if envisaged on the model in
possession – indicates this necessity).The charcoal filter may NOT be washed or
regenerated.
Assembly
Hook the charcoal filter at the back on the metal tongue of the hood first, then on
the front with the two knobs.
Disassembly
Remove the charcoal filter by turning the knobs fixing it to the hood by 90°.
Replacing lamps
Disconnect the hood from the electricity.
Warning! Prior to touching the light bulbs ensure they are cooled down.
1. Using a flat head screwdriver or equivalent tool, carefully pry loose the light
cover.
2. Remove the damaged light and replace with a new 12 Volt, 20 Watt
(Maximum) halogen light made for a G-4 base SUITABLE FOR USE IN
OPEN LUMINAIRES. Follow package directions and do not touch new light
with bare hands.
3. Reinstall the light cover. (it will snap shut).

14
EN
DISPOSAL
This appliance is marked according to the European directive 2002/96/EC on
Waste Electrical and Electronic Equipment (WEEE). By ensuring this product is
disposed of correctly, you will help prevent potential negative consequences for
the environment and human health, which could otherwise be caused by
inappropriate waste handling of this product.
The symbol on the product, or on the documents accompanying the
product, indicates that this appliance may not be treated as household waste.
Instead it should be taken to the appropriate collection point for the recycling of
electrical and electronic equipment. Disposal must be carried out in accordance
with local environmental regulations for waste disposal.
For further detailed information regarding the process, collection and recycling of
this product, please contact the appropriate department of your local authorities
or the local department for household waste or the shop where you purchased
this product.
MALFUNCTIONS
If something appears not to be working properly, do the following simple checks
before calling Technical Service:
• If the hood is not working:
Check that:
- The power has not been disconnected.
- A speed has been selected.
• If the hood performs inefficiently:
Check that:
- The motor speed selected is sufficient for the amount of smoke and
vapours released.
- The kitchen is sufficiently ventilated to allow air intake.
- The charcoal filter is not worn (hood in filtering version).
• If the hood has turned off during normal functioning:
Check that:
- The power has not been disconnected.
- the omnipolar disconnection device has not tripped.
If the hood fails to operate correctly, briefly disconnect it from the mains power
supply for almost 5 sec. by pulling out the plug. Then plug it in again and try once
more before contacting the Technical Assistance Service.
TECHNICAL DATA
Model HKE 6 X
Height 74-119,6 cm
Width 59,8 cm
Depth 52,3 cm
Gross weight: 19,6 Kg
Total absorption 355 W
Motor absorption 1x315 W
Lamp absorption 2x20 W (G4 - 12V)
Exhaust pipe Ø 15 cm
Model HKE 9 X
Height 74-119,6 cm
Width 89,8 cm
Depth 52,3 cm
Gross weight: 23,9 Kg
Total absorption 355 W
Motor absorption 1x315 W
Lamp absorption 2x20 W (G4 - 12V)
Exhaust pipe Ø 15 cm
This appliance conforms to the following EEC Directive:
• “Low Voltage Equipment” Directive 2006/95/EC (12-12-2006)
• “Electromagnetic Compatibility” Directive 2004/108/EC (15-12-2004)
Components not provided with the product

Italiano
15
IT
La cappa può avere estetiche differenti rispetto a quanto illustrato nei
disegni di questo libretto, comunque le istruzioni per l'uso, la
manutenzione e l'installazione rimangono le stesse.
! E' importante conservare questo manuale per poterlo consultare in ogni
momento. In caso di vendita, di cessione o di trasloco, assicurarsi che resti
insieme al prodotto.
! Leggere attentamente le istruzioni: ci sono importanti informazioni
sull'installazione, sull'uso e sulla sicurezza.
! Non effettuare variazioni elettriche o meccaniche sul prodotto o sulle
condotte di scarico.
SICUREZZA GENERALE
La distanza minima fra la superficie di supporto dei recipienti sul dispositivo di
cottura e la parte più bassa della cappa da cucina deve essere non inferiore a
50cm in caso di cucine elettriche e di 65cm in caso di cucine a gas o miste.
Se le istruzioni di installazione del dispositivo di cottura a gas specificano una
distanza maggiore, bisogna tenerne conto.
La cappa è dotata di tasselli di fissaggio adatti alla maggior parte di pareti/soffitti.
E’ tuttavia necessario interpellare un tecnico qualificato per accertarVi
sull’idoneità dei materiali a seconda del tipo di parete/soffitto. La/il parete/soffitto
deve essere sufficientemente robusto da sostenere il peso della cappa.
Attenzione! Non collegare l’apparecchio alla rete elettrica finche l’installazione
non è totalmente completata.
Prima di qualsiasi operazione di pulizia o manutenzione, disinserire la cappa
dalla rete elettrica togliendo la spina o staccando l’interruttore generale
dell’abitazione.
Per tutte le operazioni di installazione e manutenzione utilizzare guanti da lavoro
L’apparecchio non è destinato all’utilizzo da parte di bambini o persone con
ridotte capacità fisiche sensoriali o mentali e con mancata esperienza e
conoscenza a meno che essi non siano sotto la supervisione o istruiti nell’uso
dell’apparecchiatura da una persona responsabile per la loro sicurezza.
I bambini devono essere controllati affinché non giochino con l’apparecchio.
Mai utilizzare la cappa senza griglia correttamente montata!
La cappa non va MAI utilizzata come piano di appoggio a meno che non sia
espressamente indicato.
Il locale deve disporre di sufficiente ventilazione, quando la cappa da cucina
viene utilizzata contemporaneamente ad altri apparecchi a combustione di gas o
altri combustibili.
L’aria aspirata non deve essere convogliata in un condotto usato per lo scarico
dei fumi prodotti da apparecchi a combustione di gas o di altri combustibili.
E’ severamente vietato fare cibi alla fiamma sotto la cappa.
L’impiego di fiamma libera è dannoso ai filtri e può dar luogo ad incendi, pertanto
deve essere evitato in ogni caso.
La frittura deve essere fatta sotto controllo onde evitare che l’olio surriscaldato
prenda fuoco.
Quando il piano di cottura è in funzione le parti accessibili della cappa possono
diventare calde.
Per quanto riguarda le misure tecniche e di sicurezza da adottare per lo scarico
dei fumi attenersi strettamente a quanto previsto dai regolamenti delle autorità
locali competenti.
La cappa va frequentemente pulita sia internamente che esternamente
(ALMENO UNA VOLTA AL MESE, rispettare comunque quanto espressamente
indicato nelle istruzioni di manutenzione riportate in questo manuale).
L’inosservanza delle norme di pulizia della cappa e della sostituzione e pulizia
dei filtri comporta rischi di incendi.
Non utilizzare o lasciare la cappa priva di lampade correttamente montate per
possibile rischio di scossa elettrica.
Si declina ogni responsabilità per eventuali inconvenienti, danni o incendi
provocati all’apparecchio derivati dall’inosservanza delle istruzioni riportate in
questo manuale.
COLLEGAMENTO ELETTRICO
La tensione di rete deve corrispondere alla tensione riportata sull’etichetta
caratteristiche situata all’interno della cappa. Se provvista di spina allacciare la
cappa ad una presa conforme alle norme vigenti posta in zona accessibile anche
dopo l’installazione. Se sprovvista di spina (collegamento diretto alla rete) o la
spina non è posta in zona accessibile, anche dopo installazione, applicare un
interruttore bipolare a norma che assicuri la disconnessione completa della rete
nelle condizioni della categoria di sovratensione III, conformemente alle regole di
installazione.
Attenzione! Prima di ricollegare il circuito della cappa all’alimentazione di rete e
di verificarne il corretto funzionamento, controllare sempre che il cavo di rete sia
stato montato correttamente.
Sostituzione del cavo di alimentazione
La cappa è provvista di un cavo alimentazione speciale; in caso di
danneggiamento del cavo, richiederlo al servizio assistenza tecnica.
SCARICO DELL' ARIA
(per le versioni aspiranti)
Collegare la cappa a tubi e fori di scarico a parete con diametro equivalente
all'uscita d'aria (flangia di raccordo).
L'utilizzo di tubi e fori di scarico a parete con diametro inferiore determinerà una
diminuizione delle prestazioni di aspirazione ed un drastico aumento della
rumorosità.
Si declina perciò ogni responsabilità in merito.
! Usare un condotto lungo il minimo indispensabile.
! Usare un condotto con minor numero di curve possibile (angolo massimo
della curva: 90°).
! Evitare cambiamenti drastici di sezione del condotto.
! Usare un condotto con l’interno piu’ liscio possibile.
! Il materiale del condotto deve essere approvato normativamente.
!L'azienda declina ogni responsabilità qualora queste norme non vengano
rispettate.
FILTRANTE O ASPIRANTE ?
!La vostra cappa è pronta per essere utilizzata in versione aspirante.
Per utilizzare la cappa in versione filtrante va installato l’apposito KIT
ACCESSORIO.
Verificate nelle prime pagine di questo manuale se il KIT ACCESSORIO è
già fornito a corredo o va acquistato a parte.
Nota: Se fornito a corredo, in alcuni casi, il sistema di filtraggio aggiuntivo a
base di carboni attivi potrebbe essere già installato sulla cappa.
Le informazioni per la trasformazione della cappa da versione aspirante a
versione filtrante sono già contenute in questo manuale.
Versione aspirante
I vapori vengono evacuati verso l’esterno tramite un tubo di scarico fissato alla
flangia di raccordo.
Il diametro del tubo di scarico deve essere equivalente al diametro dell'anello di
connessione.
Attenzione! Il tubo di evacuazione non è fornito e va acquistato.
Nella parte orizzontale, il tubo deve avere una leggera inclinazione verso l’alto
(10° circa) in modo da poter trasportare l’aria verso l’esterno più facilmente.
Se la cappa è provvista di filtri al carbone, questi devono essere tolti.
Versione filtrante
L’aria aspirata verrà sgrassata e deodorata prima di essere riconvogliata nella
stanza. Per utilizzare la cappa in questa versione è necessario installare un
sistema di filtraggio aggiuntivo a base di carboni attivi.

16
IT
COMANDI
Per selezionare le funzioni della cappa è sufficente sfiorare i comandi.
T1. ON/OFF Luci
T2. Decremento velocità
Premendo il tasto "T2" si ottiene il decremento della velocità, dalla velocità
4 (intensiva) alla velocità 1.
Premendo il tasto "T2" durante il funzionamento in velocità 1, la cappa
passa allo stato OFF.
T3. Incremento velocità
Premendo il pulsante T3 la cappa passa dallo stato OFF alla velocità 1.
Premendo il pulsante (cappa in stato ON) viene incrementata la velocità del
motore dalla velocità 1 alla velocità intensiva (temporizzata).
Velocità 1 led L1
Velocità 2 led L1+L2
Velocità 3 led L1+L2+L3
Velocità intensiva (temporizzata) led L1+L2+L3+L4 lampeggiante
Nota: La Velocità 4 (intensiva temporizzata) rimane in funzione per 5 minuti
,dopodichè la cappa imposta automaticamente la velocità 2
T4. Temporizzazione velocità
La temporizzazione delle velocità si abilita premendo il tasto T4, a
temporizzazione scaduta la cappa si spegne.
La temporizzazione è così suddivisa:
Velocità 1 - 20 minuti (led L1 lampeggiante)
Velocità 2 - 15 minuti (led L2 lampeggiante)
Velocità 3 - 10 minuti (led L3 lampeggiante)
Velocità Intensiva - 5 minuti (led L4 lampeggiante)
Durante il funzionamento temporizzato premendo il tasto T2 la cappa esce
dalla modalità temporizzata e decrementa la velocità.
Premendo il tasto T3 la cappa esce dalla modalità temporizzata e
incrementa la velocità.
Premendo il tasto T4 la cappa esce dalla modalità temporizzata
mantenendo la velocità impostata.
T5. Tasto di controllo e configurazione segnalazione della saturazione dei
filtri:
Vedi istruzioni relative nei paragrafi successivi.
T6. ON/OFF Motore di aspirazione: A cappa accesa a qualsiasi velocità
premendo il tasto T6 la cappa si spegne.
A cappa spenta (OFF) premendo il tasto T6 la cappa si accende alla
Velocità 1.
Segnalazione filtro grassi
Dopo 40 ore di funzionamento il led L1 lampeggia.
Quando compare tale segnalazione eseguire la manutenzione del filtro grassi.
Per resettare la segnalazione tenere premuto il tasto T5 per 5”. (cappa in stato
ON).
La cappa emetterà un "BEEP" e il led L1 smetterà di lampeggiare.
Segnalazione filtro carboni
Dopo 160 ore di funzionamento il led L2 lampeggia.
Quando compare tale segnalazione eseguire la manutenzione del filtro carboni.
Per resettare la segnalazione tenere premuto il tasto T5 per 5”. (cappa in stato
ON).
La cappa emetterà un "BEEP" e il led L2 smetterà di lampeggiare.
Nel caso di segnalazione contemporanea di entrambi i filtri, i led L1 eL2
lampeggeranno alternativamente.
Il reset avviene effettuando 2 volte la procedera sopra descritta.
La prima volta resetta la segnalazione del filtro carboni, la seconda resetta la
segnalazione del filtro grassi.
Nella modalità standard la segnalazione filtro carboni non è attiva.
Nel caso si utilizzi la cappa in versione filtrante è necessario abilitare la
segnalazione filtro carboni.
Attivazione segnalazione filtro carboni:
Posizionare la cappa in OFF e tenere premuto il tasto T5 per 5”.
Appena premuto il tasto si illumineranno i led relativi alle segnalazioni filtri al
momento attivi.
La cappa emetterà un "BEEP" e il led L2 lampeggerà per 2".
I led L1 e L2 rimarranno accesi per circa 2" prima che la cappa torni allo stato
OFF.
Disattivazione segnalazione filtro carboni:
Posizionare la cappa in OFF e tenere premuto il tasto T5 per 5”.
Appena premuto il tasto si illumineranno i led relativi alle segnalazioni filtri al
momento attivi.
La cappa emetterà un "BEEP" e il led L2 si spegnerà.
Il led L1 rimarrà acceso per circa 2" prima che la cappa torni allo stato OFF.

17
IT
MANUTENZIONE
Attenzione! Prima di qualsiasi operazione di pulizia o manutenzione,
disinserire la cappa dalla rete elettrica togliendo la spina o staccando
l’interruttore generale dell’abitazione.
Pulizia
La cappa va frequentemente pulita (almeno con la stessa frequenza con cui si
esegue la manutenzione dei filtri grassi), sia internamente che esternamente.
Per la pulizia usare un panno inumidito con detersivi liquidi neutri.
Evitare l’uso di prodotti contenenti abrasivi. NON UTILIZZARE ALCOOL!
Attenzione: L’inosservanza delle norme di pulizia dell’apparecchio e della
sostituzione dei filtri comporta rischi di incendi. Si raccomanda quindi di attenersi
alle istruzioni suggerite.
Si declina ogni responsabilità per eventuali danni al motore, incendi provocati da
un’impropria manutenzione o dall’inosservanza delle suddette avvertenze.
Manutenzione dei filtri antigrasso
Trattiene le particelle di grasso derivanti dalla cottura.
Deve essere pulito una volta al mese (o quando il sistema di indicazione di
saturazione dei filtri - se previsto sul modello in possesso- indica questa
necessità), con detergenti non aggressivi, manualmente oppure in lavastoviglie a
basse temperature ed a ciclo breve.
Con il lavaggio in lavastoviglie il filtro antigrasso metallico può scolorirsi ma le
sue caratteristiche di filtraggio non cambiano assolutamente.
Per smontare il filtro grassi tirare la maniglia di sgancio a molla.
Manutenzione del filtro al carbone
Trattiene gli odori sgradevoli derivanti dalla cottura.
La saturazione del filtro carbone si verifica dopo un uso più o meno prolungato a
seconda del tipo di cucina e della regolarità della pulizia del filtro grassi. In ogni
caso è necessario sostituire la cartuccia al massimo ogni quattro mesi (o quando
il sistema di indicazione di saturazione dei filtri - se previsto sul modello in
possesso- indica questa necessità).
NON può essere lavato o rigenerato
Montaggio
Agganciare il filtro ai carboni attivi prima posteriormente sulla linguetta metallica
della cappa, poi anteriormente con i due pomelli.
Smontaggio
Rimuovere il filtro ai carboni attivi girando di 90° i pomelli che lo fissano alla
cappa.
Sostituzione delle lampade
Disinserire l’apparecchio dalla rete elettrica.
Attenzione! Prima di toccare le lampade sincerarsi che siano fredde.
1. Estrarre la protezione facendo leva con un piccolo giravite a taglio o simile
utensile.
2. Sostituire la lampada danneggiata.
Utilizzare solo lampade alogene da 12V -20W max - G4, avendo cura di non
toccarle con le mani.
3. Richiudere la protezione (fissaggio a scatto).

18
IT
SMALTIMENTO
Questo apparecchio è contrassegnato in conformità alla Direttiva Europea
2002/96/EC, Waste Electrical and Electronic Equipment (WEEE). Assicurandosi
che questo prodotto sia smaltito in modo corretto, l'utente contribuisce a
prevenire le potenziali conseguenze negative per l'ambiente e la salute.
Il simbolo sul prodotto o sulla documentazione di accompagnamento
indica che questo prodotto non deve essere trattato come rifiuto domestico ma
deve essere consegnato presso l'idoneo punto di raccolta per il riciclaggio di
apparecchiature elettriche ed elettroniche. Disfarsene seguendo le normative
locali per lo smaltimento dei rifiuti. Per ulteriori informazioni sul trattamento,
recupero e riciclaggio di questo prodotto, contattare l'idoneo ufficio locale, il
servizio di raccolta dei rifiuti domestici o il negozio presso il quale il prodotto è
stato acquistato.
ANOMALIE DI FUNZIONAMENTO
Se qualcosa non sembra funzionare, prima di chiamare il Servizio Assistenza
effettuare i seguenti semplici controlli:
• Se la cappa non funziona:
Verificare che:
- non c’è interruzione di corrente.
- è stata selezionata una velocità.
• Se la cappa ha un rendimento scarso:
Verificare che:
- La velocità motore selezionata è sufficiente per la quantità di fumo e di
vapori liberata.
- La cucina è sufficientemente areata per permettere una presa d’aria.
- Il filtro carbone non è consumato (cappa in versione filtrante).
• Se la cappa si è spenta nel corso del normale funzionamento:
Verificare che:
- non c’è interruzione di corrente.
- il dispositivo di interruzione omnipolare non è scattato.
In caso di eventuali anomalie di funzionamento, prima di rivolgerVi al servizio
assistenza scollegate per almeno 5 sec. l’apparecchio dall’alimentazione
elettrica estraendo la spina e collegatelo poi nuovamente. Nel caso in cui
l’anomalia di funzionamento dovesse perdurare, rivolgersi al servizio
d’assistenza.
DATI TECNICI
Modello HKE 6 X
Altezza 74-119,6 cm
Larghezza 59,8 cm
Profondità 52,3 cm
Peso lordo 19,6 Kg
Assorbimento totale 355 W
Assorbimento motore 1x315 W
Assorbimento lampade 2x20 W (G4 - 12V)
Ø del tubo di scarico 15 cm
Modello HKE 9 X
Altezza 74-119,6 cm
Larghezza 89,8 cm
Profondità 52,3 cm
Peso lordo 23,9 Kg
Assorbimento totale 355 W
Assorbimento motore 1x315 W
Assorbimento lampade 2x20 W (G4 - 12V)
Ø del tubo di scarico 15 cm
La cappa è conforme alle seguenti Direttive EC:
!“Low voltage” Directive 2006/95/EC (12-12-2006)
!“EMC” Directive 2004/108/EC (15-12-2004)
Componenti non in dotazione con il prodotto

Français
19
FR
La hotte peut avoir des configurations esthétiques différentes par rapport à
ce qui est illustré dans les dessins de ce manuel, cependant les
instructions pour l’utilisation, l’entretien et l’installation restent identiques.
! Il est important de conserver ce livret pour pouvoir le consulter à tout
moment. En cas de vente, de cession ou de déménagement, s’assurer qu’il
reste avec le produit.
! Lire attentivement les instructions: il y a d’importantes informations sur
l’installation, sur l’emploi et sur la sécurité.
! Ne pas effectuer des modifications électriques ou mécaniques sur le produit
ou sur les conduit d’évacuation.
SÉCURITÉ GÉNÉRALE
La distance minimum entre la superficie de support des récipients sur le
dispositif de cuisson et la partie la plus basse de la hotte de cuisine ne doit pas
être inférieure à 50cm dans le cas de cuisinières électriques et de 65cm dans le
cas de cuisinières à gaz ou mixtes.
Si les instructions d’installation du dispositif de cuisson au gaz spécifient une
plus grande distance, il faut en tenir compte.
La hotte est équipée de chevilles de fixation convenant à la plupart des
parois/plafonds. Il est cependant nécessaire de s’adresser à un technicien
qualifié afin de s’assurer que le matériel est approprié au type de paroi/plafond.
La paroi/plafond doit être suffisamment solide pour supporter le poids de la
hotte.
Attention! Ne pas raccorder l’appareil au circuit électrique avant que le montage
ne soit complètement terminé.
Avant toute opération de nettoyage ou d’entretien, débrancher la hotte du circuit
électrique en retirant la prise ou en coupant l’interrupteur général de l’habitation.
Munissez-vous de gants de travail avant d’effectuer toute opération d’installation
et d’entretien.
L’appareil n’est pas destiné à une utilisation par des enfants ou des personnes à
capacités physiques, sensorielles ou mentales réduites et sans expérience et
connaissance à moins qu’ils ne soient sous la supervision ou formés sur
l’utilisation de l’appareil par une personne responsable de leur sécurité.
Les enfants doivent être surveillés afin qu’ils ne jouent pas avec l’appareil.
Ne jamais utiliser la hotte sans que la grille ne soit montée correctement!
La hotte ne doit JAMAIS être utilisée comme plan pour déposer quelque chose
sauf si cela est expressément indiqué.
Quand la hotte est utilisée en même temps que d’autres appareils à combustion
de gaz ou d’autres combustibles, le local doit disposer d’une ventilation
suffisante.
L’air aspiré ne doit jamais être envoyé dans un conduit utilisé pour l’évacuation
des fumées produites par des appareils à combustion de gaz ou d’autres
combustibles.
Il est formellement interdit de faire flamber les aliments sous la hotte.
L’utilisation de flammes libres peut entraîner des dégâts aux filtres et peut
donner lieu à des incendies, il faut donc les éviter à tout prix.
La friture d’aliments doit être réalisée sous contrôle pour éviter que l’huile
surchauffée ne prenne feu.
Les pièces accessibles peuvent se réchauffer de façon importante quand elles
sont utilisées avec des appareils pour la cuisson.
En ce qui concerne les mesures techniques et de sécurité à adopter pour
l’évacuation des fumées, s’en tenir strictement à ce qui est prévu dans les
règlements des autorités locales compétentes. La hotte doit être régulièrement
nettoyée, aussi bien à l’intérieur qu’à l’extérieur (AU MOINS UNE FOIS PAR
MOIS, respecter néanmoins les instructions relatives à l’entretien fournies dans
ce manuel).
La non observation de ces normes de nettoyage de la hotte et du changement et
nettoyage des filtres comporte des risques d’incendie.
Ne pas utiliser ou laisser la hotte sans que les ampoules soient correctement
placées pour éviter tout risque de choc électrique.
La société décline toute responsabilité pour d’éventuels inconvénients, dégâts
ou incendies provoqués par l’appareil et dérivés de la non observation des
instructions reprises dans ce manuel.
BRANCHEMENT ÉLECTRIQUE
La tension électrique doit correspondre à la tension reportée sur la plaque
signalétique située à l’intérieur de la hotte. Si une prise est présente, branchez la
hotte dans une prise murale conforme aux normes en vigueur et placée dans
une zone accessible également après l’installation. Si aucune prise n’est
présente (raccordement direct au circuit électrique), ou si la prise ne se trouve
pas dans une zone accessible également après l’installation, appliquez un
disjoncteur normalisé pour assurer de débrancher complètement la hotte du
circuit électrique en conditions de catégorie surtension III, conformément aux
règlementations de montage.
Attention! Avant de rebrancher le circuit de la hotte à l’alimentation électrique et
d’en vérifier le fonctionnement correct, contrôlez toujours que le câble
d’alimentation soit monté correctement.
Changement du câble d'alimentation
La hotte est pourvue d'un câble d'alimentation spécial; en cas de détérioration du
câble, en demander un neuf au service d'assistance technique.
ÉVACUATION DE L'AIR
(pour les versions aspirantes)
Relier la hotte aux tubes et trous d’évacuation de la paroi d’un diamètre
équivalent à la sortie de l’air (collier de raccord).
L’utilisation de tubes et des trous d'évacuation à paroi avec un diamètre inférieur
entraînera une diminution des performances d’aspiration et une nette
augmentation du bruit.
Nous déclinons toute responsabilité à cet égard.
! Utiliser un tuyau de la longueur strictement nécessaire.
! Les coudes du tuyau doivent être en nombre minime (angle maxi du coude:
90°).
! Éviter les variations excessives de section du tuyau.
! Utiliser un tuyau le plus lisse possible sur sa partie interne.
! Le matériau du tuyau doit être aux normes.
! La société décline toute responsabilité si ces normes ne sont pas
respectées.
FILTRANTE OU ASPIRANTE ?
! Votre hotte est prête pour être utilisée en version aspirante.
Pour utiliser la hotte en version filtrante, il faut installer le KIT
ACCESSOIRES prévu.
Vérifier dans les premières pages de ce manuel si le KIT ACCESSOIRES
est déjà fourni ou s’il faut l’acheter à part.
Remarque: Si fourni dans le kit, dans certains cas, le système de filtration
supplémentaire à base de charbon actif pourrait déjà être installé dans la
hotte.
Les informations pour la transformation de la hotte de version aspirante à
version filtrante sont déjà contenues dans ce manuel.
Version aspirante
Les vapeurs sont évacuées vers l'extérieur à travers un conduit d'évacuation fixé
à la bride de raccord qui se trouve au-dessus de la hotte.
Attention!
Le tuyau d’évacuation n’est pas fourni et doit être acheté à part.
Le diamètre du tuyau d'évacuation doit être égal à celui de la bride de raccord.
Sur la partie horizontale, le tuyau doit avoir une légère inclinaison vers le haut
(10° env.) de façon à convoyer plus facilement l’air vers l’extérieur.
Si la hotte est équipée d'un filtre à charbon, ce dernier doit être enlevé.
Version recyclage
Il convient d’utiliser un filtre à charbon actif, disponible auprès de vôtre
revendeur habituel.
L’air aspiré sera dégraissé et désodorisé avant d’être refoulé dans la pièce à
travers la grille supérieure.

20
FR
COMMANDES
Pour sélectionner les fonctions de la hotte, il suffit simplement d’effleurer les
commandes.
T1. ON/OFF Lumières
T2. Diminution vitesse
En appuyant sur la touche "T2", on obtient la diminution de la vitesse, de la
vitesse 4 (intensive) à la vitesse 1.
En appuyant sur la touche "T2" durant le fonctionnement en vitesse 1, la
hotte passe à l’état OFF.
T3. Augmentation vitesse
En appuyant sur la touche T3, la hotte passe de l’état OFF à la vitesse 1.
En appuyant sur la touche (hotte à l’état ON), on augmente la vitesse du
moteur de la vitesse 1 à la vitesse intensive (temporisée).
Vitesse 1 voyant L1
Vitesse 2 voyant L1+L2
Vitesse 3 voyant L1+L2+L3
Vitesse intensive (temporisée) led L1+L2+L3+L4 clignotant
Note: La Vitesse 4 (intensive temporisée) reste en fonction pendant 5
minutes, après quoi la hotte se règle automatiquement à la vitesse 2
T4. Temporisation vitesse
La temporisation des vitesses s’habilite en appuyant sur la touche T4, à
temporisation terminée, la hotte s’éteint.
La temporisation est subdivisée comme suit :
Vitesse 1 - 20 minutes (voyant L1 clignotant)
Vitesse 2 - 15 minutes (voyant L2 clignotant)
Vitesse 3 - 10 minutes (voyant L3 clignotant)
Vitesse Intensive - 5 minutes (led L4 clignotant)
Durant le fonctionnement temporisé, en appuyant sur la touche T2, la hotte
sort de la modalité temporisée et diminue la vitesse.
En appuyant sur la touche T3, la hotte sort de la modalité temporisée et
augmente la vitesse.
En appuyant sur la touche T4, la hotte sort de la modalité temporisée en
maintenant la vitesse réglée.
T5. Touche de signalement de saturation des filtres - Contrôle et
Configuration:
Voir instructions relatives dans les paragraphes suivants.
T6. ON/OFF Moteur d’aspiration: A hotte allumée à n’importe quelle vitesse,
on peut éteindre la hotte en appuyant sur le touche T6.
A hotte éteinte (OFF), on allume la hotte à la vitesse 1 en appuyant sur la
touche T6.
Signal filtre anti-graisses
Après 40 heures de fonctionnement, le voyant L1 clignote.
Quand ce signal apparaît, effectuer l’entretien du filtre anti-graisses.
Pour remettre à zéro le signal, maintenir la touche T5 enfoncée pendant 5”.
(hotte à l’état ON).
La hotte émettra un "BIP" et le voyant L1 cessera de clignoter.
Signal filtre au charbon
Après 160 heures de fonctionnement, le voyant L2 clignote.
Quand ce signal apparaît, effectuer l’entretien du filtre au charbon.
Pour remettre à zéro le signal, maintenir la touche T5 enfoncée pendant 5”.
(hotte à l’état ON).
La hotte émettra un "BIP" et le voyant L2 cessera de clignoter.
En cas de signal simultané des deux filtres, les voyants L1 et L2 clignoteront
alternativement.
Le reset se fait en effectuant 2 fois la procédure décrite ci-dessus.
La première fois pour annuler le signal du filtre au charbon, le deuxième annule
le signal du filtre anti-graisses.
En modalité standard, le signal filtre au charbon n’est pas actif.
Dans le cas où l’on utilise la hotte en version filtrante, il faut habiliter le signal
filtre au charbon.
Activation signal filtre au charbon:
Mettre la hotte sur OFF et maintenir la touche T5 enfoncée pendant 5”.
Juste après avoir appuyé sur la touche, les leds relatifs au signalement des
filtres activés en ce moment s’allumeront.
La hotte émettra un "BIP" et le voyant L2 clignotera pendant 2".
Les voyants L1 et L2 resteront allumés pendant environ 2" avant que la hotte ne
retourne en OFF.
Désactivation signal filtre au charbon:
Mettre la hotte sur OFF et maintenir la touche T5 enfoncée pendant 5”.
Juste après avoir appuyé sur la touche, les leds relatifs au signalement des
filtres activés en ce moment s’allumeront.
La hotte émettra un "BIP" et le voyant L2 s’éteindra.
Le voyant L1 restera allumé pendant environ 2" avant que la hotte ne retourne
en OFF.
This manual suits for next models
1
Table of contents
Languages:
Popular Ventilation Hood manuals by other brands

Fantech
Fantech PBF4 Installation, operation and maintenance manual

Gorenje
Gorenje DF 6115 E Instruction on mounting and use

NEFF
NEFF D99W59N0 Instructions for use

KOBE
KOBE CH77 SQB-5 Series Installation instructions and operation manual

CONSTRUCTA
CONSTRUCTA CD686866 User manual and installation instructions

Fisher & Paykel
Fisher & Paykel HC60CGX1 Installation instructions and user guide