Arkbird 3.0 User manual

Arkbird
-1-
HDMI output! 1080P HD digital transmission, new animation interface, DVR recording!
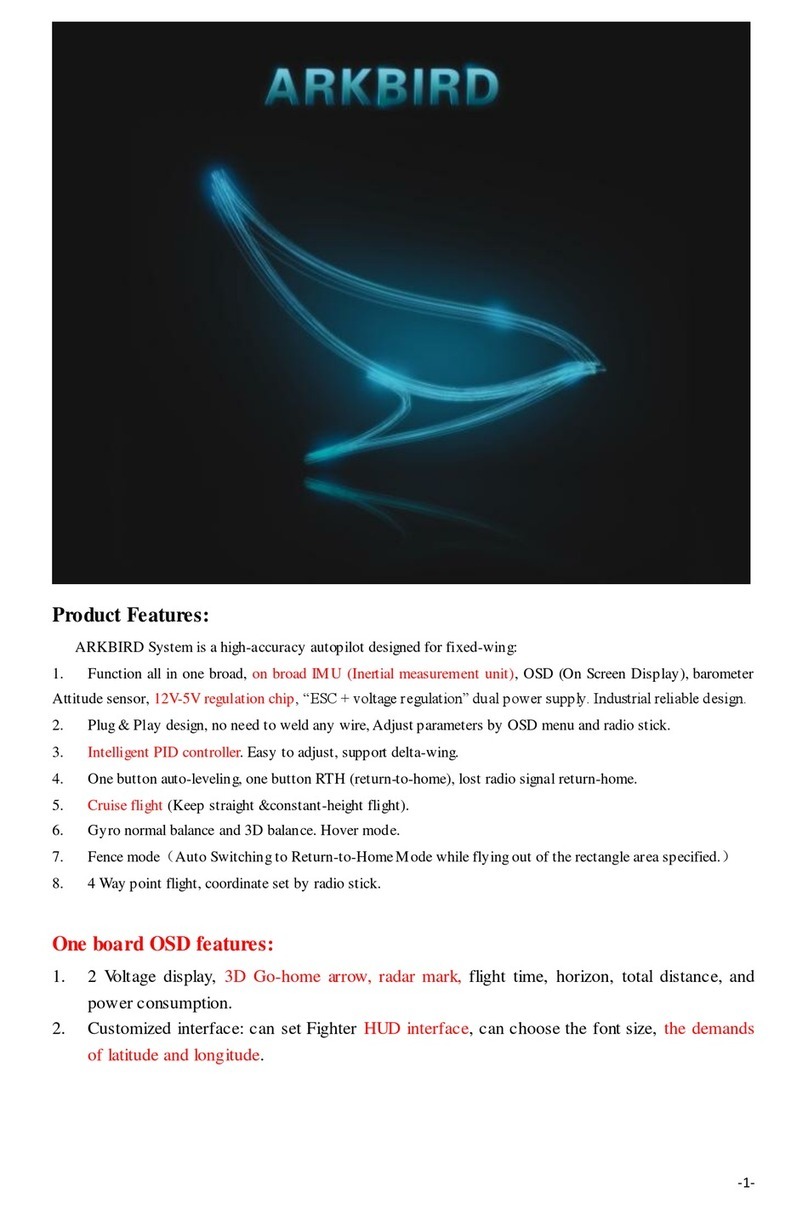
The ARKBIRD 3.0 Autopilot is based on a new architecture for HD video transmitter. it can control
balance, return to home, waypoint and other modes with high precision.
The super stabilizing system and Plug-and-Play design make you worry-free and effortless, and
instantly enjoy the beauty of FPV.
(The product is continuously being upgraded, please follow the official
website(www.arkbirdfpv.com), Facebook or join the QQ group 19329609 for the latest information
and download the latest documents)
Arkbird 3.0 Set
1. HD video transmitter resolution: 1920x1080p 30fps; 1280x720p 60fps; 1296x972p 42fps; 1640x922p
40fps; ultra-low latency (typical 100ms, maximum 190ms)
2. Ultra-light weight (flight control + video transmitter + camera no more than 100g), air distance
above 15km(TX is 650mW);
3. The receiver is equipped with DVR function, ground recording (.mp4 format); with ground station
data recording, the flight track can be played back by computer.
4. HDMI output to the display, CSI or HDMI input (requires adapter module), supports mainstream
cameras such as Gopro;
5. Easy adjustment, move the remote stick up and down to set every parameter, OSD interface style,
including the following:
6. 256-color adjustable OSD interface; adjustable transparency;
7. Eight kinds of 3D three-dimensional aircraft (large, medium and small three sizes), you can make
your favorite 3D aircraft style

Arkbird
-2-
Video manual: Arkbird3.0 flight control and high-definition digital image transmission
method (6 minutes and 20 seconds from the Mavlink method)
https://www.bilibili.com/video/BV1BV411m7kR/
8. With high-precision digital airspeed meter interface; with airspeed/ground speed protection
control;
9. Support Sbus or PPM input, 7-channel output, stabilized output with steering gear and pan/tilt;
10. Intelligent flap control, slow-release flaps, speed control flaps can be set, 1-7 channels
(secondary-flaps) mixed control;
11. More mixing control methods include delta wing, V-tail mixing, dual-engine flying wings,
dual-engine general layout (differential steering), butterfly brake mixing (1247 channel mixing)
12. Support Arkbird433 ten-channel + RSSI single wire transmission.
Arkbird 3.0 Main Functions
1. Function all in one broad, on broad IMU (Inertial measurement unit), OSD (On Screen Display), barometer
Attitude sensor, 12V-5V regulation chip, “ESC + voltage regulation” dual power supply. Industrial reliable
designed.
3. Can be installed flatwise or sidewise, suitable for small aircraft.
4. Intelligent PID controller. Easy to adjust.
7. One button auto-leveling, stick back to center, plane can fly levelly.
8. One button RTH (return-to-home), lost radio signal return-home.
Extended 12 functions Meets all you need
Launch Assist Run up with aircraft in hands, when the speed is higher than 5kmph, the throttle will start
output and automatically control the take-off.
Fence mode Out of rectangle area or safe height, it returns automatically, best helper for beginner
Waypoint Mode It is able to trace the Way Point Set by menu.
Hover mode Regard the hover position as balance position, nose up and keep steady
Cruise flight Keep a straight & constant-height flight.
Flap control Lower the flap surface automatically when speed is insufficient.
Butterfly brake Mixed control Make the fly wing change its direction smoothly without aileron inclining
Flight Record Records the time, voyage, data of power consumption and various maximum records of the
flights.
Gyro Mode It will do compensation for unintentional attitude changes to keep 3D angle status.
PTZ output When the flight is tilting, channel 5&6 will give an opposite compensation, so as to level the
camera.

Arkbird
-3-
Semi-Balance Mode When the CH1 and CH2 of rocker is less than 50%, the plane is in Balance Mode. When the
rocker is more than 50%, the plane is in Gyro Mode. (This function allows you making a turn
with a large dip angle, even vertical rise and roll or other actions. After finished these actions,
you only need to move the stick to the center to make the plane back.)
VTOL plane A unique fpv fixed wing plane with vertical taken off and landing function
(Move controller' stick to adjust parameters)

Arkbird
-4-
Attention
All the details can be found in our instruction. Please read carefully before operating and pay close attention
to the details and important parameters, in case you miss any important information which may leave hazards or
cause damage.
Please install the propellers after debugging, and remember to open the radio controller before power on
the plane, also please power off the plane before close the radio controller. Otherwise, the autopilot will out of
control and returning, and 100% throttle output in condition of GPS incorrect positioning.
Reminding:
For the first installation, please power up after a wire check. Forcible satellite search interface will be
entered (incontrollable) every time you power up. You can pop-up manually and adjust rudder angle directions in
Manual Mode and auxiliary control in Balance Mode. A Neutral Point Check for the sensor is necessary. Also, you
need a fail-safe protection for the receiver in case your autopilot loses control when returning home. Adjust the
OSD voltage value before takeoff.
For the first flight, we suggest taking off with "Manual Mode". Check if the aircraft flies normally after
switching to “Balance Mode” in a level flight. Then switch to "RTH Mode" and check the autopilot by using OSD
parameter (see the last chapter in the instructions: Notes for Balance and RTH). Please keep an eye on the
important parameters during the flight (Vibration value, Satellite number, Speed and Altitude).
When the maiden flight test is done, Balance Mode can be used freely for taking off the autopilot, or you can
use extended functions such as waypoints, cruise flight or fence mode.
VTOL models haven’t manual mode. Please switch to balance mode to check if the remote control, the
servos and motors movement are correct or not firstly. Then please switch to hover mode, after confirm all
movement are correct, then unlock the plane to fly.
Working Principle & Suggested Setting Value
The working principle of the ARKBIRD Nano autopilot is: When you input 0-100% rudder quantity, it will be
analyzed to lock 0-45 degree angle. Therefore, increasing the rudder angle of the remote control will only
increase the maximum inclination angle of the rocker. Therefore, if you do not want to increase the flight
inclination angle, you can set the rudder angle of the remote control to the default 100%.
The autopilot control value of CTL (roll, pitch, yaw) is corresponding to the installed mechanical angle of the
aircraft, which determines the speed of the aircraft "reaching to the target angle". Because of most installed
mechanical angles are designed during process of designing planes, usually using the second mounting hole, so
you can use the default control value of CTL. (Models can use the default parameters include Pterosaur, Good Boy,
Minth Cessna, Skywalker 1880, Skywalker 1900, Skywalker 2016, Skua, 757 series models and most like real
models)
For some models, control value is designed quite large(for example Skywalker X5), or speed is designed very
fast, so you need to reduce the control value (X5 control value is set to 45, 45, 90, Mini Talon can be set to 65, 65,
90, X-UAV Talon and Clouds set to 80, 80, 125, Skywalker X8 series set to 80, 80, 120, Most of the flying wings
need to reduce the aileron lifting control value and increase the direction control value Yaw);
A few models rudder surface is narrow, which direction stability is weak and easy to be deflected by wind or
returning in the shape of “S”. We suggest you to increase Yaw value properly. (For example, Skywalker 1680
Arkbird
-5-
recommends control values of 100, 100, 120, Skyhunter control values of 100, 100, 130; 1.4 m Surfers, Sirius, 2 m
surfers MTD increased to 100, 100, 140 or even 100, 100, 170 )
Attention:
When the aircraft reaches to the target angle under control of the autopilot, we cannot ensure the plane
won’t loss speed at high angle of attack flight. So we suggest you set up the RTH head-up angle to 25-30
degrees(Default angle is 35 degrees), such as Skyhunter, X8, Talon and mini Talon these heavy-loading planes, also
please move the center of gravity forward, for avoiding the plane stalling and cannot come out from spiral status
to level flight.
Adjusting autopilots’ control value can only solve the rudder angle problem, but cannot cover the imbalance
brought by mechanical problem, such as the uneven center of gravity and tension line. Therefore, please
remember that you need to switch to Manual Mode to check if the plane is real “mechanical stabilization” or not.

Arkbird
-6-
CONTENTS
1. Wirings 7
2. Power Supply Mode 9
3. 5V Dual Power Supply 10
4. Installation 11
5. Switch Modes through CH5 and CH6 14
6. GPS&Save Home Position 14
7. Manual Mode 16
8. GPS and Return to Home Instruction 17
9. Fail-Safe to RTH mode 17
10. OSD and Menu 17
11. Balance Mode and RTH Adjustment11 28
12. FAQ and Solutions 29
13. Other FAQ 30
14. Attentions 30

Arkbird
-7-
1 Wirings
Attention:
For each 3P wire, from left to right or from up to down the correct order is Ground, Power and Signal wire. The
yellow port is high pressure port(for power supply, video power voltage, camera and video transmitter, please
DON’T connect it to 5V power equipment ).
Mixed control output
Arkbird 3.0 autopilot provides various intelligent mixed control
Ordinary
Fly-Wing
V-Tail
Bi-motor
Bi-motor
Fly-Wing
Butterfly
Brake
CH 1
Aileron Y
Right surface
Aileron Y
Aileron Y
Right surface
Left-Outer
surface
CH 2
Elevator
Left surface
Right V-Tail
Elevator
Left surface
Right-Inner
surface
CH 3
ESC
ESC
ESC
Left ESC
Left ESC
ESC
CH 4
Rudder
Rudder
Left V-Tail
Right ESC
Right ESC
Left-Inner
surface
CH 5
Gimbal Roll
Gimbal Roll
Gimbal Roll
Gimbal Roll
Gimbal Roll
Gimbal Roll
CH 6
Gimbal Pitch
Gimbal Pitch
Gimbal Pitch
Gimbal Pitch
Gimbal Pitch
Gimbal Pitch
CH 7
Flap Y*
Flap Y*
Flap Y*
Flap Y*
Flap Y*
Right-Outer
surface *
Note:
1 When connecting CH7 to two Flap servos with a Y shape wire, you need a inversed servo, but when
connecting Butterfly Brake, there is no need using a inversed servo.
2 Except the fly-wings, you can use CH1/7 mixed control, using two surfaces to achieve aileron & flap
functions.

Arkbird
-8-
3 Bi-motor mixed control, when throttle is less than 25%, there is no differential steering, when over
25%, throttle outputs differential steering.
4 You can plug the airspeed sensor into paralleling "RX" port if using GCS function.
5 CH5 and CH6 default output are gimbal roll and gimbal pitch, it can be set up direction, value, or it can
be output through CH7, CH8, CH9 and CH10 directly. Please enter OSD menu and set up in the option of
“Gimbal Roll” and “Gimbal Pitch”.

Arkbird
-9-
All Electric Equipment Configure
Note: The RX line (yellow) of 4P wire from video transmitter to flight control is a reserved port,
should be connected to the signal port at the right end of the RX.
The new airspeed meter has a single 5V output wire (blue), please connect it to the middle power
position of RX;
After the installation is completed, it is recommended to use hot melt glue to fix all the terminals
to avoid loosening.
1. Do not unplug the camera cable! Unplugging the cable will cause it to fail to work!
2. It is recommended to place the digital video transmitter outside the fuselage to improve the
heat dissipation effect; if it is placed outside the fuselage, the fan can be removed.
3. PPM port, support Arkbird 433 receiver to realize single-line transmission with 10 channels
of rudder and signal strength RSSI. (Plug in automatic recognition)
4. Standard digital high-precision airspeed meter, if you need to use RSSI function, the airspeed
meter can be connected to the RX port instead of AR port. Unlike GPS ground speed, an airspeed
meter can measure the relative speed of the aircraft and the air. Since airspeed is a necessary
condition for generating lift, insufficient airspeed may cause a stall. The airspeed meter
collects the oncoming wind speed, and the aircraft accelerates downwind and decelerates against
the wind, which is helpful for windy weather, slow flight and heavy load flight.
5. The airspeed indicator can be extended with a steering gear extension cord. Please do not place
the nozzle close to the fuselage or propeller during installation to avoid airflow interference.
It will be automatically calibrated within 10 seconds after power-on, please do not touch the
nozzle during this period.
6. When the airspeed meter is connected, the OSD will display the airspeed value A 0km/h; in

Arkbird
-10-
autonomous flight modes such as return home, waypoint, etc., if any value of the airspeed or ground
speed is less than the setting "Safe Speed", it will press Increase the throttle proportionally.

Arkbird
-11-
2Power Supply Mode
Note that there is a 5V port under 12V. Do not connect high voltage to 5V to avoid damage!
3S Battery Shared Power Supply (Factory Default)
The 3P wire definition: Black-Ground wire, Red-Power, White-Signal. (Left picture)
The latest model, add "extra line - 5V output", please connect to the 5V position of RX to increase
power supply stability for image transmission. (Picture on the right)
Connect the black, red and white wires of the current sensor to the flight controller. After the
jumper cap is connected, the power supply and the video communication are connected to provide
power for the flight control, camera and video transmitter.
The extra
line is 5V
5V

Arkbird
-12-
Independent Power Supply
2. If the power exceeds the 4S battery, please supply power and video separately. Remove the jumper
cap and use a 12V battery to supply power independently in the second row. The 3P line is Ground
GND, floating, and 12V line sequence. The power supply is on the left and right sides of the
3P line. Don't connect it wrongly (800mah-1400mah is recommended).
(You can also use NANO and 3.0 dedicated 12V Mini stabilized current meter. The power and video
parts share a battery. Note that it is not common with LITE and 2.0 stabilized current meters)
The new version of the current meter has a separate 5V wire, please connect it to the middle
5V position of the TX, RX or AR interface.
35V Dual Power Supply
Servos and receivers are 5V voltage, please connect a regulator 5V BEC to the autopilot when you testing,
otherwise the servo cannot work.
The power (OSD 12V to 5V regulator) with 5V BEC (from ESC) supplies power to the CPU module at the same
time.
5V

Arkbird
-13-
If OSD function is not used, please plug in OSD 12V power as well to prevent a lack of power supply for 5V ESC.

Arkbird
-14-
4Installation:
1. The pins of GPS and 12V ports shall stay forward (toward flying direction); the side with Arkbird LOGO shall
be upward or vertical toward right wing. (Default is level installation)
2. Keep GPS antenna upward placed and away from interference sources such as VideoTX and camera.
3. Put on heat-shrink tubing, fix by sponge and cable tie. Please keep away from motor to avoid vibration
which will reduce the accuracy of sensor.
4. When setting return-to-home, please take off propellers for safety concern.
Level Installation
The arrow mark points to the direction of the machine head, and the side with the blue silk screen
is up. (The schematic diagram is as follows)

Arkbird
-15-
Vertical Installation
The arrow mark points to the direction of the nose, with the blue silkscreen facing the right
wing. (The schematic diagram is as follows)

Arkbird
-16-
5 Switch Modes through CH5 and CH6
Use the remote control CH5, CH6 channel to switch mode:
After installing the aircraft, first test the input and output of the rudder, and use the 5 and
6 channels of the remote control to switch the flight mode.
While CH5 < 50%, it switches to Manual Mode, autopilot is not involved in the control.
While CH5 > 50% and CH6 < 30%, it switches to Balance Mode;
While CH5 > 50% and 30% < CH6 < 70%, it switches to Custom Mode(Waypoint Mode ,Hover Mode, Fence
Mode, RTH mode), Default is RTH mode.
While CH5 > 50% and CH6> 70%, it switches to Return-to-home (RTH) Mode.

Arkbird
-17-
6 GPS & Save Home Position
After power on, Arkbird will start to search GPS satellite and save the first valid position as Home.
During searching, the elevator will be up and any manipulation of radio stick is invalid. If need to skip the
searching, please push CH6 more than 75% and push CH1 to left or right side for 0.5 second.
For indoor testing, please unplug the GPS, or jump out of the search star waiting, after that,
you will not be able to switch to the return home mode to prevent the output throttle from hurting
people.
Once skipped the searching, it CANNOT switch to RTH mode, RTH logo will flash but it is balance mode.
GPS compulsory search star waiting interface, the aircraft cannot be operated at this time

Arkbird
-18-
Note:
1. When the flight control is flying autonomously, such as return to home, waypoint, fixed altitude
and orientation, the lower right corner of the OSD will display the control target angle and
throttle value. These three values can be used to judge how the flight control is operating the
aircraft.
2. The camera signal needs to be connected to display the OSD and use the AAT function; when the
video is not connected, the VDSTS yellow light of the side status light of the flight control
flashes slowly, and the yellow light flashes quickly after identification;
3. There is an AAT modulation module inside the Arkbird OSD, which superimposes GPS information
on the video signal and downloads it through the image transmission video. With the Arkbird AAT
ground terminal, the GPS signal can be directly identified and tracked; (AAT ground terminal should
be yellow light double flashing, positioning The rear yellow light flashes quickly. Because there
is no audio output, the green light does not flash). If the VDSTS yellow light or the ground end
yellow light does not flash quickly, please try to change the PN system. When using the N system,
you need to upgrade the AAT ground module.
4. The acceleration health value of 99 is the maximum value, and the health value will be reduced
if vibration or movement is too large. Please do a good job of damping to ensure that the ground
is greater than 70 when the throttle is full.
5. The current value should be about 0.8A when the throttle is turned off. If it is not correct,
please enter the OSD menu once and then exit to correct the current value.
6. Pay close attention to the number of GPS satellites and fly carefully. When the number of
satellites is less than 7, it will cause inaccurate positioning.
7. Since Arkbird uses an anti-jamming inertial navigation compass instead of a magnetic compass,
manual calibration is not required, but the flight direction (compass) is not accurate on the
ground, and it will automatically be calibrated according to GPS coordinates within 10 seconds
after takeoff. It can work normally after that.
8. The rolling ruler will roll with the ground speed and altitude, which is the same as the actual
fighter.

Arkbird
-19-
9. The horizon position should be consistent with the actual horizon. If not, please recalibrate
the sensor.

Arkbird
-20-
7Balance Mode
1. First switch to "manual mode", set the rudder angle on the remote control to 100%, fine-tune
it back to center, and set the amount of forward and reverse rudder manually controlled on the
remote control.
2. Then switch to "Balance Mode", if the midpoint is correctly calibrated, the plane should be
placed horizontally, the rudder surface should be basically at the midpoint, otherwise please
recalibrate the midpoint. (Refer to OSD menu)
3. When tilting the aircraft on the roll and pitch axes, the flight control should give the correct
movement that allows the aircraft to return to level flight.
4. Tilt the aircraft in the roll direction, the fuselage tilts to the right, and a control quantity
for the aircraft to roll to the left should be automatically given on the aileron. If the fuselage
is tilted to the left, a control amount for the aircraft to roll to the right should be automatically
given on the aileron. As shown below:
If the given roll direction is opposite, please adjust the roll value from “Norm”to "Reverse"
in the menu "ROLL KEY1".
If other mixing controls are used, it is also to observe whether the flight control gives the
correct movement to restore the plane to level flight.
5. Elevator detection: tilt the aircraft in the pitch direction, the nose is tilted, and a control
amount to make the aircraft bow should be automatically given in the elevator. The fuselage lowers
its head, and a control quantity for raising the aircraft's head should be automatically given
on the lifting. As shown below:
If the pitch direction given is opposite, please dial switch 2 to the other direction.
If other mixing controls are used, it is also to observe whether the flight control gives the
correct movement to restore the plane to level flight.
Table of contents
Other Arkbird Autopilot System manuals
Popular Autopilot System manuals by other brands

AUTOHELM
AUTOHELM 1000 Installation and operating handbook

Aspen Avionics
Aspen Avionics Evolution EFD1000 PFD quick reference

Garmin
Garmin GHC 50 installation instructions

TMQ
TMQ AP47C Installation and service manual

Garmin
Garmin Reactor 40 installation instructions

Raytheon
Raytheon ST6000 Plus Owner's handbook

Raytheon
Raytheon NAUTOPILOT 2010 Operator's manual

Navicontrol
Navicontrol AP3003 gold Instruction manual for installation and use

Raytheon Electronics
Raytheon Electronics ST4000 Plus Owner's handbook

COURSEMASTER
COURSEMASTER CM80i System manual

Honeywell
Honeywell KAP 140 installation manual

Simrad
Simrad NAC-2 installation guide