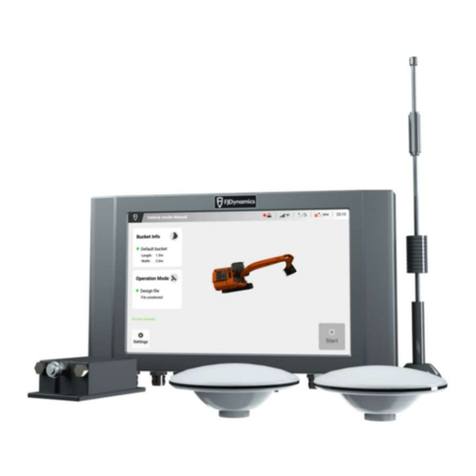
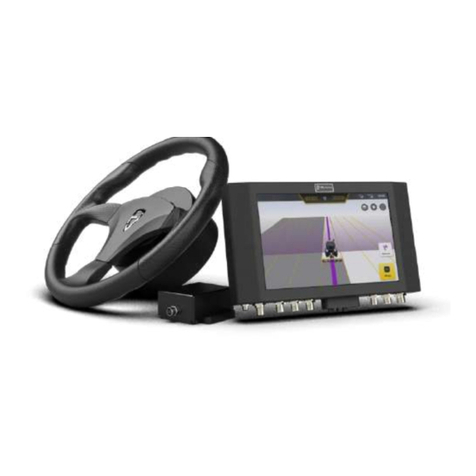
FJDynamics AT2 Assembly instructions

FJDynamics AT2 Auto Steer System
Hardware Installation Manual


© FJDynamics. All rights reserved.
FJDynamics AT2 Auto Steer System Hardware Installation Manual
Copyright Notice:
Read Before Installation:
Follow this manual for installation.
FJDynamics reserves the copyright for this manual and all contents herein. No part of
this manual may be reproduced, extracted, reused, and/or reprinted in any form or by
any means without the prior written permission of FJDynamics.
This manual is subject to change without notice.
Improper installation may cause machine damage and poor performance.
If you have any questions during installation, contact our customer service.

© FJDynamics. All rights reserved.
FJDynamics AT2 Auto Steer System Hardware Installation Manual
•The purchased products, services, and features are stipulated by the contract. All or
part of the products, services, and features described in this manual may not be within
the scope of your purchase or usage. Unless otherwise specied in the contract, all
the content in this manual is provided "AS IS" without warranties of any kind, express or
implied.
•The content of this manual is subject to change due to product upgrades and other
reasons. FJ DYNAMICS INTERNATIONAL LIMITED (FJDynamics) reserves the right to modify
the content of this manual without notice.
•This manual only provides guidance for use of this product. Every effort has been made
in the preparation of this manual to ensure accuracy of the content, but no information
in this manual constitutes a warranty of any kind, express or implied.
Thank you for purchasing FJDynamics' product. This manual provides detailed hardware
installation guide. If you have any questions, contact the local dealer.
This manual introduces the physical characteristics, installation procedures, and technical
specications of the product as well as the specications and use of the wiring harnesses
and connectors.
Based on the assumption that the users are familiar with the terms and concepts related
to this product, this manual is intended for users who have read the preceding content and
have experience in hardware installation and maintenance.
FJDynamics' ofcial website: www.fjdynamics.com
Preface
Purpose and Intended Users
Technical Support
Disclaimer

© FJDynamics. All rights reserved.
FJDynamics AT2 Auto Steer System Hardware Installation Manual
1. Product Introduction.......................................................................................................................................... 1
2. Preparation Before Installation................................................................................................................. 1
2.1. Safety Instructions..................................................................................................................................................... 1
2.2. Installation Requirements.................................................................................................................................... 2
2.3. Installation Tools....................................................................................................................................................... 3
2.4. Unpacking and Inspection.................................................................................................................................. 4
3. Inspection.................................................................................................................................................................... 6
3.1. Inspection Before Installation............................................................................................................................ 6
3.2. Precautions................................................................................................................................................................. 6
4. Installation................................................................................................................................................................ 7
4.1. Installing the Electric Steering Wheel............................................................................................................. 7
4.2. Installing the GNSS Receiver............................................................................................................................... 11
4.3. Installing the Attitude Sensor........................................................................................................................... 13
4.4. Installing the Radio Antenna........................................................................................................................... 14
4.5. Installing the Control Terminal........................................................................................................................ 15
4.6. Installing the SIM Card......................................................................................................................................... 17
4.7. Installing Wiring Harness.................................................................................................................................... 18
5. System Commissioning................................................................................................................................19
5.1. Site Requirements....................................................................................................................................................19
5.2. Power-on.................................................................................................................................................................... 20
5.3. Parameter Calibration........................................................................................................................................ 20
6. Appendix................................................................................................................................................................... 20
6.1. Specications........................................................................................................................................................... 20
Contents

© FJDynamics. All rights reserved.1
FJDynamics AT2 Auto Steer System Hardware Installation Manual
1 Product Introduction
2 Preparation Before Installation
FJDynamics AT2 Auto Steer System is an autosteering system that is launched by
FJDynamics for agricultural machinery and supports assisted straight line driving. The
system consists of the control terminal, GNSS receiver, electric steering wheel, and wiring
harnesses. The control terminal runs the software developed by FJDynamics.
Before installation, read the safety advice in this manual carefully to avoid doing harm to
people and equipment.
Note that the following safety advice cannot cover all possible dangerous situations.
•Do not install and commission the equipment in environments with high temperature,
heavy dust, harmful gases, ammables, explosives, electromagnetic interference (for
example, around large radar stations, transmitting stations, and substations), unstable
voltages, great vibration, and strong noise.
•Do not install the equipment in places where water is likely to accumulate, seep, drip,
and condense; otherwise, the equipment ports could be damaged.
2.1 Safety Instructions
2.1.1 Installation

© FJDynamics. All rights reserved. 2
FJDynamics AT2 Auto Steer System Hardware Installation Manual
To ensure the normal operation of the equipment, the installation site must meet the
following requirements.
•Ensure that the installation position is rm enough to support the equipment and its
accessories.
•Ensure that there is enough space to install the equipment at the installation position,
without any obstruction or obstacle.
• The temperature and humidity of the working environment should be kept within a
reasonable range to ensure the normal operation and service life of the equipment.
Avoid high temperature and humidity. In summer, protect the control terminal from direct
sunlight, and note that appropriate space must be maintained between the shelter and
the control terminal.
• The equipment will be damaged if it works under improper environmental temperature
and humidity.
• When the relative humidity is too high, insulating materials may not perform well,
causing leakage currents. Mechanical property changes, rusting, and corrosion may also
occur.
• When the relative humidity is too low, insulating materials will dry and contract, and
static electricity may occur and damage the electric circuits of the equipment.
•To avoid accidental damage, do not frequently disassemble the equipment after
installation.
•Before disassembly, turn off all power supplies and disconnect the cable from the battery
to prevent equipment damage.
•Electrical operations must be performed by qualied personnel in accordance with local
laws and regulations.
•Carefully check the working area for potential hazards, such as wet ground.
•Before installation, learn about the position of the emergency stop button. Use this button
to cut off the power supply in case of accidents.
•Do not put the equipment in a humid place. Prevent the liquids from entering the
equipment.
•Stay away from radio transmitting stations, radar stations, high-frequency and large-
current equipment, and other high-power radio equipment.
•Direct or indirect contact with high voltage or utility power may cause death.
2.2 Installation Requirements
2.1.2 Disassembly
2.1.3 Electrical Operations
2.2.1 Installation Position
2.2.2 Temperature and Humidity

© FJDynamics. All rights reserved.3
FJDynamics AT2 Auto Steer System Hardware Installation Manual
2.2.3 Air
2.2.4 Power Supply
•Ensure that the contents of salt, acid, and sulfide in the air are within a reasonable range.
Some hazardous substances will accelerate the rusting and corrosion of metals and the
aging of parts. Keep the working environment free of harmful gases (for example, sulfur
dioxide, hydrogen sulfide, nitrogen dioxide, and chlorine).
• Input voltage: The system supports the input voltage of 9-36 V.
• Ensure that the power line is connected properly to the positive and negative terminals
of the battery. Keep wiring harnesses away from hot objects.
Prepare the following tools before installation.
2.3 Installation Tools
Installation Tools for FJDynamics AT2 Auto Steer System
No. Tool Specications Qty. Function
1Cross
screwdriver
PH0*75
small size 1 Install the SIM card.
2PH2*100
medium size 1 Install the GNSS receiver and bracket.
3
Allen key
3 1 Install the splined sleeves.
4 5 1 Install the motor bracket and nameplate
bracket.
5
Open-end
wrench
8 1 Install the GNSS receiver bracket on top of
the machine.
6 11 1 Fix the U-bolts of the control terminal.
7 13 2 Install the motor bracket.
8 12/14 2
Install the battery cables (bolt size
depends on the machine model) and
motor bracket.
9 18/21 1
Disassemble and install the front axle
shaft cover bolts (bolt size depends on the
machine model).
10
Sleeve
8 1 Install the GNSS receiver bracket on top of
the machine.
11 24/27 1 Disassemble and install the lock nut of the
original steering wheel.

© FJDynamics. All rights reserved. 4
FJDynamics AT2 Auto Steer System Hardware Installation Manual
Unpack and check the items according to the following list.
2.4 Unpacking and Inspection
12 Electric drill / 1 Work with sleeves.
13 Tweezers / 1 Install the SIM card.
14 Ejector pin / 1 Install the SIM card.
15 Box cutter / 1 Unpack.
16 Scissors / 1 Cut cable ties.
17 Tape measure 5 m 1 Measure vehicle parameters.
18 Open-end
wrench
9/10 1 Spare part.
19 Extra-long box-
end wrench
11/13/14 1 Spare part.
No. Assembly Component Qty. Remarks
1
Electric
steering
wheel
Steering wheel 1
2 Steering motor 1 12 V/24 V
3
Small self-
sealing bag
Hexagon socket
head cap screw
M4×14
6
Install splined sleeves.
4 Spring washer M4 6
5 Plain washer M4 6
6
Control
terminal
Control terminal 1
7 Control terminal bracket 1
Fix the control terminal.
8 Control terminal mounting base 1
9 Nut 4
10 U-bolt 2

© FJDynamics. All rights reserved.5
FJDynamics AT2 Auto Steer System Hardware Installation Manual
11
GNSS
receiver
GNSS receiver 1
12 GNSS receiver bracket 1
13 Small self-
sealing bag
1
3M sticker 2
Fix the GNSS receiver
and bracket.
14 Assembly bolt
M4×12 4
15
Small self-
sealing bag
2
Self drilling screw 4
16
Nameplate
bracket
Nameplate bracket 1 With the nameplate
mounted.
17
Small self-
sealing bag
Hexagon socket
head cap screw
M6×16
2
Fix the nameplate
bracket.
18 Spring washer M6 2
19 Plain washer M6 2
20
Wiring
harnesses
Power wiring harness 1
21 GNSS receiver wiring harness 1
22 Main wiring harness 1
23 Spare main wiring harness 1
24 Attitude sensor wiring harness 1
25
Radio
antenna
Sucker base 1
26 Radio antenna 1
27 3M sticker 1 Fix the radio antenna.
28
Others Large self-
sealing bag
Packing list 1
29 Warranty card 1
30 Software user
manual 1
31
Hardware
installation
manual
1
32 Certication 1
33 Nylon cable tie 20
Table of contents
Other FJDynamics Autopilot System manuals
