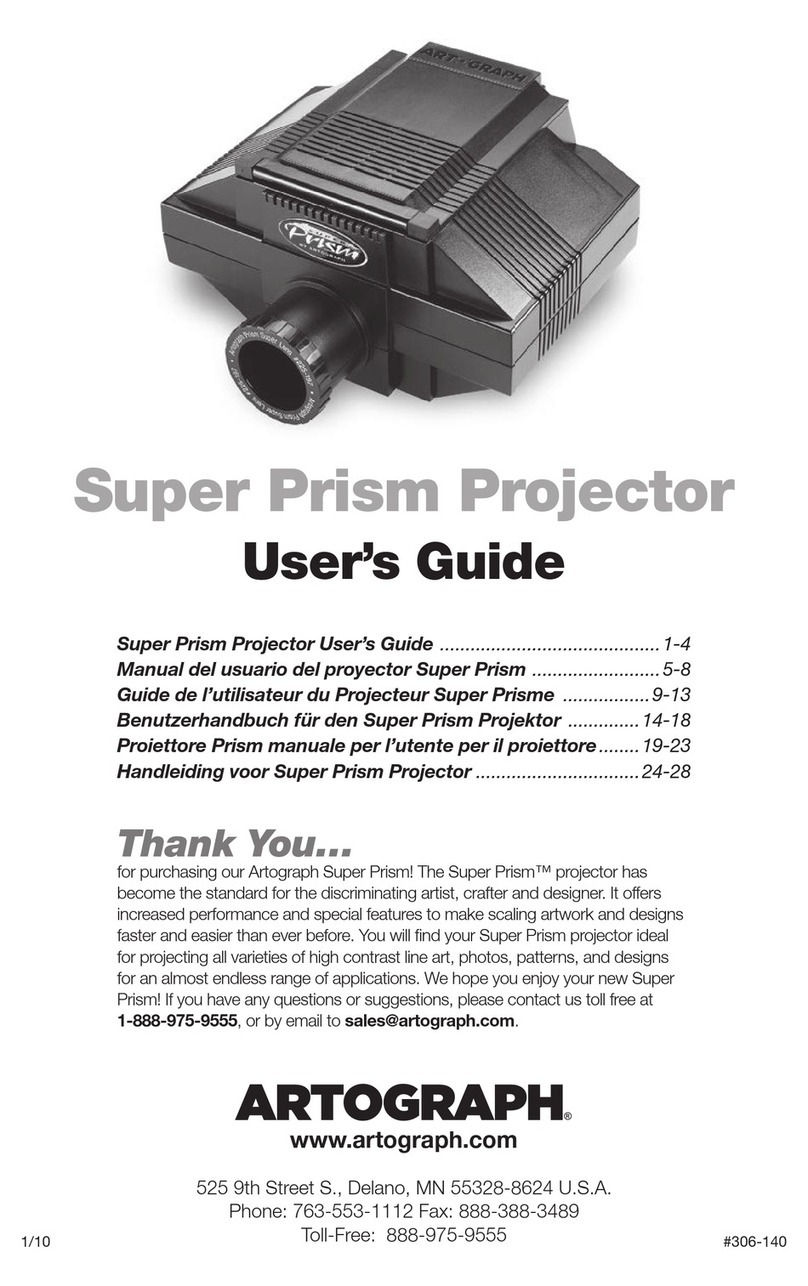
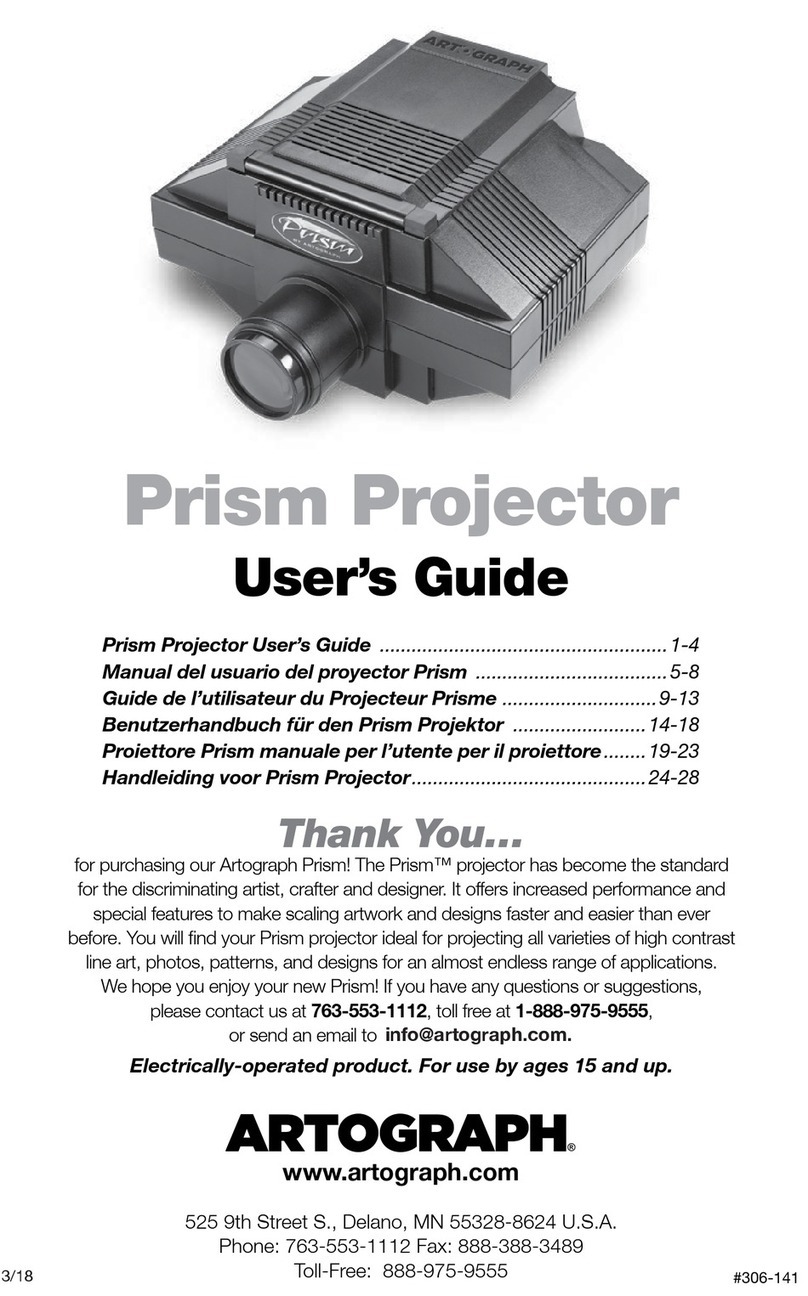
artograph ES5287 User manual

www.artograph.com
525 9th Street S., Delano, MN 55328-8624 U.S.A.
Phone: 763-553-1112 Fax: 888-388-3489
Toll-Free: 888-975-9555
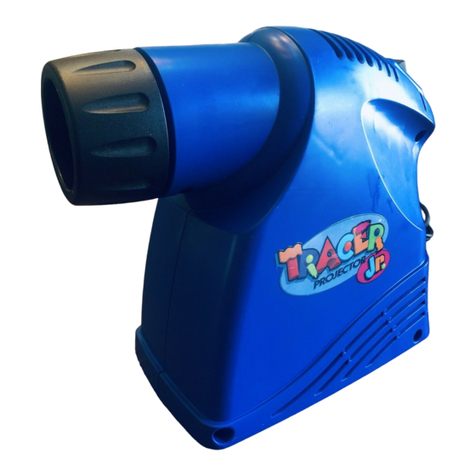
Tracer Projector
User’s Guide
Tracer Projector User’s Guide ....................................... 1-4
Manual del usuario del proyector Tracer ..................... 5-8
Guide de l’utilisateur du Projecteur Tracer................ 9-12
Benutzerhandbuch für Tracer Projektor.................. 13-16
Il Manuale per l’utente per il Tracer Proiettore ....... 17-20
De Handleiding voor Tracer De projector ................ 21-24
#306-127
Thank You…
for purchasing Artograph’s Tracer Projector. Whether you wish to enlarge a pattern,
trace a picture, create a mural or more, the Tracer provides a fast and easy way to let
you get to the fun part faster. We hope you enjoy your new Tracer! If you have
any questions or suggestions, please contact us at 763-553-1112, toll-free at
1-888-975-9555, or send an email to [email protected]
Electrically-operated product. For use by ages 15 and up.
2/13

Important Safety
Instructions
When using this projector, always follow
basic safety precautions, including the
following:
1. Read and understand all instructions
before operating.
2. Close supervision is necessary
when used by or near children. Do
not leave unattended while in use.
3. Do not operate this equipment
with a damaged cord, or if it has
been dropped or otherwise
damaged, until it has been
examined by a qualified electrician.
4. If an extension cord is necessary,
be sure it has a suitable current
rating. Cords rated for less
amperage than this equipment may
overheat. Be careful to arrange the
cord so that it will not be tripped
over or pulled.
5. Always unplug from the electrical
outlet when not in use. Disconnect
by grasping and pulling the plug
from the outlet; never yank the cord
to disconnect the plug.
6. Allow the projector to cool
completely before moving. Loop the
cord loosely when storing.
7. If the projector receives water
damage, do not use until inspected
by a qualified electrician.
8. To avoid electrical shock hazard,
do not disassemble. Take the
projector to a qualified electrician.
Incorrect reassembly can cause an
electrical shock hazard.
9. Care must be taken as burns can
occur from touching hot parts.
10. The projector switch is provided
with the symbols 0, indicating off,
and I, indicating on.
11. Position the cord so that it will
not be tripped over, pulled or come
in contact with hot surfaces.
12.
Always unplug the projector from
electrical outlet before cleaning,
servicing and when not in use.
13. To reduce risk of electrical shock,
do not immerse this projector in
water or other liquids.
14. The use of accessory attachment
not recommended by the
manufacturer may cause the risk of
fire, electric shock or injury to
persons.
15. Connect this projector to a
grounded outlet.
16.
Disconnect the projector from
power supply before replacing lamps.
Set up &
Operation
1. Room Lighting
All opaque projectors work like a
flashlight; the darker the room, the
brighter the projected image will appear.
The clearest and brightest images
are produced in a completely dark
room. For best results, operate your
Tracer in a room where you are able to
control the lighting conditions, or work
in the evening. The darker the room
conditions, the brighter and sharper the
projected image will be.
SAVE THESE INSTRUCTIONS
2

2. Projecting the Image
CAUTION: We do not recommend
using photographs or resin-
coated prints with the Tracer.
Photographs were not intended
to handle the intense light and
heat created by a projector.
Photographs may be adversely
affected by the heat and light. If
using original or valuable art, we
recommend that you project from
copies if it can not be replaced.
1. Lay the art or design you wish to
project face-up on a flat hard surface.
A stool or hard chair is ideal, as they
can be easily moved when adjusting
the size of the projected image.
CAUTION: Do no put the projector
on a soft or heat sensitive surface, as
damage may occur.
WARNING: The Tracer must be
positioned near an electrical outlet.
Carefully arrange the cord so that
it won’t be tripped over or pulled
while projecting in a dark room.
2. Place the Tracer on top of the art or
design with the opening at the bottom
of the projector positioned over the area
you wish to project.
3. Make sure the red on/off switch on
top of the unit is in the “O” (off) position.
Plug the Tracer into an electrical outlet
and flip the red switch to the “I” (on)
position.
4. Turn off any room lights and point the
Tracer toward the desired wall or vertical
surface (i.e. easel, canvas etc.).
3. Sizing and Focusing
To change the size of the projected
image, move the Tracer either closer to
the projection surface (i.e. wall, easel,
canvas, etc.) for a smaller enlargement,
or farther away for a greater
enlargement. Then, focus by sliding
the lens barrel in or out slowly until the
projected image becomes clear. The
Tracer can enlarge an image anywhere
between 2 and 14 times the original
size. See Distance Chart for desired
sizes and approximate distances.
Range
2X 4x 6x 8x 10x 12x 14x
Distance
24” 40” 56” 6’ 7.3’ 8.6’ 10’
(61cm) (1.02m) (1.42m) (1.83m) (2.24m) (2.65m) (3.05m)
3

Parts List
1. Lens .................................... 200-685
2. Lamp (120V, 23 watt)
Fluorescent.......................... 106-061
Lamp (220/240V, 23 watt)
Fluorescent.......................... 106-062
Projector
Maintenance
Replacement Lamps
The Tracer projector includes one of
the lamps listed above in the parts list;
however any lamp up to 100 watts may
be used including a fluorescent lamp.
A 23 watt fluorescent helix lamp may be
substituted for the standard 100 watt
incandescent lamp. Fluorescent lamps
are much cooler and offer long life.
For best image brightness and color,
use Daylight (6500 ansi) lamps. For
questions contact customer service.
Cleaning
LENS: Clean the lens with a
commercial lens cleaner and a soft cloth
or lens tissue. Apply cleaner to the cloth:
NEVER apply cleaner directly onto the
lens as it may seep inside.
MIRROR: The Tracer features a special
front-surface mirror, which eliminates
double imaging and enhances
brightness. Normally the mirror will not
require cleaning other than occasional
dusting. Clean the silvered surface with
care using a mild cleaning solution and
a soft cloth or tissue. DO NOT SCRUB!
Warranty
Be sure to register your Artograph
product online at www.artograph.com.
THIS WARRANTY DOES NOT
APPLY TO LAMPS.
Artograph® products are warranted to be free from
defects in material and workmanship for a period
of one year from the date of sale to the original
purchaser. Any defective product will be repaired
or replaced by Artograph® at its option, provided
the product is returned, shipping prepaid, to our
factory within the warranty period. Customer shall
promptly notify either the original seller or Artograph
of any warranty claim in sufficient detail to describe
both the problem and its symptoms along with
a copy of the original purchase receipt or other
acceptable proof of purchase. All allowed returns
will be provided a Return Authorization (RA)
number. Any product received without a Return
Authorization number will be returned. Equipment
repaired or replaced under this warranty will be
returned freight or postage prepaid. The warranty
period for repaired or replacement products shall
be for the same duration as the original warranty.
This warranty does not cover repair for damage
to the product, or product components or
malfunctions caused by (i) misuse, neglect, power
failures or surges, lightning, fire, flood or accident;
(ii) use of products or facilities supplied by others;
or (iii) failure to follow installation, operation or
maintenance instructions.
THE EXPRESS WARRANTIES HEREIN
CONTAINED ARE IN LIEU OF ANY AND ALL
OTHER WARRANTIES, EXPRESS OR IMPLIED,
INCLUDING, BUT NOT LIMITED TO, THE IMPLIED
WARRANTIES OF MERCHANTABILITY, FITNESS
FOR A PARTICULAR PURPOSE AND NON-
INFRINGEMENT, EACH OF WHICH SELLER
DISCLAIMS AND ARE EXCLUDED. WHILE THERE
ARE NO WARRANTIES WHICH EXTEND BEYOND
THE DESCRIPTION ON THE FACE HEREOF,
CUSTOMER’S LOCAL LAW MAY PROVIDE
OTHERWISE. SELLER SHALL NOT BE LIABLE
FOR DAMAGES, INCLUDING SPECIAL AND
INCIDENTAL OR CONSEQUENTIAL DAMAGES,
INTERRUPTION OF BUSINESS ARISING OUT OF
OR IN CONNECTION WITH PERFORMANCE OF
THE PRODUCTS OR USE BY CUSTOMER.
4
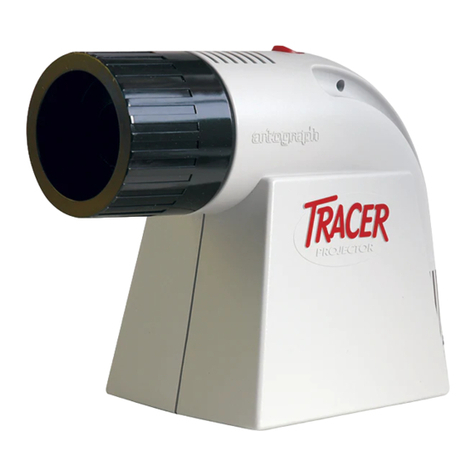
Lens •
Lamp (inside) •

5
www.artograph.com
525 9th Street S., Delano, MN 55328-8624 EE.UU.
Teléfono: 763-553-1112 Fax: 888-388-3489
Línea gratuita: 888-975-9555
Manual del usuario del
proyector Tracer
Gracias…
por comprar el Proyector Tracer de Artograph. Si desea aumentar un
patrón, calcar un dibujo, crear un mural u otras aplicaciones, el proyector
Tracer le ofrece una forma rápida y sencilla de llegar antes a la parte más
divertida del trabajo. Esperamos que disfrute su nuevo Tracer. Si tiene
preguntas o sugerencias, por favor contáctenos al 763-553-1112, sin cargo
Producto de funcionamiento eléctrico.
Para ser usado por personas mayores de 15 años.

6
Importantes medidas
de seguridad
Cuando utilice su proyector, tome
siempre precauciones de seguridad
básicas, incluyendo las siguientes:
1. Lea y asegúrese de comprender
todas las instrucciones antes de
operar el equipo.
2. Supervise cuidadosamente el
funcionamiento del proyector
cuando sea utilizado por niños o
cerca de éstos. No deje solo el
equipo mientras esté encendido.
3. Si el equipo tiene el cable dañado, si
se ha caído o si ha sufrido algún otro
desperfecto, no lo use hasta que lo
examine un electricista calificado.
4. Si necesitara un cable de extensión,
asegúrese de que tenga la corriente
apropiada. Los cables con amperaje
inferior al de este equipo pueden
recalentarse. Coloque el cable
de manera que nadie pueda
tropezar con él o tirar del mismo
accidentalmente.
5. Desconecte el equipo cuando no lo
esté utilizando. Para hacerlo, sujete
el enchufe con los dedos y quítelo
del tomacorriente. Nunca tire del
cable para desenchufar el equipo.
6. Deje que el proyector se enfríe
completamente antes de moverlo
de sitio. Para guardarlo, enrosque el
cable sin apretar.
7. Si el proyector se mojara, no lo
utilice hasta que lo examine un
electricista calificado.
8. Para evitar el peligro de descarga
eléctrica, no desarme la unidad.
Llévesela a un electricista
calificado. Si se arma el proyector
incorrectamente, existe el riesgo de
descarga eléctrica.
9. Tenga cuidado: puede sufrir
quemaduras si toca partes calientes.
10.El interruptor del proyector está
provisto de los símbolos 0,para
indicar apagado, y l,para indicar
encendido.
11.Coloque el cable de manera que
nadie pueda tropezar con él o tirar
del mismo accidentalmente o que
pueda tocar. superficies calientes.
12.Siempre desenchufe el proyector
de la toma eléctrica antes deuna
limpieza o reparación y cuando no
esté en uso.
13.Para reducir el riesgo de descarga
eléctrica, no sumerja el proyector en
agua u otros líquidos.
14.El uso de accesorios no
recomendados por el fabricante
puede causar incendios, descargas
eléctricas o heridas.
15.Enchufe el proyector a en un
tomacorrientes conectado a tierra
16.Desconecte el suministro eléctrico
antes de reemplazar lámparas.
Puesta En marcha Y
Funcionamiento
1. Iluminación del ambiente
Para obtener mejores resultados, la
habitación deberá estar tan oscura
como sea posible.
CONSERVE ESTAS INSTRUCCIONES

7
2. Para proyectar la imagen
PRECAUCIÓN: Recomendamos
no utilizar fotografías o
impresiones revestidas con resina
con el proyector Tracer. Las
fotografías no están preparadas
para soportar la intensa luz y el
calor emitidos por el proyector y
pueden resultar dañadas. Cuando
se utilicen piezas originales
o valiosas que no se pueden
reemplazar recomendamos
utilizar copias.
1. Coloque boca arriba, sobre una
superficie plana y firme, la copia
o el material que desea proyectar.
PRECAUCIÓN: No coloque el
proyector sobre una superficie blanda
o sensible al calor ya que puede
dañarse.
ADVERTENCIA: El Tracer se debe
colocar cerca de un tomacorrientes.
Asegúrese de poner el cable donde
nadiese tropiese con él o lo jale en
la oscuridad.
2. Sitúe el proyector Tracer sobre
el dibujo o diseño, enfocando la
abertura sobre la zona que desea
proyectar.
3. Enchufe el proyector Tracer en un
tomacorrientes y oprima el botón rojo,
en la parte superior del aparato.
4. Apague todas las luces de la
habitación y enfoque el Tracer hacia
la pared u otra superficie vertical
(caballete, etc.).
3. Enfoque y Tamaño
Para graduar el tamaño de la imagen
proyectada mueva el Tracer hacia la
superficie de proyección (por. Ej., pared,
caballete, tela, etc.), si desea obtener
una imagen más reducida, o lejos
para una imagen más grande. Luego
enfoque haciendo deslizar el tambor
hacia adentro o hacia fuera hasta que
la imagen proyectada sea clara. El
Tracer puede ampliar imágines de 2 a
14 veces el tamaño original. (Ver la tabla
para determinar medidas y distancias
aproximadas.)
Rango de la imagen
2X 4x 6x 8x 10x 12x 14x
Distancia
24” 40” 56” 6’ 7.3’ 8.6’ 10’
(61cm) (1.02m) (1.42m) (1.83m) (2.24m) (2.65m) (3.05m)

8
Piezas
1. Lentes................................ 200-685
2. Foco (110 voltios, 23 vatios) ..... 106-061
Foco (220 voltios, 23 vatios) ..... 106-062
Mantenimiento
De Rutina
Focos
Solicite los focos de reemplazo
deArtograph, de cualquiera de sus
representantes o de un vendedor de
focos de su zona. NO EXCEDA LOS
100 VOLTIOS.
Se puede substituir la lámpara
fluorescente helocoidal de 23 vatios por
una lámpara incandescente estándar de
100 vatios. Las lámparas fluorescentes
no se recalientan tanto y lbrindan una
vida más larga. Para mejor brillo y color
de la imagen, utilice las lámparas de
la luz de día (ANSI 6500). Póngase en
contacto con el servicio al cliente si
necesita más información.
Limpieza
LENTES: Limpie las lentes con
limpiadores comerciales para lentes y
un paño suave o con paño para limpiar
lentes. Aplique el limpiador sobre la lente
y NUNCA directamente sobre la lente ya
que podría penetrar en el proyector.
ESPEJO: Tracer tiene un espejo
especial de superficie frontal que elimina
la duplicación de la imagen y brinda
mayor brillo. Normalmente todo lo
que necesita hacer es quitar el polvo
del espejo. Limpie cuidadosamente
la superficie platinada, usando una
solución no abrasiva y un paño suave.
¡NO RASPAR! ADVERTENCIA:
Garantía del Producto
Los productos Artograph® están garantizados contra
defectos en materiales y mano de obra durante un
período de un año a partir de la fecha de venta al
comprador original. Cualquier producto defectuoso
será reparado o reemplazado por Artograph® a
su elección, siempre y cuando el producto sea
devuelto, con porte prepagado, a nuestra fábrica
dentro del período de garantía. El cliente deberá
notificar puntualmente ya sea al vendedor original
o a Artograph sobre cualquier reclamación de
garantía proporcionando información suficientemente
específica que describa el problema y sus síntomas,
junto con una copia del recibo original de compra
u otra prueba aceptable de compra. Todas las
devoluciones aprobadas recibirán un número de
autorización de devolución. Todos los productos
recibidos sin un número de autorización serán
devueltos. Los equipos reparados o reemplazados
bajo esta garantía serán devueltos al cliente, previo
pago del porte o franqueo. El período de garantía
para los productos reparados o reemplazados
tendrá la misma duración que la garantía original.
Esta garantía no cubre la reparación de daños en el
producto o en los componentes del producto ni su
mal funcionamiento causado por (i) uso inadecuado,
negligencia, cortes eléctricos o sobretensiones, rayos,
incendios, inundaciones o accidentes, (ii) el uso de
productos o servicios suministrados por terceros, o
(iii) incumplimiento de las instrucciones de instalación,
operación o mantenimiento.
LAS GARANTÍAS EXPLÍCITAS CONTENIDAS EN
ESTE DOCUMENTO REEMPLAZAN A TODAS
Y CADA UNA DE LAS DEMÁS GARANTÍAS,
EXPRESAS O IMPLÍCITAS, INCLUYENDO, PERO
SIN LIMITARSE A, LAS GARANTÍAS IMPLÍCITAS
DE COMERCIALIZACIÓN, IDONEIDAD PARA UN
PROPÓSITO PARTICULAR Y NO INFRACCIÓN,
A CADA UNA DE LAS CUALES EL VENDEDOR
RENUNCIA Y EXCLUYE. SI BIEN NO EXISTEN
GARANTÍAS QUE SE EXTIENDAN MÁS ALLÁ
DE LO DESCRITO EN ESTE DOCUMENTO,
CABE LA POSIBILIDAD DE QUE LAS LEYES
DE LA LOCALIDAD DEL CLIENTE DISPONGAN
LO CONTRARIO. EL VENDEDOR NO SERÁ
RESPONSABLE POR DAÑOS, INCLUYENDO
DAÑOS ESPECIALES E INCIDENTALES
O CONSECUENTES, ASÍ COMO POR LA
INTERRUPCIÓN DE ACTIVIDAD COMERCIAL,
RESULTANTES DE O RELACIONADOS CON EL
RENDIMIENTO DE LOS PRODUCTOS O SU USO
POR PARTE DEL CLIENTE.
Lentes •
Foco •
9
www.artograph.com
525 9th Street S., Delano, MN 55328-8624 États-Unis
Téléphone : 763-553-1112 Fax : 888-388-3489
Appel gratuit : 888-975-9555
Guide de l’utilisateur du
Projecteur Tracer
Merci…
d’avoir acheté le Projecteur Tracer d’Artograph. Que vous vouliez agrandir
un dessin, faire le tracé d’une image, créer une peinture murale ou autre, le Tracer
offre un moyen rapide et facile de passer à la partie la plus amusante de votre projet.
Nous espérons que vous aimerez votre nouveau Tracer! Si vous avez des questions
ou des suggestions, veuillez nous contacter au 763-553-1112, sans frais d’interurbain
Produit Fonctionnant A L’electricite.
L’utilisateur Doit Être Agé De Plus De 15 Ans.

10
Dispositifs de
protection importants
Pendant l’utilisation de ce projecteur, il
est important de toujours observer les
précautions de sécurité suivantes:
1. Lire et comprendre toutes les
consignes avant de mettre l’appareil
en marche.
2. Une étroite supervision est
nécessaire pendant l’utilisation par
des enfants ou lorsqu’ils se trouvent
à proximité. Ne pas laisser sans
surveillance pendant l’utilisation.
3. Ne pas faire fonctionner cet appareil
sans une inspection préalable par
un électricien qualifié si le cordon
électrique est endommagé, si
l’appareil est tombé par terre ou s’il
a subi des dommages quelconques.
4. Lorsqu’une rallonge électrique
est nécessaire, s’assurer qu’elle
possède un courant nominal
convenable. Une rallonge électrique
présentant un courant nominal
à intensité inférieure à celui de
l’appareil utilisé risquerait d’entraîner
une surchauffe. Veiller à bien
disposer la rallonge de manière à ce
que personne ne trébuche ou tire
dessus accidentellement.
5. Toujours débrancher l’appareil entre
les utilisations. Déconnecter en
tirant la fiche de la prise. Ne jamais
tirer sur le cordon électrique pour
débrancher l’appareil.
6. Laisser le projecteur se refroidir
complètement avant de le déplacer.
Avant de procéder au rangement,
enrouler le cordon sans le serrer
7. Si le projecteur subit un
endommagement causé par un
liquide, ne pas l’utiliser avant qu’il
soit inspecté par un électricien
qualifié.
8. Pour éviter les chocs électriques,
ne pas démonter. Faire inspecter le
projecteur par un électricien qualifié.
Un réassemblage incorrect peut
causer des chocs électriques.
9. Il faut prendre des précautions car
le contact avec des pièces chaudes
peut causer des brûlures.
10.L’interrupteur du projecteur est muni
des symboles O, signifiant arrêt et I
signifiant marche.
11.Placer le cordon de manière à éviter
de faire trébucher quelqu’un, à éviter
qu’il soit tiré qu qu’il entre en contact
avec une surface chaude.
12.Toujours débrancher le projecteur de
la prise électrique avant le nettoyage,
l’entretien et lorsque .l’appareil n’est
pas utilisé
13.Pour réduire le risque de choc
électrique, ne pas plonger ce
projecteur dans l’eau ou d’autres
liquides.
14.L’utilisation d’accessoires non
recommandés par le fabricant peut
provoquer un risque d’incendie, de
décharge électrique ou de blessure.
15.Raccorder ce projecteur à une prise
mise à la terre.
16.Débrancher le projecteur de
l’alimentation électrique avant de
remplacer des ampoules.
Montage Et
Fonctionnement
1. Eclairage de la Pièce
Pour de meilleurs résultats, la pièce doit
être aussi sombre que possible.
CONSERVER CES INSTRUCTIONS

11
2. Pour projeter l’image
MISE EN GARDE : Nous
recommandons de ne pas utilier
des photographies ou des é
preuves sur papier RC (enduit
de réésine) avec votre Tracer.
Les photographies ne sont pas
destinénées à subir une lumiè re
intense et la chaleur créées par
un projecteur. Les photographies
peuvent être abîmées par la lumière
et la chaleur. Si vous utilisez un
original ou une œuvre d’art, nous
vous recommandons de les projeter
à partir de copies s’ils ne peuvent
pas être remplacés.
1. Placer la copie ou l’objet que vous
désirez projeter, côté face vers le haut,
sur une surface plane et dure. MISE EN
GARDE: Ne mettez pas le projecteur
sur une surface molle ou sensible à la
chaleur, car il pourrait être endommagé.
ATTENTION: Le Tracer doit ê tre
installé prè s d’une prise de courant.
Disposez soigneusement le fil pour é
viter, dans l’obscurité, de tré bucher
ou de le tirer.
2. Posez le Tracer par dessus l’objet ou le
dessin, l’ouverture étant placée au dessus
de la zone que vous désirez projeter.
3. Branchez le Tracer et appuyez sur le
bouton rouge sur le dessus de l’appareil.
4. Eteignez les lumières de la pièce et
dirigez le Tracer vers le mur ou la surface
verticale (chevalet) où vous désirez
projeter.
3. Mise à Echelle et
Mise au Point
Pour changer l’échelle de l’image
projetée, approchez ou éloignez
le Tracer du mur pour obtenir
l’agrandissement souhaité. Procédez
ensuite à la mise au point en faisant
glisser la partie cylindrique de l’objectif
vers l’intérieur. Le Tracer peut agrandir
une image de 2 à 10 fois la dimension
originelle. (Reportez-vous au diagramme
pour la distance approximative.)
Portée
2X 4x 6x 8x 10x 12x 14x
Distance
24” 40” 56” 6’ 7.3’ 8.6’ 10’
(61cm) (1.02m) (1.42m) (1.83m) (2.24m) (2.65m) (3.05m)

12
Liste Des Pièces
1. Objectif ...................................200-685
2. Ampoule (110V, 23 Watts) ...........106-061
Ampoule (220V, 23 Watts) ...........106-062
Entretien Du
Projecteur
Ampoules
Commandez des ampoules de
remplacement chez un revendeur
Artograph ou directement à Artograph
ou bien chez un détaillant local.
NE PAS DEPASSER 100 WATTS.
Une lampe fluorescente hélicoïdalede
23 watts peut être substituée à la
lampe incandescente standard de
100 watts. Les lampes fluorescentes
sont beaucoup plus agréables et ont
une durée de vie plus longue. Pour un
meilleurs éclairage et de plus belles
couleurs d’image, utilisez les lampes
à lumière du jour (norme ANSI 6500).
Pour toutes questions supplémentaires,
veuillez contacter le Service Clients.
Entretien
OBJECTIF: Nettoyez l’objectif avec un
produit commercial pour objectif et un
chiffon doux ou du papier pour objectif.
Versez le produit sur le chiffon: NE
JAMAIS verser le produit directement
sur l’obectif, car il pourrait s’infiltrer à
l’intérieur de l’appareil.
MIROIR: Nettoyez sa surface argentée
avec soin et utilisez un détergent doux
et un chiffon doux ou de papier. NE
FROTTEZ PAS!
Garantie du Produit
Les produits Artograph® sont garantis d’être libres
de défaut de matériau et de main d’oeuvre pendant
une période d’un an à compter de la date de vente
à l’acheteur original. Tout produit défectueux sera
réparé ou remplacé par Artograph®, à sa discrétion,
à condition que le produit soit retourné, port
prépayé, à notre usine durant la période de garantie.
Le client devra rapidement aviser le vendeur original
ou Artograph de toute réclamation au titre de la
garantie, et ce, de façon détaillée pour décrire le
problème et ses symptômes, en plus de fournir
une copie du reçu d’achat original ou toute autre
preuve d’achat acceptable. Tous les retours permis
recevront un numéro d’autorisation de retour.
Tout produit reçu sans numéro d’autorisation
sera retourné. L’équipement réparé ou remplacé
en vertu de cette garantie sera retourné fret ou
port payé d’avance. La durée de garantie des
produits réparés ou remplacés sera la même que
celle de la garantie d’origine. Cette garantie ne
couvre pas les réparations pour les dommages au
produit, aux composants du produit ou les mauvais
fonctionnements causés par (i) une mauvaise
utilisation, la négligence, les pannes de courant
ou les surtensions, la foudre, un incendie, une
inondation ou un accident; (ii) l’utilisation de produits
ou d’installations fournis par d’autres; ou (iii) le non-
respect des directives d’installation, d’utilisation ou
d’entretien.
LES GARANTIES EXPRESSES CI-DESSUS
REMPLACENT TOUTES LES AUTRES GARANTIES,
EXPRESSES OU IMPLICITES, Y COMPRIS, SANS
EN EXCLURE D’AUTRES, LES GARANTIES
IMPLICITES DE VALEUR MARCHANDE,
D’ADAPTATION À UN USAGE PARTICULIER ET
D’ABSENCE DE CONTREFAÇON, QUI SONT
RENONCÉES ET EXCLUES PAR LE VENDEUR.
BIEN QU’IL N’Y AIT PAS DE GARANTIE QUI
S’ÉTENDENT AU-DELÀ DE LA DESCRIPTION
CI-DESSUS, LA LOI LOCALE DU CLIENT PEUT
STIPULER AUTREMENT. LE VENDEUR NE
SERA PAS RESPONSABLE DES DOMMAGES,
Y COMPRIS LES DOMMAGES SPÉCIAUX
ET CONSÉCUTIFS OU INDIRECTS, DE
L’INTERRUPTION COMMERCIALE DÉCOULANT
OU LIÉE À LA PERFORMANCE DES PRODUITS
OU À L’UTILISATION PAR LE CLIENT.
Objectif •
Ampoule •

13
www.artograph.com
525 9th Street S., Delano, MN 55328-8624 U.S.A.
Phone: 763-553-1112 Fax: 888-388-3489
Toll-Free: 888-975-9555
Benutzerhandbuch für
Tracer Projektor
Vielen Dank...
dass Sie sich für den Kauf des Artograph Tracer Projektors entschieden haben.
Ob Sie ein Muster zu vergrößern, ein Bild durchzupausen, ein Wandgemälde oder
mehr anzufertigen wünschen – der Tracer sorgt dafür, dass Sie schnell und einfach
zum spaßigen Teil kommen. Wir hoffen, dass Sie viel Freude an Ihrem neuen T
racer haben! Falls Sie Fragen oder Anregungen haben, können Sie gerne
unter +1-763-553-1112 oder gebührenfrei unter 1-888-975-9555 anrufen
Elektrisches Produkt.
Zur Benutzung für Personen, die mindestens 15 Jahre alt sind.

14
Wichtige
Sicherheitshinweise
Beim Betrieb dieses Projektors sind
grundlegende Vorsichtsmaßnahmen
zu treffen. Insbesondere folgenden
Hinweise beachten:
1 Vor der Inbetriebnahme alle
Anleitungen gründlich lesen.
2 Anwesende oder das Gerät
benutzende Kinder immer
beaufsichtigen und nicht mit dem
laufenden Gerät allein lassen.
3 Geräte mit beschädigten Kabeln
oder anderweitig (etwa durch
Herunterfallen) beschädigte Geräte
erst nach der Prüfung durch einen
qualifizierten Elektriker in Betrieb
nehmen.
4 Nur für entsprechende Leistung
ausgelegte Verlängerungskabel
verwenden. Bei Kabeln, deren
Amperezahl niedriger als
die des Geräts ist, besteht
Überhitzungsgefahr. Das Kabel so
verlegen, dass man nicht darüber
stolpert oder es aus Versehen
herauszieht.
5 Den Netzstecker eines nicht
gebrauchten Geräts immer
herausziehen. Zum Trennen der
Verbindung den Stecker selbst aus
der Steckdose ziehen, nicht am
Kabel ziehen.
6 Den Projektor vor dem Bewegen
vollständig abkühlen lassen. Zur
Verstauung des Geräts das Kabel
lose aufwickeln.
7 Nach einer Beschädigung des
Projektors durch Wasser erst nach
fachlicher Überprüfung wieder
benutzen.
8 Zur Verhinderung eines
Stromschlags das Gerät nicht
zerlegen, sondern einem
qualifizierten Elektriker bringen.
Fehler bei der Montage können zu
Stromschlägen führen.
9 Beim Berühren heißer Geräteteile
besteht Verbrennungsgefahr.
10 Der Ein-/Ausschalter des Projektors
ist mit den Symbolen 0 (aus) und I
(ein) gekennzeichnet.
11 Das Kabel so verlegen, dass man
nicht darüber stolpert, es nicht
versehentlich herausgezogen wird
und nicht mit heißen Flächen in
Berührung kommt.
12 Im ungebrauchten Zustand sowie
vor der Reinigung und Wartung des
Projektors immer den Netzstecker
abziehen.
13 Den Projektor nicht in Wasser oder
andere Flüssigkeiten eintauchen,
sonst besteht die Gefahr eines
Stromschlags.
14 Durch die Verwendung von
Zubehör, das nicht vom Hersteller
empfohlen wurden, kann
Brand-, Elektroschock- und
Verletzungsgefahr entstehen.
15 Diesen Projektor immer an eine
geerdete Steckdose anschließen.
16 Vor dem Auswechseln der Lampen
den Netzstecker abziehen.
DIESE INFORMATIONEN AUFBEWAHREN

15
Bedienungsanleitung
Allgemeiner Hinweis
Sie erhalten die besten Ergebnisse,
wenn Sie in einem abgedunkelten
Raum arbeiten. Dabei gilt: Je
dunkler der Raum, desto besser die
Projektionsergebnisse.
Bedienung
1. Legen Sie ihre Vorlage, die Sie
projizieren mchten auf eine glatte,
flache Unterlage mit dem Gesicht
nach oben. Am besten eignen sich ein
Hocker oder ein Stuhl (kein Polster)
dafür.
ACHTUNG: Plazieren Sie den TRACER
in der Nähe einer Steckdose, so daß Sie
im abgedunkelten Raum nicht über das
Stromkabel stolpern können.
2. Stellen Sie jetzt den Projektor auf Ihre
Vorlage bzw. den Ausschnitt, den Sie
vergrößern mchten.
3. Stecken Sie den Stecker in die
Steckdose und schalten Sie das Gerät
am roten EIN/AUS Schalter ein.
4. Dunkeln Sie jetzt den Raum ab.
Vergrösserung/
Schärfentiefe
Um die Bildgröße der projizierten
Vorlage zu verändern, plazieren Sie den
TRACER entweder näher zur Wand
(Verkleinerung) oder vergrßern Sie den
Abstand (Vergrößerung). Die Bildschärfe
erhalten Sie, indem Sie die Linse
justieren.
Der TRACER vergrößert Ihre Vorlage bis
zum 10-fachen (Abb. 1).
Bildverzerrung
Um Verzerrungen zu vermeiden,
muß die Bildvorlage senkrecht auf
der Wand auftreffen (Abb. 1). Wenn
Sie symmetrische Bilder/Vorlagen
oder Buchstaben/Wörter projizieren,
empfiehlt es sich, die Hhe der
projizierten Buchstaben/Layout an einer
Seite zu messen und mit der anderen
zu vergleichen. Wenn Sie ein ungleiches
Ergebnis erhalten, justieren Sie den
Projektor nochmals neu.
Projektion Von
Übergrossen Vorlagen
Die Projektionsöffnung im TRACER
beträgt 12.7 x 12.7 cm. Bei grßeren
Vorlagen gehen Sie bitte wie folgt vor:
1. Wählen Sie einen Vorlagenausschnitt.
2. Ziehen Sie diesen Ausschnitt auf
Ihrem Malgrund nach.
3. Stellen Sie jetzt den TRACER auf den
angrenzenden Ausschnitt und passen
Sie ihn dem vorher gezeichneten Bild-/
Layout-Ausschnitt an.
4. Verfahren Sie auf diese Weise so
lange, bis Sie Ihr komplettes Bild
erhalten.
3-D Objekte
Mit dem TRACER können Sie kleine,
flache 3 D – Gegenstände wie Münzen,
Schmuck etc. projizieren, indem Sie den
Projektor über den Gegenstand plazieren.

16
WARNHINWEIS: Keine leicht
entflammbaren gegenstände
projizieren! leicht entflammbare
gegenstände während der
inbetriebnahme nicht in
unmittelbarer nähe plazieren!
Wartung
Glühbirne
Ersatzglühbirnen erhalten Sie entweder
von Ihrem Fachhändler oder im
Elektrofachhandel.
ACHTUNG: Keine glühbirne über
100 w benutzen!
Linse
Die Linse kann mit einem (Foto-)
Linsenreiniger gesäubert werden.
Niemals den Reiniger direkt auf die
Linse geben, sondern immer mit einem
weichen Tuch, da der Reiniger in die
Linseninnenseite eindringen kann.
Spiegel
Der Spiegel muß normalerweise nicht
gereinigt werden. Es kann sich aber auf
dem Spiegel Staub absetzen, den Sie
mit einer milden Reinigungslösung und
einem weichen Tuch entfernen können.
Nicht auf der Spiegeloberfläche kratzen.
Projektionstabelle
Entfernung (X)*
Größe (Projektor zur Wand)
2x 24 in. (61 cm)
4x 40 in. (102 cm)
6x 56 in. (142 cm)
8x 72 in. (183 cm)
10x 88 in. (224 cm)
12x 103 in. (262 cm)
14x 120 in. (305 cm)
*Entfernung: Von der Projektionsfläche
zur Mitte der Linse messen.
Ersatzteile
Linse ............................................200-685
Glühbirne (220V, 23 watt) ............106-062
Glühbirne (110V, 23 watt) ............106-061
Achtung
Durch die hohe Lichtstärke entwickelt
das Gerät Hitze. Bei längerer
Inbetriebnahme kann es vorkommen,
daß der Projektionsausschnitt im Gerät
heiß wird und hitzeempfindliche Vorlagen
beeinträchtigen kann. Gehen Sie daher
mit Originalfotos, harzbeschichteten
Drucken sowie Originalvorlagen sehr
sorgfältig um. Zu Ihrer Sicherheit
empfehlen wir Ihnen, wo immer es
mglich und sinnvoll ist, Kopien vom
Original zu ziehen und zu projizieren.
Produktgarantie
Artograph® garantiert dem Erstkäufer für einen Zeitraum von
einem Jahr ab Kaufdatum, dass seine Produkte frei von Material-
und Verarbeitungsfehlern sind. Jedes fehlerhafte Produkt,
das innerhalb des Garantiezeitraums portofrei an unser Werk
zurückgeschickt wird, wird nach Ermessen von Artograph®
repariert oder ersetzt. Der Kunde hat gegenüber dem
Erstverkäufer bzw. Artograph seinen Gewährleistungsanspruch
umgehend geltend zu machen. Hierzu muss das aufgetretene
Problem und seine Symptome in hinlänglich ausführlicher Form
beschrieben und eine Kopie des Original-Kaufbelegs oder
ein anderer geeigneter Kaufnachweis beigefügt werden. Alle
akzeptierten Rücksendungen erhalten eine Rückgabenummer.
Alle Produkte, die ohne Rückgabenummer eingehen, werden
an den Absender zurückgeschickt. Produkte, die innerhalb
des Garantiezeitraums repariert oder ersetzt werden, werden
kostenfrei zurückgeschickt. Für reparierte oder ausgetauschte
Produkte gilt der Garantieanspruch nur für den verbleibenden
Zeitraum der ursprünglichen Garantiezeit. Die Garantie erstreckt
sich nicht auf Schäden am Produkt oder dessen Komponenten
bzw. Fehlfunktionen durch: (i) Missbrauch, Fahrlässigkeit,
Stromausfall oder Überspannungen, Blitzeinschlag, Brände,
Überschwemmungen oder Unfälle, (ii) Verwendung von
Produkten oder Einrichtungen, die von Dritten zu Verfügung
gestellt wurden, oder (iii) Nichtbeachtung der Anweisungen zu
Installation, Betrieb oder Wartung.
DIE HIERIN ENTHALTENEN AUSDRÜCKLICHEN
GARANTIEN TRETEN AN DIE STELLE ALLER ANDEREN
AUSDRÜCKLICHEN ODER IMPLIZITEN GARANTIEN,
EINSCHLIESSLICH, ABER NICHT BESCHRÄNKT AUF
IMPLIZITE GARANTIEN DER MARKTGÄNGIGKEIT,
EIGNUNG FÜR EINEN BESTIMMTEN ZWECK SOWIE
NICHTVERLETZUNG VON SCHUTZRECHTEN, FÜR DIE DER
VERKÄUFER JEGLICHE HAFTUNG ABLEHNT. ÜBER DIE
VORLIEGENDE GARANTIERKLÄRUNG HINAUSGEHENDE
GARANTIEN SIND AUSGESCHLOSSEN, KÖNNEN JEDOCH
DURCH DIE GESETZGEBUNG AM STANDORT DES KUNDEN
BESTEHEN. DER VERKÄUFER HAFTET NICHT FÜR
SCHÄDEN, EINSCHLIESSLICH MITTELBARER, ZUFÄLLIGER
ODER FOLGESCHÄDEN, SOWIE FÜR UNTERBRECHUNGEN
DER GESCHÄFTSTÄTIGKEIT, DIE AUS DER LEISTUNG DER
PRODUKTE BZW. DEREN VERWENDUNG DURCH DEN
KUNDEN RESULTIEREN BZW. HIERMIT IN ZUSAMMENHANG
STEHEN.

17
www.artograph.com
525 9th Street S., Delano, MN 55328-8624 U.S.A.
Phone: 763-553-1112 Fax: 888-388-3489
Toll-Free: 888-975-9555
Il Manuale per l’utente
per il Tracer Proiettore
Grazie…
per avere acquistato l’episcopio proiettore Artograph. Sia che desideriate
ingrandire un modello, tracciare un’immagine, creare un murale o altro l’episcopio
è il modo più veloce e facile di arrivare in breve alla parte più divertente. Siamo certi
che vi divertirete moltissimo con il nuovo episcopio! Per ogni domanda o consiglio,
potete telefonare al numero +1 763-553-1112, numero verde 1-888-975-9555,
Prodotto a funzionamento elettrico.
L’uso è consentito a partire dai 15 anni di età in su.

18
Importanti consigli
per la sicurezza
Quando usate questo proiettore,
seguite sempre le precauzioni basilari di
sicurezza, incluse quelle che seguono:
1. Leggete attentamente tutte le
istruzioni prima dell’utilizzo del
proiettore
2. Particolare attenzione è necessaria
quando il proiettore è utilizzato da o
vicino a dei bambini. Non lasciare il
proiettore senza supervisione mentre
è in uso.
3. Non utilizzate lo strumento se il cavo
di alimentazione è danneggiato, o
se è stato fatto cadere a terra o se
è stato altrimenti danneggiato, fino
a che non è stato controllato da un
elettricista qualificato.
4. Se un cavo prolunga si rende
necessario, assicuratevi che abbia
il giusto amperaggio. Cavi con
un amperaggio diverso da quello
dell’apparecchio potrebbero
surriscaldarsi. Fate attenzione a
sistemare il cavo in modo che non
sia possible inciampare in esso o
tirarlo.
5. Ricordatevi sempre di staccare
il cavo dalla presa di corrente
quando l’apparecchio non è in uso.
Disconnettere estraendo la spina
fuori dalla presa, mai tirare il cavo
per disconnettere dalla corrente.
6. Lasciate che il proiettore si raffreddi
completamente prima di spostarlo.
Arrotolate il cavo senza stringere
quando archiviate il proiettore.
7. Se il proiettore riceve danni causati
dall’acqua, non utilizzaterlo se non
dopo l’ispezione da parte di un
elettricista qualificato.
8. Per evitare rischi di scosse elettriche,
non smontare il proiettore. Portate
il proiettore da un elettricista
qualificato. Un riassemblaggio non
corretto può causare una scossa
elettrica.
9. Prestate attenzione: è possible
scottarsi toccando le parti calde
dell’apparecchio.
10.Il tasto di accensione del proiettore
è fornito di simboli: 0 indica spento, I
indica acceso.
11.Posizionate il cavo in modo che non
sia possible inciampare in esso,
tirarlo, o farlo venire a contatto con
superfici molto calde.
12.Disconnettete sempre il proiettore
dalla corrente elettrica prima di
pulirlo, muoverlo, o quando non è in
uso.
13.Per ridurre il rischio di scossa
elettrica, non immergete il proiettore
in acqua o in altri liquidi.
14.L’uso di accessori non raccomandati
dal produttore può causare rischio di
incendio, scosse elettriche o danni
alla persona.
15.Connettete il proiettore ad una presa
a terra.
16.Disconnettete il proiettore dalla
corrente prima di cambiare le
lampadine.
Istruzioni
Illuminazione dell’ambiente
Per ottenere i migliori risultati è
preferibile usare il Tracer in una stanza o
in una zona in cui l’illuminazione possa
essere controllata. Più l’ambiente è al
buio, più le immagini proiettate risultano
nitide e brillanti.
CONSERVARE QUESTE ISTRUZIONI

19
Come si usa il Tracer
1. Posate il disegno o il materiale che
volete proiettare su una superficie rigida
piatta, a faccia in su. Vanno bene anche
uno sgabello o una sedia, che si possono
spostare facilmente per ottenere la
grandezza di proiezione desiderata.
ATTENZIONE: Il Tracer deve essere
collegato ad una presa elettrica.
Sistemate con cura il cavo, in modo
da evitare di inciamparvi nella
penombra o di strapparlo.
2. Mettete il Tracer sopra al disegno
o all’illustrazione, con l’apertura in
corrispondenza della zona che volete
proiettare.
3. Inserite la spina nella presa di
corrente e premete il pulsante rosso che
c’è in cima all’apparecchio.
4. Spegnete tutte le luci od oscurate
la stanza e puntate il Tracer verso la
superficie verticale prescelta (una parete,
un pannello sul cavalletto o altro).
Messa in scala e
messa a fuoco
Per cambiare le dimensioni
dell’immagine proiettata, spostate
il Tracer più vicino alla parete per
ingrandimenti minori o più lontano
per ingrandimenti maggiori. Poi
mettete a fuoco l’immagine facendo
scivolare l’obbiettivo avanti o indietro.
Il Tracer può ingrandire l’immagine da
2 a 10 volte rispetto alle dimensioni
dell’originale. Si vedano nella Figura
1 le distanze suggerite per i diversi
ingrandimenti.
Distorsioni
Per rendere minima la distorsione
delle immagini, il proiettore deve
essere perpendicolare alla parete su
cui si proietta l’immagine (v. Fig. 1).
Aggiustate la posizione finchè vi sembra
corretta ed otterrete buoni risultati. Se
dovete proiettare delle scritte o dei
disegni simmetrici, la cosa migliore è
misurare l’altezza dell’immagine alle
due estremità. Se ci sono differenze,
spostate leggermente l’apparecchio fino
ad eliminarle.
Proiezione di originali
di grandi dimensioni
Per proiettare e disegnare un
documento più grande dell’area utile
del Tracer (13x13 cm), bisogna
proiettare per sezioni. Proiettate una
sezione, disegnatela sulla superficie,
poi spostate il proiettore su una zona
adiacente. Allineate la nuova immagine
a quella disegnata prima e
continuate nel disegno. Assicuratevi
che il proiettore sia sempre ben
perpendicolare (v. “Distorsioni”) e alla
stessa distanza dalla parete.
Oggetti tridimensionali
Il Tracer può proiettare anche piccoli
oggetti tridimensionali piatti, come
monete, gioielli, fiori e foglie, ricami o
tessuti a struttura spessa. Per proiettare
gli oggetti tridimensionali, mettete il
Tracer sull’oggetto o sulla parte di
oggetto da proiettare.
ATTENZIONE: non mettere mai
oggetti o materiali inflammabili nel
Tracer o vicino ad esso quando è in
funzione.
Manutenzione
Lampade
Prima di smontare la lampada, staccate il
Tracer dalla presa di corrente ed aspettate
che la lampada si raffreddi. Potete trovare
le lampade di ricambio presso un buon

20
rivenditore di materiale elettrico o ordinarle
al vostro Rivenditore Artograph. NON
SUPERATE I 100 WATTS.
Pulizia
Obbiettivo
Pulite l’obbiettivo con un normale liquido
per lenti ed un panno morbido o con
un panno per lenti. Versate il liquido sul
panno e non direttamente sull’obbiettivo
perchè potrebbe infiltrarsi.
Specchio
Il Tracer ha uno specchio speciale con
l’argentatura in superficie, che elimina
lo sdoppiamento dell’immagine e ne
aumenta la nitidezza. Normalmente lo
specchio non richiede pulizia, salvo il
togliere la polvere di tanto in tanto. Pulite
la superficie argentata con delicatezza,
usando un detergente leggero non
abrasivo e un panno morbido.
NON STROFINATE
ATTENZIONE: non immergete mai
nell’acqua il proiettore.
Ingrandimento Distanza (X)*
2x 24 in. (61 cm)
4x 40 in. (102 cm)
6x 56 in. (142 cm)
8x 72 in. (183 cm)
10x 88 in. (224 cm)
12x 103 in. (262 cm)
14x 120 in. (305 cm)
(*) Distanza fra il centro dell’obbiettivo e
la parete.
Ricambi
Obbiettivo
Lampada (220 V, 23 W)
fluorescente (220/240 V 23 watt) 106-062
Attenzione
Fate molta attenzione quando dovete
proiettare fotografie, carte emulsionate
o trattate o lavori originali. Il Tracer
fornisce una eccellente illuminazione
con un calore moderato. Tuttavia,
con l’uso prolungato si può generare
abbastanza calore da danneggiare i
materiali termosensibili. Per sicurezza
raccomandiamo di fare una copia di
qualsiasi documento che possa essere
ritenuto di un certo valore o in qualche
misura sensibile al calore e di proiettare
la copia.
Garanzia Del Prodotto
Si garantisce che i prodotti Artograph® sono privi di
difetti di materiali e di lavorazione per un periodo di un
anno dalla data di acquisto da parte dell’acquirente
originale. Un prodotto che si riveli difettoso sarà riparato
o sostituito a discrezione di Artograph®, purché il
prodotto sia restituito in fabbrica, con spedizione
prepagata, entro il periodo di validità della garanzia. Il
cliente dovrà informare tempestivamente il venditore
originale o Artograph di eventuali richieste di intervento
in garanzia descrivendo in modo sufficientemente
dettagliato sia il problema sia i relativi sintomi, e
allegando una copia della ricevuta di acquisto originale
o altra prova di acquisto accettabile. A tutti i resi
consentiti sarà fornito un numero di autorizzazione
al reso. Tutti i prodotti resi senza numero di
autorizzazione saranno rispediti al mittente.
L’attrezzatura riparata o sostituita nel periodo di
validità della garanzia sarà restituita con nolo o costi di
spedizione prepagati. Per i prodotti riparati o sostituiti,
la garanzia avrà validità per l’intera durata della garanzia
originale. La presente garanzia non copre riparazioni
di danni al prodotto, o a componenti del prodotto, o
guasti causati da (i) uso errato, negligenza, interruzioni
di alimentazione o sbalzi di corrente, fulmini, incendi,
inondazioni o incidenti; (ii) utilizzo di prodotti o strutture
forniti da altri; o (iii) mancata osservanza delle istruzioni
di installazione, uso o manutenzione.
LE GARANZIE ESPRESSE IVI CONTENUTE
ESCLUDONO E SOSTITUISCONO TUTTE LE ALTRE
GARANZIE, ESPRESSE O TACITE, COMPRESE
SENZA LIMITAZIONE EVENTUALI GARANZIE TACITE
DI COMMERCIABILITÀ, IDONEITÀ PER SCOPI
PARTICOLARI E NON VIOLAZIONE. SONO ESCLUSE
ALTRE FORME DI GARANZIA CHE ESTENDANO I
TERMINI SUMMENZIONATI, SALVO DIVERSAMENTE
PREVISTO DALLE LEGGI LOCALI VIGENTI PRESSO
LA GIURISDIZIONE DEL CLIENTE. IL VENDITORE
NON SI RITERRÀ RESPONSABILE PER DANNI,
COMPRESI DANNI SPECIALI E INCIDENTALI O
CONSEQUENZIALI, INTERRUZIONE DI ATTIVITÀ
COMMERCIALE DERIVANTE O CORRELATA AL
FUNZIONAMENTO DEI PRODOTTI O ALL’USO DA
PARTE DEL CLIENTE.
This manual suits for next models
1
Table of contents
Languages:
Other artograph Projector manuals

artograph
artograph MC 250 User manual

artograph
artograph Impression1400 PF1500A User manual

artograph
artograph Super Prism User manual

artograph
artograph Super Prism User manual

artograph
artograph Inspire 1200 User manual

artograph
artograph Tracer User manual

artograph
artograph Tracer Jr User manual

artograph
artograph LED300 User manual

artograph
artograph Super Prism User manual

artograph
artograph EZ Tracer User manual