4 5
Double Subwoofer
Four Subwoofers
PLACEMENT CONNECTIONS
Speakers and electronics have corresponding (+) and (–) terminals. Most manufacturers of speakers and electronics, use
red to denote the (+) terminal and black for the (–) terminal. It is important to connect both terminals identically: (+) on
the speaker to (+) on the amplier, and (–) on the speaker to (–) on the amplier.
! This connection ensures, that all speakers work in unison and make a forward movement if a positive signal is applied
and move backward when a negative signal is applied.
Wiring “out of phase” results in thin sound, weak bass, and a poor stereo image. With the advent of multichannel sur-
round sound systems, connecting all the speakers in your system with the correct polarity remains equally important to
preserve the proper ambience and directionality of the program material.
The AIA “The 12 SUB Pro Passive Sealed Shallow” subwoofer has a single speaker wire input terminal. Usually The 12 is
driven from a single amplier channel, the (+) terminal of the amplier should connect to (+) input terminals of the The
12. The (–) terminal of the amplier should be connected to (–) terminals. In this wiring conguration, the amplier will
be presented with a 4 Ohm nominal load.
If two The 12 subwoofers are used, the wires for both speakers should be similar in length. If the bass response seems
low, there may be a polarity problem between the two subwoofers, with the sound waves from the two subwoofers
canceling each other out. In this case check the correct polarity of all wiring including Speaker wires, XLR signal cables,
DSP settings etc.
To connect the speaker terminals on the terminal cup located behind the The 12, unplug the phoenix connector for easier
termination. Insert the bare end of the wires (max 12GA (3,3mm2) making sure to observe the correct polarity. The wire
from the amplier’s negative (-) terminal is to be connected to the negative (-) terminal on the terminal cup, and the
amplier’s positive (+ ) terminal is to be connected the positive (+) terminal on the terminal cup.
The 12 subwoofer is specically designed for use in conjunction with the AIA DSP ampliers. It is optimized to oer the
best dynamics and frequency response which is specially designed to use the proprietary The 12 tuning le. When using
a dierent amplier with the The 12, contact your certied AIA installer or calibrator for correct adjustment and loading
of the tuning le. Connect your main receiver or processor’s LFE subwoofer output to the line-level input on your sub-
woofer amplier. When using two or more subwoofers, use the correct number of amplier channels (these can be mono
or multi-channel ampliers) each connected to the appropriate output on your processor or receiver. Then connect the
positive and negative terminals for each amplier channel to a single The 12 subwoofer system.
USING ONE The 12 SUB Pro Passive Sealed Shallow SUBWOOFER WITH A SINGLE AMPLIFIER CHANNEL
Single Subwoofer
Rooms with a single row of seating Rooms with multiple seating rows
Video Screen Video Screen
Video Screen
When using subwoofers within the limited con-
nes of a typical home theater room, the bound-
ary reections, standing waves, and resonant
absorbers within the room will create peaks and
dips in the bass response that can vary greatly
depending on where the listeners are seated in
the room. A listener located in one place may
hear an overabundance of several bass frequen-
cies created by a response peak at the location,
while another listener only a few feet away may
hear far less bass at those frequencies but have
other peaking or dipping frequencies at that
location.
The locations of subwoofers within the room
(along with the room’s dimensions) also have
a profound eect on the creation of these bass
response peaks and dips. Careful subwoofer
placement alone cannot compensate for all bass
response peaks and dips throughout a room,
but careful subwoofer placement can eliminate
or signicantly reduce the largest response dips.
It is important to reduce response peaks and
dips throughout the room as much as possible
via proper subwoofer placement because equal-
ization cannot be used to compensate for large
response dips, only peaks. For example, using
equalization to restore a 13dB response dip re-
quires that the subwoofer amplier deliver 20
times the power at that frequency if it solves the
problem at all, which it does not in most cases.
This can quickly overdrive the subwoofer am-
plier into clipping, which will signicantly de-
grade audio quality and reduce the overall out-
put capability. In almost any room, placing the
subwoofers in corners will produce the fewest
large bass response dips and will also produce
the largest bass response peaks. We strongly
recommend that you install multiple subwoofers
regardless of the room size. A single subwoof-
er will result in the least consistent bass per-
formance throughout the room. Using multiple
subwoofers can reduce some room modes at
the various listening locations, resulting in much
more consistent low frequency throughout the
listening area. It is often impossible to place a
single subwoofer in a way that large response
dips, which cannot be corrected via equalization,
are not present. The use of two or more proper-
ly placed subwoofers almost always reduces or
eliminates such response dips. Common place-
ment formulas such as placing the subwoofers at
¼ points rarely work in practice. The best solu-
tion is to make high-resolution measurements
from the primary listening area while experi-
menting with speaker placement. Placing a sub-
woofer at the listening position and measuring it
from the potential installation positions around
the room – using acoustic reciprocity – can help
speed nding the best position(s). Measurement
at the best positions in this manner will produce
the measurements with the fewest and smallest
peaks and dips in the response.
Video Screen
ELE VAT E YOUR SOUND
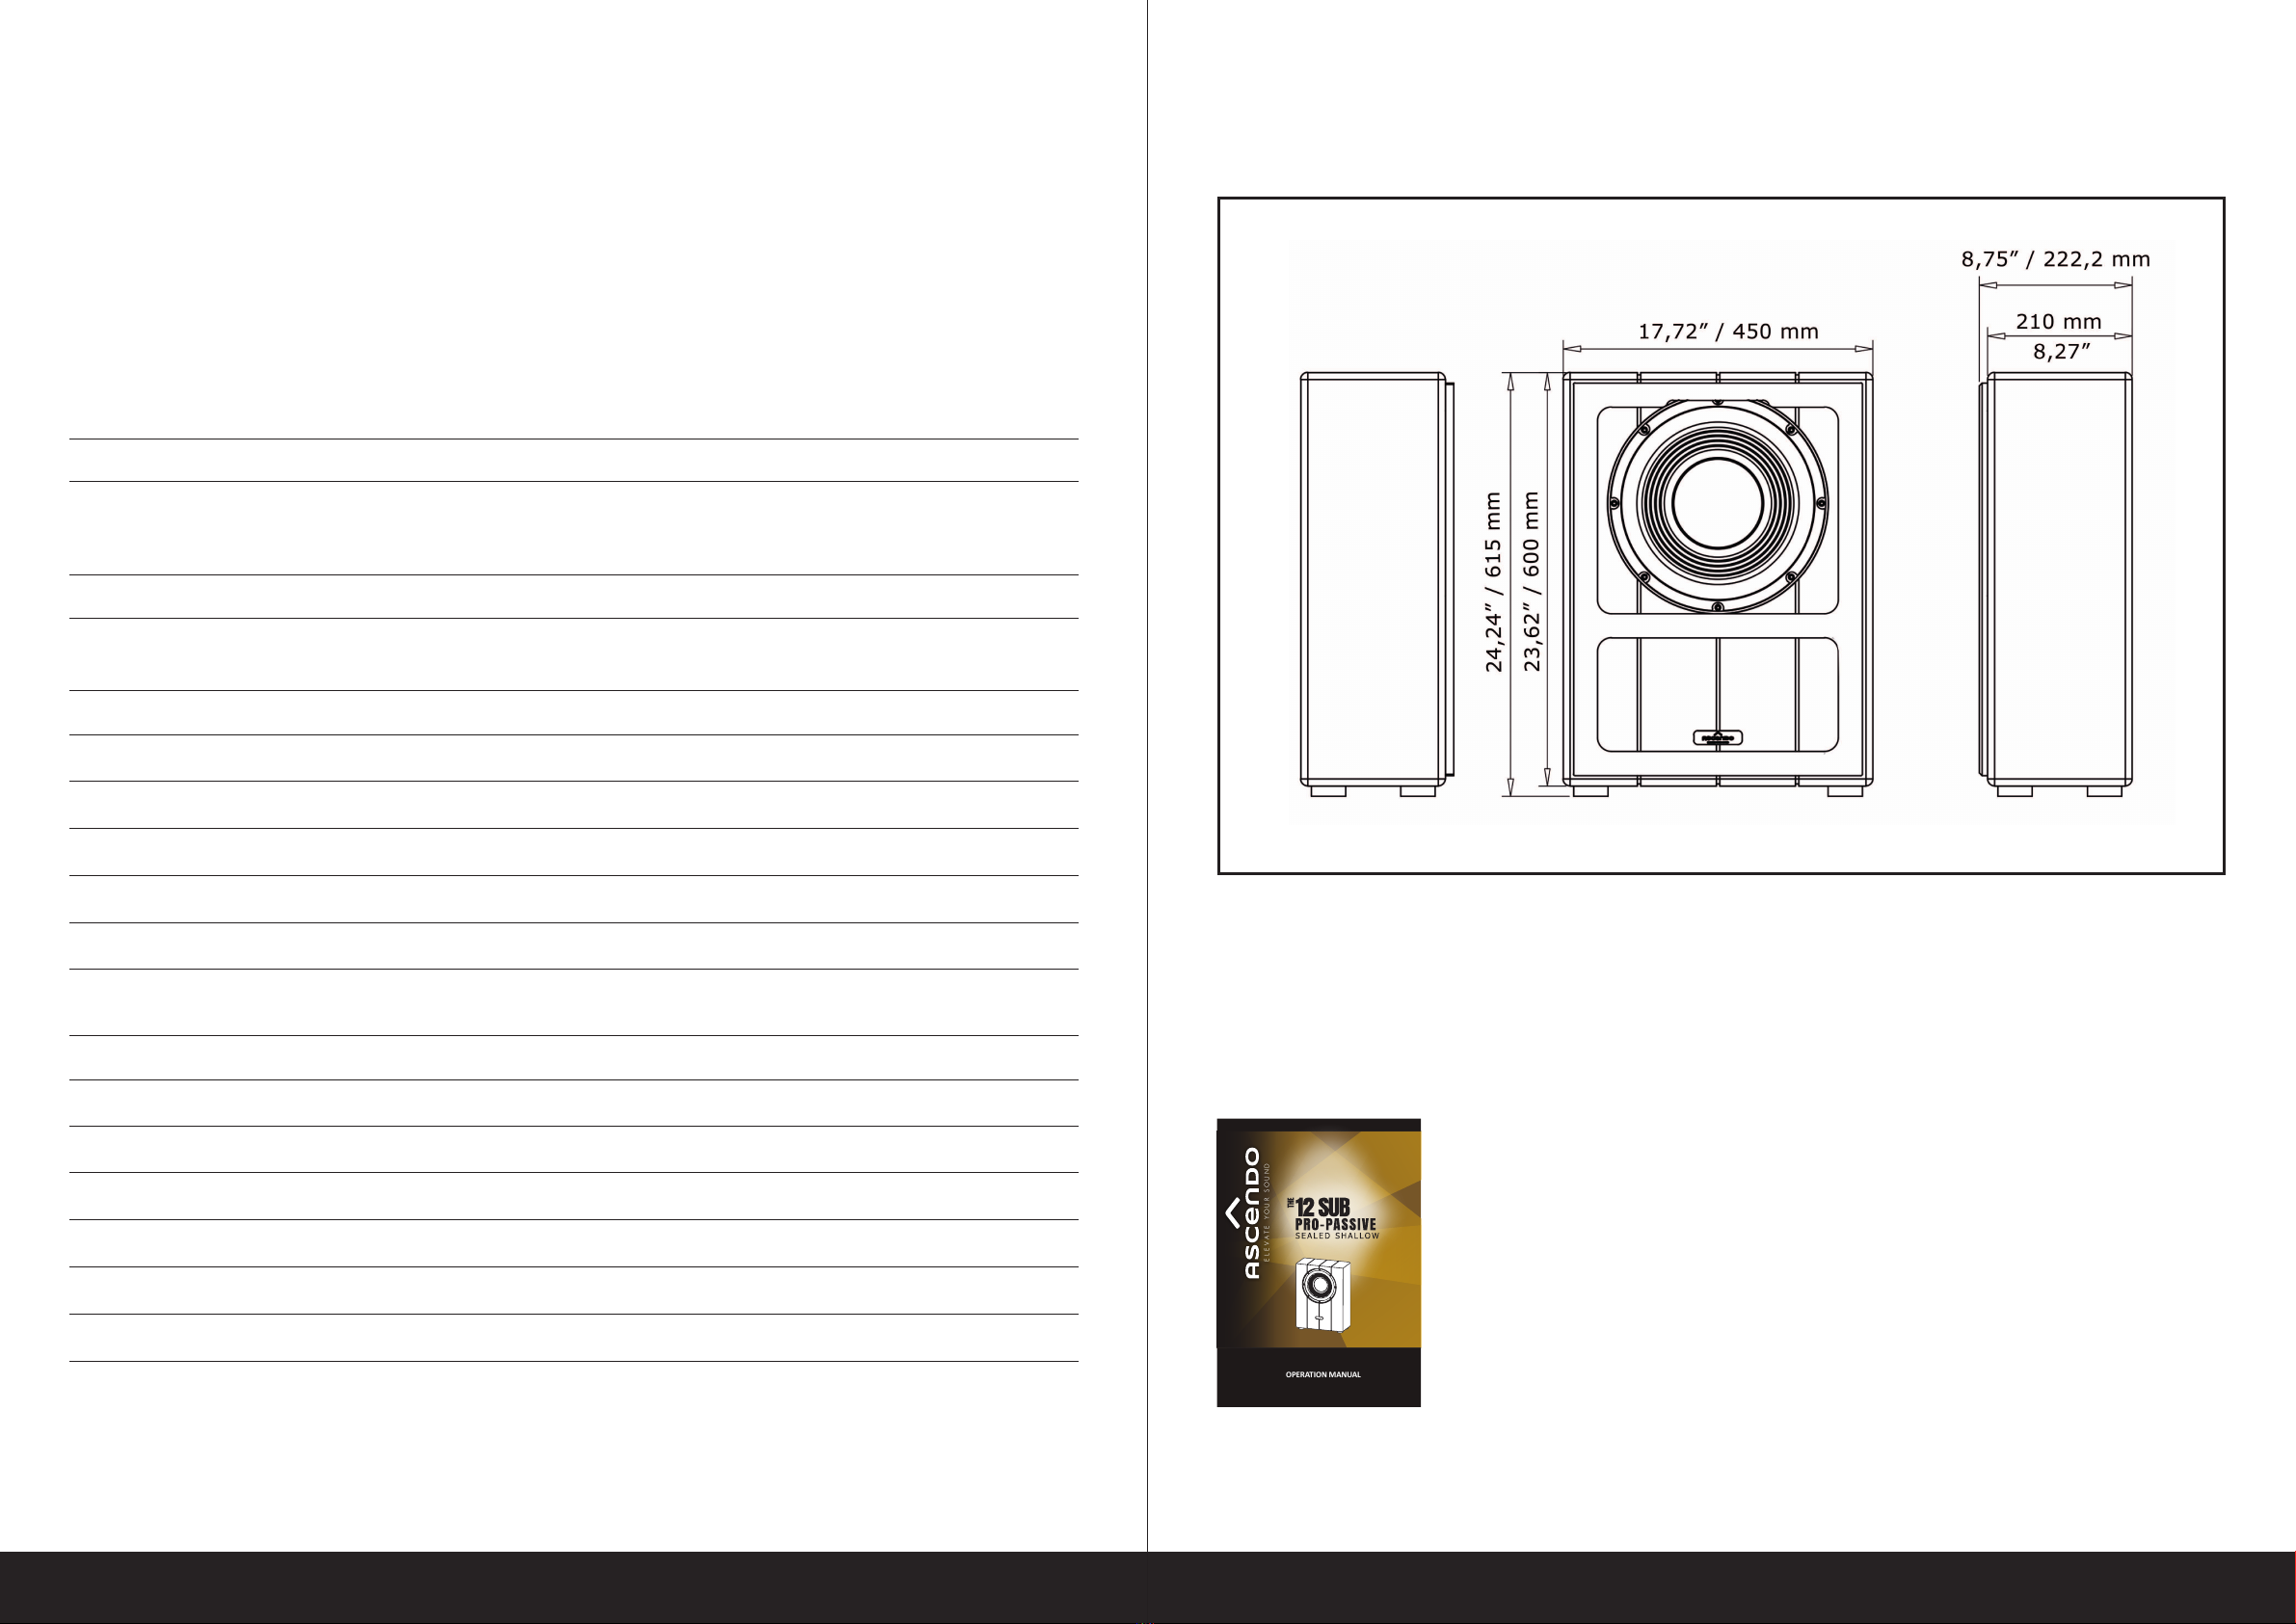
THE 12 SUB PRO Passive Sealed Shallow
Wiring Diagram
with a single amplier channel