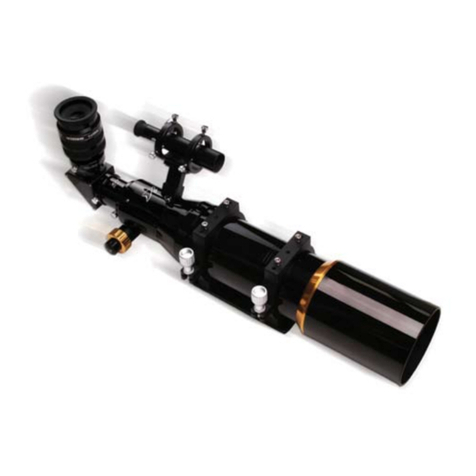
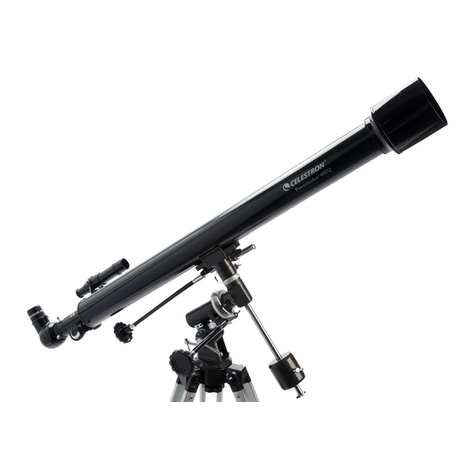
Ascension 80ED User manual


© Opticstar Ltd / Ascension 2007-2014
1

© Opticstar Ltd / Ascension 2007-2014
2
PLEASE READ THIS FIRST!
TAKE CARE WHEN HANDLING YOUR
TELESCOPE. TELESCOPES CAN BE LARGE
AND HEAVY AND CAN CAUSE DAMAGE IF
NOT HANDLED CORRECTLY. ALWAYS SEEK
ASSISTANCE IF IN DOUBT.
TO GET THE MOST OUT OF YOUR
EQUIPMENT TAKE THE TIME TO READ
THROUGH THIS MANUAL.
NEVER LOOK AT THE SUN WITHOUT THE
CORRECT EYE PROTECTION. LOOKING AT
OR CLOSE TO THE SUN WITH OR WITHOUT
AN OPTICAL INSTUMENT AND WITHOUT
PROTECTION WILL PERMANENTLY DAMAGE
YOUR EYES. CHILDREN SHOULD ALWAYS
BE SUPERVISED BY A RESPONSIBLE ADULT
WHILE OBSERVING.

© Opticstar Ltd / Ascension 2007-2014
3

© Opticstar Ltd / Ascension 2007-2014
4
Introduction
Congratulations on the purchase of this premium Ascension apochromatic
refractor telescope. Your new Ascension refractor is very well suited for
both astronomical and terrestrial observation. Its Japanese FCD1 triplet
objective lens, solid construction and medium focal ratio make it also ideal
for deep sky imaging. The 80mm Ascension refractor in particular is
extremely well suited as a wide angle imaging instrument, guide scope or
spotting scope.
Please read through the manual to familiarise yourself with your telescope
so that you can get the best use of the equipment. This manual details the
setting up, operation, specification and optional accessories of the
Ascension triplet air-spaced apochromatic refractors.
Parts
Depending on the model the following items are included with the telescope
unless stated otherwise.
Ascension 80mm F6 Refractor
Optical tube assembly with 1:10 Precision focuser and dovetail
2” drawtube with 1.25” adapter.
High quality 2” dielectric diagonal (99%reflectivity)
Two 1.25” wide-angle 70O, high-contrast eyepieces (10mm and 20mm)
High quality telescope and accessories aluminium case
Twenty page printed manual
Interferometer report with HP models (optional with Premium models)
Ascension 80ED triplet refractor

© Opticstar Ltd / Ascension 2007-2014
5
Ascension 102mm F7 Refractor
Optical tube assembly with 1:10 Precision focuser
2” drawtube with 1.25” adapter.
Pair of mounting rings with carry handle and mounting dovetail
High quality 2” dielectric diagonal (99%reflectivity)
Two 1.25” wide-angle 70O, high-contrast eyepieces (10mm and 20mm)
High quality illuminated 8x50mm finder scope with bracket
High quality telescope and accessories aluminium case
Twenty page printed manual
Interferometer report with HP models (optional with Premium models)
Ascension 127mm F7.5 Refractor
Optical tube assembly with 1:10 Precision focuser
2” drawtube with 1.25” adapter.
Pair of mounting rings with carry handle and mounting dovetail
High quality 2” dielectric diagonal (99%reflectivity)
Two 1.25” wide-angle 70O, high-contrast eyepieces (10mm and 20mm)
High quality illuminated 8x50mm finder scope with bracket
High quality telescope and accessories aluminium case
Twenty page printed manual
Interferometer report with HP models (optional with Premium models)
Mounting the Telescope
The telescope can be mounted on a
telescope mount as illustrated in the
picture on the left.
Depending on the weight of your
telescope a light mount will be required
for the 80mm, a medium/heavy mount
will be required for the larger 102mm
and 127mm refractors. When the
102mm and 127mm optical tubes are
used as part of a complete imaging
system a heavy mount is recommended
with a capacity of 18Kg for the 102mm
and 20Kg for the 127mm tube.
A complete imaging system would consist of a main imaging telescope,
guide telescope, cameras and platforms.

© Opticstar Ltd / Ascension 2007-2014
6
Using the Finder-scope
If your telescope includes an Ascension 8x50 finder scope please read this
section to understand how to get the most out of it. The Ascension finder
scope is a high example showing a desirable right way-up image when you
look through it.
Finder-scope Assembly
To adjust the finder-scope you will need to focus the cross-hair as well as
the finder-scope itself.
To focus the crosshair first separate the dioptre-focusing-ring from the
dioptre-locking-ring by holding one firmly and turning the other, loosen them
enough to allow a good adjustment range. Look through the finder-scope
and adjust the dioptre-focusing-ring so that the crosshair looks sharp, finally
tighten the dioptre-locking-ring against the dioptre-focusing-ring.
To focus the finder-scope separate the finder-scope-focusing-ring from the
finder-scope--locking-ring by holding one firmly and turning the other, loosen
them enough to allow a good adjustment range.
crosshair
dioptre
focusing ring
dioptre locking
ring
finder-scope
focusing ring
finder-scope
locking ring
collimating
thumb-screws
bracket
blue/red bracket
support collar
bracket holding
screw
protective
cap
protective
cap
illuminator

© Opticstar Ltd / Ascension 2007-2014
7
Look through the finder-scope and adjust the finder-scope--focusing-ring so
that you can obtain a sharp view, finally tighten the finder-scope-locking-ring
against the finder-scope-focusing-ring.
Finder-scope Illuminator
The Ascension finder-scope uses a red LED
variable illuminator to light up the crosshair.
You can adjust the brightness of the built-in
LED by turning the brightness-adjustment-
knob on top of the illuminator.
Always remember to switch of the illuminator
to save on batteries at the end of a session.
You can switch off the illuminator by turning
the brightness-adjustment-knob clockwise
until the LED goes off, this will be confirmed
by an audible click.
The illuminator requires two 1.5V LR41
batteries to operate. These can be found at
camera shops and electronics suppliers.
Finder-scope Alignment
To assemble the finder-scope first remove the illuminator by unscrewing it
form the finder-scope. Slide the finder-scope in its bracket as shown in the
above picture and gently tighten the three thumb screws to hold it in place,
take care not to over tighten the thumbscrews. Screw the illuminator back in
place.
Make certain that you first tighten collar locking thumbscrew, this is a second
large thumbscrew on the other side of the supporting collar. Mount the
assembled finder-scope to the telescope and secure it in place by tightening
the bracket holding screw collar holding screw. Attach the telescope to a
mount/tripod.
To align the finder-scope please perform steps 1 through 9 as outlined
below, we recommend that the telescope is first aligned during daytime.
Please note that view through the main telescope would appear mirrored
and/or flipped.
LR41 1.5V
brightness
adjustment
knob

© Opticstar Ltd / Ascension 2007-2014
8
1. Attach the finder-scope to the telescope.
2. Mount the telescope to a photographic tripod or astronomical mount.
3. Place a low to medium power (i.e. 20mm) eyepiece in the telescope’s
diagonal. Secure the eyepiece in place.
4. Loosen the movement locks of your mount/tripod, this will allow the
telescope to move freely.
5. Point the telescope to a distant land object (i.e. the top of a lamp post,
tree or chimney). You will notice that the image will appear mirrored
and/or upside down through the telescope, this is normal for an
astronomical telescope. The image will by correctly oriented when
looking through the finder scope.
6. Turn the focuser knob to bring the target in focus and centre the object
in the eyepiece.
7. Re-tighten the tripod/mount movement locks so that the telescope
remains stable during the finder-scope alignment procedure.
8. Look through the finder-scope.
9. Use the three collimating thumbscrews on the finder scope’s bracket to
align the finder scope so that the cross-hair is precisely over the same
object in the eyepiece.
The finder-scope is now aligned to the main telescope. You can check and
refine alignment on a night sky object like a star if required. If you do not
use a diagonal you may need an extension tube to reach focus.
Telescope
view
Finder-scope
view,
aligned
Finder-scope
view,
not aligned

© Opticstar Ltd / Ascension 2007-2014
9
Setting-up your Ascension Refractor
If you are new to observing it is advisable to first use the telescope during
daytime to learn how it operates. First mount the telescope on a tripod or
telescope mount. Once the optical tube has been mounted and has been
balanced attach the finder-scope, then attach a diagonal and low/medium
power eyepiece i.e. 20mm. Make certain that all parts are secure and
remove the lens cap by carefully unscrewing it taking care not to hit the lens
behind the cap.
Now it is a good to extend the telescope’s dew-shield. If your telescope has
a retractable dew-shield pull the dew-shield slowly and away from the
telescope using both hands.
If your telescope has a removable dew-shield un-tighten the two silver
thumb-screws on the periphery of the dew-shield and carefully pull the dew-
shield slowly and away from the telescope using both hands. Reverse the
dew-shield and place it over the front of the telescope. Use the two silver
thumb-screws on the periphery of the dew-shield to secure it in place.
Simply choose a distant target to observe, like a large building or large tree.
Point the telescope towards the target so that it roughly lines up with the
target.
Look through the finder-scope, if you have not aligned it already this is a
good time to do so before you proceed. Move the telescope until the target is
visible in the finder-scope and positioned under the cross-hair.
Once the object is lined up in the finder-scope you will be able to observe
the target through the telescope’s eyepiece. Look through the eyepiece, turn
the focuser knob to bring the target into focus.
Terrestrial Observation
You can use the telescope for terrestrial observation for which you need a
prism diagonal, otherwise the image will appear mirrored and/or upside
down. In astronomy it is not relevant if the Moon is say upside down, what is
important is to capture as much light as possible and image correctors take
some of this valuable light away.
Astronomical Observation
When observing at night your first target should be the Moon as it offers a
wealth of detail, it is large, bright and easy to locate. Spend some time with
the Moon, high magnifications will show a wealth of detail. You will see
mountain ranges, craters and evidence of volcanic activity when the Moon
was mainly composed of molten rock. You will need a neutral density filter to

© Opticstar Ltd / Ascension 2007-2014
10
observe the Moon, a 13% transparency filter is recommended for medium
magnifications, a 25% for high magnifications.
Once confident with the Moon the planets would be the next target. Planets
are easy to identify as they are bright and do not twinkle unlike stars do.
Please note that when a planet is out of focus and it becomes very dim you
may not be able to see it.
Use the finder-scope to place the planet in the centre of the field of view,
then look through the eyepiece and use the telescope focuser to bring the
planet into focus. Planets that are easy to observe include Venus, Mars,
Jupiter and Saturn. You will get the most out of the planets at high
magnifications.
Even at high magnifications planets will look like peas, they will however
reveal lots of detail to the trained eye. Jupiter will show banding and the Red
Spot and you will be able to observe the Galilean Moons.
Saturn is probably the most exciting planet to observe through a telescope.
While surface detail is subtle its rings are a unique sight and you should be
able to observe the Cassini division which appears as a black gap between
the rings.
Mars also known as the Red planet will reveal a good amount of detail when
close to Earth. Its orange colour is prominent and surface markings are
visible as are the Polar caps when present.
Venus can be observed early in the morning before dawn or just after
sunset. Venus appears quite large in the telescope but its atmosphere will
hide any surface detail.
Deep sky observation greatly depends on the prevailing sky conditions. City
lights, low sky transparency and the presence of the Moon will greatly affect
what you can see through the telescope. From a dark site and under
favourable conditions you will be able to see several deep sky objects
including star-clusters, galaxies, nebulae and comets. Such objects with the
exception of stars will appear as feint clouds of matter in monochrome,
human eyes are not able to pickup colour. Cameras on the other hand can
reveal colour and considerable amounts of detail.
Good deep sky objects to look for with a small telescope include the Orion
Nebula, the Trifid nebula, the Ring nebula, the Andromeda Galaxy and a
number of star-clusters among various other objects.

© Opticstar Ltd / Ascension 2007-2014
11
Observation Skills
In general it is easier to locate a target with a low power eyepiece i.e. 25mm.
Once the target has been located centre it in the field of view before
replacing the 25mm eyepiece with a higher power one and so on.
There are many factors that will affect the quality of the image through the
eyepiece; such factors include sky quality in terms of the level or light
pollution, sky transparency and the presence of the Moon if you are
observing deep sky objects like galaxies and nebulae. If you use an
equatorial mount make certain that the telescope has been balanced and
that all screws are reasonably tight.
You will always be limited by the type, size and the optics of your telescope
in what you can see. However there are other important factors to consider
that can substantially improve the experience. Let the optics cool down for
best results, this varies depending on the size and type of the telescope but
typically an 80mm triplet refractor like the 80mm will need around 30 minutes
to properly cool down, the 102mm 60 minutes and the 127mm around 90
minutes. Having said that the telescope will offer reasonably good views at
half the quoted times.
Please keep in mind that targets near the horizon will not look as sharp,
targets near the zenith will look substantially sharper. Avoid setting your
telescope on concrete; wood and grass are better as they do not release
heat. Your line of sight should ideally not pass just over a warm house as the
rising heat will substantially affect the quality of the image.
When conditions are not favourable the maximum useful magnification for
most scopes will be around 25-35 times per inch of aperture. Otherwise high
quality apochromatic refractors like the Ascension ED triplets will offer the
highest magnifications per inch of aperture under favourable conditions to a
maximum of around x100 per inch. Such conditions are rare in the UK.
Dew shields are useful as they cut stray light entering the telescope; they
also protect objective lenses from dew building up on the optics. The
Ascension triplets come with dew –shields that should always be used.
Observing the Sun
Special precautions need to be taken when observing the Sun with a
telescope. A full aperture filter must be used to dramatically reduce the
amount of light that enters the telescope, only use filters designed to be
used for Solar observation with a telescope. A second filter can also be used
at the eyepiece end in conjunction with a full aperture Solar filter to increase
the level of surface detail i.e. Solar Continuum Filters. Such filters work very

© Opticstar Ltd / Ascension 2007-2014
12
well with digital cameras in particular and will reveal additional detail
otherwise not visible to the human eye.
Always check the integrity of any Solar filter before using it with any
telescope. A hair-line scratch on a filter is enough to damage your eyesight.
If in doubt seek professional advice and never point a telescope towards the
Sun without a suitable Solar filter.
Visual Accessories
Depending on what came with your telescope you may need a number of
extra eyepieces which will provide a wider range of magnifications. For
example high magnifications are required for the Moon, planets and
planetary nebulae. Low magnifications are useful for observing extended
objects and for locating targets. Ninety degrees star diagonals are necessary
as they make astronomical observation comfortable. For terrestrial
observation forty-five degrees prism diagonals are preferred, such diagonals
will also offer a corrected view unlike star diagonals.
A Moon filter will be necessary to observe the Moon with almost all
telescopes including the Ascension refractors, light pollution filters can also
help by reducing sky glow and incoming light from other local light sources.
Imaging Accessories
When imaging with a camera attached to the telescope infra-red (IR) block,
nebula (UHC) and narrow-band filters (O3, H-alpha, S2) are recommended
depending on requirements.
For colour imaging an IR block filter will work well to decrease the levels of
background noise and reduce star bloating. Alternatively a UHC photo-visual
filter can be used to block unwanted light wavelengths and effectively act as
a light pollution filter.
When imaging in monochrome Ultra-Violet (UV) and IR
blocked LRGB filters will allow you to create composite
images. In addition narrow-band filters can be used to
create images that remind of the ones captured by the
Hubble telescope. However a lot of experience and time
is required to produce high quality pictures when
imaging in monochrome.
Ascension triplet ED refractors are ideal instruments for wide field deep-sky
imaging due to their high quality apochromatic ED Japanese triplets, solid
structure and Precision Focusers. They are very well suited for deep sky
imaging when coupled with a camera like the Opticstar DS336 XL TEC-
DS-616C XL

© Opticstar Ltd / Ascension 2007-2014
13
cooled camera which supports long exposures in
conjunction with very low noise levels.
The small camera pixels of the DS336 XL closely match
the focal length of the 80mm Ascension refractor to
produce unusually high definition images.
The 80mm Ascension refractor can also be used as a guide scope for auto-
guiding motorised/GOTO telescope mounts in conjunction with an
appropriate guide camera and auto-guide controller. Complete auto-guide
kits include the Opticstar AG-130M CA, AG-131M CA and AG-131C CA.
Such kits consist of a guide-camera, auto-guide controller, cables, adapters
and software to auto-guide with.
The 102mm and 127mm Ascension triplet ED refractors are excellent for
observing at any magnification and make excellent imaging telescopes when
coupled with a high quality camera like the 3.3mp Opticstar DS-336 XL and
especially the large-format 6mp Opticstar DS-616 XL.
The Ascension triplet refractors can be used with the Ascension optical
corrector to produce a flat field of view free of any distortions. The Ascension
corrector has been designed specifically for the Ascension ED triplet
refractors and will also work well with other F6 to F7.5 triplet apochromatic
refractor telescopes.
An adapter may be needed to attach the corrector to a camera, filter-wheel
or other imaging accessory.
OPTICSTAR
DS-616 XL
OPTICSTAR
PL131C CA
C to T-thread
adapter
Ascension corrector
T-thread (M)
2-inch nosepiece
DS-336 XL

© Opticstar Ltd / Ascension 2007-2014
14
APPENDICES

© Opticstar Ltd / Ascension 2007-2014
15
APPENDIX A: Magnification & Field of View
Appendix A outlines the most important aspects of a telescope in terms of its
focal length and focal ratio. These values are important as they dictate
magnification, exposure times when imaging and fields of view.
Practical Magnification
The focal length of a telescope can be calculated by multiplying the focal
ratio of the telescope with its aperture i.e. an f6 refractor with 80mm of
aperture will have a focal length of 480mm (6x80=480).
In a telescope, magnification is the number of times an object appears larger
to the observer when compared to what the observer can see with the naked
eye. There is no real limit to the amount of magnification possible in a
telescope, but practical magnification is limited by the optical system and is
normally around 35-40 times per inch, and up to 100 times per inch of
aperture for very high quality apochromatic refractors.
Maximum useful magnification from a city with most telescopes is around
x35 per inch of aperture, this is due to light pollution, thermal currents and
other environmental factors. Expect much higher magnifications from a dark
site when using the same telescope.
Eyepieces and Magnification
The actual magnification capability of a telescope will vary depending on the
eyepiece attached to the telescope. Magnification can be changed by simply
exchanging eyepieces.
Magnification depends on two factors. The focal length of the telescope and
the focal length of the eyepiece used. To calculate the magnifying power an
eyepiece gives, simply divide the focal length of the eyepiece into the focal
length of the telescope.
Magnification = telescope’s focal length / eyepiece’s focal length = F/f
For example a telescope with a focal length of 480mm and an eyepiece with
a focal length of 5mm will magnify its target 100 times (480/5=96).
O
f
F
FOCUSER
FOCUSER DRAWTUBE
OBJECTIVE LENS
EYEPIECE
INCOMING LIGHT

© Opticstar Ltd / Ascension 2007-2014
16
Barlow lenses can be employed with an eyepiece to increase magnification.
To calculate the magnifying power of an eyepiece in conjunction with a
Barlow lens, divide the focal length of the eyepiece into the focal length of
the telescope and multiply the result by the Barlow’s magnifying power.
Magnification = telescope’s focal length / eyepiece’s focal length x Barlow power
For example a telescope with a focal length of 1000mm used with an 10mm
eyepiece and x2 Barlow will offer a magnification of x200 (1000/10x2=200).
Focal Ratio
The focal ratio represents the speed of the telescope’s optics; the focal ratio
can be calculated by dividing the focal length by the telescope’s aperture.
Telescopes with faster/shorter focal ratios like the Ascension 80mm F6 ED
triplet benefit from wider fields of view, and a subsequent increase in
brightness and image resolution. Fast f/4 focal ratios are generally best for
lower power wide field observing and deep space imaging. On the other
hand slow f/10 focal ratios and above are better suited to higher power lunar
and planetary observation as well as high magnification imaging in general.
For example when imaging extended deep sky objects like nebulae and
galaxies an f/4 telescope will capture four times the mount of light in the
same time period when compared to a telescope with an f/8 focal ratio. The
same does not apply to single point light sources like stars where aperture
alone dictates what you can see.
Field Of View
The field of view is the portion of the sky that is visible through the telescope
and depends on the focal ratio of the telescope and eyepiece used. In
general higher magnifications result in smaller fields of view.
Short focal ratios (f/4) with wide fields of view greatly favour deep sky
viewing and imaging, where focal ratios of f/10 and above are better suited
for planetary and Lunar observation. Focal ratios in between these values
(f6) may be considered appropriate for general use. It is possible to calculate
the field of view of a telescope given a certain eyepiece using the following
formula.
where Magnification = Telescope Focal Length / Eyepiece Focal Length
Consider a telescope with a focal length of 500mm and a 40mm eyepiece
with a 70 degrees Apparent Field of View.
Magnification = 500/40 = 12.5 ~ Actual Field of View = 70/12.5 = 5.6 degrees

© Opticstar Ltd / Ascension 2007-2014
17
APPENDIX B: Optics
Optics Care
Lenses and corrector plates can be treated as
camera lenses for cleaning purposes. What
makes them difficult to clean is the large size of
such optical elements.
The general rule is not to touch the optics and
only clean them when absolutely necessary; dust
on the objective lens could be removed with very
gentle strokes of a camel hair brush available at
camera shops.
Another way to remove dust from an optical surface is with compressed
photographic air which is free of contaminants. Be careful and always make
certain that the nozzle is propellant free. Hold the compressed air-can the
right way up as otherwise they can discharge liquid propellant which will
stain the optics. Stains on optics can be removed with optical cleaners used
to clean photographic lenses. Always use compressed air at very low
pressure as contaminants that may have landed on the lens could scratch
the glass surface, never rush the cleaning process.
Condensation
When temperature drops rapidly condensation may form on the objective
lens of the telescope. This happens over time and its effects become
noticeable as condensation builds up and the target becomes dimmer and
appears as if it is out of focus.
Condensation can be removed from the optics with a hair-dryer set to ‘cold’.
Otherwise bring the telescope inside and let condensation to dissipate
before putting on the cover. Place the telescope on a table and not on the
floor where most of the dust can be found. Never try to remove condensation
using a cleaning cloth or similar, this will most likely smear the optics.

© Opticstar Ltd / Ascension 2007-2014
18
APPENDIX C: The Focuser
Focuser Adjustment
The Ascension comes with a 1:10 dual-speed focuser
that has been adjusted at the factory. In certain cases it
may be necessary to regulate the tension to improve
performance by adjusting the two silver thumb-screws
below the focuser. This may be required if the focuser
was adjusted at room temperature and then used in sub-
zero temperatures.
Also as the focuser is worked-in over time surfaces smoothen out and the
focuser may need slight re-adjusting. When done for the first time this
procedure requires patience and time.
We recommend only adjusting the focuser beyond simply re-adjusting the
two silver thumb-screws, as outlined below, if there was a real need. The
focuser has been designed to be fine-tuned externally by the user.
It is also possible to re-adjust the
internal clutch of the focuser
mechanism to regulate the tension
on the focuser drawtube for which
the clutch will need to be removed
for the adjustment to take place.
Please keep in mind that this is a
rather difficult procedure to
perform without experience and
the right set of tools.
To set the tension on the focuser drawtube follow the instructions below:
1. Remove all accessories from the telescope drawtube
2. Tilt the telescope to say 60 degrees and pointing to the sky
3. Loosen thumbscrew A
4. Loosen thumbscrew B
5. Tighten/adjust thumbscrew Bin very small increments till you obtain
the preferred focus tension
6. Attach a heavy accessory to the focuser like a 2-inch diagonal and
eyepiece.
7. Go to step 4and repeat the process until the tension is right.
8. Lightly tighten thumbscrew A until it comes in contact with the

© Opticstar Ltd / Ascension 2007-2014
19
The above procedure should resolve any focuser adjustment issues. Once
the correct tension has been set thumbscrew A can then be used to lock the
focuser in place as and when required.
The tension can be regulated further by adjusting the two sets of three
screws D1, D2 and D3. This is however needs a lot practice and experience
to get right.
To set the tension on the focuser drawtube follow the instructions below:
1. Loosen thumbscrews Aand B
2. Use a hex key to loosen the two larger
centre locking screws D1 on the top of
the focuser on either side
3. Adjust the two pairs of screws D2 and D3
on either side of the focuser in very small
increments until you obtain the preferred
focus knob tension
4. Use a hex key to tighten the two locking
screws D1
5. Screw Bback into place and adjust until
you obtain the desired tension on the
focuser’s drawtube as described earlier in
this document.
Acan then be used to lock the focuser in place as and when required.
Note that if you over tighten the screw pairs D2 and D3 the drawtube will
‘stick’, if the screws are too loose the drawtube will not hold in place.
Table of contents

