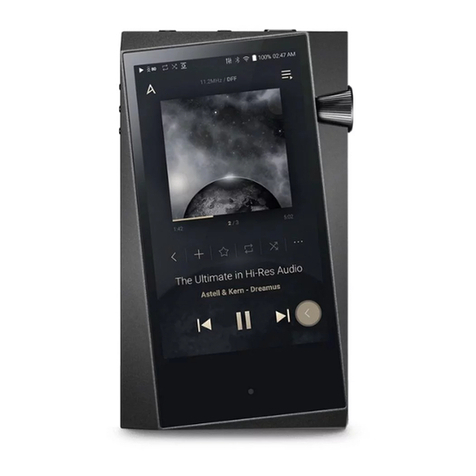
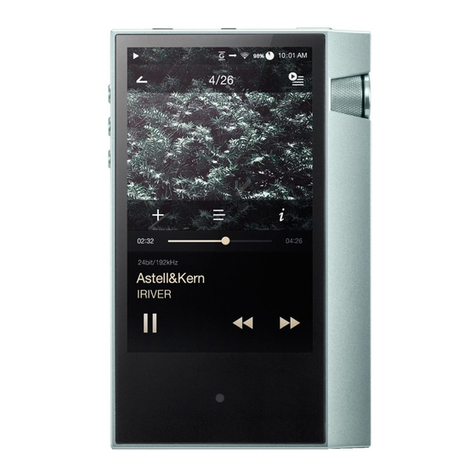
Astell & Kern PPE12 User manual

PPE12
INSTRUCTION BOOK
UserGuide

Package Contents
PPE12 at a Glance
Power Management
Connections Firmw
areUpgrade
02
03
04
06
11
Getting Started _01
BasicOperations
Home Screen N
otification Bar St
ore
AK Connect Listenin
g to Music PlaylistM
anagement USB DA
CInstallation CDRip
ping
UsingBluetooth
Settings
Connecting to a WirelessNetwork
EqualizerSetup
12
14
15
18
19
25
31
34
35
37
39
44
45
Using the Device _02
SafetyPrecautions Tro
ubleshooting Copyrigh
t Certifications Specifi
cations RegisteredTra
demarks Disclaimers
TechnicalSupport
48
49
51
51
52
53
53
54
Miscellaneous_03
CONTENTS

UserGuide
PPE12
microSD Card SlotCover
Micro-USB Cable
Leather Case & Protective Film: Protect the device and its
screen. The warranty for the leather case guarantees the qu
ality of theleather.
Micro-USB Cable: Connect the device to a computer or
charge the device.
Quick Start Guide:Basic overview of device functionality.
Warranty Card: The warranty card is required for customer
and technical support. Do not misplace the card.
User Guide:The User Guide can be downloaded from the Astell&
Kern website. [http://www.astellnkern.com/ > Support > Download].
MicroSD CardSlot Cover:Thecover is usedto protect themicroSD
card slotwhen notinuse.Itisinstalledon theproductby default.
Contents may be changed without prior notice to
improve the performance or quality of the product.
Package
Contents
ProtectiveFilm Quick StartGuide
& WarrantyCard
Getting Started 2

UserGuide
The appearance of the product as well as the printed and
engraved information may vary depending on the model.
PPE12at
aGlance
microSD
CardSlot Home Button
Earphones / Optical Port: Output sound to connected ear
phones. Music can be played back on a S/PDIF-capable ex
ternal device by using an optical cable.
Power: Turn the screen on and off.
Long press - Turn the device on and off.
Balanced Out: Output sound to earphones or headphones
that support balanced audio connections. Connect to an e
xternal audio device by using both the earphone port (grou
nd) and balanced audio port (LR) in conjunction.
Micro-USB Port: Connect to a computer or rechargethe
device.
Expansion Unit Balanced Out: Output sound to an expans
ion device that supports balanced audio connections. Previo
us/Rewind:Play the previous song or restart thesong.
Long press - Rewind.
LCD
Touchscreen
Volume
Previous/
Rewind
Play/Pause
Next/
Fast-Forward
Earphones / Optical PortPower
Micro-USB Port
Balanced
Audio Port
Power
BalancedAudio
PinMap
R- R+L+ L-
Getting Started 3

This device has an automatic shutdown feature to reduce batter
y consumption. The device will turn off after a defined period if t
here is no user input. [ - Power Saving - Automatic Shutdown] (
See p.42)
This device has an automatic timeout feature to reduce battery c
onsumption. The screen will turn off after a defined period of tim
e if there is no user input. [ - Power Saving - Screen Timeout] (S
ee p.42)
Turn the ScreenOn/Off
1. While the screen is on, press the [ ] button to turn off t
hescreen.
2. Press the [ ]button again to turn off the screen.
TurnOn/Off
1. Long-press the [ ]button to turn on thedevice.
2. Whilethe device is on, long-press the [] button to disp
lay a shutdown confirmation message.
3. Press [Confirm] to turn off the device.
Power
Manage-
ment
UserGuide
Play/Pause: Play or Pause a song.
Long press - Show the playback screen.
Next/Fast-Forward: Skip to the next song.
Long press: Fast-forward. L
CD Touchscreen: Display with touch control. Vol
ume: Control the volume by turning the wheel.
microSD Card Slot:Insert amicroSDcard and access itsfiles.
Home Button: Show the home screen.
Getting Started 4

Charging
1. Turn on the computer.
2. The device will charge automatically when connected to
a computer via the micro-USB cable.
UserGuide
ResetFunction
1. In cases of unexpected device failure or freeze, press the
[ ] button for 12 seconds to force a shutdown. The device
can be restarted after a shutdown.
The device can be restarted after a shutdown.
Resetting the devicewill not affect the storeddata or time settin
g.
Do not usethe reset functionwhile the product is in use. Doing s
o may corrupt the data on the device.
When charging via PC connection, the charging time may vary d
epending on whether the device is turned on or off. The maximu
m charge time with a 5V 2A charging adapter is 4 hours (Fully dis
charged battery,power off).
The device will not charge normally when using a fast-charge ad
apter that supports 5V and 9V together. Doing so may cause da
mage to thedevice.
If the device is on and/or being used while charging, the charge t
ime may be longer or the battery may not fully charge. Charging
with the deviceturned offis recommended.
The device may not charge if the PC or USB connection goes int
o standbyor sleepmode.
The device may charge slowly or not charge at all in extreme te
mperatures. Charging in a room-temperature setting is recomm
ended.
The built-in battery will gradually lose capacity over time accordi
ngto the number of charges/discharges.
Be sure to use a high-powered USB 2.0 port. A low-powered US
B port (e.g. keyboard or USB hub without a dedicated power sup
ply)willincreasethe charging time.
Do not use any micro-USB cable other than the one supplied wit
h the device.Doingso may cause a malfunction.
Getting Started 5
UserGuide
Connec-
tions Earphones/Headphones
1. Connect earphones or headphones to the earphonesport.
OR
Balanced Earphones/Headphones
1. Connect supported earphones or headphones to the
balancedport.
OR
Getting Started 6
Balanced Audio Device
1. Connect to an external audio device by using the
Earphones port and Balanced port inconjunction.
Earphones Port BalancedPort (LR)
(Ground)

Connecting to a Computer
1. Turn on the device and your PC.
2. Connect the device to your PC as a standard USB device
by using a micro-USB cable. [ - Connect USB]
Media Device (USB Drive):Transfer files from a PC to
thedevice.
DAC input: Listen to music located on a PC through the
device. (See p. 34)
UserGuide
Optical Out
1. Music can be played back on a S/PDIF-capable external
audio device by using an optical cable.
DSD format is converted to PCM when using OpticalOut.
Thevolumewillbe fixedat the maximum level.
Mac users need to download and install the MTP program from
the Astell&Kern website. [http://www.astellnkern.com Support >
Download]
For an optimal connection, quit any unnecessary programs befo
re connectingthe device to the computer.
Only use the micro-USB cable supplied with the device. Doing so
may cause a malfunction.
Getting Started 7

UserGuide
Copy Files/Folders to the Device
1. To copy files/folders from your computer, select the des
ired files/folders and drag & drop them into the USB de
vice.
Disconnecting from the Computer
1. Verify that all operations are completed before attempting
to disconnect the device from the computer.
Disconnecting the devicefrom the computer duringan operation
(e.g.file transfer)may corrupt data on the device.
Windows XP users require Service Pack 2 and Windows Media
Player 10 to be installed for the computer to recognize the USB
device.
Download necessary Service Packs and Windows Media Player f
rom the Microsoft website. http://www.microsoft.com
Getting Started 8

Make sure that the micro-USB cable is securely connected. Not
e that removingthe micro-USB cable or turningoff the deviceor
computerduringa filetransfer maycorruptdata onthe device.
Filetransferspeedsmaybeaffecteddependingonthecomputer
and/or OSenvironment.
UserGuide
Insert/Remove a microSDCard
1. Refer to the diagramand
gently insert a microSD
card into the microSD c
ardslot.
Getting Started 9
Delete Files/Folders on the Device
1. Right-click the desired file/folder,and then select [Delete].
2. Select [Yes]in the [Confirm File/FolderDeletion]window
to delete the selected file/folder.

UserGuide
Maximum supported microSD card capacity:128GB
Notes on inserting128GB microSDcard.
Do not force the microSD card intothe slot. Doingso may
cause damage to the deviceand/or microSD card.
Do not repeatedlyinsert/remove the microSDcard.
If the microSDcard is improperlyinserted,it may become
immovableor cause damage to the device.
Notes onremovinga microSDcard
Be sureto safely unmountand remove the microSD card from
the device.Not following the proper procedure may corrupt da
ta and cause seriousdamage to thesystem.
Do not removethe microSDcard whileit is inuse.Doingso m
ay cause data corruption/deletion, malfunction,anddamage to
the microSDcard.
Miscellaneous
If the deviceis unableto recognize the microSD card and/or
malfunctions, format the memory card before use. We reco
mmend usingthe FAT32format.
Using microSDcards other than the recommended brands
may cause device malfunction.
A microSDcard is not included with thisdevice.Please
purchaseseparately.
Recommended microSDCards
Brand : SanDisk,Transcend
2. To safely remove a microSD card,
select [Safely remove SD card] fr
om the Notification Bar or select [
Unmount SD card] from [ -Syste
mInformation].
3. Gently press the microSD card
to release it from theslot.
Getting Started 10

Refer to page 44 of the manual for more information on connecti
ng to a wirelessnetwork.
The firmware upgrade may not initialize if the battery level is too
low.(A minimum battery levelof 50% is required.)
Moving to another screen during a file download will cancel the
download.
Do not disconnect from the wireless network while downloading
a firmware upgrade. Doing so may cause data corruption and/or
damage to thesystem.
If an error occurs or the notice in the Notification Bar disappears
during an upgrade, download the firmware update again through
[ - Update - System Update].
UserGuide
Wi-Fi Update / OTA(Over-the-Air)
1. Connect to a wirelessnetwork.
2. When a new firmware version is available,the screen will
display a Firmware Update Guidewindow.
3. Select [Update] and choose the items for update.
4. Follow the on-screen instructions and proceed with the
firmwareupgrade.
Firmware
Upgrade
Getting Started 11

Topreventdamage, do not use a sharpobject or use excessive f
orce when touchingthe screen.
The[Home] buttonon the AK380 is pressure-sensitiveand can b
e operated with lightpressure.
Basic LCDTouchscreen
Operations 1. This device featuresan LCD touchscreen that allows you t
o perform operations bytouch.
Interact with the device by touching the screen to access
variousfeatures.
UserGuide
Home Screen
Using the Device 12
Return to the Home Screen
1. Press the [Home] button at any time to return to the
HomeScreen.

UserGuide
Navigating Up/Down in a List
1. Scroll through the list by dragging
the list screen [up] and [down].
Using the Device 13

UserGuide
Currently playing song information.
Launches AK Connect.
View the list of songs by different
searchoptions.
1 Current Song
2 AK CONNECT
3 Search Options
1
2
3
Home
Screen
Thesearchoptionscan be long-pressedand draggedtochange
theirlocations.
Using the Device 14

UserGuide
8
9
10
11
12
13
14
15
16
17
3
4
5
6
7
Notification 1
Bar
2
Using the Device 15

UserGuide
Press [ ] to turn Wi-Fion
oroff.
Press [ ] to turn Bluetooth
on oroff.
Press [ ] to turn the EQ o
n or off. The most recent EQ s
ettings are applied by default.
Press [ ] to turn Gapless
Playback on oroff.
Turn Line Out on oroff.
Turn Wi-Fi speakers on or off.
(Must be on the same network.)
(The icon will become enabled
whenAK Connect isturned on.)
Notification contents are
displayed in this area.
Enter keywords to displaya
list of items containing the
searchterms.
Displays a list ofsettings.
Notification Bar Expand or collapsethe
notificationbar by dragging the
bar down or up, respectively.
Wi-Fi
Bluetooth
EQ
Gapless
Playback
LineOut
Wi-FiSpeakers
Notifications
Display
FileSearch
Settings
1
2
3
4
5
6
7
8
9
10
Using the Device 16

Long-press[ / / ] to move to the correspondingscreen.
UserGuide
Mode
ScreenLock
PlayMode
Repeat Mode
RipperPower
Cradle
Screen Bri
ghtness
11
12
13
14
15
16
17
PC Connection Select the appropriate mode
Press [ ] to turn the screen lo
ck on or off. The volumewheel i
s disabled when the screen is lo
cked.
Press [ ] to cycle through
different playmodes.
:Sequentialplayback.
:Shuffleplayback.
Press [ ] to cycle through
different Repeatmodes.
:Repeat the entire playlist.
:Repeat the current song.
:Disablerepeat.
Turn the CD Ripper on or off.
(Enabled when connected to
the AK CD Ripper.)
Output sound through the cradle’s
Balanced Out port. (Enabled when
connected to the AK Cradle.)
Use the adjustment bar to co
ntrol the display brightness.
when connected to acomputer.
DISK :USB drive mode for tra
nsferring mediafiles.
:Listen to music located on
a PC through the device.
Using the Device 17

UserGuide
Purchasing Music
1. Connect to a wirelessnetwork.
2. Select [Store]from the home screen.
3. Select the desiredstore.
4. Check the user guide or help menu within each store for
detailedinformation.
Using the Device 18
connected to a wirelessnetwork.
Purchasing Conveniently purchase music from the Store when
Music from
aStore

SystemRequirements
PC Minimum SystemRequirements
OS : Windows XP, Windows7/8 (32 & 64-bit)
Mac Minimum SystemRequirements
OS X 10.7 (Lion)orlater
UserGuide
MQS Streaming Server Installation
1. Visit the Astell&Kernwebsite and download the server
installerthat corresponds to your operating system. [
http://www.astellnkern.com > Support > Download].
2. Run the downloaded installer and follow the on-screen
instructions.
3. Check the User Guide within the program for detailed
information on using the MQS StreamingServer.
The PPE12 can access and play back music filesstored on
a computer on the same network as well as output sound
AK
CONNECT through Astell&Kern speakers.
Connecting to the AK Connect Server
1. Turn on the serverand connect to
the same network as the PPE12.
Run the MQS Streaming Server
on yourcomputer.
2. Turn on [AK Connect] from the
devicesettings.
3. Press [AK Connect] from the home
screen.
Using the Device 19
Table of contents
Other Astell & Kern MP3 Player manuals

Astell & Kern
Astell & Kern DSF11 User manual

Astell & Kern
Astell & Kern AK240 User manual

Astell & Kern
Astell & Kern AK100 II User manual

Astell & Kern
Astell & Kern PPM41 User manual

Astell & Kern
Astell & Kern A&futura SE100 User manual

Astell & Kern
Astell & Kern AK120 II User manual

Astell & Kern
Astell & Kern SR25 User manual

Astell & Kern
Astell & Kern SP1000 User manual

Astell & Kern
Astell & Kern KANN CUBE PPM42 User manual

Astell & Kern
Astell & Kern SP1000M User manual