..........................................................................................
................................................................................................
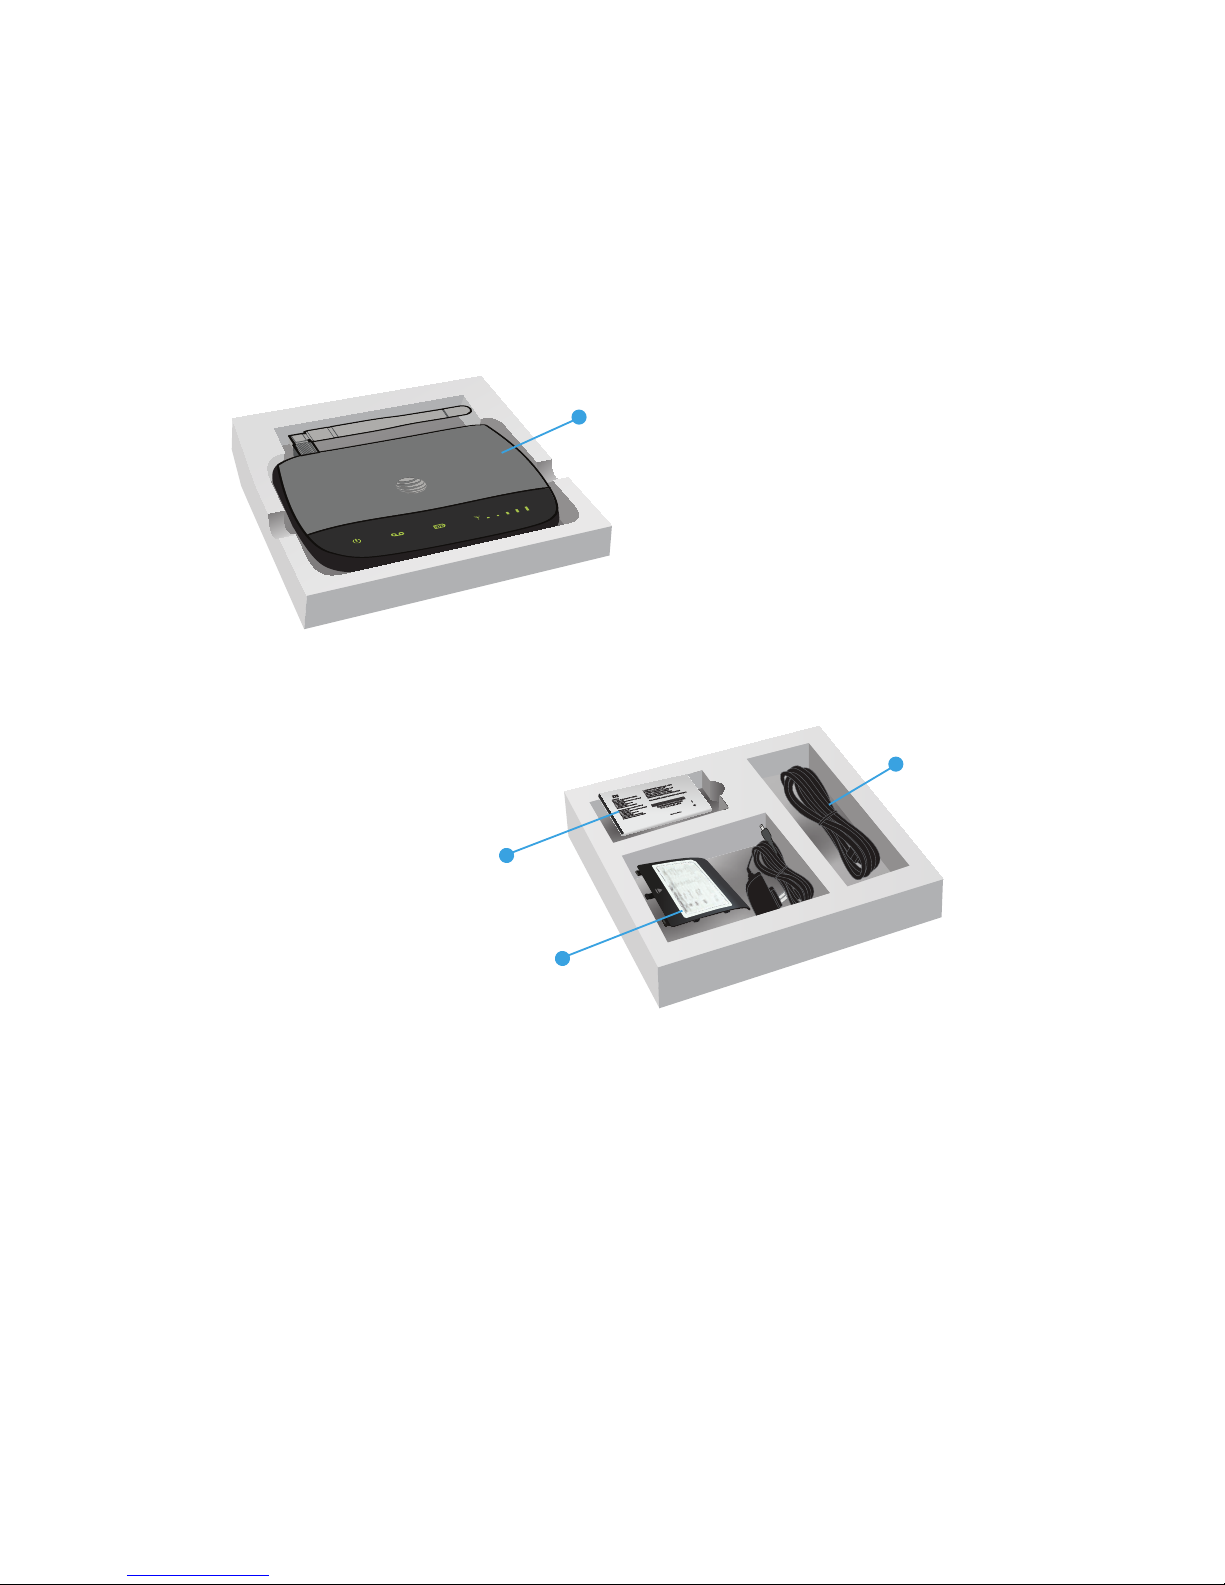
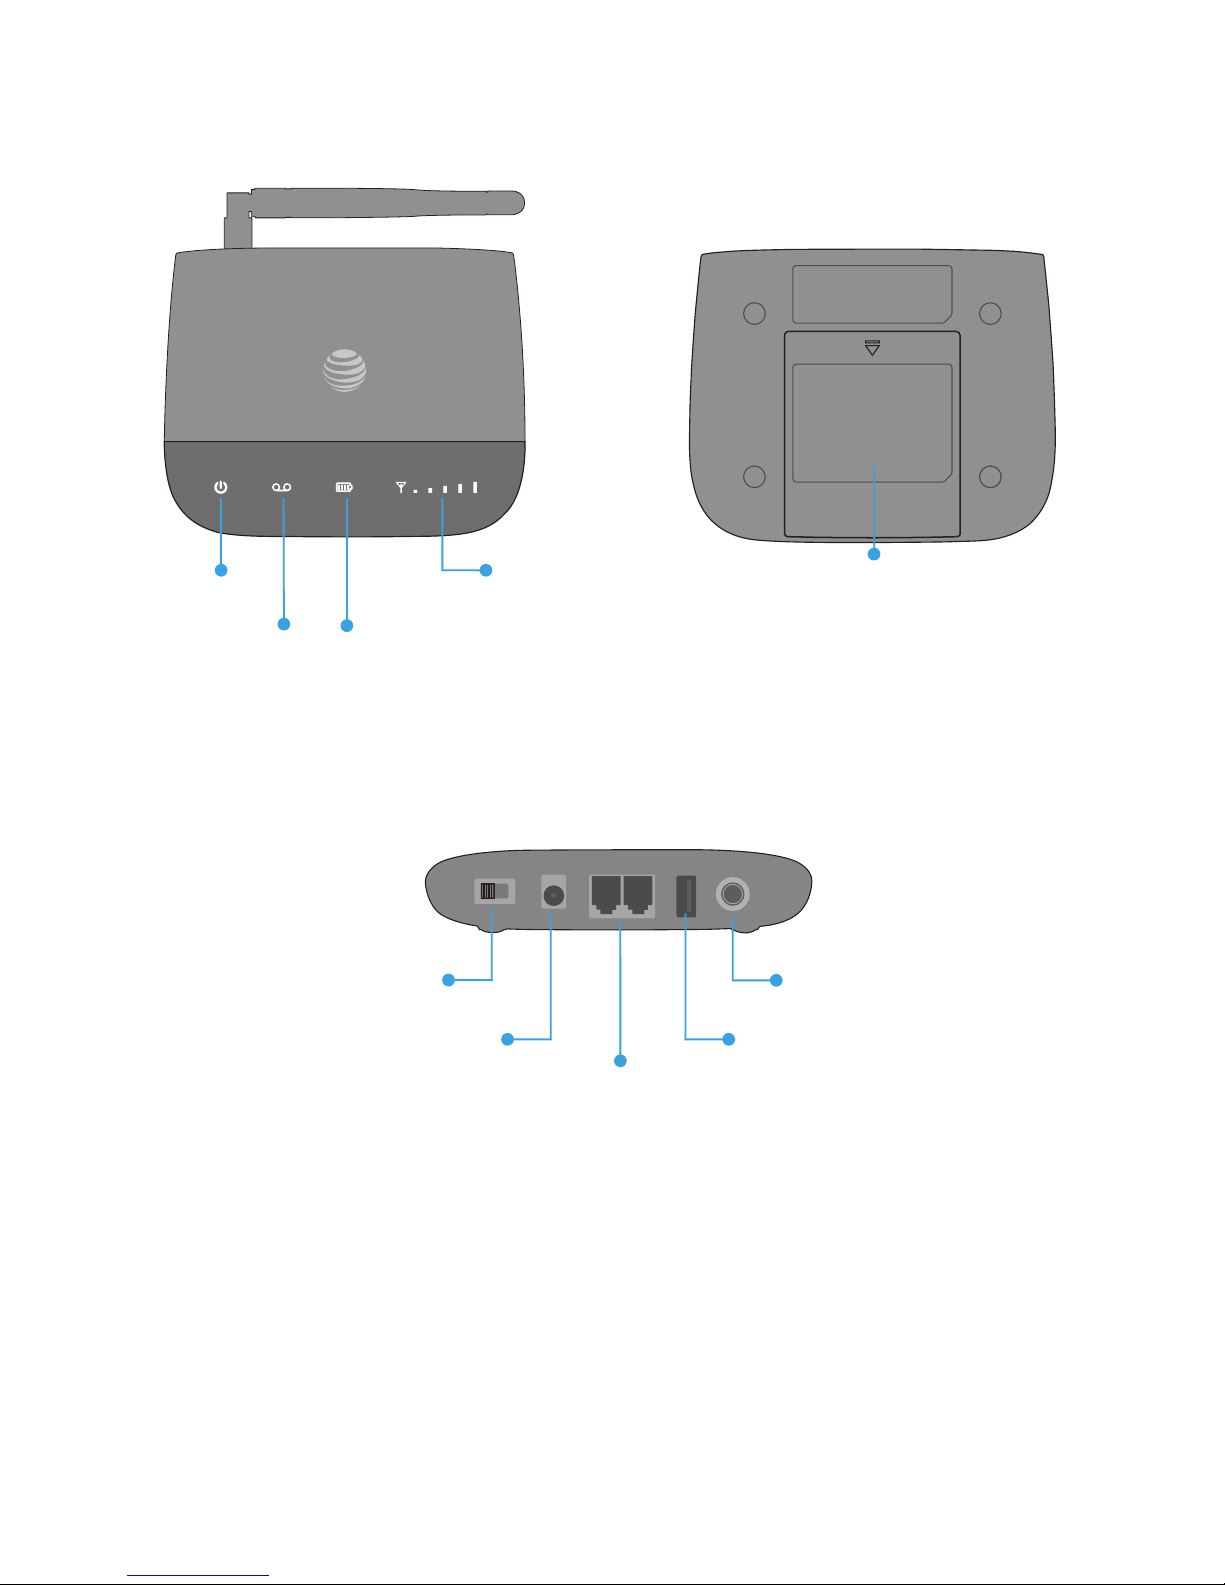
Getting to know your devic
............................................................
.........................................................................................
..............................................................................
.............................................................................................
Transferring a phone numbe
.......................................................
.....................................................................................
.........................................................................................
...............................................................................
...........................................................................................
...................................................................................
..........................................................................................
...........................................................................
.........................................................................................
....................................................................................
.........................................................................
...................................................................................
.................................................................
....................................................................................
.........................................................................................
................................................................................
..............................................................
.....................................................................................
...................................................................................................
How to get warranty service
..........................................................
...............................................................
.........................................................................................................