ATD Tools ATD-10522 User manual

ATD-10522
1/2” DRIVE ELECTRIC IMPACT WRENCH
OWNER’S MANUAL
WARNING: This product contains chemicals, including lead, known to the State of California to cause cancer,
birth defects or other reproductive harm. Wash hands after handling.
Made in China to ATD Tools, Inc. Specications
Visit us at www.atdtools.com
Features:
ͻDelivers 240 Ō.-lbs. of torque for high-demand projects and heavy-duty fastening applicaƟons
ͻAliminum alloy gearhousing provides reliability, durability & lighter weight for easy handling
ͻForward/reverse rocker switch for convenient one-handed use
ͻ1/2" square drive with fricƟon ring system that securely holds sockets andadaptors
ͻSoŌgrip handle for superior ergonomics
ͻBall bearing construcƟon for increased durability
ͻImproved gearbox structure toavoid oil leaks andenhance product performance
ͻPacked in a custom case for easy transport and storage
SpeciĮcaƟons:
ͻRatedVoltage:120V, 60 Hz
ͻInput: 7.5A
ͻMaximum Torque: 240 Ō.-lbs.
ͻNo-Load Speed: 2200 rpm
ͻBlows per Minute: 2,700 bpm
ͻDrive: 1/2” square
39LH
E325983
012009

WARNING: The instrucƟons andwarnings contained in this manual should be read and
understood before using or operaƟng this tool. Do not allow anyone to use or operate this tool unƟl they
have read this manual and have developed a thorough understanding of how this tool works. Failure to
observe any of the following instrucƟons could result in severe personal injury totool user and
bystanders, or cause damage to the tool and property. Keep this manual for future reference.
Note: The warnings and cauƟons discussed in this instrucƟon manual cannot cover all possible
condiƟons and situaƟons that may occur. It must be understood by the operator that common sense and
cauƟon are factors whichcannot be built into this product, but must be supplied by the operator.
WARNING: Use safety equipment. User and bystanders should use safety goggles or safety
glasses with side shields which comply with current naƟonal standards,or when needed, a face shield.
Use an ANSI approved dust mask or respirator when working around metal, wood, and chemical dusts
and mists. tĞĂƌŚĞĂƌŝŶŐƉƌŽƚĞĐƟŽŶǁŚĞŶƵƐŝŶŐƚŚŝƐƚŽŽůdhis applies to all persons in the work area.
Also use non-skid safety shoes, hardhat, gloves, and dust colleĐƟon systems where applicable.
WARNING: Keep bystanders and children out of the work area while operaƟng this tool.
WARNING: Always keep your work area clean, uncluƩered, and well lit. CluƩered or dark areas
invite accidents and injuries. DO NOT work on Ňoor surfaces that are slippery.
WARNING: Do not operate thistool if you areƟred or under the inŇuence of alcohol, drugs, or
medicaƟonsthat could aīect your ability to use the tool properly.
WARNING: Dress properly. Do not wear loose clothing or jewelery as they can be caught in
moving parts. Wear restriĐƟve hair covering to contain long hair.
WARNING: Do not reach over or across running machines. Keep proper fooƟng and balance at
allƟmes. Non-skid footwear is recommended when working.
WARNING:
ƵŶĚĞƌƐŽŵĞĐŝƌĐƵŵƐƚĂŶĐĞƐŝŶƚĞƌĨĞƌĞǁŝƚŚĂĐƟǀĞŽƌƉĂƐƐŝǀĞŵĞĚŝĐĂůŝŵƉůĂŶƚƐdŽƌĞĚƵĐĞƚŚĞƌŝƐŬŽĨƐĞƌŝŽƵƐŽƌ
fatal injury, we recommend persons with medical implants to consult their physician and the medical implant
ŵĂŶƵĨĂĐƚƵƌĞƌďĞĨŽƌĞŽƉĞƌĂƟŶŐƚŚŝƐŵĂĐŚŝŶĞ
dŚŝƐƉŽǁĞƌƚŽŽůƉƌŽĚƵĐĞƐĂŶĞůĞĐƚƌŽŵĂŐŶĞƟĐĮĞůĚĚƵƌŝŶŐŽƉĞƌĂƟŽŶdŚŝƐĮĞůĚŵĂLJ
General Safety Warnings

WARNING: Read all safetywarnings and instrucƟons. Failure to follow all warnings and
instrucƟons may result in electric shock,Įreand/or serious injury or death.
WARNING: Before conneĐƟng a tool to a power supply, always check to ensure the power supply
corresponds to the voltage on the nameplate of the tool. A power supply with avoltage greater than
that specŝĮed for thetool can result in serious injury to the user, as well as damage to the tool. Using a
power supply with a voltage less than the nameplate raƟng is harmful to the motor. If in doubt, do not
plug in the tool.
NOTE:Double insulated tools are equipped with a polarized plug (one blade is wider than the
other). This plug will Įt in a polarized outlet only one way. If the plug does not Įt fully in the outlet,
reverse the plug. If it sƟll doesn’t Įt, contact a quaůŝĮed electrician to installa polarized outlet. Do not
change the plug in any way.
WARNING: To reduce the risk ofelectric shock,DO NOT use indamp condiƟons, on wet surfaces,
or expose to rain. Do not plug in this tool or operate it with wet hands or while standing in water.
WARNING: Never use the cordfor carrying, pulling or unplugging the power tool. Grasp plug
and pull to disconnect from outlet. Keep cord away from heat, oil, sharp edges or moving parts. Replace
damaged cords immediately.
WARNING: Do not carry the power tool with your Įnger on the switch. Ensure the switch is in
the oīposiƟon before plugging the tool into the power outlet. In the eventofa power failure while a
tool is being used, turn the switch oīto prevent surprise starƟng when the power is restored.
WARNING: Always remove the powercord from the electricoutlet whenmaking adjustments,
changing parts, cleaning or working on the tool.
WARNING: Care shouldbe taken to arrange the cord so it will not be stepped on, trippedover,
or otherwise subjected to damage or stress.
WARNING: Never aƩempt to plug in or operate equipment with defecƟve or damaged wires,
power cord or power cord plug. Have any defecƟve or damaged parts replaced immediately by quĂůŝĮed
personnel.
Electrical Safety Warnings
WARNING: Avoid body contact with electrically grounded surfaces. There is an increased riskof
electric shock if your body is grounded.

WARNING: If the work area is not equipped with a permanently installed Ground Fault Circuit
Interrupter outlet (GFCI), use a plug-in GFCI between the power tool or extension cord and the power
receptacle.
WARNING: If an extension cord is necessary, use only ‘Listed’ extension cords. If used outdoors,
they must be marked “For Outdoor Use”.
WARNING: Use of improper size or gauge of extension cord may cause unsafe or ineĸcient
operaƟonof your tool,or cause damage to your tool. Be sure your extension cord is rated to allow
suĸcient current Ňow to the motor. If in doubt, always use a larger gauge cord. Be sure to checkthe
voltage requirements of the tool to your incoming power source.
NOTE:The table below shows the correct size to use according to cord lengthand the amperage
draw of the tool (speciĮed on the nameplate). When in doubt, use the next heavier gauge. The smaller
the gauge number, the heavierthe cord. (AWG= American Wire Gauge).
Minimum Gauge for Extension Cords (AWG)
(when using 120 volts only)
Ampere RaƟng Total Length of Cord in Feet (meters)
More Than Not More Than 25' (7.6m) 50' (15m) 100' (30.4m) 150' (45.7m)
0 6 18 16 16 14
6 10 18 16 14 12
10 12 16 16 14 12
12 16 14 12 Not Recommended
NOTE:The term “powertool” in thewarnings referstoyour electricallyoperated (corded) power
tool or baƩery operated (cordless) power tool.
WARNING: Beware ofall power lines, electrical circuits, water pipes and other mechanical
hazards in your work area, parƟcularly thosebelow the work surface hidden from the operatorsview.
UnintenƟonal contact with these hazards may cause personal injury or property damage.
Power Tool Use and Care
WARNING: Do not force the power tool. Use the correct power tool for yourapplicaƟon. The
correct power tool will do the job beƩer and safer at the rate for which it was designed.

WARNING: Do not use the power tool ifthe switch loses its funcƟon. Any power tool that
cannot be controlled with the switch is dangerous and must be repaired.
WARNING: Do not operate power toolsinexplosive atmospheres, suchas in the presence of
ŇĂmmable liquids, gases or dust. Power tools create sparks which may ignite the dust or fumes.
WARNING: Make sure that stored or idle power tools areout of the reachofchildren and do not
allow persons unfamiliar with the power toolorthese instrucƟons to operate the power tool. Power
tools are dangerous in the hands of untrained users.
WARNING: Maintain power tools. Check for misalignment or binding of moving parts, breakage
of parts and any other condiƟons that may aīect the power tools operaƟon. If damaged, have the power
tool repaired before using it. Many accidents are caused by poorly maintained power tools.
WARNING: If devices are provided for the connecƟon of dust extracƟon and collecƟon faciliƟes,
ensure thatthese are connected andproperly used.
WARNING: Remove adjusƟng keys or wrenches before turning the toolon. A wrench or a key
that is leŌaƩached to a rotaƟng part of the tool may result in personal injury.
WARNING: Have your power tool serviced by a quĂůŝĮed repair person using only idenƟcal
replacement parts. This will ensure that the power tool is safe.
WARNING: Avoid prolonged exposure to vibraƟon. VibraƟon, repĞƟƟve moƟons, or
uncomfortable posiƟons over extended periods of Ɵme may be harmful to your hands and arms. Do not
ignore symptoms or persistent or recurring discomfort, pain, throbbing, aching, Ɵngling, numbness,
burning sensaƟon, or sƟīness. DisconƟnue use of the tool and seek medical advice before resuming use.
WARNING: Adopt a comfortable posture whilemaintaining secure fooƟng and avoiding
awkward or oībalance postures. Changing posture during extended tasks can help avoid discomfort and
faƟgue.
Repetitive Motion / Vibration Hazards

The voltage specifications on the rating plate must correspond with the supply voltage.
Before attempting to use your tool, familiarize yourself with all operating features and safety requirement.
1. Switch
2. Brush Cap
3. Gear Housing
4. Handle
5. Motor Housing
Switch
This impact wrench is equipped with a rocker switch that switches rotation from clockwise to counter-clockwise
easily, allowing fasteners to be broken loose. Pressing the lower part of the switch causes the impact wrench to
move clockwise; pressing the upper part of the switch causes the rotation to reverse.
Install/remove socket
To install a socket on the anvil, align the hole of the socket with the anvil, push firmly.
To remove a socket from the anvil, pull the socket out firmly.
Operating Instructions
Functions
UNPLUG THE IMPACT WRENCH BEFORE PERFORMING ANY MAINTENANCE
Ɣ 'RQRWDWWHPSWWRPDNHDQ\DGMXVWPHQWVZKLOHWKHWRROLVLQRSHUDWLRQ
Ɣ &OHDQRXWDQ\DFFXPXODWHGGXVWUHJXODUO\
Ɣ 'RQRWDOORZSHWUROHXPEDVHGSURGXFWVWRFRPHLQWRFRQWDFWZLWKSODVWLFSDUWVDVWKH\FRQWDLQ
chemicals that can damage, weaken or destroy plastic.
Ɣ 7KLVLPSDFWZUHQFKZLOOUHTXLUHOXEULFDWLRQDIWHUFRQWLQXRXVKRXUVRULQWHUPLWWHQWKRXUVRIXVH
Remove the screws for the gear box as shown below (two on each side), and lubricate the gears.
8VH([[RQ0RELOOXEULFDQWV/,7+6+&3//%RUHTXLYLODQWWROXEULFDWHDVQHHGHG
Ɣ 'DPDJHGFDUERQEUXVKHVEXUQWEURNHQRUOHVVWKDQPPPXVWEHFKDQJHG
Maintenance

Problem Possible Causes Likely Solutions
Tool will not start. 1. Cord not connected.
2. No power at outlet.
Internal damage or wear. (Carbon
brushes or switch, for example.)
1. Check that cord is plugged in.
2. Check power at outlet. If outlet is unpowered,
turn off tool and check circuit breaker.
If breaker is tripped, make sure circuit is right
capacity for tool and circuit has no other loads.
Have technician service tool.
Tool operates slowly. 1. Excess pressure applied to workpiece.
2. Power being reduced by long or small
diameter extension cord.
1. 'HFUHDVHSUHVVXUHDOORZWRROWRGRWKHZRUN
2. Eliminate use of extension cord.
If an extension cord is needed, use one with
the proper diameter for its length and load.
See Extension Cords in GROUNDING section.
Performance
decreases over time. Carbon brushes worn or damaged. Have qualified technician replace brushes.
Excessive noise
or rattling. Internal damage or wear.
(Carbon brushes or bearings, for example.) Have technician service tool.
Overheating. 1. Forcing tool to work too fast.
2. %ORFNHGPRWRUKRXVLQJYHQWV.
Motor being strained by long or
small diameter extension cord.
1. Allow tool to work at its own rate.
2. Wear ANSI-approved safety goggles and
NIOSH-approved dust mask/respirator while
blowing dust out of motor using compressed air.
Eliminate use of extension cord.
If an extension cord is needed, use one with
the proper diameter for its length and load.
See Extension Cords in GROUNDING section.
Follow all safety precautions whenever diagnosing or servicing
the tool. Disconnect power supply before service.
Ɣ 7KHEUXVKHVVKRXOGFKHFNHGSHULRGLFDOO\IRUUHSDLU/RRVHQWKHSODVWLFFDSVORFDWHGRQWKHVLGHRIWKH
motor housing to reveal the spring and brush assembly.
Ɣ :KHQUHSODFLQJWKHROGFDUERQEUXVKHVWKHQHZEUXVKHVPXVWVOLGHLQWRWKHEUXVKKROGHUHDVLO\
'2127)25&(%586+(6,1727+(+2/'(5
Ɣ 7KHQRUPDOVL]HRIWKHFDUERQEUXVKHVLVVKRZQEHORZ
Troubleshooting

ITEM# ORDERING PART# PART DESCRIPTION ITEM# ORDERING PART# PART DESCRIPTION
1PRT122-1 SCREW STX48F 2PRT122-2%EARING%USH
2PRT122-2 SPRINGWASHER/ĭ 26 PRT122-26 WASHER/ĭ8.2X7.2
PRT122- WASHER/ĭ 27 PRT122-27 PIN/ĭ8X
4PRT122-4GEAR%OX 28 PRT122-28 NEE'LE %EARING\HK8121
PRT122- SEALING RING %USHING 29 PRT122-29 COUPLE GEAR
6PRT122-6 FRICTION %EARING PRT122- WASHER/ĭ8Xĭ16X.
7PRT122-7 WASHER 1PRT122-1%AFFLE
8PRT122-8SNAP RING 2PRT122-2SCREW/ST4X6C
9PRT122-9O-RING/ĭ8Xĭ1.PRT122- STATOR
1PRT122-1SPIN'LE 6PRT122-6 REAR COVER
11 PRT122-11 IMPACT%LOCK 7PRT122-7SCREWST4X16F
12 PRT122-12 STEEL %ALL/ĭ 8PRT122-8 SCREW/ST4X18F
1PRT122-1SPRING 9PRT122-9HAN'LE COVER
14 PRT122-14 STEEL %ALL/ĭ7.14 41 PRT122-4SWTICH
1PRT122-1GEARSHAFT 42 PRT122-42 HOUSING
16 PRT122-16 GEAR 44 PRT122-44 %RUSH HOL'ER
17 PRT122-17 WASHER/ĭ8.1Xĭ16X4PRT122-4CAR%ON %RUSH
18 PRT122-18 %RACKET 46 PRT122-46 %RUSH HOL'ER CAP
19 PRT122-19 SEALING RING 47 PRT122-47 COR'CLAMP
2PRT122-2GEAR%OX COVER 48 PRT122-48 SCREW/ST4X16C
21 PRT122-21 CIRCLIP FORHOLE 49 PRT122-49 COR'
22 PRT122-22 %ALL %EARING/61.2RS PRT122- COR'SLEEVE
2PRT122-2ARMATURE 1PRT122-1FELTRING
24 PRT122-24 %ALL %EARING/68.2Z 2PRT122-2O-RING
ATD-10522

WARRANTY
1 YEAR LIMITED WARRANTY
THIS WARRANTY AND CONFIRMED RECEIPT(S) SHOULD BE RETAINED BY THE CUSTOMER AT ALL TIMES
385&+$6(')520 _______________________________________
DATE PURCHASED: ____________________________________________
INVOICE/REC,(37180%(5BBBBBBBBBBBBBBBBBBBBBBBBBBBBBBBBBBBBBBBBB
<RXU$7'LVZDUUDQWHGIRUDSHULRGRIPRQWKVIURPWKHRULJLQDOSXUFKDVHGDWH
)RUDSHULRGRIRQH\HDUIURP\RXUSXUFKDVHGDWH$7'7RROV,QFZLOOUHSDLURUUHSODFHDWLWVRSWLRQZLWKRXWFKDUJH\RXU
$7'SURGXFWLILWZDVSXUFKDVHGQHZDQGWKHSURGXFWKDVIDLOHGGXHWRDGHIHFWLQPDWHULDORUZRUNPDQVKLSZKLFK\RXH[SHULHQFHG
during normal use of the product. This limited warranty is your exclusive remedy.
To access the benefits of this warranty, contact your supplier, or point of sale directly. You may be advised to return the product
under warranty, freight prepaid, to your supplier for warranty determination.
,IWKLV$7'SURGXFWLVDOWHUHGDEXVHGPLVXVHGPRGLILHGRUXQGHUJRHVVHUYLFHE\DQXQDXWKRUL]HGWHFKQLFLDQ\RXUZDUUDQW\ZLOO
EHYRLG:HDUHQRWUHVSRQVLEOHIRUGDPDJHWRRUQDPHQWDOGHVLJQV\RXSODFHRQWKLV$7'SURGXFWDQGVXFKRUQDPHQWDWLRQVKRXOG
not cover any warnings or instructions or they may void the warranty. This warranty does not cover scratches, superficial dents, and
other abrasions to the paint finish that occur under normal use. It also does not cover noremal wear items such as but not limited to
brushes, batteries, drill bits, drill chucks, pads or blades.
6XEMHFWWRWKHODZLQ\RXUVWDWH
(1) Your sole and exclusive remedy is repair or replacement of the defective product as described above.
$7'LVQRWOLDEOHIRUDQ\LQFLGHQWDOGDPDJHVLQFOXGLQJEXWQRWOLPLWHGWRORVWSURILWVDQGXQIRUHVHHDEOHFRQVHTXHQFHV
7KHUHSDLUDQGUHSODFHPHQWRIWKLVSURGXFWXQGHUWKHH[SUHVVOLPLWHGZDUUDQW\GHVFULEHGDERYHLV\RXUH[FOXVLYHUHPHG\DQGLV
provided in lieu of all other warranties, express or implied. All other warranties, including implied warranties and warranties of
merchantability or fitness for a particular purpose are disclaimed and, if disclaimer is prohibited, these warranties are limited to
one year from your date of purchase of this product.
Some states’ laws do not allow limited durations on certain implied warranties and some states’ laws do not allow limitations on
incidental or consequential damages. You should consult the law in your state to determine how your rights may vary.
[Affix receipt or invoice here for safe keeping]
Table of contents
Other ATD Tools Impact Driver manuals
Popular Impact Driver manuals by other brands

Chicago Pneumatic
Chicago Pneumatic CP7731C Operator's manual
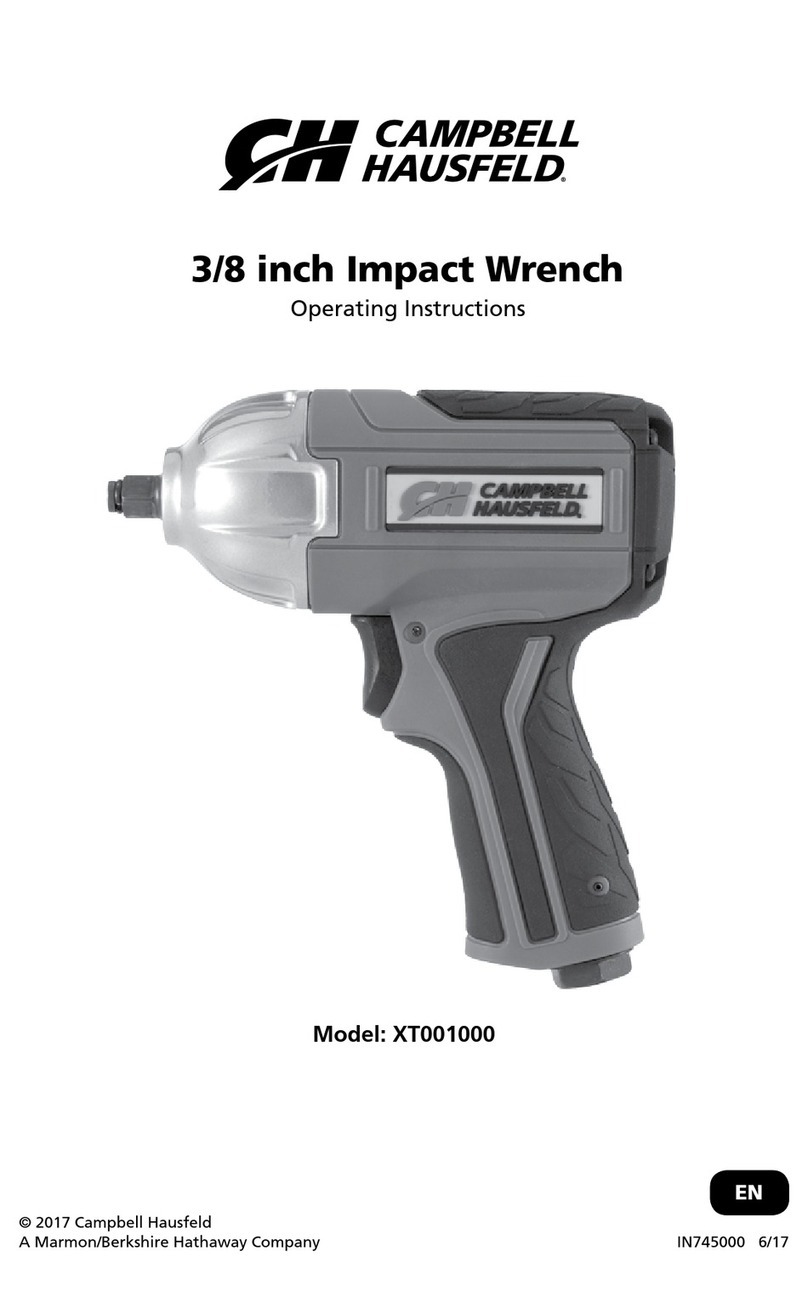
Campbell Hausfeld
Campbell Hausfeld XT001000 operating instructions
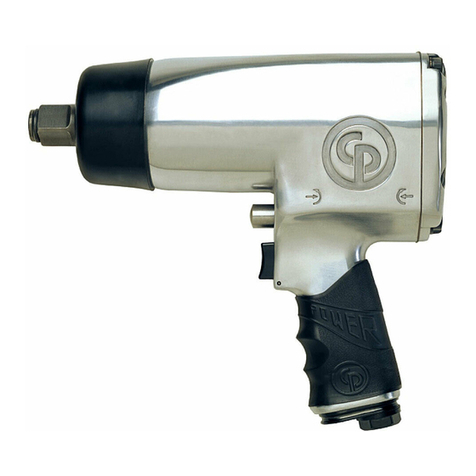
Chicago Pneumatic
Chicago Pneumatic CP772H Series Operator's manual
Hitachi
Hitachi WH 12DM2 Handling instructions
Makita
Makita DTD154 instruction manual
Performax
Performax 241-9891 owner's manual
