DIVA Quick Start, version 1.0.1
1....................................................................................................................................... 3INTRODUCTION
2..................................................................................................................................... 3DIVA OVERVIEW
2.1 .............................................................................................................................................. 3GENERAL
2.2 ................................................................................................................................................... 3AUDIO
2.3 ..................................................................................................................................... 3CONNECTIVITY
2.4 ..................................................................................................................... 3SYSTEM CONFIGURATION
2.5 ................................................................................................................................3SYSTEM CONTROL
3.................................................................................................................. 4HARDWARE DESCRIPTION
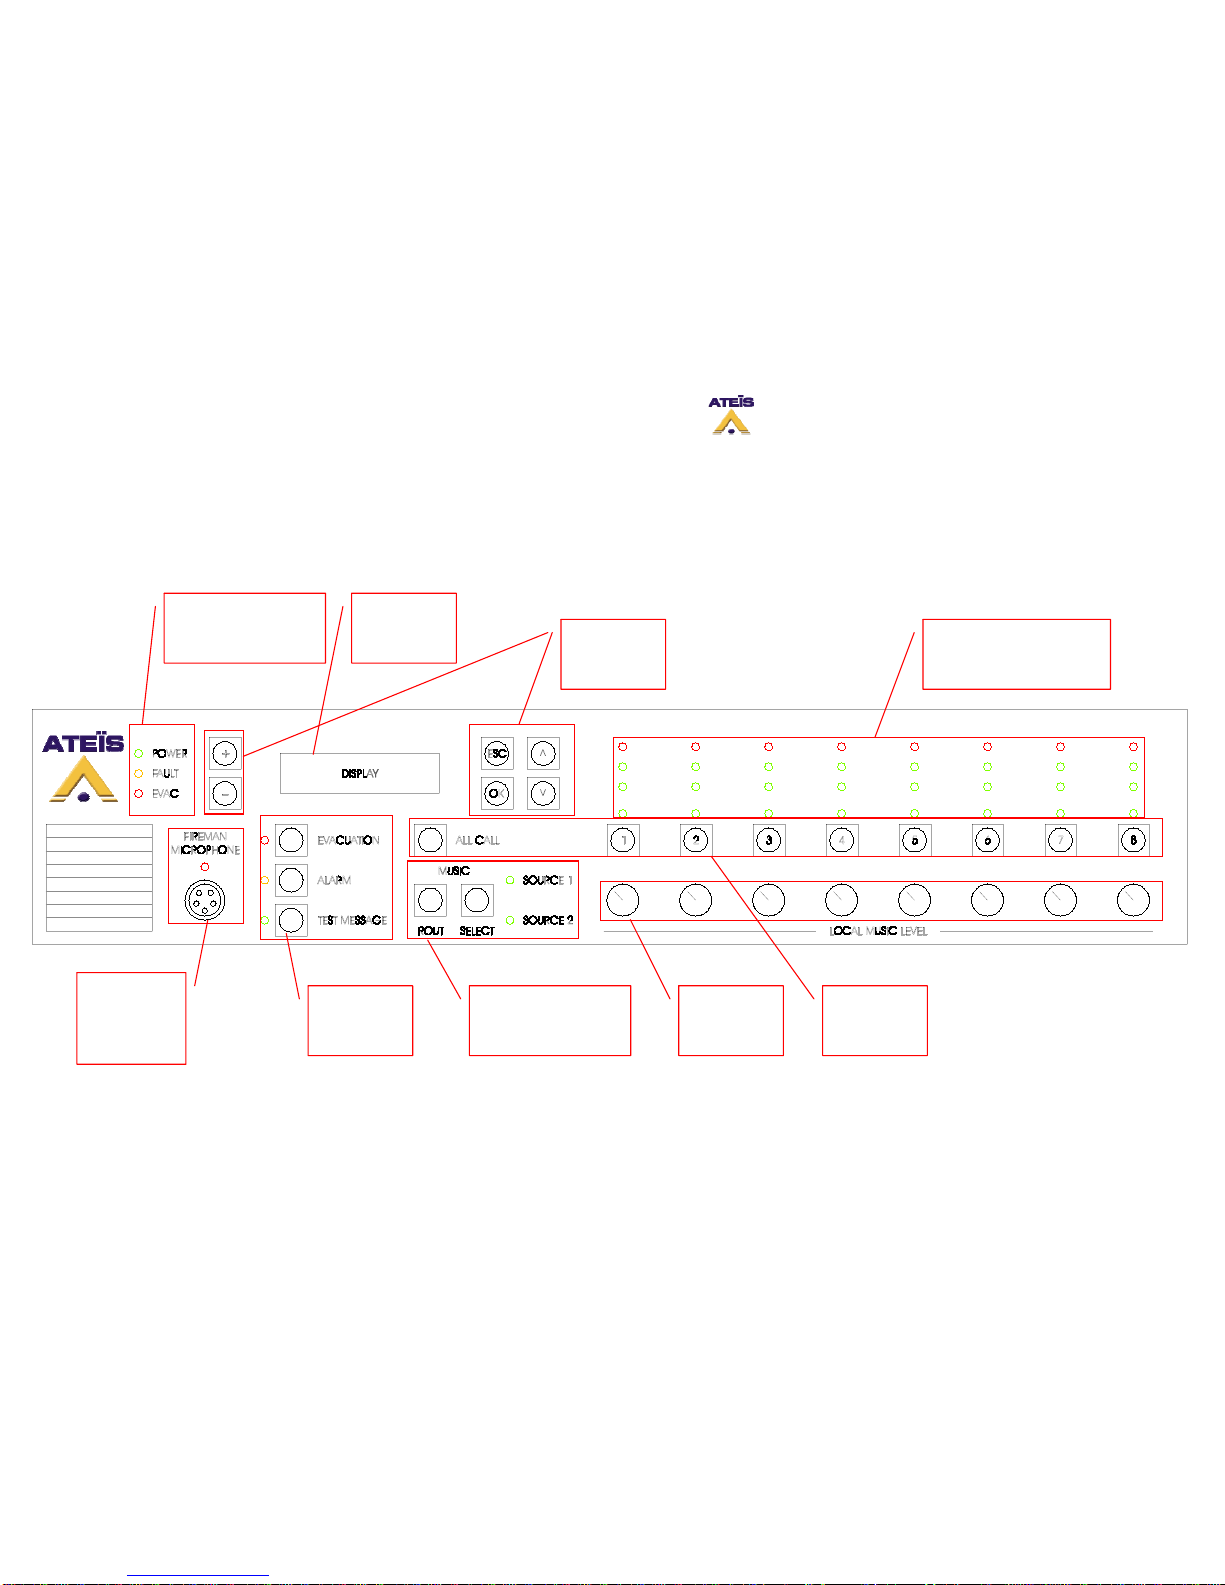
3.1 ......................................................................................................................................... 4FRONT VIEW
3.2 ........................................................................................................................................... 5REAR VIEW
4............................................................................................................................................. 6BASIC SETUP
4.1 ............................................................................................................. 6CONNECTIONS AND POWER UP
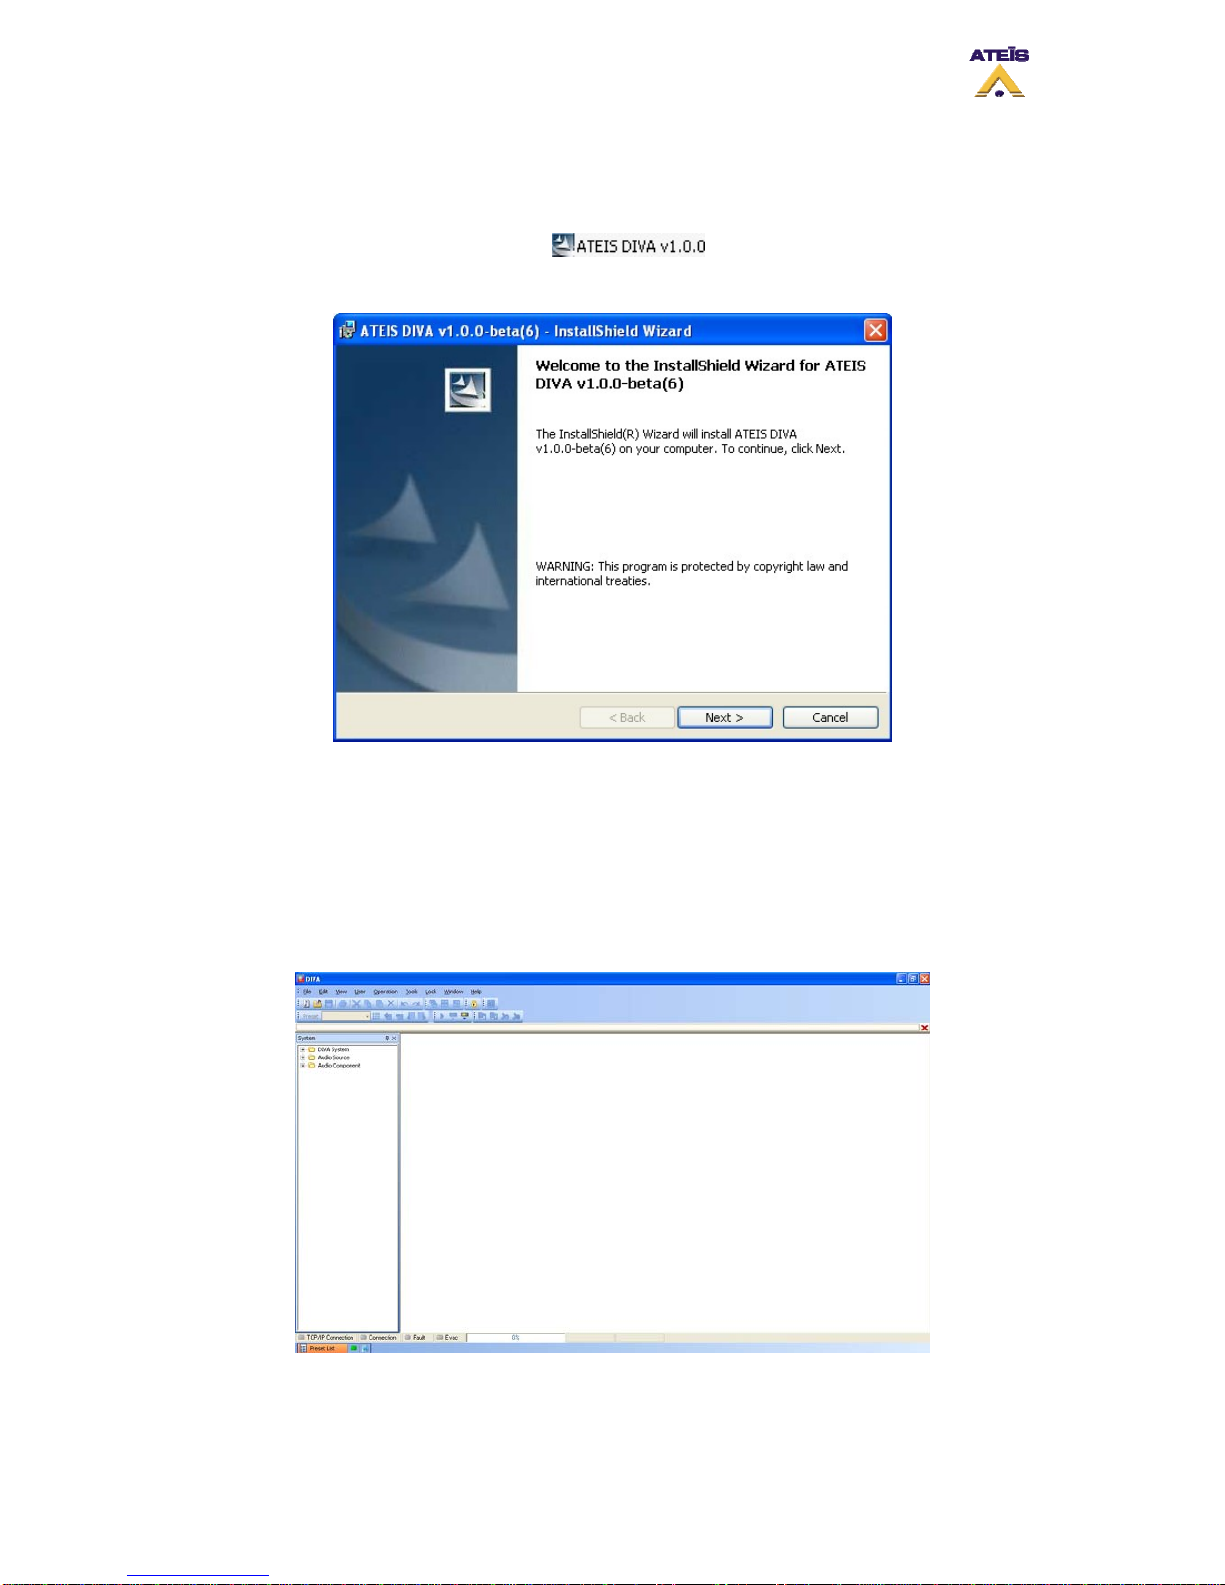
4.2 ........................................................................................................................... 8SOFTWARE START UP
4.3 ........................................................................................................................ 8DIVA CONFIGURATION
4.3.1 ........................................................................................................................... 11Event Philosophy
4.3.2 ............................................................................................................................................. 11Music
4.3.3 ....................................................................................................................................... 14Messages
4.3.4 ..................................................................................................................... 16Fireman Microphone
4.3.5 ............................................................................................................................................ 18GPIOs
4.3.6 ................................................................................................................ 20Surveillance Monitoring
4.4 .................................................... 22FRONT PANEL CONTROL AND SOFTWARE REAL-TIME MONITORING
4.4.1 ............................................................................................................................................. 22Music
4.4.2 ....................................................................................................................................... 23Messages
4.4.3 ..................................................................................................................... 23Fireman Microphone
4.4.4 ........................................................................................................................................ 23Amplifier
5.................................................................................................... 25COMPILING AND STORING FILES
6................................................................................................................................25ADVANCED SETUP
6.1 .................................................................................................................................... 25CONNECTIONS
6.2 ............................................................................................................. 27ADDING A LINE/MIC SOURCE
6.3 .................................................................................................................................... 28ADDING A PSS
6.4 .................................................................................................................. 30USING EVENT SEQUENCES
6.5 .................................................... 32FRONT PANEL CONTROL AND SOFTWARE REAL-TIME MONITORING
6.5.1 ................................................................................................................................... 32Microphone
6.5.2 ................................................................................................................................................ 32PSS
7.................................................................................................................................................... 33ANNEXE
Ateïs International
Ch. du Dévent, 1024 Ecublens, Switzerland.
Phone : +41 21 881 25 10
2