ATLINKS BILOBA 250 User manual

1
1. GETTING STARTED . . . . . . . . . . . . . . . . . . . . . . . . . . . . . . . . . . . . . . . . . . . . . . . . . . . . 3
1.1 Installation . . . . . . . . . . . . . . . . . . . . . . . . . . . . . . . . . . . . . . . . . . . . . . . . . . . . . . . . . . . . 3
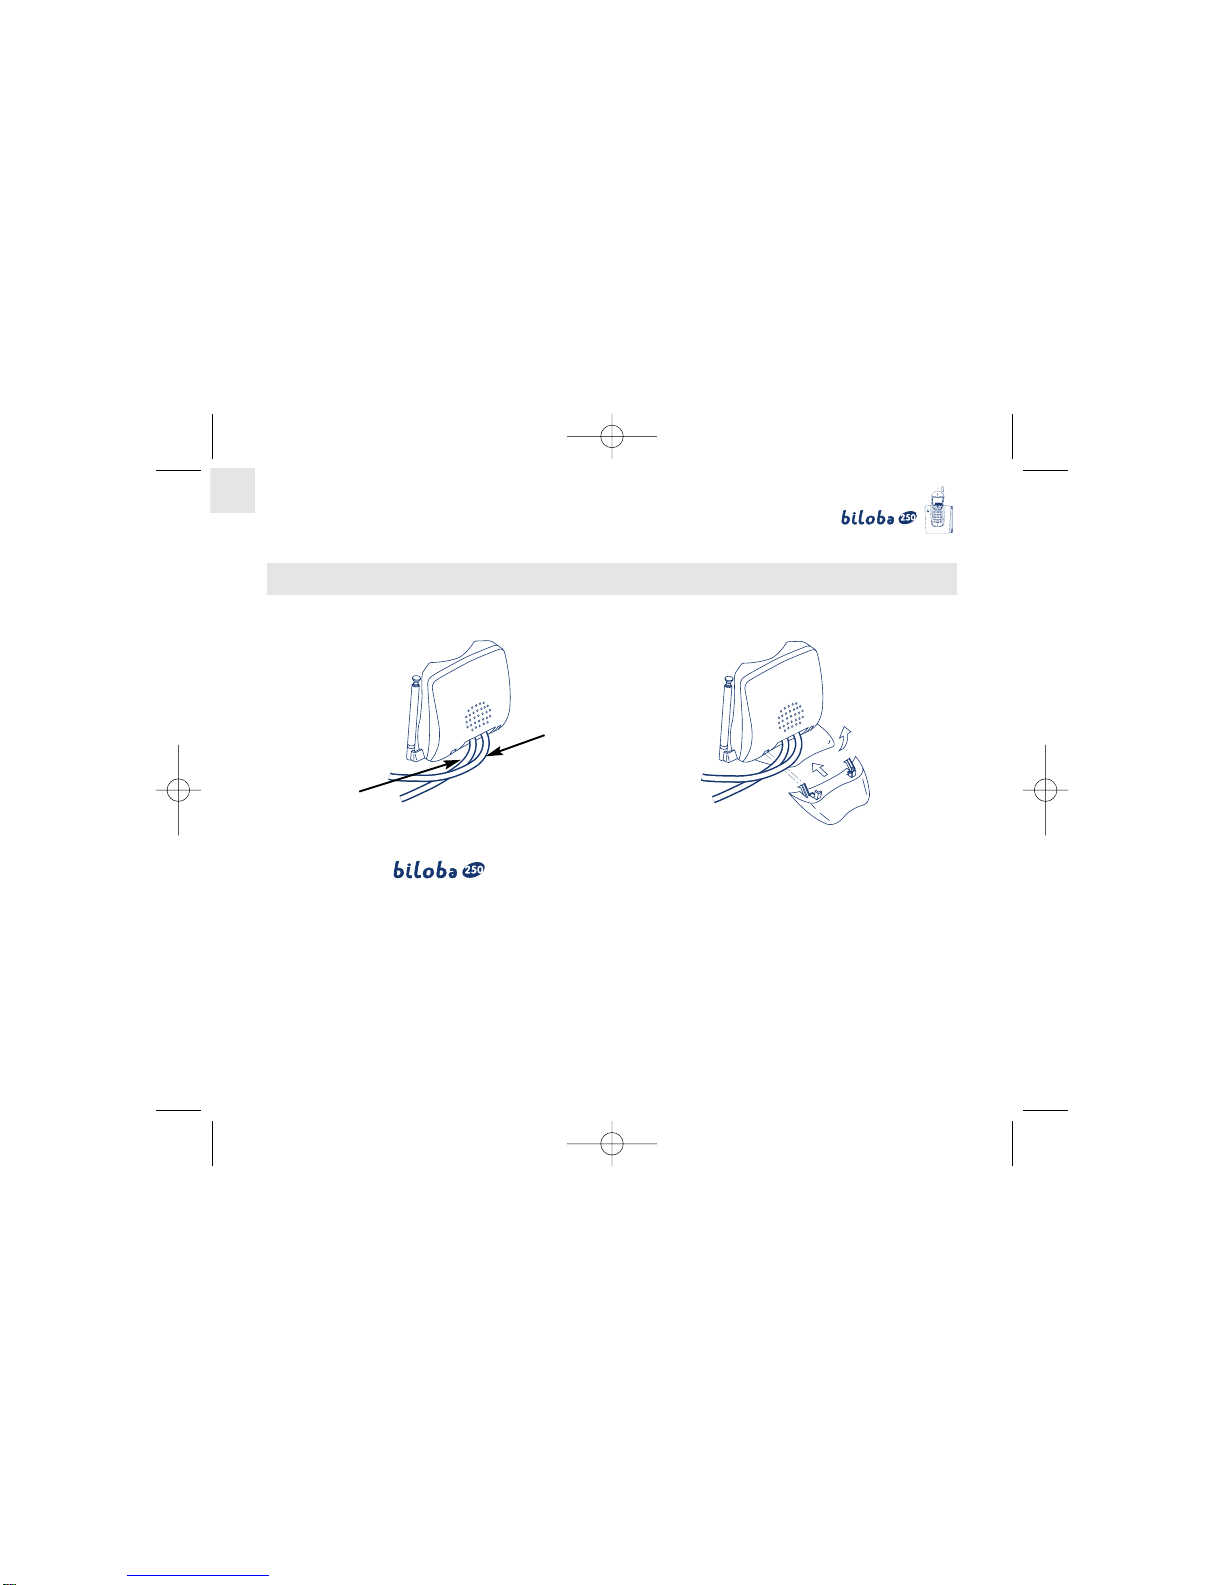
1.2 Preparing the base . . . . . . . . . . . . . . . . . . . . . . . . . . . . . . . . . . . . . . . . . . . . . . . . . . . . . .4
1.3 Preparing the handset . . . . . . . . . . . . . . . . . . . . . . . . . . . . . . . . . . . . . . . . . . . . . . . . . . . 5
1.4 Identification . . . . . . . . . . . . . . . . . . . . . . . . . . . . . . . . . . . . . . . . . . . . . . . . . . . . . . . . . . . 6
2. USINGTHETELEPHONE . . . . . . . . . . . . . . . . . . . . . . . . . . . . . . . . . . . . . . . . . . . . . . . 7
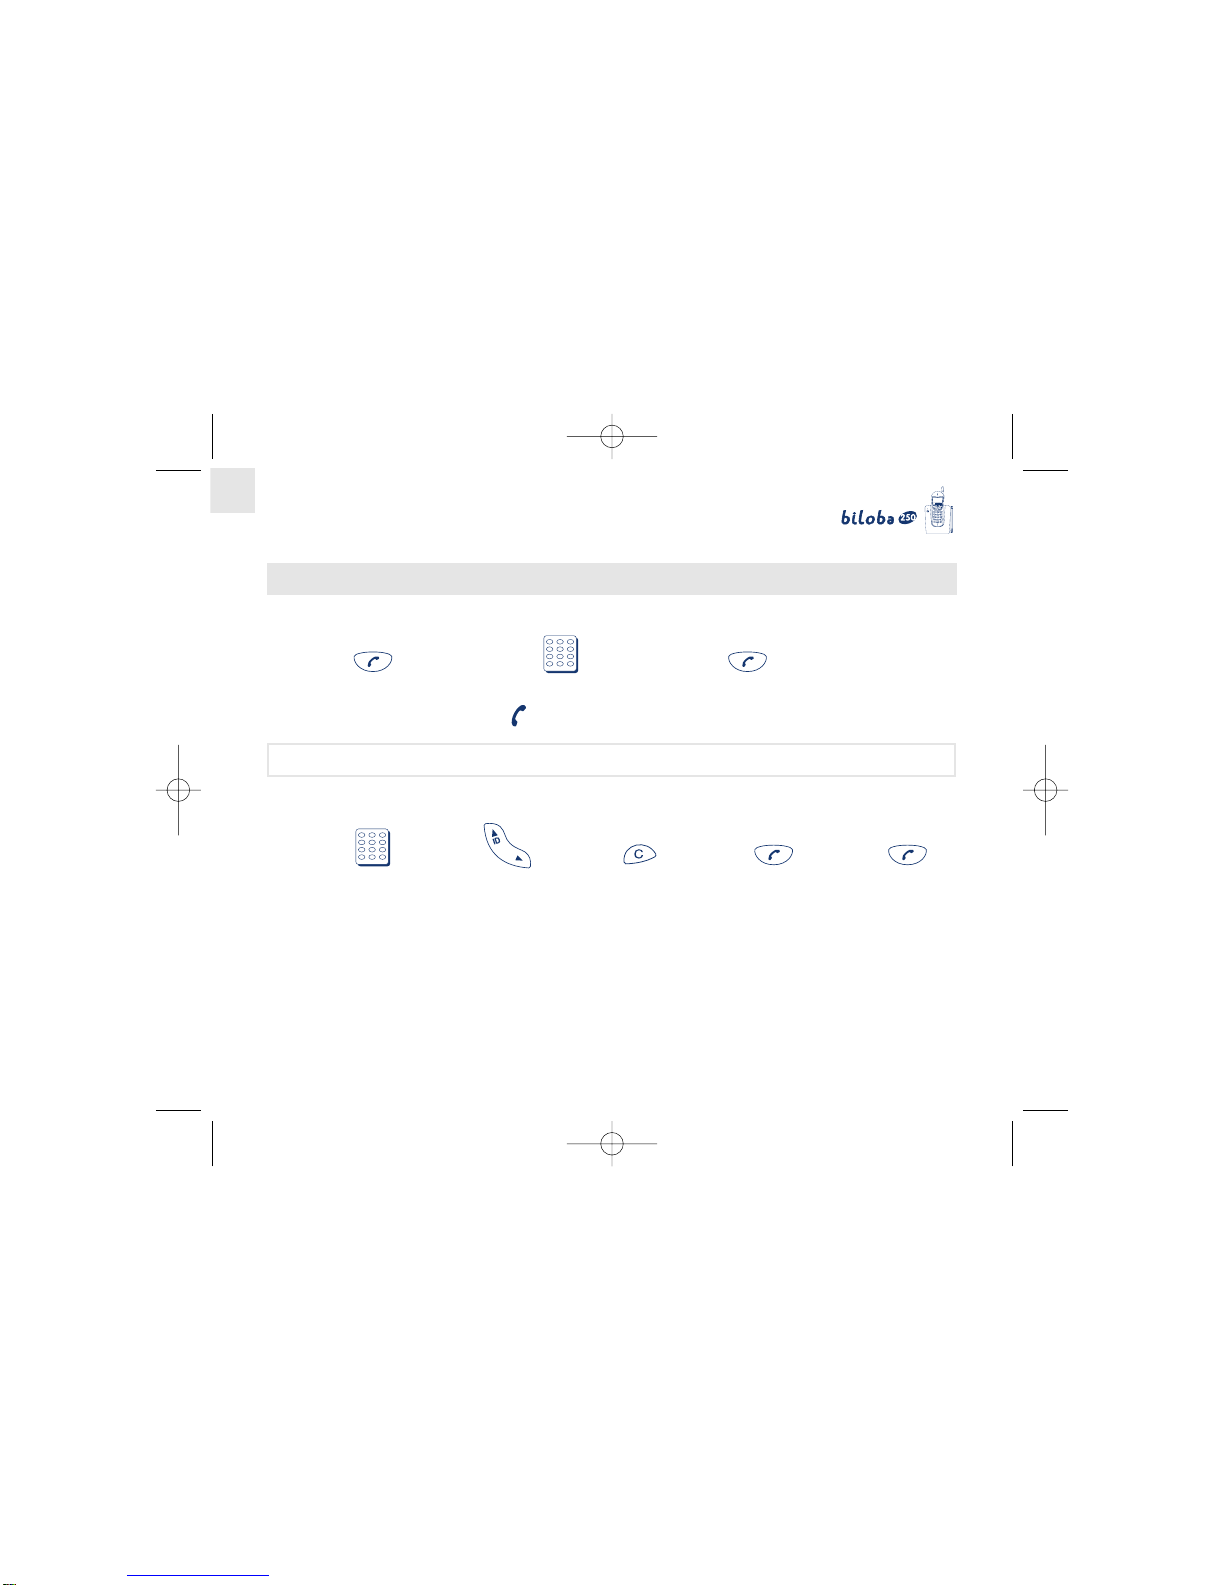
2.1 Receiving a call . . . . . . . . . . . . . . . . . . . . . . . . . . . . . . . . . . . . . . . . . . . . . . . . . . . . . . . . 7
2.2 Making a call . . . . . . . . . . . . . . . . . . . . . . . . . . . . . . . . . . . . . . . . . . . . . . . . . . . . . . . . . . 8
2.3 Adjusting the earpiece volume during the call . . . . . . . . . . . . . . . . . . . . . . . . . . . . . . . . . 9
3. ACTIVATING/DEACTIVATINGTHE LOUDSPEAKER AND ADJUSTING
LOUDSPEAKERVOLUME . . . . . . . . . . . . . . . . . . . . . . . . . . . . . . . . . . . . . . . . . . . . . . . 10
4 REDIAL LAST NUMBER . . . . . . . . . . . . . . . . . . . . . . . . . . . . . . . . . . . . . . . . . . . . . . . . . 11
5. ORGANISINGYOUR ADDRESS BOOK . . . . . . . . . . . . . . . . . . . . . . . . . . . . . . . . . . . . . 12
5.1 Creating a contact page . . . . . . . . . . . . . . . . . . . . . . . . . . . . . . . . . . . . . . . . . . . . . . . . . 12
5.2 Modifying a contact page . . . . . . . . . . . . . . . . . . . . . . . . . . . . . . . . . . . . . . . . . . . . . . . . . 13
5.3 Deleting a contact page . . . . . . . . . . . . . . . . . . . . . . . . . . . . . . . . . . . . . . . . . . . . . . . . . . 14
5.4 Calling a correspondent recorded in the address book . . . . . . . . . . . . . . . . . . . . . . . . . . 15
6. CONSULT CALLER LOG . . . . . . . . . . . . . . . . . . . . . . . . . . . . . . . . . . . . . . . . . . . . . . . . 16
6.1 Recording a contact page in the address book . . . . . . . . . . . . . . . . . . . . . . . . . . . . . . . . 17
6.2 Deleting a contact page from the list of calls received . . . . . . . . . . . . . . . . . . . . . . . . . . 18
BILOBA250gb.qxd 07/12/00 12:14 Page 1

2
7. CUSTOMISINGYOURTELEPHONE . . . . . . . . . . . . . . . . . . . . . . . . . . . . . . . . . . . . . . . . 19
7.1 Activate/Deactivate handset ringer . . . . . . . . . . . . . . . . . . . . . . . . . . . . . . . . . . . . . . . . . . 19
7.2 Activating/Deactivating key "BEEPS" . . . . . . . . . . . . . . . . . . . . . . . . . . . . . . . . . . . . . . . 20
7.3 Record date and time . . . . . . . . . . . . . . . . . . . . . . . . . . . . . . . . . . . . . . . . . . . . . . . . . . . . 21
8. BILOBA AND ACCESSTO OPERATOR SERVICES . . . . . . . . . . . . . . . . . . . . . . . . . . . 22
9. USINGYOURTELEPHONEWITH MORETHAN ONE HANDSET . . . . . . . . . . . . . . . . . 23
9.1 Adding a new handset . . . . . . . . . . . . . . . . . . . . . . . . . . . . . . . . . . . . . . . . . . . . . . . . . . . 23
10. IDENTIFYINGYOUR HANDSETTO ANOTHER BILOBA BASE . . . . . . . . . . . . . . . . . . 24
11. OTHER SETTINGS . . . . . . . . . . . . . . . . . . . . . . . . . . . . . . . . . . . . . . . . . . . . . . . . . . . . . 25
12. ADDITIONAL INFORMATION . . . . . . . . . . . . . . . . . . . . . . . . . . . . . . . . . . . . . . . . . . . . . 26
12.1 Technical specifications . . . . . . . . . . . . . . . . . . . . . . . . . . . . . . . . . . . . . . . . . . . . . . . . . .26
12.2 Warranty . . . . . . . . . . . . . . . . . . . . . . . . . . . . . . . . . . . . . . . . . . . . . . . . . . . . . . . . . . . . . 27
12.3 Safety . . . . . . . . . . . . . . . . . . . . . . . . . . . . . . . . . . . . . . . . . . . . . . . . . . . . . . . . . . . . . . . 28
12.4 Maintenance . . . . . . . . . . . . . . . . . . . . . . . . . . . . . . . . . . . . . . . . . . . . . . . . . . . . . . . . . . 29
12.5 Consumer services . . . . . . . . . . . . . . . . . . . . . . . . . . . . . . . . . . . . . . . . . . . . . . . . . . . . . 29
BILOBA250gb.qxd 07/12/00 12:14 Page 2

3
1. GETTING STARTED
1.1 INSTALLATION
The base must not be placed near any excessive heat sources (radiator, sunlight, etc.)
and should be protected against vibration, dust, humidity, splashes.
Take care when choosing the location of the base, as the quality of communications depends on it. In
particular avoid placing it near the following: window, reinforced concrete, large metal object, television
set, fluorescent tube, halogen lamp, burglar alarm unit, Hi-Fi system, etc.
!
The range of your telephone varies according to its environment. Obstacles such as thick
walls and metal structures can alter the range.To optimise the range, you can alter the direction
of the base and its aerial.
BILOBA250gb.qxd 07/12/00 12:14 Page 3

4
1.2 PREPARINGTHE BASE
lConnect the telephone cable and the power supply cable to the rear of the base as shown.
lSecure the stand to the base, under the cables.
lConnect your telephone jack to the telephone socket.
lConnect the mains adapter to a 230V/50 Hz power outlet.
4The green led shows that the base is powered.
lExtend the telescopic aerial on the base.
telephone
cable
mains power
cable
BILOBA250gb.qxd 07/12/00 12:14 Page 4

5
1.3 PREPARINGTHE HANDSET
Connect the battery
lOpen and remove the battery compartment cover.
lConnect the battery connector.
lClose the cover.
open the cover connect and install close the cover
the battery
lPlace the handset on the base: the battery is now charging.
4The battery icon will light up a few seconds later.
!
Before using for the first time, we recommend that you leave the handset to charge on the
base for a whole day (12 hours), in order to optimise battery performance and life.
!
Only use rechargeable batteries with exactly the same specifications as those supplied with
the product.Any failure to do so will immediately invalidate any warranty on the part of ATLINKS.
BILOBA250gb.qxd 07/12/00 12:14 Page 5
Table of contents
Other ATLINKS Cordless Telephone manuals