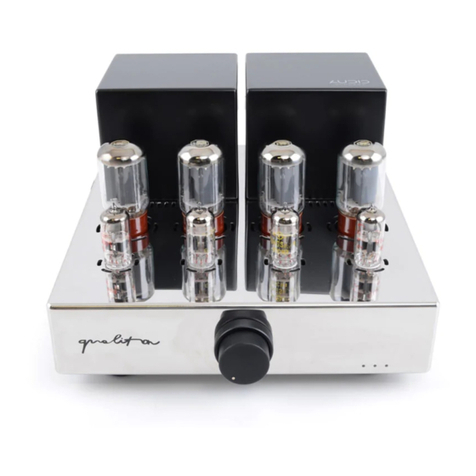
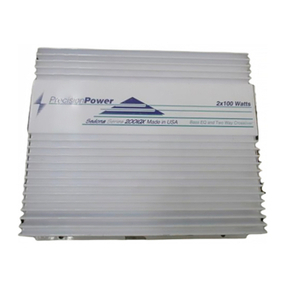
Audio Hungary Qualiton A35 User manual

Qualiton A35
User’s Manual


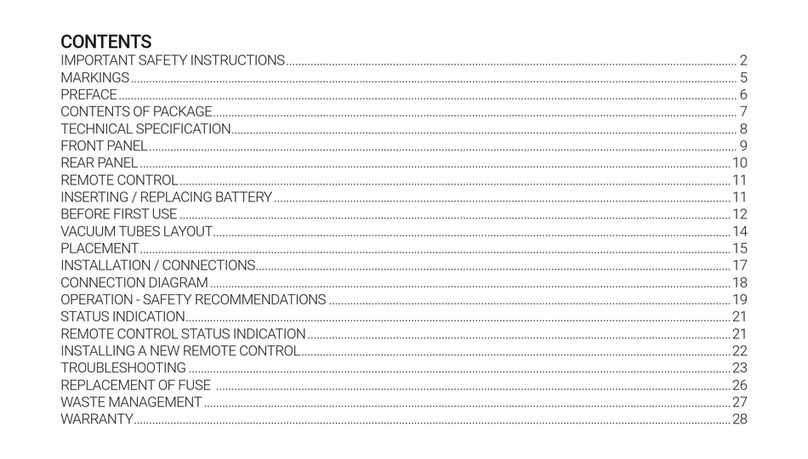
IMPORTANT SAFETY INSTRUCTIONS................................ 4
MARKINGS ............................................................................... 8
PREFACE ................................................................................... 9
BASIC INFORMATION...........................................................10
TECHNICAL ASSISTANCE AND SERVICE INFORMATION ... 11
GENERAL SPECIFICATIONS................................................12
ELECTRICAL SPECIFICATIONS ..........................................13
FRONT PANEL........................................................................14
REAR PANEL...........................................................................16
CONTENTS OF PACKAGE....................................................18
PLACEMENT...........................................................................19
INSTALLATION OF VACUUM TUBES .................................20
USING THIRD PARTY VACUUM TUBES ............................23
BLOCK DIAGRAM ..................................................................24
CONNECTION DIAGRAM .....................................................25
AC MAINS CONNECTION ....................................................26
GOOD TO KNOW....................................................................27
REMOTE CONTROL ..............................................................28
INSERTING / REPLACING BATTERY .................................29
REPLACEMENT OF FUSE ....................................................30
WASTE MANAGEMENT .......................................................31
CONTENTS

1. Read these instructions.
2. Keep these instructions.
3. Heed all warnings.
4. Follow all instructions.
5. Improper installation may cause malfunction!
6. Do not use this apparatus near water.
7. Clean only with a dry cloth.
8. Do not block any ventilation openings since this
may lead to re. Install in accordance with the
manufacturer’s instructions.
9. Do not install near any heat sources such as
radiators, heat registers, stoves, or other apparatus
(including ampliers) that produce heat.
10. Do not defeat the safety purpose of the polarized
or grounding-type plug. A polarized plug has two
blades with one wider than the other. A grounding
type plug has two blades and a third grounding
prong. The wide blade or the third prong are provided
for your safety. If the provided plug does not t into
your outlet, consult an electrician for replacement of
the obsolete outlet.
11. Connect mains power supply cord only to a
mains socket outlet with a protective earthing
connection.
QUALITON A354
IMPORTANT SAFETY INSTRUCTIONS
PLEASE READTHEM BEFORE OPERATING THIS EQUIPMENT!

12. Be careful with appliance cables! Do not lead
them across sharp surfaces, do not clam them
together and do not leave them in a hanging
position.
Protect the power cord from being walked on or
pinched particularly at plugs, convenience
receptacles, and the point where they exit from the
apparatus.
13. You must not operate the appliance with
damaged cables.
14. Before powering up your amplier, make sure
protective cover, ports, plugs and cables are checked
for intactness.
15. Only use attachments/accessories specied by
the manufacturer.
16. Use only with the cart, stand, tripod, bracket, or
table specied by the manufacturer, or sold with the
apparatus. When a cart is used, use caution when
moving the cart/apparatus combination to avoid
injury from tip‑over.
17. Unplug this apparatus during lightning storms or
when unused for long periods of time.
18. No user‑serviceable parts inside. Improper
repair may lead to loss of warranty! Refer servicing
to qualied service personnel.
USER’S MANUAL 5
IMPORTANT SAFETY INSTRUCTIONS

19. Servicing is required when the apparatus has
been damaged in any way, such as power supply
cord or plug is damaged, liquid has been spilled or
objects have fallen into the apparatus, the apparatus
has been exposed to rain or moisture, does not
operate normally, or has been dropped.
20. You must not start up damaged or faulty
appliance. In case of any malfunction, unplug your
amplier immediately.
21. In case of a malfunction, the protective cover
must not be opened or removed.
22. Do not expose this equipment to dripping or
splashing and ensure that no objects lled with
liquids, such as vases, are placed on the equipment.
23. Do not touch the appliance or its mains cable
with wet hands.
24. In case of re, you must not use water to
extinguish the re, even if the amplier is switched
off.
25. The appliance may only be used by qualied
adults or children above 14 years of age if
supervised by a qualied adult.
26. Keep the appliance out of the reach of children.
27. Make sure your domestic animal does not lie or
sit on the top of the appliance.
28. If you do not use your amplier for a long time,
unplug the appliance carefully.
QUALITON A356
IMPORTANT SAFETY INSTRUCTIONS
PLEASE READTHEM BEFORE OPERATING THIS EQUIPMENT!

29. To completely disconnect this equipment from
the AC mains, disconnect the power supply cord
plug from the AC receptacle.
30. The mains plug of the power supply cord shall
remain readily operable.
31. Do not expose batteries to excessive heat such
as sunshine, re or the like.
32. WARNING! To reduce risk of re or electrical
shock, do not expose this equipment to rain or
moisture.
33. CAUTION! To reduce the risk of electric shock,
do not remove cover.
USER’S MANUAL 7
IMPORTANT SAFETY INSTRUCTIONS

The exclamation point within an equilateral
triangle is intended to alert the user to the
presence of important operating and maintenance
instructions in the literature accompanying the
appliance.
CAUTION: Hot Surface! Do Not Touch!
Protective cover of the product may become
hot when operating this product continuously.
The crossed-out wheeled bin is the European
Union symbol for indicating separate
collection for electrical and electronic equipment.
This product contains electrical and electronic
equipment which should be reused, recycled or
recovered and should not be disposed of with
unsorted regular waste. Please return the unit or
contact the authorised dealer from whom you
purchased this product for more information.
The product meets the relevant directives
and standards of the European Union.
Supplied with alternating current (AC).
115 V / 230 V Nominal supply voltage.
50 Hz / 60 Hz Nominal supply frequency.
QUALITON A358
MARKINGS

Before installing the Qualiton A35 stereo amplier,
please study this User’s Manual carefully!
Operating your amplier in a manner it is designed
for, ensures you an utmost musical experience and
a reliable operation.
If you have any questions on our products or
services, please do not hesitate to contact us on our
website www.audiohungary.com
USER’S MANUAL 9
PREFACE

For your convenience, please ll out
the following lines to facilitate any future
technical assistance and repair service:
Serial Number:
_______________________________
Date of purchase:
_______________________________
Dealer Name:
_______________________________
Vacuum tubes used:
_______________________________
_______________________________
_______________________________
QUALITON A3510
BASIC INFORMATION

If at any time you have any questions about your
Qualiton product, do not hesitate to contact your
local Qualiton dealer, who is at your disposal. If you
or your dealer need more help, you can receive
technical assistance at:
Audio-Hungary Ltd.
132 Derkovits Street
4400, Nyíregyháza, Hungary
Phone: +36 42 446-688
Fax: +36 42 446-688
E-mail: infox@audiohungary.hu
If it becomes clear that your Qualiton product needs
service, you should still contact your local dealer
rst. You can also contact us directly for more
instructions at one of the contact details above.
USER’S MANUAL 11
TECHNICAL ASSISTANCE AND
SERVICE INFORMATION

QUALITON A3512
GENERAL SPECIFICATIONS
Number of input ports / channel 3 unbalanced Stereo IN
1 balanced Stereo IN
Number of output ports / channel 1 unbalanced Power OUT
Tubes required 4 x 7581A
2 x 12AX7
2 x 6922
Weight 15 kg
Dimensions 29 x 37 x 19 cm
Power requirement idle: 150 W, max: 300 W

Rated output power 2 x 35 W
Input impedance, Balanced Stereo IN 40 kOhm
Input impedance, Unbalanced Stereo IN 10 kOhm
Input sensitivity, Balanced Stereo IN 500 mV, to rated output
Input sensitivity, Unbalanced Stereo IN 500 mV, to rated output
Gain +30 dB (RL = 8 Ohm)
Frequency response 22 Hz to 80 kHz (-3 dB, rated output)
Total Harmonic Distortion < 0,3% (f = 1 kHz, rated output)
Signal-to-noise ratio > 98 dB (RL = 8 Ohm, rated output)
Load impedance 4 - 8 Ohm
USER’S MANUAL 13
ELECTRICAL SPECIFICATIONS

QUALITON A3514
FRONT PANEL
2 3 41

1. MAIN SWITCH with position indicator
2. VOLUME control allows adjustment of the stereo
listening level
3. INPUT LEDs indicating the selected input port.
From left to right: BALANCED INPUTS - LINE 1, 2, 3
4. INPUT SOURCE SELECTOR push-button allows
selection of amplier channel used.
USER’S MANUAL 15
FRONT PANEL

QUALITON A3516
REAR PANEL
1 2 3 4 5 6

1. BALANCED INPUTS accept high level program
source signals.
2. LINE 1, 2, and 3 INPUTS accept high level program
source signals
3. RIGHT POWER OUTPUT - Connections for a
4 or 8 Ohm loudspeaker.
4. LEFT POWER OUTPUT - Connections for a
4 or 8 Ohm loudspeaker.
5. IEC Appliance AC INLET with built-in main fuse
holder to connect the Qualiton A35 to a live AC
outlet.
6. MAIN SWITCH with position indicator.
USER’S MANUAL 17
REAR PANEL

QUALITON A3518
CONTENTS OF PACKAGE
Once you have unpacked the entire contents of the
package, you can now check that you have received
all the accessories.
- 1 pc Qualiton A35
- 1 pc Remote Control
- 1 pc User’s Manual
- 4 pcs 7581A / 5881 power tubes
- 2 pcs 12AX7 / ECC83 vacuum tubes
- 2 pcs 6922 / E88CC vacuum tubes
- 1 pc Standard Mains Cable
- 1 pc Torx Wrench (TX10)

• Please read the following carefully to select a
correct location for your amplier.
• IMPORTANT! Due to the vacuum tube construction
of the amplier, it may heat up during use. Thus,
choose a location for installation where the
appliance can be well ventilated.
• The ventilation holes of the amplier must not be
covered (by tablecloth, curtain, newspaper, book,
etc.). Impairing ventilation can lead to overheating
and irregular operation conditions.
• Do not stack multiple units on top of each other.
• Avoid relocating the appliance from a cold to a
warm environment. Sudden temperature changes
can lead to moisture condensation. Please wait until
moisture is evaporated before putting your amplier
into operation.
• The aforesaid applies to the very rst installation of
the amplier as well. Prior to the rst installation,
leave the amplier at its place of operation at least
for 2 hours. Once this time is over, the amplier can
be powered up, according to this guide.
• The appliance is designed for indoor use. Do not
operate it in wet, humid environment.
• Do not store any electrical device or object in a
perimeter of 200 millimetres around your amplier.
Do not use the appliance next to heating sources
and radiators. Keep it away from hot or dusty
environment and ame.
200mm200mm
200mm
USER’S MANUAL 19
PLACEMENT

QUALITON A3520
INSTALLATION OF VACUUM TUBES
• You have to remove the protective cover to prepare
for the insertion of the electron tubes. The protective
cover locks in place with relatively high resistance,
be careful not to scratch the device while removing
it. See the gure below.
• Remove a power tube from one of the boxes
labeled 7581A and carefully place it in one of the
tube sockets labeled 7581A / 5881 in the gure
below. Make sure that the position of the small 'key'
on the bottom of the vacuum tube matches the
position of the notch in the middle of tube socket
and ts in it correctly. See the gure below.
• Repeat the same steps with the three remaining
7581A tubes. If all four power tubes are in place, the
driver tubes may follow.
• Remove a tube from one of the boxes labeled
12AX7 and carefully place it in one of the tube
sockets labeled 12AX7 / ECC83 in the gure below.
Make sure that the holes in the electron tube socket
t the pins of the electron tube correctly. See the
gure below.
• Repeat the previous step with the other 12AX7
tube.
• Remove a tube from one of the boxes labeled 6922
and carefully place it in one of the tube sockets
labeled 6922 / E88CC in the gure below. Make sure
that the holes in the electron tube socket t the pins
of the electron tube correctly. See the gure below.
• Repeat the previous step with the other 6922 tube.
• Carefully put the protective cover back in place. See
the gure below.
Table of contents
Other Audio Hungary Amplifier manuals

Audio Hungary
Audio Hungary Qualiton A20i User manual

Audio Hungary
Audio Hungary QUALITON X2 User manual

Audio Hungary
Audio Hungary Qualiton C200 User manual

Audio Hungary
Audio Hungary qualiton phono User manual
Audio Hungary
Audio Hungary Qualiton A50i User manual

Audio Hungary
Audio Hungary Qualiton A20i User manual

Audio Hungary
Audio Hungary Qualiton X200 User manual
Audio Hungary
Audio Hungary Qualiton APR 204 User manual