Audio Reveal second signature User manual

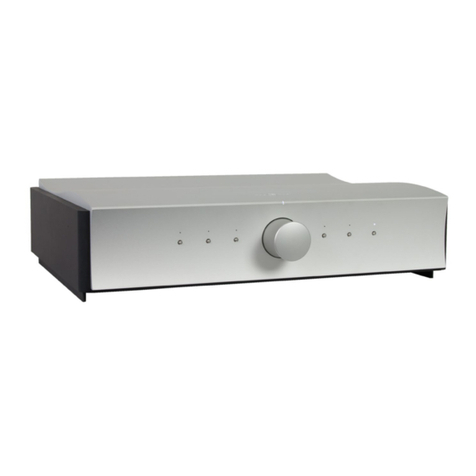
Audio Reveal
second
signature
Instruction manual
Instrukcja obsługi
www.audioreveal.com

!
2!

!
3!
English

!
4!
1. Introduction
Thank you for choosing Audio Reveal second signature
amplifier, we hope it will meet your expectations. Taking care
about every detail and using highest grade components, we
created an amplifier that provides neutral and musical sound,
which is authentic.
Please read this manual carefully to obtain complete satisfaction
of your new Audio Reveal second signature.
2. Unpacking and first start
Check whether the box was not damaged in transport, if is it so,
report it to the dealer immediately.
Box Contents:
- Audio Reveal second signature amplifier
- set of tubes (in a separate box)
- remote control (Audio Reveal RM-1)
- two tube cages
- power cord
- instruction manual
- cotton gloves
Place the unit on a solid, stable surface, away from warm and wet
places (radiators, ovens).
The unit must be able to ventilate.
(Do not cover the ventilation slots, Do not place unit in enclosed
cabinets, Do not insert anything into the ventilation slots).

!
5!
If the unit was in a low temperature, wait until it reaches room
temperature (do not turn on the unit when moisture is inside).
Tube Box Contents:
- 2 x 12AX7 (ECC83)
- 2 x 12BH7
- 2 x KT170
Using the cotton gloves place tubes in the sockets (respectively to
the description).
ATTENTION! DO NOT TURN ON THE UNIT WITHOUT
TUBES
DO NOT CHANGE TUBES DURING OPERATION
Connect loudspeakers to the amplifier using speaker cables.
Left Loudspeaker to Speaker L terminals,
respectively to 4Ωor 8Ω.
Right Loudspeaker to Speaker R terminals,
respectively to 4Ωor 8Ω.
ATTENTION! DO NOT TURN ON THE AMPLIFIER
WITHOUT SPEAKERS CONNECTED
DO NOT DISCONNECT SPEAKERS DURING OPERATION

!
6!
Connect a source e.g. CD Player to one of Inputs (1, 2, 3, 4),
right channel to Input R, left channel to Input L.
Connect the unit to the mains using power cord (230V 50Hz).
CAUTION! IN ORDER TO ENSURE SAFETY THE
ELECTRICAL INSTALLATION MUST BE EQUIPPED WITH
GROUND (EARTH) CONNECTION.
DISCONNECT THE UNIT FROM MAINS BEFORE
REPLACING THE FUSE
USE FUSE (SLOW) T3.15A 250V

!
7!

!
8!
Turn on the power switch (POWER).
The amplifier warms up the tubes initially (to extend their
lifetime); it takes 60s (until the LED light is green).
Using the Input Selector (INPUT)choose input (1, 2, 3, 4) where
the source is connected e.g. CD Player.
Using the Volume Knob (VOLUME)set desired volume level.
Full sonic possibilities are reachable after 40 minutes.
ATTENTION! A new amplifier and the tubes need to break-in.
It happens when music is played through the system.
Break-in time: 100h

!
9!
It is possible to control the volume level using a remote control
(Audio Reveal RM-1).
Vol + button increases volume level.
Vol –button decreases volume level.
Audio Reveal RM-1 remote uses CR2450 battery.

!
10!
The amplifier has an NFB (Negative Feedback) switch.
You can adjust the sound to your preferences.
NFB Low NFB High
3. Safety and Maintenance
Do not open the case!
High voltage inside can cause serious health problems and may be
life threatening.
Refer all servicing to qualified service personnel only.
Do not pour liquids on the unit!
Do not clean the device with chemicals, detergents – always use a
soft, dry cloth.
Clean only when the device is unplugged from the mains.
Worn tubes replace only with the same type, specific parameters,
paired ones (contact Audio Reveal).
Never change the tubes during operation.
Unplug unit from the mains when unused for long periods of
time.

!
11!

!
12!

!
13!
4. Warranty
The device is covered by a 2-year warranty.
(except for driver tubes* and power tubes*)
The warranty period is from the date of purchase.
The warranty only comes into force if a proof of purchase is
shown.
The manufacturer's warranty is only carried out through
authorised sales points.
The warranty does not cover faults resulting from:
- incorrect placement, faulty connections, improper operation
(including use of tubes of unknown parameters and origin)
- mechanical damages
- random events, including lightning discharges, failures of power
networks, fire, flooding, high temperatures and chemical agents
- connecting the amplifier to the unstable mains (unstable voltage)
* (3 months); the tubes warranty does not cover mechanical
damage, cracks, scratches, loss of vacuum, etc. resulting from
improper handling

!
14!
Technical Data:
Type
Integrated Tube Amplifier
Single-ended Class-A
Dual Mono
Model
second signature
Driver Tubes
2 x 12AX7 (ECC83)
2 x 12BH7
Power Tubes
2 x KT170
Frequency Response
20Hz – 25kHz
±
0.7dB @1W
Power (RMS)
21W (8Ω, 4Ω@1kHz)
Speakers impedance
4 – 8 Ω
Speaker terminals
4Ωand 8Ω
Inputs
4 x RCA
Input impedance
50k ohm
Remote control
Audio Reveal RM-1
Start-up Time
60s
Power consumption (nominal)
240W
Dimensions
476 x 410 x 220
Net Weight
30.2 kg
Fuse
T3.15A / 250V (Slow)
*!Manufacturer reserves the right to change specifications without prior
notice.
More information at www.audioreveal.com or
info@audioreveal.com
01.2021-en Audio Reveal ®

!
15!
Polski

!
16!
1. Wstęp
Dziękujemy za wybór wzmacniacza firmy Audio Reveal,
mamy nadzieję, że spełni on Państwa oczekiwania. Dbając o
każdy szczegółoraz zastosowanie elementów najwyższej jakości
stworzyliśmy wzmacniacz, który dostarcza dźwięk neutralny a
zarazem muzykalny, będący w swojej istocie prawdziwym.
Prosimy o dokładne przeczytanie tej instrukcji w celu uzyskania
pełnej satysfakcji z zakupionego przez Państwa urządzenia.
2. Wypakowanie i uruchomienie wzmacniacza
Należy upewnićsię, że opakowanie nie zostało uszkodzone w
transporcie, jeśli tak, niezwłocznie zgłosićto w miejscu zakupu.
W opakowaniu znajduje się:
- wzmacniacz Audio Reveal second signature
- zestaw lamp
- pilot zdalnego sterowania (Audio Reveal RM-1)
- dwie osłony lamp
- kabel zasilający
- instrukcja obsługi
- rękawiczki
Umieścićwzmacniacz na stabilnej powierzchni, z dala od
nasłonecznionych i wilgotnych miejsc (kaloryferów, grzejników).
Wzmacniacz musi miećmożliwość swobodnej wentylacji
(nie zakrywaćotworów wentylacyjnych, nie wkładać
przedmiotów w otwory wentylacyjne, nie umieszczać
wzmacniacza w zabudowanych szafkach bądźpółkach).

!
17!
Jeśli wzmacniacz przebywałw niskich temperaturach, po jego
wyjęciu z opakowania należy odczekaćdo momentu, kiedy
nabierze on temperatury pokojowej (nie należy
uruchamiaćurządzenia, kiedy w jego wnętrzu znajduje
sięwilgoć).
W pudełku z lampami znajdująsię:
- dwie lampy 12AX7 (ECC83)
- dwie lampy 12BH7
- dwie lampy KT170
Używając dołączonych rękawiczek umieścićlampy w
odpowiednich miejscach zgodnych z opisem.
UWAGA! NIE URUCHAMIAĆWZMACNIACZA BEZ
WŁOŻONYCH LAMP
NIE WYMIENIAĆLAMP W TRAKCIE PRACY
URZĄDZENIA
Po umieszczeniu lamp w podstawkach podłączyćkolumny
głośnikowe do wzmacniacza przy użyciu przewodów
głośnikowych.
Kolumnęlewądo gniazd Speaker L, odpowiednio do 4Ωlub 8Ω
Kolumnęprawądo gniazd Speaker R, odpowiednio do 4Ωlub 8Ω
UWAGA! NIE URUCHAMIAĆWZMACNIACZA BEZ
PODŁĄCZONYCH KOLUMN GŁOŚNIKOWYCH
NIE ODŁĄCZAĆKOLUMN GŁOŚNIKOWYCH W TRAKCIE
PRACY URZĄDZENIA

!
18!
Podłączyćźródło np. odtwarzacz CD pod jedno z wejść (1, 2, 3, 4),
odpowiednio kanałprawy do Input R, kanałlewy do Input L.
Podłączyćwzmacniacz kablem sieciowym do gniazdka
elektrycznego (230V 50Hz).
UWAGA! W CELU ZAPEWNIENIA BEZPIECZEŃSTWA
INSTALACJA ELEKTRYCZNA MUSI BYĆWYPOSAŻONA
W UZIEMIENIE
W PRZYPADKU WYMIANY BEZPIECZNIKA NALEŻY
BEZWZGLĘDNIE ODŁĄCZYĆURZĄDZENIE OD SIECI
ELEKTRYCZNEJ
ZASTOSOWAĆBEZPIECZNIK ZWŁOCZNY T3.15A 250V

!
19!

!
20!
Ustawićprzełącznik POWER w pozycji ON.
Wzmacniacz wstępnie rozgrzewa lampy (w celu wydłużenia ich
żywotności), należy odczekać60 sekund (do zapalania siędiody
LED zielonym stałym światłem).
Selektorem wejść INPUT wybraćwejście (1, 2, 3, 4) pod które
zostało podłączone źródło np. odtwarzacz CD.
Pokrętłem głośności VOLUME ustawićżądany poziom głośności.
Pełne możliwości soniczne wzmacniacza sąosiągalne po 40
minutach od włączenia urządzenia.
UWAGA! Nowe urządzenie oraz zestaw lamp wymagają
wygrzania. Proces ten odbywa siępodczas odtwarzania muzyki.
Minimalny czas wygrzewania wynosi 100 godzin.
Table of contents
Languages:
Other Audio Reveal Amplifier manuals


