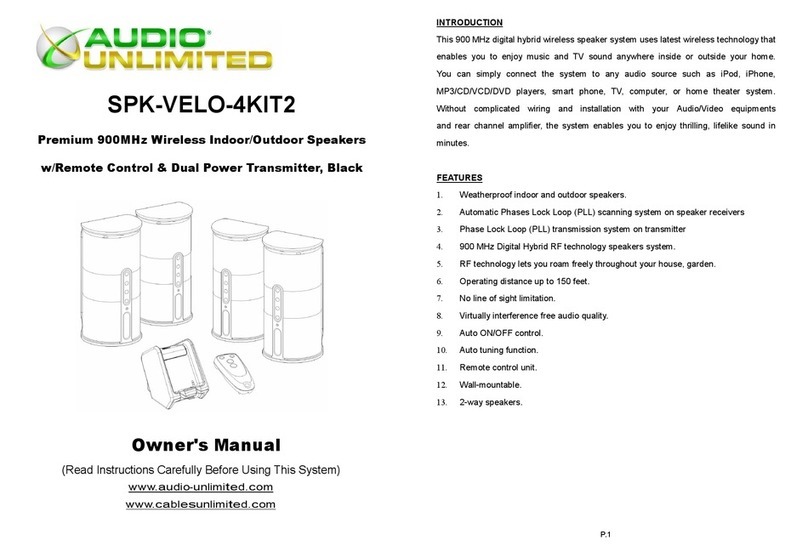
Audio Unlimited SPK-ROCK-DUO2 User manual

SPK-ROCK-DUO2
Premium 900MHz, Grey Wireless Rock Speaker,
w/ Dual Power Transmitter
Owner's
M
a
nu
al
(Read Instructions Carefully Before Using This System
)
www.
a
ud
i
o
-
un
li
m
i
t
e
d.
c
o
m
www.
ca
b
l
e
s
un
li
m
i
t
e
d.
c
o
m

P.1
INTRODUCTION
This 900 MHz wireless rock speaker system uses the latest wireless technology that enables you to
enjoy music and TV sound anywhere inside or outside your home. Simply connect the system to any
audio source such as Radio, TV, VCR, Hi-Fi and CD/MP3/VCD/DVD player. Without any complicated
wiring and installation with your Audio/Video equipment and rear channel amplifier, the system enables
you to enjoy thrilling, lifelike sound in minutes.
FEATURES
1. Automatic Phases Lock Loop (PLL) scanning system on speaker receivers
2. Phase Lock Loop (PLL) transmission system on transmitter
3. 900 MHz RF technology rock-type outdoor speaker system
4. RF technology lets you place the rock speaker freely anywhere in your garden
5. Operating distance up to 150 feet
6. No line of sight limitation
7. Virtually interference free audio quality
8. Auto ON/OFF control on the transmitter
9. Auto tuning function on the speaker
10. Auto shut-off on speaker

P.2
COMPONENT IDENTIFICATION
TRANSMITTER
SPEAKER RECEIVER

P.3
INSTALLATION
TRANSMITTER
1. Connect the supplied AC power adapter to an electrical wall outlet
2. Plug the AC power adapter (12V/200mA) in the DC jack located at the rear of the transmitter, or you
can insert 4 X “AA” size ALKALINE batteries (not included) into the battery compartment of the
transmitter with correct polarity
3. Turn on the transmitter by setting the POWER switch to the “ON” position, and the POWER LED
(blue) on the transmitter will start flashing
4. The retractable audio cord that is located at the front of the transmitter can be connected to the
audio output jack of any audio source such as i-Pod, i-Phone, MP3 mobile phone, Hi-Fi,
MP3/CD/VCD/DVD players.\, laptops, computers and more.
5. As soon as the transmitter is receiving the audio signal, the POWER LED (blue) will illuminate
steady.
SPEAKER RECEIVER
1. Plug in the power adapter with the rock speaker and AC power outlet to charge the lead acid battery
built inside the rock speaker. The battery pack must be charged at least 12 hours before operating
the product for the first time

P.4
2. The rock speaker can be operated either with power supplied by the battery pack or via AC outlet by
connecting the power adapter. When the power adapter is connected with the AC outlet, the battery
pack will simultaneously be charged while the unit is in operation. Press the “On/Off” button and turn
the speaker “ON”. The POWER LED will light up in green. Switch off the speaker by pressing the
“ON/OFF” button on the speaker, and the LED will turn off
OPERATION
1. Turn on the audio source (TV or audio component) to which the transmitter is connected with. The
green LED on the transmitter will light up
2. Select channel 1 or 2 of the transmitter to optimize performance at your location
3. Turn on the ON/OFF button on the speaker. Press the “AUTO TUNE” button to get the best tuning
reception in the speaker. When the button is pressed, frequency tuning starts automatically and it
stops once a signal is detected
4. Volume can be adjusted up by pressing “+” button or down by pressing the button “-“ to the desired
listening level

P.5
5. Whenever you find frequency jam, move your channel switch from one channel to the other channel
(there are two channels for selection) on the transmitter, and then press the “AUTO-TUNE” button
on the speaker again
6. Switching Off
a) For protection of the transmitter and power saving, the transmitter will cut off automatically if
there is no/weak operation input signal from audio source for longer than 4 minutes
If the audio signal comes back, the transmitter will turn on automatically
b) Turn off the speaker by pressing the ON/OFF button, or automatically going off in
approximately 4 minutes when the transmitter is off
7. Weather Condition
a) The rock speaker unit should be operated under the temperature range 14˚F – 122˚F.
Operation at temperature conditions beyond this range will likely cause some damage on the
unit
b) The rock speaker unit should be moved to indoor environment when the
weather conditions are at extreme worst case scenarios, like heavy downpours,
snow, or at temperatures below 14˚F and over 122˚F.
WARNING: THE POWER ADAPTERS ARE FOR INDOOR USE ONLY. IF IT IS DRIZZLING OR
SPRINKLING (RAINING), THE SPEAKER CAN BE OPERATED BY BATTERY BUT THE
ADAPTERS NEED TO BE MOVED TO AN AREA AWAY FROM THE RAINWATER
8. Recharging battery
a) Connect the power cable to the AC power outlet and speaker, batteries will be recharged
automatically

P.6
TROUBLE SHOOTING
NO SOUND
- Ensure the AC/DC adapter is fully inserted into the AC outlet and the power connection input
on the transmitter
- Ensure the speaker is switch ON
- Speaker’s battery capacity is low, connect the AC/DC adapter to the speaker
- Ensure the TV or audio component is ON
- The connected audio / video equipment is not playing. Start playing the equipment.
- The volume of speaker is too low, adjust the volume to an appropriate level.
- The volume of the audio source is too low. Turn up the volume of the source equipment (iPod,
radio, etc.).
DISTORTED
- Press the “AUTO-TUNE” button on the speakers until they tune into the matching frequency of
the transmitter
- Change the position of the channel selector on the transmitter. Press the “AUTO TUNE”
button on the speaker
- Ensure the volume level of speaker is adjusted properly
- The speaker is too far away from the transmitter, move it closer.
- The audio input level of the audio signal is too low. Turn up the volume of the audio source
equipment
- The audio input level of the transmitter is too high, lower the volume of the audio source
equipment

P.7
TECHNICAL SPECIFICATIONS
Transmission Mode : UHF stereo
Carrier Frequency : 900 MHz
Operation Voltage : Transmitter, DC 12V 200mA
Speaker, built-in lead acid rechargeable
battery
or DC 15V 1A adapter
Frequency Response : 40Hz – 12KHz
Distortion : 1%
S/N Ratio : 65dB
Operation Distance : Up to 150 feet
Output Power : 100Watts (PMPO)
Storage Conditions : Put the speaker indoor if
1) Heavy downpours
2) Snowing
3) Temperature below 14˚F, over 122˚F
Operation Conditions : At temperature below 122˚F, over 14˚F
WARNING : Changes or modifications to this unit not expressly approved by the party responsible
for compliance could void the user’s authority to operate the equipment. Operation is
subject to the following two conditions: (1) this device may not cause interference, and
(2) this device must accept any interference, including interference that may cause
undesired operation of the device.
This device must be used with the AC/DC adapter supplied in the package.

P.8
SPK-ROCK-DUO2
Haut-parleur de qualité supérieure 900MHz gris,
sans fil en forme de roche avec émetteur à
alimentation double
Manuel du propriétaire
(Veuillez lire ces instructions soigneusement avant l’utilisation de ce système
)
www.
a
ud
i
o
-
un
li
m
i
t
e
d.
c
o
m
www.
ca
b
l
e
s
un
li
m
i
t
e
d.
c
o
m

P.9
INTRODUCTION
Ce système de haut-parleur sans fil 900 MHz en forme de roche utilise la technologie sans fil la plus
récente, vous permettant ainsi d’apprécier le son de votre musique ou de la télévision en tout endroit
que ce soit à l’intérieur ou l’extérieur de votre maison. Branchez tout simplement votre système à une
source audio tels celle de la radio, TÉLÉVISION, VCR, chaîne hi-fi ou lecteur CD/MP3/VCD/DVD. En
raison de son installation simple, l’absence de filage vers votre équipement audio/vidéo et l’amplificateur
arrière de voie, ce système vous permet d’apprécier un son électrisant et réaliste en quelques minutes.
CARACTÉRISTIQUES
1. Système de balayage à boucle à verrouillage de phase (PPL) automatique sur les récepteurs des
haut-parleurs
2. Système de transmission à boucle à verrouillage de phase (PPL) sur l’émetteur
3. Système de haut-parleur extérieur de type roche à technologie RF 900 MHz
4. La technologie RF vous permet de placer le haut-parleur en forme de roche sans contrainte en tout
endroit de votre jardin
5. Distance opérationnelle de 150 pieds
6. Aucune limite de visibilité directe
7. Une qualité audio virtuellement sans interférence
8. Commande auto ON/OFF sur l’émetteur
9. Fonction de syntonisation automatique sur le haut-parleur
10. Fermeture automatique sur le haut-parleur

P.10
IDENTIFICATION DES COMPOSANTS
ÉMETTEUR
RÉCEPTEUR DU HAUT-PARLEUR

P.11
INSTALLATION
ÉMETTEUR
1. Branchez l’adaptateur d’alimentation AC fourni à une prise murale électrique.
2. Insérez l’adaptateur d’alimentation AC (12V/200mA) dans la prise DC située à l’arrière de l’émetteur,
ou insérez 4 piles alcalines « AA » (non comprises) dans le compartiment des piles de l’émetteur, en
respectant la polarité.
3. Mettez l’émetteur sous tension en plaçant l’interrupteur d’alimentation à la position « ON ». Le DEL
d’alimentation (bleu) de l’émetteur clignote.
4. Branchez le cordon audio escamotable situé à l’avant de l’émetteur à toute prise de sortie audio sur
tout appareil audio tel l’iPod, l’iPhone, un cellulaire MP3, chaîne hi-fi, lecteur MP3/CD/VCD/DVD,
portable et ordinateur, entre autres.
5. Dès que l'émetteur reçoit le signal audio, la POWER LED (bleu) s'allume stable.
RÉCEPTEUR DU HAUT-PARLEUR
1. Branchez l’adaptateur d’alimentation au haut-parleur roche et à la prise d’alimentation AC afin de
charger l’accumulateur au plomb-acide intégré au haut-parleur. Le bloc-piles doit être chargé au
moins 12 heures avant la première utilisation du produit.

P.12
2. Ce haut-parleur roche s’alimente avec soit, le bloc-piles ou une prise AC en utilisant l’adaptateur
d’alimentation. Lorsque l’adaptateur d’alimentation est branché à la prise AC, le bloc-piles se charge
simultanément pendant que l’unité est en marche. Appuyez sur le bouton « On/Off » et mettez le
haut-parleur sous tension (« ON »). Le DEL ALIMENTATION s’allume en vert. Mettez le
haut-parleur hors tension en appuyant sur le bouton « ON/OFF » du haut-parleur et le DEL s’éteint.
OPÉRATION
1. Mettez la source audio à laquelle l’émetteur est branché (Télévision ou composante audio) sous
tension. Le DEL vert sur l’émetteur s’allume.
2. Choisissez le canal 1 ou 2 sur l’émetteur pour optimiser le rendement à votre endroit.
3. Appuyez sur le bouton ON/OFF du haut-parleur. Appuyez sur le bouton « AUTO TUNE » afin
d’obtenir la meilleure syntonisation pour la réception du haut-parleur. Lorsque vous appuyez sur un
bouton, la syntonisation de la fréquence démarre automatiquement et s’arrête lorsqu’un signal est
détecté.
4. Vous pouvez régler le volume en appuyant sur le bouton « + » pour l’augmenter et sur le bouton « -
» pour le baisser, afin d'obtenir le niveau de son désiré.

P.13
5. Si vous obtenez un brouillage de fréquence, faites basculer l’interrupteur de canal vers l’autre canal
(vous pouvez choisir entre deux canaux) sur l’émetteur et ensuite appuyez à nouveau sur le bouton
« AUTO-TUNE » du haut-parleur.
6. Fermeture automatique
a) Afin de protéger l’émetteur et économiser l’alimentation, l’émetteur se fermera
automatiquement si le signal d’entrée de la source audio est absent pendant 4 minutes.
Si le signal audio est détecté à nouveau, l’émetteur se remettra automatiquement sous tension.
b) Mettez le haut-parleur hors tension en appuyant sur le bouton ON/OFF. Le haut-parleur se
fermera automatiquement après 4 minutes lorsque l’émetteur est hors tension.
7. Conditions météorologiques
a) Vous pouvez utiliser l’unité haut-parleur roche lorsque la température est entre 14°F et 122°F.
L’utilisation de l’unité au cours de conditions météorologiques qui dépassent cette gamme
l’endommagera.
b) L’unité doit être placée à l’intérieur lorsque les conditions climatiques sont extrêmes, comme
exemple lors d’orages, lorsqu’il neige ou lorsque la température descend au-dessous de 14°F
ou augmente au-dessus de 122°F.
AVERTISSEMENT : LES ADAPTATEURS D’ALIMENTATION SONT CONÇUS POUR
UTILISATION INTÉRIEURE SEULEMENT. DANS DES CONDITIONS DE PLUIE FINE OU
AVERSES, LE HAUT-PARLEUR PEUT S’UTILISER EN UTILISANT LA PILE, MAIS LES
ADAPTATEURS DOIVENT ÊTRE DÉPLACÉS VERS UN ENDROIT À L’ABRI DE LA PLUIE.
8. Chargement de la pile
a) Branchez le câble d’alimentation à la prise d’alimentation AC et au haut-parleur et les piles se
chargeront automatiquement.

P.14
DÉPANNAGE
AUCUN SON
- Vérifiez que l’adaptateur AC/DC est complètement inséré dans la prise AC et dans l’entrée
d’alimentation sur l’émetteur.
- Assurez-vous que l’interrupteur du haut-parleur est à la position ON.
- La capacité de la pile du haut-parleur est basse – branchez l’adaptateur AC/DC au
haut-parleur
- Assurez-vous que la télévision ou autre source audio est sous tension.
- Le volume de la source audio est trop bas. Augmentez le volume de l'appareil source (iPod,
radio, etc).
- Le volume du haut-parleur est trop bas, augmentez le niveau du volume.
- Le réglage d'entrée audio de l'émetteur est trop fort, diminuez le volume de l'appareil source.
DISTORSION
- Appuyez sur le bouton « AUTO-TUNE » du haut-parleur pour le syntoniser avec la fréquence
correspondante de l’émetteur.
- Changez la position du sélecteur de canal sur l’émetteur. Appuyez sur le bouton « AUTO
TUNE » du haut-parleur.
- Assurez-vous que le niveau du volume du haut-parleur est réglé correctement.
- Le haut-parleur est trop éloigné de l’émetteur, rapprochez-le.
- Le niveau d’entrée de l’audio du signal audio est trop bas. Augmentez le volume de la source
audio.
- Le niveau d’entrée de l’audio de l’émetteur est trop haut. Baissez le volume de la source audio

P.15
CARACTÉRISTIQUES TECHNIQUES
Mode de transmission : Stéréo UHF
Fréquence porteuse : 900 MHz
Tension d’opération : Émetteur, DC 12V 200mA
Haut-parleur, pile plomb-acide rechargeable ou adaptateur
DC 15V 1A
Réponse en fréquence : 40 Hz – 12KHz
Distorsion : 1 %
Ratio S/N : 65 dB
Distance d’opération : Jusqu’à 150 pieds
Alimentation de sortie : 100 watts (PMPO)
Conditions d’entreposage : Placez le haut-parleur à l’intérieur dans les conditions
suivantes :
1) Orages
2) Neige
3) Température au-dessous de 14˚F, et au-dessus de 122˚F
Conditions d’utilisation : Température au-dessous de 122˚F et au-dessus de 14˚F
AVERTISSEMENT : Tout changement ou toute modification à cette unité sans l’autorisation
expressément approuvé par les autorités responsables des normes peut annuler
l’autorisation de l’utilisateur d’opérer cet équipement. L’opération est soumise
aux deux conditions suivantes : (1) cet appareil ne doit pas causer de
l’interférence, et (2) cet appareil doit accepter toute interférence y compris de
l’interférence qui peut engendrer l’opération indésirable de cet appareil.
Cet appareil doit être utilisé avec l’adaptateur AC/DC fourni dans
l’emballage.

P.16
SPK-ROCK-DUO2
Altavoz en forma de Roca Gris, inalámbrica a 900MHz,
con transmisor de alimentación dual
M
a
nu
al del Usuario
(Lea las instrucciones cuidadosamente antes de usar este sistema
)
www.
a
ud
i
o
-
un
li
m
i
t
e
d.
c
o
m
www.
ca
b
l
e
s
un
li
m
i
t
e
d.
c
o
m

P.17
INTRODUCCIÓN
Este sistema de altavoz en forma de roca inalámbrico a 900MHz usa la más moderna tecnología
inalámbrica para permitirle disfrutar de la música y el sonido de su TV en cualquier lugar dentro y fuera
de su hogar. Simplemente conecte el sistema a cualquier fuente de sonido cómo Radio, TV, VCR, Hi-Fi
o un reproductor de CD/MP3/VCD/DVD. Sin requerir de ningún cableado o instalación complicada a
su equipo de Audio/Video y al amplificador del canal trasero, el sistema le permite disfrutar de un sonido
excitante, vívido en minutos.
CARACTERÍSTICAS
1. Sistema de barrido automático Phase Lock Loop (PLL) en el receptor del altavoz
2. Sistema de transmisión Phase Lock Loop (PLL) en el transmisor
3. Sistema de altavoces para exteriores con transmisión inalámbrica con tecnología de RF a
900 MHz RF
4. Tecnología de RF, le permite colocar el altavoz con forma de roca libremente en cualquier parte de
su jardín
5. Distancia de operación de hasta 150 pies (50 m)
6. Sin limitación de línea de visibilidad
7. Calidad de audio virtualmente libre de interferencias
8. Control de encendido/apagado automático en el transmisor
9. Función de sintonía automática en el altavoz
10. Sistema de apagado automático en el altavoz

P.18
IDENTIFICACIÓN DE COMPONENTES
TRANSMISOR
RECEPTOR DE ALTAVOZ

P.19
INSTALACIÓN
TRANSMISOR
1. Conecte la fuente de alimentación de AC suministrada a cualquier toma de corriente doméstica.
2. Conecte el adaptador de AC (12V/200mA) en el conector de DC ubicado en la parte posterior del
transmisor, o bien inserte 4 baterías alkaline “AA” (no incluidas) en el alojamiento de baterías del
transmisor observando conectar de acuerdo a la polaridad correcta.
3. Encienda el transmisor deslizando el interruptor POWER a la posición “ON”; el indicador azul
“POWER” en el transmisor empezará a parpadear.
4. El cable de audio retractile que se ubica al frente del transmisor puede ser conectado a la salida de
audio de cualquier fuente de sonido, cómo un iPod, iPhone, teléfono celular con MP3, Hi-Fi,
reproductores de MP3/CD/VCD/DVD, computadoras portátiles y de escritorio, y muchos más.
5. Tan pronto como el transmisor recibe la señal de audio, el indicador LED de encendido (azul) se
iluminará constante.
RECEPTOR DE ALTAVOZ
1. Conecte el adaptador de corriente al altavoz en forma de roca y la salida de corriente AC para
cargar la batería recargable de ácido-plomo que se encuentra dentro del altavoz en forma de roca.
El paquete de baterías debe cargarse al menos 12 horas antes de operar el producto por primera
vez.
Table of contents
Languages:
Other Audio Unlimited Speakers manuals
Audio Unlimited
Audio Unlimited SPK-ROCK2 User manual
Audio Unlimited
Audio Unlimited SPK-ROCK4 User manual

Audio Unlimited
Audio Unlimited SPK-SHOWER User manual
Audio Unlimited
Audio Unlimited SPK-VELO-P User manual
Audio Unlimited
Audio Unlimited Bluetooth Speaker User manual

Audio Unlimited
Audio Unlimited SPK-SHOWER User manual
Audio Unlimited
Audio Unlimited SPK-VELO-003 User manual
Audio Unlimited
Audio Unlimited Audio Unlimited SPK-POOL User manual
Audio Unlimited
Audio Unlimited BD-9674-N User manual
Audio Unlimited
Audio Unlimited SPK-VELO-001 User manual
