AudioMX HG-31B User manual

User Manual
HG-31B
Digital Over-Ear Headphones

01
Congratulations! Thank you for choosing AudioMX HG-31B Digital Over-
Ear Headphones. To get familiar with this product, please read this manual
carefully before use. We hope you will enjoy the pleasure and convenience
the headphones bring you.
Introduction
The AudioMX HG-31B Digital Over-Ear Headphones use the latest digital wireless
technology that enables you to enjoy crystal clear stereo music and TV sound anywhere
inside your home. Simply connect the transmitter to a desired audio source: DVD player, CD
player, TV set, VCR, Hi-Fi system, or iPod. Without complicated wiring and installation, the
system lets you enjoy thrilling, lifelike sound in minutes.
Package Contents
1 × Headphones (digital receiver)
1 × Transmitter charging stand
1 × RCA to 3.5 mm cable
1 × 3.5 mm to RCA adapter (Short “Y” shaped cable)
1 × 3.5 mm to 3.5 mm Direct Line-in cable
1 × AC / DC adapter
2 × NiMH AAA size batteries for headphones
1 × 3.5 mm to 6.3 mm jack adaptor
1 × User manual

02 03
4. Chargeable design: place the headphones on the transmitter charging stand to charge
when not in use.
5. Dual usage methods: use wirelessly with the help of the transmitter or use as regular
wired headphones by connecting them to an audio source.
6. Ergonomic headband design allows it to snugly fit different head sizes; well-padded
headphone cushions provide comfortable cover for ears.
13
14
15
16
17
18
1
3
4
5
6
2 7
8
9
12 11 10
Technical Specifications
Transmission Mode GFSK
Carrier Frequency 2.4 GHz
Transmitter Operating Voltage DC 5V 550 mA
Receiver Operating Voltage 2 × 1.2 V AAA
Signal-to-Noise Ration ≥ 85 dB
Frequency Response 15Hz ~ 22 KHz
Distortion < 0.5%
Transmission Distance 30 m
THD ≤ 0.3%
Channel Separation ≥75 dB
Unit Diameter 40 mm
Unit Resistance 24 Ω
Sensitivity 105 dB
Output Power 7 mW
Gross Weight 992 g
Package Size 23 cm × 15.5 cm × 29 cm
Features
1. 2.4 GHz digital wireless technology with strong anti-interference performance enables
you to enjoy crystal stereo music and TV sound anywhere inside your home.
2. 31-channel frequency hopping system automatically finds the strongest signal.
3. The transmitter has auxiliary input connections for various audio sources like DVD player,
CD player, TV set, VCR or iPod and more.

04 05
17. 3.5 mm to 6.3 mm jack adaptor
18. 3.5 mm to RCA adapter (Short “Y” shaped cable)
Installation
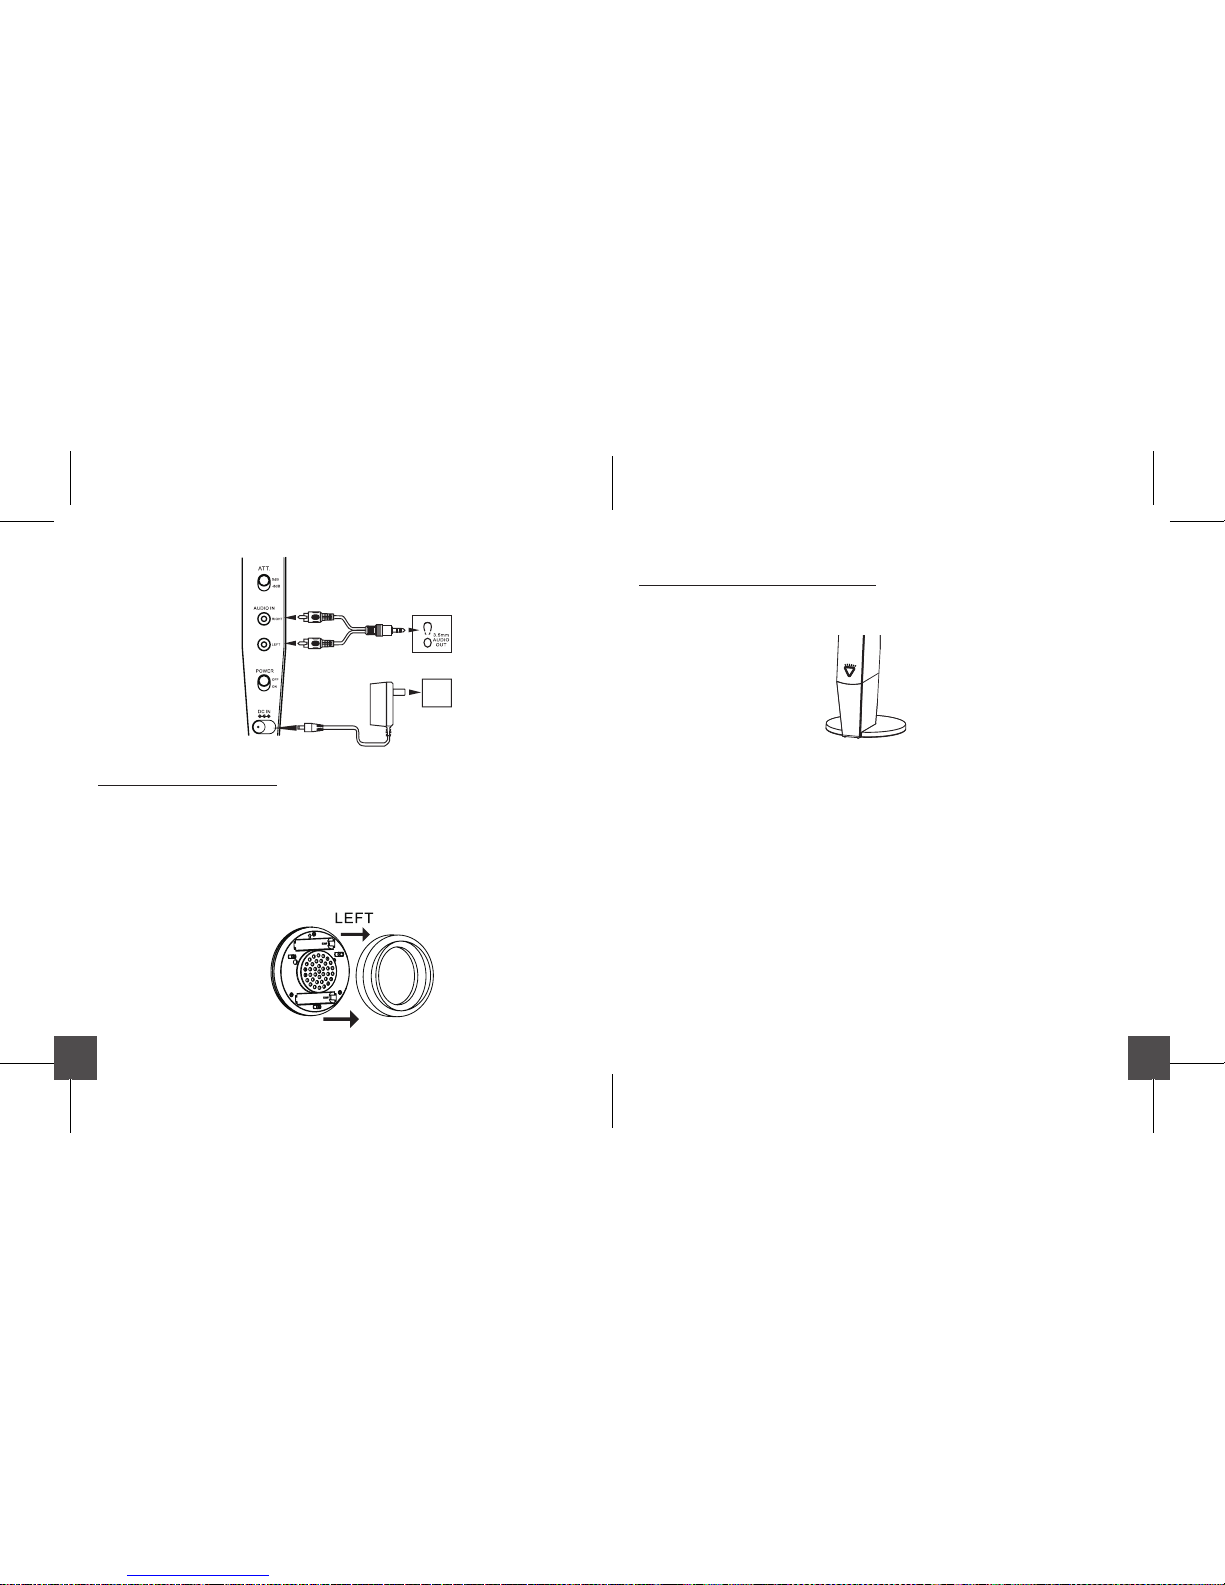
Transmitter installation
1. Connect the supplied AC / DC power adapter to an electrical wall outlet.
2. Plug the AC / DC power adaptor in the DC jack located on the rear of the transmitter.
Slide the power switch to “ON ”. The triangle shape Power / Signal / Charge LED indicator
on the transmitter starts to flash in orange for about 15 seconds and then light up
steadily.
3. Connect the transmitter to an audio source with the included RCA to 3.5 mm cable. The
rear of the transmitter has audio sockets with Left and Right tracks for connecting the
RCA cable to the audio output jack of TV, DVD, VCD, VCR, Hi-Fi, CD / MP3 / VCD / DVD
players, iPod, MP3 and more audio sources. (If the desired audio source only has a 6.3
mm jack, connect the RCA audio cable with the supplied 3.5 mm to 6.3 mm jack adaptor
first.)
4. For TV / DVD / VCD / VCR / Hi-Fi, switch to “-8dB”. For portable devices like CD / MP3 / VCD
/ DVD players, and iPod, switch to“0 dB”.
5. The LED on the transmitter lights up in orange steadily when the transmitter receives
the audio signal. It changes to blue if the transmitter does not connect to or receive any
audio signal from the audio source.
Notes: The transmitter must be used with the AC / DC adaptor supplied in the package.
Product Profile
Transmitter
1. Power / Signal / Charge LED indicator
2. Charging pins
3. Attenuation select switch
4. RCA Audio In socket
5. Power On / Off switch
6. DC In socket
Headphones
7. Charging contacts
8. Volume up ( + )
9. Volume down (-)
10. Direct line in
11. Power / Signal LED indicator
12. Power button
Accessories
13. RCA to 3.5 mm cable
14. 3.5 mm to 3.5 mm Direct Line-in cable
15. AC / DC adapter
16. NiMH AAA size batteries for headphones
06 07
Operation
Using the transmitter and the headphones
1. Turn on the audio source which the transmitter is connected to. The LED indicator on the
transmitter will light in orange when the transmitter receives the audio signal.
2. Turn on the headphones by pressing the power button for about 1 second. The LED
indicator on the headphones will light up in red. It changes to green when the audio
signal link between the transmitter and headphones is established.
3. Place the headphones on your head. To obtain the desired sound level, adjust the volume
control on the headphones.
4. If interference or poor signal reception occurs, the headphones will mute and the green
LED will change to red. The headphones will automatically search for another channel to
run. The LED indicator on the headphones will light up in green again when the re-link
between the transmitter and headphones is successful.
5. When the battery power of the headphones is too low, the LED indicator on the
headphones will blink in red. There will be beeping sound from the headphones every
minute. After two continuous beeping sounds, the headphones will automatically turn
Off.
6. The headphones can be used as regular wired headphones by connecting your audio
source to the headphones’jack directly.
Headphones battery installation
1. To install or replace the rechargeable batteries, carefully pull out the headphones cushion
(Left) and take it off.
2. Insert the 2 pieces of AAA size rechargeable batteries (supplied in the package) into the
battery compartment of headphone cabinet (Left). Make sure the batteries are placed at
the right polarity.
3. Reinstall the cushion to the headphones after the batteries are inserted.
Transmitter
Rear View
RCA Cable Music Player
DC 5V 550mA
Power Adaptor
Mains
Socket
08 09
3. Store the transmitter and headphones in a dry and clean place. Humidity or dust may
cause damage to the inside components.
4. Never use another type of battery or non-rechargeable batteries to replace the
rechargeable batteries supplied.
5. Do not disassemble transmitter or the headphones on your own. It may cause damage.
6. Excessive sound pressure from headphones can cause hearing loss.
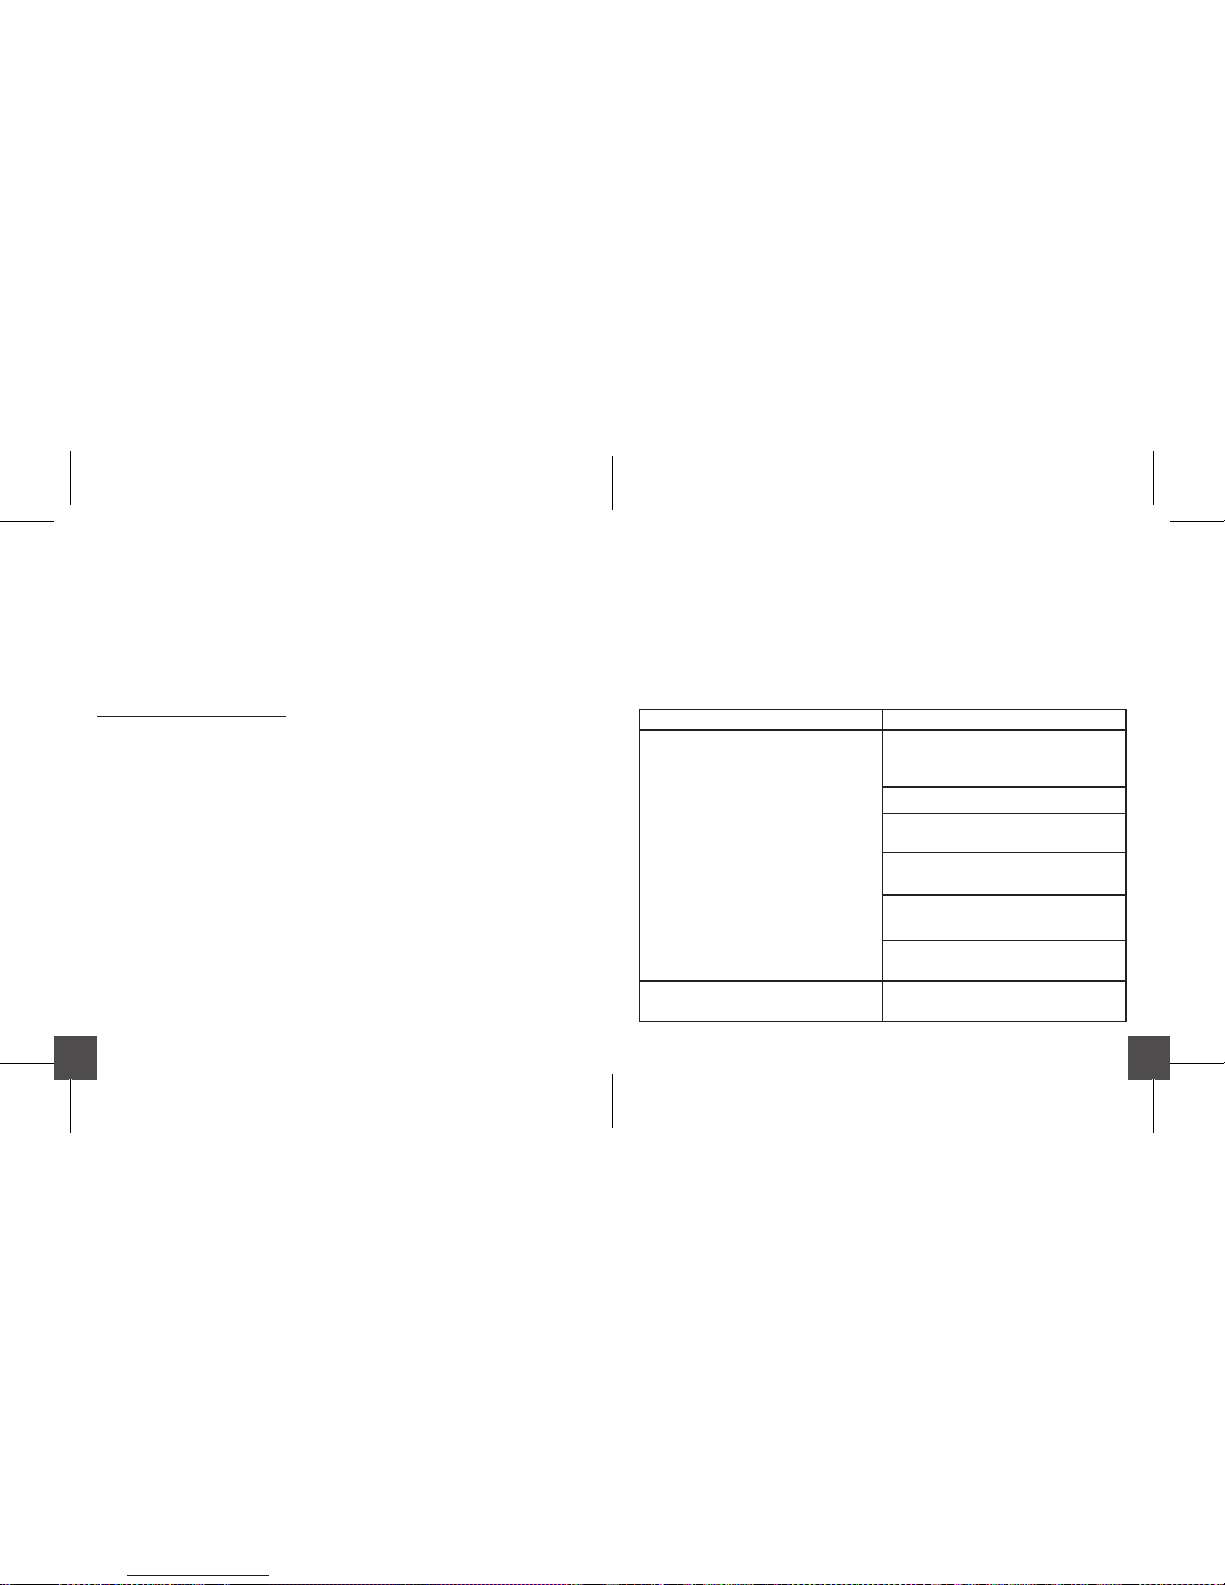
Trouble-shooting
Problem Possible Solution
No sound Make sure the AC / DC adaptor is
fully inserted into the AC outlet and the
power connection input on the transmitter.
Make sure the headphones are switched on.
Headphones battery charging level
maybe too low. Recharge the batteries fully.
Make sure the TV or the connected
audio device is switched On.
The volume of the headphone may be too
low. Adjust the volume to a moderate level.
The audio signal input level is too
Increase the volume of the audio source.
Distortion Ensure the volume level of the
headphones is set to an appropriate level.
Notes:
1. For power saving and transmitter protection, the transmitter will automatically switch
to standby mode if there is no audio signal source for approximately 5 minutes (LED on
the transmitter will change to blue). If the audio source signal returns, the transmitter will
automatically switch on (LED on the transmitter will change to orange). Then, power on the
headphones again to listen to music.
2. The headphones will automatically switch off if there is no signal from the transmitter for 5
minutes.
Charging the headphones battery
1. Turn off the headphones by pressing the power button before charging. This may avoid
battery damage.
2. Place the headphones on the top of the transmitter. Make sure the charging pins on the
transmitter and charging contacts of the headphones are matched.
3. The indicator on the transmitter will light in purple during charging process and change
to blue when charging is completed.
Notes:
1. To ensure a longer service life, fully charge the batteries for 7 hours before using the headphones
for the first time. According to the capacity of the rechargeable battery included, the battery
charging process will take approximately 5 hours.
2. Do not charge the batteries over 12 hours. Overcharging may lead to damage of batteries.
Cautions
1. Never attempt to recharge conventional dry cells (batteries).
2. Do no expose the batteries to excessive heat such as direct sunshine, fire or the like.
10 11
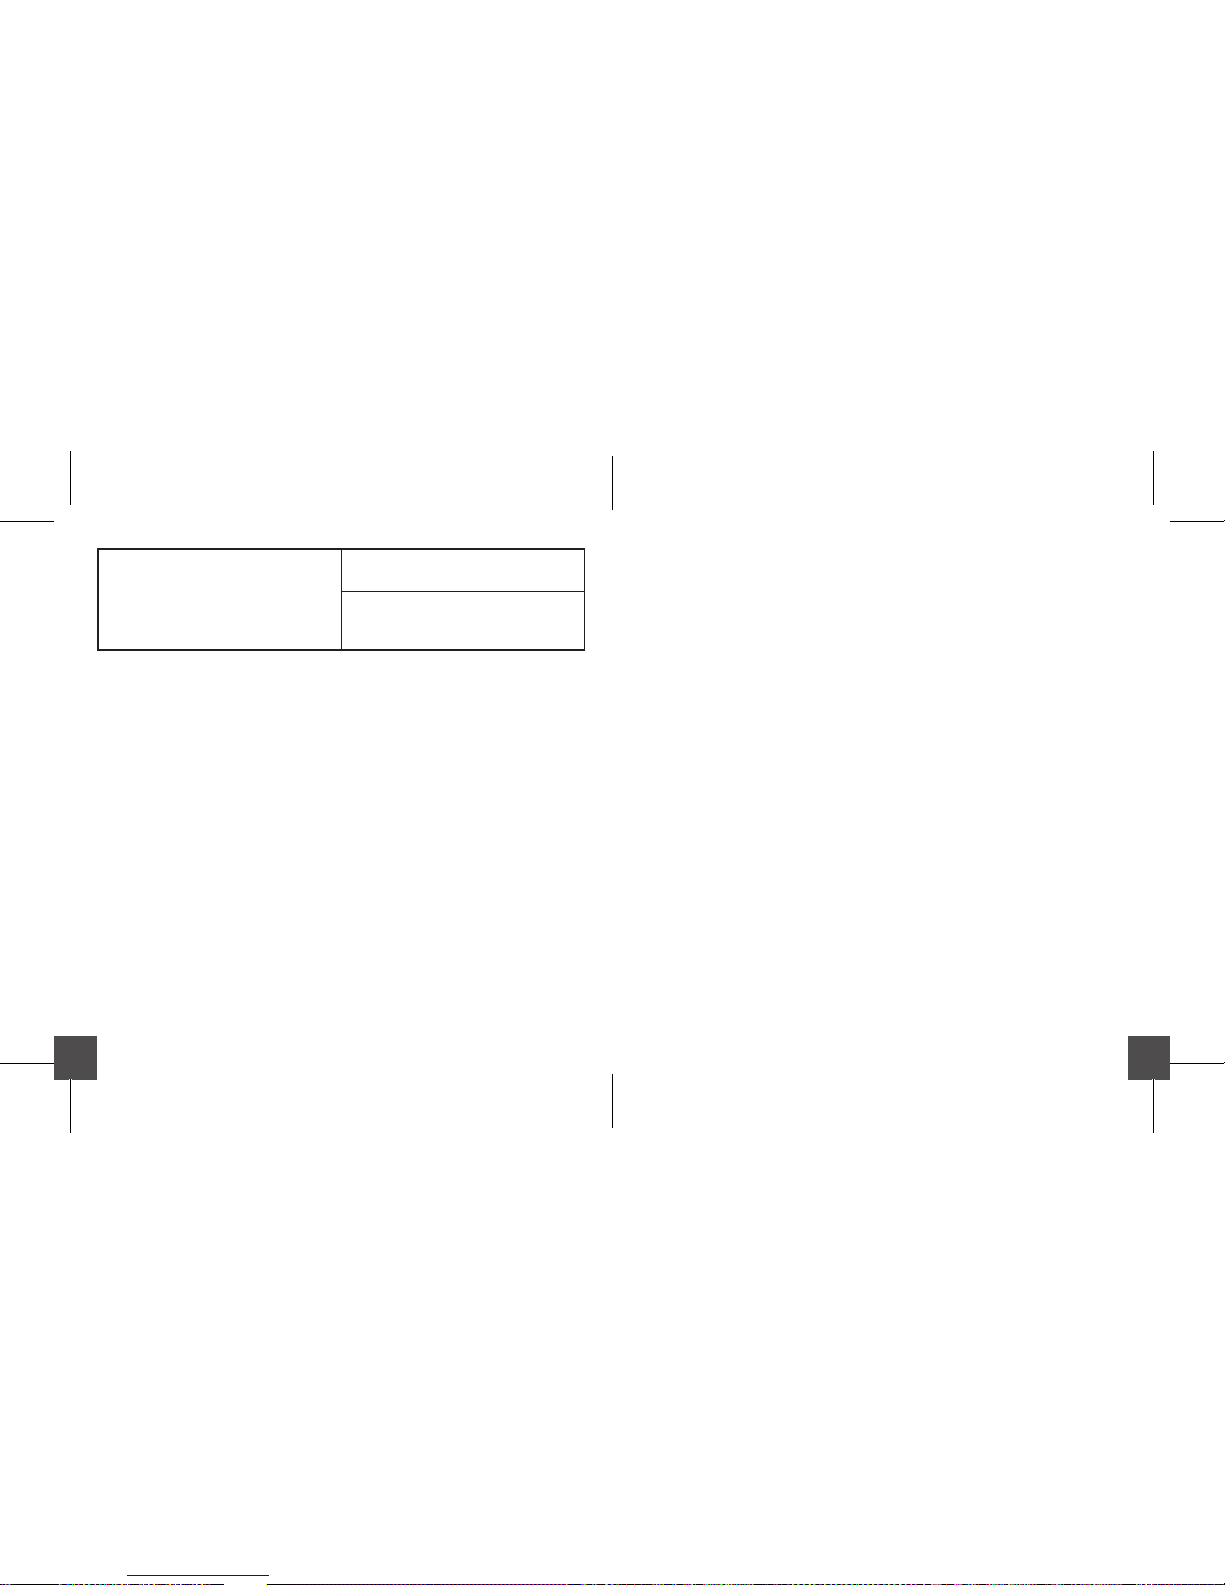
The headphones are too far from
the transmitter. Move it closer.
The audio signal input level is too
low. Increase the volume of the audio
source.

12

Unit04, 7/F Bright Way Tower, No, 33 Mong Kok Road,
Kowloon, Hong Kong
Email: [email protected]
2016 Claybox Limited, All Rights Reserved
AudioMX is a Trademark owned by Claybox Limited
Table of contents
Other AudioMX Headphones manuals


