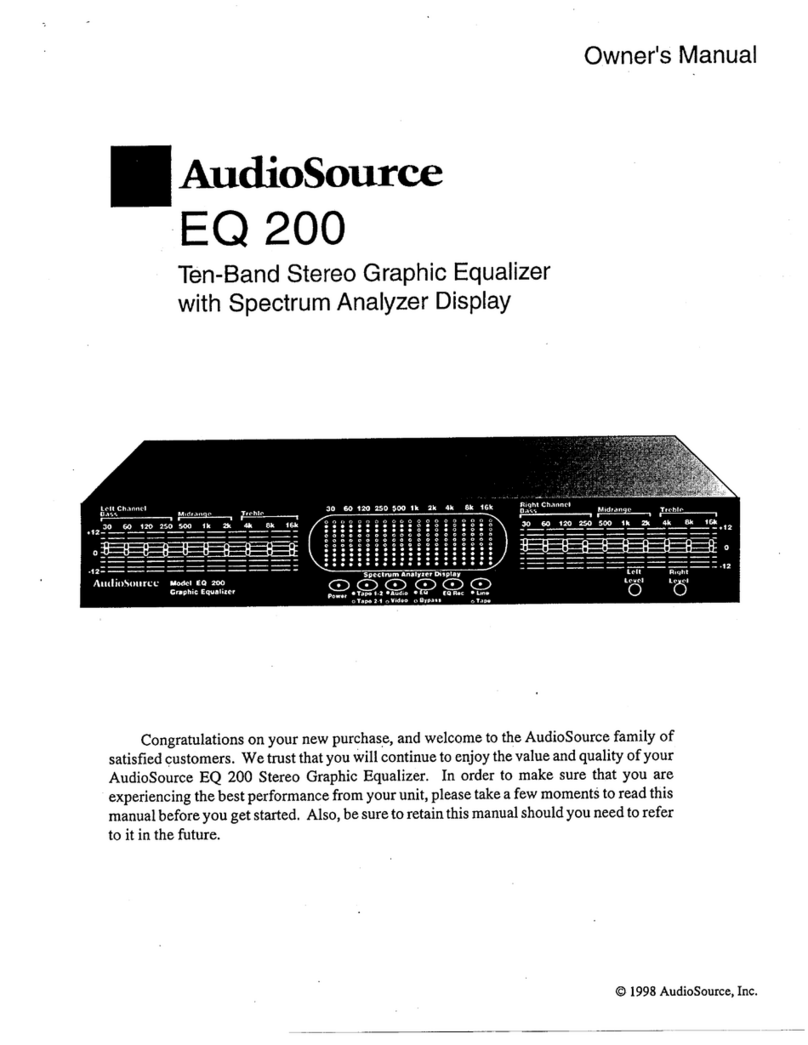
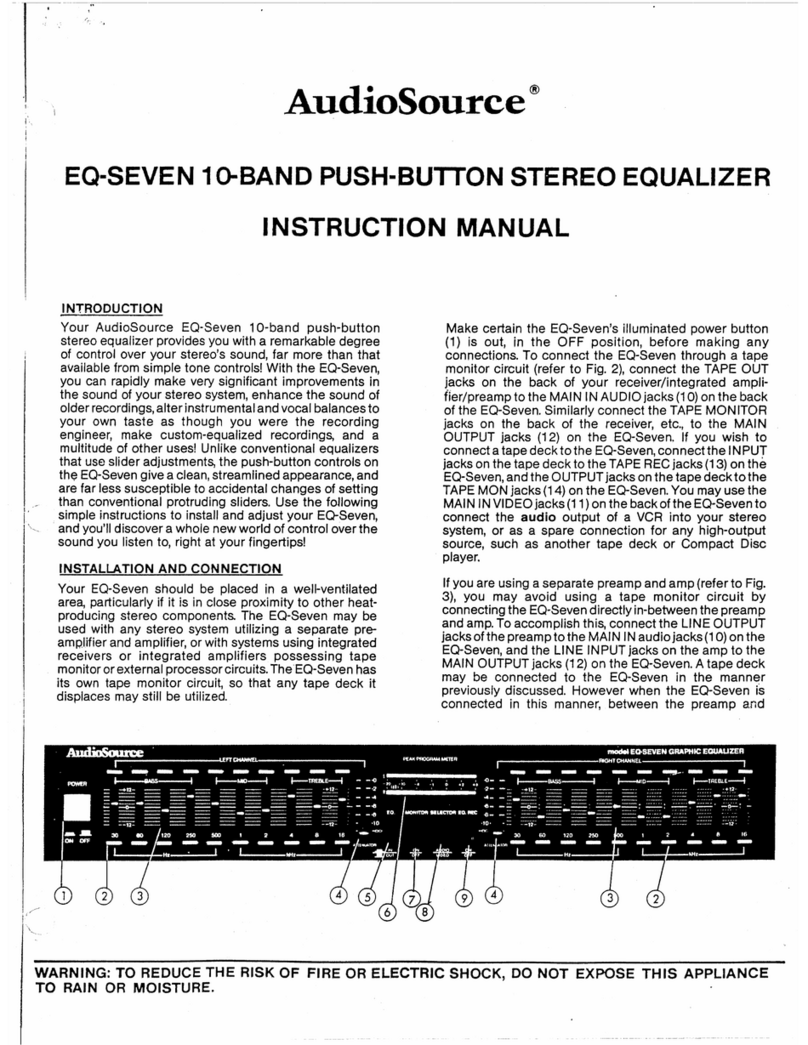
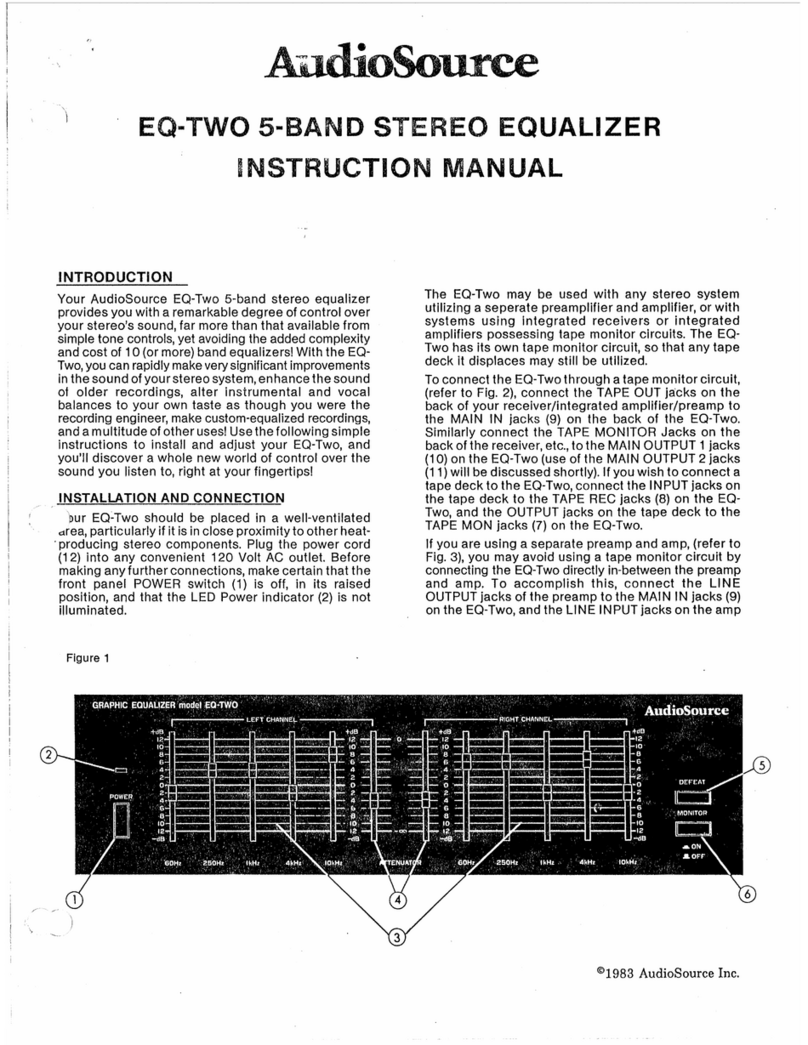
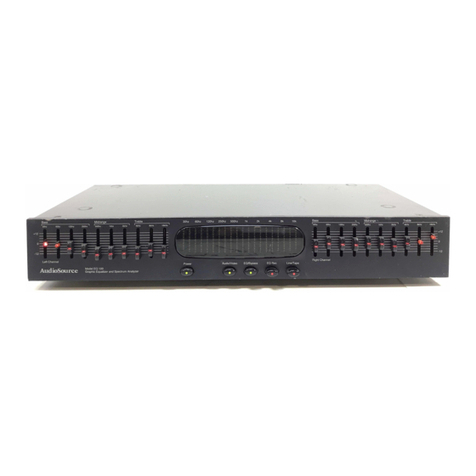
AudioSource EQ 200 User manual

Owner’s Manual
AdiOSOUl?CE!
EQ 200
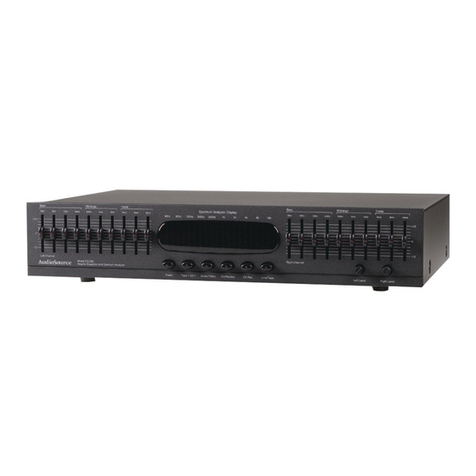
Ten-Band Stereo Graphic Equalizer
with Spectrum Analyzer Display
P,
Congratulationsonyournewpurchase,andwelcometo theAudioSourcefamily of
satisfiedcustomers.Wetrustthatyouwill continuetoenjoythevalueandqualityof your
AudioSourceEQ 200 StereoGraphicEqualizer. In order to makesurethat you are
experiencingthebestperformancefromyourunit,pleasetakeafewmomentstoreadthis
manualbeforeyougetstarted.Also,besuretoretainthismanualshouldyouneedtorefer
to it in thefuture.
0 1998AudioSource, Inc.

WARNING: To
reduce the risk of fire or electric
shock, do not expose this appliance
to rain or moisture.
Thelightningflashwitharrowheadsymbol,within
anequilateraltriangle,isintendedtoalerttheuser
tothepresenceofuninsulated“dangerousvoltage”
withintheproduct’senclosurethatmaybeofsuffb
cientmagnatudeto constitutea risk of electrical
shockto persons.
The exclamationpoint within an equilateraltri-
angleisintendedtoalerttheusertothepresenceof
importantoperatingandmaintenance(servicing)
instructionsintheliteratureaccompanyingtheap-
I
pliance.
1CAUTION: “TO PREVENT ELECTRIC SHOCK,
CAUTION:
To reducethe risk of electric shock, do
not removecover (or back); no user
servicable parts inside.Refer servicing
to qualified servicepersonnel.
MATCH WIDE BLADE OF PLUG TO WIDE
SLOT, FULLY INSERT.” - “ATTENTION:
POUREVITERLES CHOCSELECTRIQUES,
INTRODUIRE LA LAME LA PLUS LARGE
DE LA FICHE DANS LA BORNE
CORRESPONDANTE DE LA PRISE ET
I
POUSSERJUSQU’AU FOND.”
-#h. - . .
Safety instructions
ReadInstructions
- All thesafetyandoperatinginstructions
shouldbereadbeforetheapplianceisoperated.
RetainInstructions
- The safetyandoperatinginstructions
shouldbeadheredto.
HeedWarnings
- All warningson the applianceandin the
operatinginstructionsshouldbeadheredto.
FollowInstructions
-All operatinganduseinstructionsshould
befollowed.
Waterand
Moisture
-Theapplianceshouldnotbeusednear
water. For example,nearabathtub,washbowl,kitchensink,
laundrytub,in awetbasement,or nearaswimmingpool,etc.
Ventilation
- The applianceshouldbe situatedso that its
locationorpositiondoesnotinterferewithitsproperventilation.
Forexample,theapplianceshouldnotbesituatedonabed,sofa,
rug,orsimilarsurfacethatmayblocktheventilationopenings;
or,placedin abuilt-in situation,suchasabookcaseor cabinet
that may impede the flow of air through the ventilation
openings.
Heat
-Theapplianceshouldbesituatedawayfromheatsources
suchasradiators,heatregisters,stoves,or otherappliances
(includingamplifiers)thatproduceheat.
Power Sources
-Theapplianceshouldbeconnectedtoapower
supplyonly of thetypedescribedin theoperatinginstructions
or asmarkedontheappliance.
Grounding or Polarization
- Precautionsshouldbetakenso
thatthegroundingorpolarizationmeansof anapplianceisnot
defeated.
Power-Cord Protection
- Power supply cords should be
routedsothattheyarenotlikely tobewalkedonorpinchedby
itemsplacedonoragainstthem,payingparticularattentionto
cordsat plugs, conveniencereceptacles,and the point
wheretheyexit from theappliance.
Cleaning
- The applianceshould be cleanedonly as
recommendedby themanufacturer.
Power
Liies - An outdoorantennashouldbe located
awayfrompowerlines.
Non-use Periods
- The power cord of the appliance
shouldbeunpluggedfromtheoutletwhenleft unusedfor
alongperiodof time.
Object and Liquid Entry
-Careshouldbetakensothat
objectsdo not fall and liquids are not spilled into the
enclosurethroughopenings.
Damage Requiring Service
- Theapplianceshouldbe
servicedby qualifiedservicepersonnelwhen:
A) Thepowersupplycordortheplughasbeen
damaged;or
B) Objectshavef#len, orliquid hasbeenspilled
into theappliance;or
C) Theappliancehasbeenexposedtorain; or
D) Theappliancedoesnotappearto operate
normallyor exhibitsamarkedchangein
performance;or
E) Theappliancehasbeendropped,orthe
enclosuredamaged.
Servicing
- The usershouldnot attemptto servicethe
appliance beyond that described in the operating
instructions. All other servicingshouldbe referredto
qualifiedservicepersonnel.
Product Servicing
- In the eventyour EQ 200 fails to
operateproperly,pleasecontactAudioSourcedirectlyfor
furtherassistance,repair,service,or replacement.Please
seebackcoverfor addressandtelephonenumber.
A FewWordsAboutGraphicEqualizers
Thank you for choosing this AudioSource EQ 200 Graphic Equalizer. Used correctly, a Graphic
Equalizer is a powerful tool for very detailed control over the sound of your speakers,far more than
available from simple tone controls. With the EQ 200, you canenhancethe sound of older recordings,
alter instrumental andvocal balanceto suit your own tastes,make “Custom Equalized” recordings, and
a multitude of other uses.However, like any tool, excessive or incorrect adjustments can yield very
unpleasant results, and can overload your amplifiers and speakers.Improvement of sound quality,
particularly in the extreme bass and treble regions, is completely dependent upon the quality of the
other equipment you ark using in your system. Limited amplifier power and speakerswith a limited
frequency range are the greatestbarriers to achieving accurate,flat response.If you detect any distor-
tion in the bassor treble regions while boosting the EQ 200’s sliders in these areas,back off immedi-
ately, asyou are probably overtaxing either your amplifier or your speakers.Pleaseread this manual
before use, and follow our suggestionsand basic guidelines for the best sound.
Having said that, be assuredthat “good sound” is arelative thing... We all have different opinions
andtastes- The EQ 200 is designedto allow you to changethe soundof your speakersto suit your own
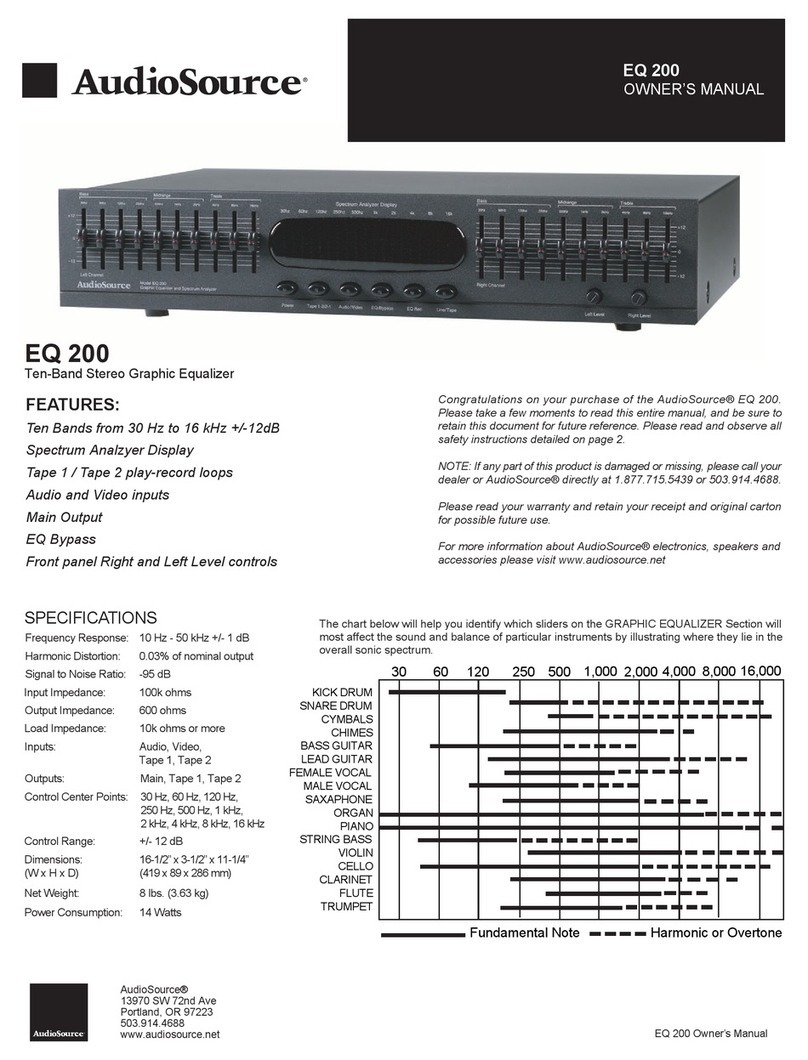
musical choices. On the last pageof this manual is achart designedto show you the frequency content
andrange for avariety of musical instruments. This chart will help you find the proper sliders to adjust
to achieve the desired results.
BasicGuidelines
Before adjusting the sliders, it is VERY IMPORTANT to clearly define your objectives. Without
this consideration before adjustment takes place, it will be very difficult to attain pleasing results.
Carefully listen to your system - askyourself “What DON’T I like about the sound ?‘I.If the answer is
“I want more Bass”, you havetwo ways to accomplish this. Choice #l - Raiseor “Boost” the sliders for
the lowest frequencies - on both channels- Left & Right. Choice #2 - lower or “Cut” the sliders on the
midrange andhigher frequencies. The endresult will bethe same- You’ll have more bass.Conversly, if
you’d like to hear more High Frequencies, you have two ways to accomplish this. #l -“Boost” the
sliders for the highest frequencies - on both channels - Left & Right. #2 - “Cut” the sliders of the
Midrange and Bassfrequencies.
As you can see,there are avariety of ways to accomplish your objectives. Be aware that due to the
nature of all equalizer sliders, you will find that movement of any given slider will also have some
effect on the setting of the sliders adjacent to either side of it. Experiment - let your earsdecide what
soundsbest,but try to have aclear objective before you begin. One suggestion:avoid the “Boost-Boost
Syndrome”... avoid “Boosting” one frequency areatoo much, by “Cutting” another frequency area.
Don’t jgst radically boost everything - it will add noise to the system, and overtax your other compo-
nents. Subtle, careful equalization will make ahuge improvement in the overall sound of your system.
Enjoy your EQ 200, and if you have any questions, we arehere to help. You can call AudioSource at
(800) HELP-l 15.

0
Power
0
Tape 1-2 I Tape 2-1
0
Audio 1Video
0
EQ I Bypass
EQ Ret
Line 1Tape
Using The Controls
Power : Pressthis button to activate the power on the EQ 200. The LED will be green
to show power is “On”. Pushthe button again to turn “Off’ the EQ 200. The LED will
be red to show this selection.
Tape I-2ITape 2-1:
This button allows you to make a tapecopy or “Dub” between the
two cassettedecks.Pressthis button “In” to “Dub” from Tape 1to Tape 2. The LED will
be green to show this selection. Leave this button in the “Out” position to “Dub” from
Tape 2 to Tape 1.The LED will be red to show this selection. When the “Line/Tape”
switch is “OUT”, or in the TAPE position, This “Tapel-2/Tape 2-1” switch will select
which tape deck is to be listened to. Leave it “IN” for Tape 1, “OUT” for Tape 2.
AudWVideo
: This button selectsbetween two input sources.Pressthe Button “IN” to
selectan Audio input source,suchasaC.D. player. The LED will begreen to show this
selection. Leave the button “OUT” to select a Video input source, such asa V.C.R., or
Laserdisc player. The LED will be red to show this selection.
Note: the EQ 200 equalizesthe soundof thesevarious components. At no time doesthe
EQ 200 alter the picture, and no “Video-Type” connections are included. These inputs
will accept any “Line Level” source, such as a CD player, tape deck, laserdisc, VCR,
etc.
EQ /
Bypass
: Use this switch to instantly compare the “equalized” and unequalized”
sound.Pressthis button “IN” to hearthe result of your equalization curve. The LED will
be green to show this selection. When this button is IN, theded LEDs in all twenty
sliders will light up. Leave this switch in the “OUT” position to bypassthe equalization
of the EQ 200. The LED will be red to show this selection, and the red LEDs in the
sliders will disappearat this time.
EQ
Rec.
: EQ Record. Pressthis button to make atapecopy with the equalization curve
you havejust set.The LED will begreento show this selection. This canbeuseful when
making acassettetapeto play in your car. A well-equalized tape canimprove the sound
from smaller, lessexpensive car stereospeakers.With this button in the “Off” position,
the cassettetape copy will be recorded without equalization. The LED will be red to
show this selection.
Line
/
Tape
: This button selectsbetween input sources.In the “In” position, the “Line
Input” is chosen.The LED will be greento show this selection. Leave this button in the
“Out” position to hear the “Tape Input”. The LED will be red to show this selection.

Using The Controls
b
0
Level Controls: Both left andright channelshave acontrol marked “Level”. This con-
trols the level, or volume of each channel. Usually, these controls can be set to their
Left Level,or
maximum position, but these levels can be reduced if an overly strong input signal
Right Level
causesdistortion. Usually, similar adjustments should be made for both channels.
EQ Sliders : Each of these sliders will give 12Db. of “Boost” and 12 dB. of “Cut”.
There are ten sliders per channel - Ten for the Left channel, and Ten for the Bight
channel.Looking atthe front panel,the sliders that control the lowest frequencies areon
the left, with the higher frequencies farther right. Usually, identical adjustments should
be made for both channels. These sliders are One Octave apart from one another. This
correspondswith theentire rangeof humanhearing. The lastpageof this owner’s manual
contains a chart, showing which sliders to adjust to affect the sound of various instru-
ments. For instance, the lowest note of a Bass Guitar is at 42 Hz.. By adjusting the
sliders at 30 Hz. and 60 Hz., you can raise or lower the volume of the bassguitar, bass
drum, and any other musical instruments that occupy this frequency range. In another
instance,the soundof the female vocalist occupies afrequency range from roughly 200
Hz. to 1500 Hz.. By adjusting the sliders within this range, you can change the tonal
character of the female voice, and any other musical instruments that occupy this fre-
quency range.
Spectrum Analyzer Splay: This provides a visual display of the relative signal lev-
els in each of the EQ Sliders. The Spectrum Analyzer display is divided into ten col-
umns of LED’s which correspond to the ten EQ Sliders. You can use this display to
assistyou in setting your equalizer sliders, as well as to obtain information about the
frequency content of the music asyou play it through the EQ 200.

..HookingIt All Up
The EQ 200 shouldbeconnectedthroughthe “TapeMonitor Loop” of you receiver,integrated
amplifier, or preamplifier.SincetheEQ 200replacesthetapedeck,rememberto activatethe “Tape
Monitor” switchonyour receiver,integratedamplifier, orpreamplifier- asyou would whenplaying
your tapedeck.Your tapedeckcannowbepluggedinto thebackof theEQ200.
Whenmakingorchangingconnections,it isalwayswisetounplugthepowercordsof yourcompo-
nents- or at leastmakesurethe power is “Off”, so you won’t hearany unexpected“pops” during
connectionof cables.
l.ConnecttheTapeOut orTapeRecordjacks(differentcomponentsusedifferentterminology)onthe
backof yourreceiver/integratedamplifier/preamplifierto theAudio In jacksof theEQ200.
2. ConnecttheMain Out jacks of theEQ 200 into theTape In or Tape Monitor jacks of your re-
ceiver/integratedamplifier. thiscompletesthe“loop”.
3. Always makesureto engagethe “Tape Monitor” buttononyour receiver,nomatterwhich input
sourceyouwantto listento.This allowsthe“Equalized”signalto beheardonanysourcematerial.
4. You canconnecttwo tapedecksto theEQ200.ForTape1,connecttheLine Out orRecordjacks
onyourtapedecktotheTape1IN (play)jacksontheEQ200.Next,connecttheLine Out orMonitor
jacksonyourtapedecktotheTape 1IN (play)jacksontheEQ200.ForTape2,repeatthisstepusing
theTape2 Ret andTape2 playjacksontheEQ200.
5.You mayusethe “Video In” jacksontheEQ200to connectanyhighoutputsource,suchasaCD
player,tapedeck,or the
audio
outputsof aVCR or laserdisc.

AudioSource@
EQ 200 Specifications
Frequency Response 10Hz -5OkHz + or - 1 dB
Harmonic Distortion 0.03% of nominal output
Signal to Noise Ratio -95dB
Input Impedance 100 k Ohms
Output Impedance 600 Ohms
Load Impedance 10 k Ohms or more
Inputs “I Audio,Video, Tape 1, Tape 2
outputs Main , Tape 1,Tape 2
Control Center Points 30 Hz, 60 Hz, 120 Hz, 250 Hz, 500 Hz, 1 kHz, 2 kHz, 4 kHz, 8 kHz, 16 kHz
Control Range +or-12dB
Dimensions 16 l/2” W x 3 l/2” H x 11 l/4” D
Weight (without packaging) 8 Ibs.
Power Consumption 14 Watts
The chart below will help you identify which sliders on the GRAPHIC EQUALIZER Section will
most affect the sound and balance of particular instruments by illustrating where they lie in the
overall sonic spectrum
KICK DRUM
SNARE DRUM
CYMBALS
CHIMES
BASS GUITAR
LEAD GUITAR
FEMALE VOCAL
MALE VOCAL
SAXAPHONE
ORGAN
PIANO
STRING BASS
VIOLIN
CELLO
CLARINET
FLUTE
TRUMPET
1 60 120 250 500 1,000 2,000 4,000 8,000 16,
I I I I I I I I
Fundamental Note - - - - Harmonic or Overtone
AudioSource
1327 North Carolan Ave.
Burlingame, Ca. 94010
(650) 348-8114 FAX (650) 348-8083
0 1998 AudioSource, Inc.

AudioSowrce@
Enjoy your new purchase.
The manuals included in this packageprovide detailed
diagrams and instructions for setting up JQZUequipment.
Our commitment to your satisfaction doesn’tend there.
We also offer friendly assistance. Toll-free.
lm800-HELP-115
Monday thru Friday From 7 A.M. to 5 P.M. P.S.T.
YoumayalsoFaxus24hoursaday
l-650-348-8083
We’re not happy until you’re happy

AudioSource@
LIMITED WARRANTY
FS WARRANTY IS TRANSFERABLg
We atAudioSourcewould like to thankyou for choosingour product.You
cantakepride in owning this quality-craftedproduct;wetakepride in having
built it.
Our warrantyis setforth in full onthereversesideof thispage.Thewarranty
is valuableto you,aswell asto anysubsequentownerof theproductduring the
termof thewarranty.Thetransferability of thewarrantyis anunusualfeature,
andthat’swhy we saywewarranttheproduct,not thepurchaser.
We havetakenconsiderablecarein building our productsandhopeyou have
manyyearsof enjoymentfrom them.Pleasereadyour warranty.We havetried to
supplyasmuchinformation aswe could;butremember,if you haveanytrouble
with ourproductswe arehereto help.
3 1327North CarolanAve., Burlingame,CA 94010
Phone(650) 348G3114Fax(650)348.8083

LIMITED WARRANTY
AudioSourcewarrantsto thepurchaser,and,subjectto re-registrationof thiswarranty,to
anytransfereeof thepurchaser,thatall newaudioequipmentshallbefreefrom defectsin
workmanshipandmaterialundernormalandproperuseandservicefor thefollowing periods
measuredfrom thedateof original purchaseatJetai1:
AudioSource@Components- 2 Years
AudioSource@Loudspeakers- 5years
AudioSource@Accessories- 1year
Defectiveequipmentreturnedby theregisteredownerwithin theappropriatewarrantyperiod
will berepairedor replacedatnochargefor laboror materialsprovidedthatownercomplies
with thefollowing instructions:
(l)The attachedwarrantyregistrationcardshallhavebeenfilled out andreturnedby purchaserto
AudioSourceWithinten(10) daysfrom thedatetheequipmentwasdeliveredto purchaser.If the
equipmentis soldor transferredby purchaser,are-registrationcardobtainedfrom AudioSource
or an AudioSourcedealershallhavebeenfilled out andreturnedto AudioSourcewithin 20 days
aftertheequipmentwasdeliveredto thesubsequentowner.
(2)Theregisteredownershallhavecontactedthedealerwheretheequipmentwaspurchasedand/or
written or calledAudioSourcedirectly anddescribedin detailthenatureof theproblemandthe
otherequipmentusedwith thesystem.Frequentlytheproblemcanbelocatedin othercompo-
nentsin thesystemor canbecorrectedby simpleadjustmentsin theequipment.
(3)If theproblemcannotbesolvedby instructionsreceivedfrom thedealerand/orAudioSource,the
defectiveequipmentshallbereturnedto AudioSourceattheaddressgivenbelow,transportation
prepaid,in theoriginal cartonor areplacementcartonobtainedatno costfrom thedealer.A
written statementmustaccompanytheequipmentlisting thename,addressandtelephone
numberof theowner,thenameof thedealeranddateof purchase,andadetaileddescriptionof
thenatureof theproblemandtheotherequipmentusedwith thesystem.
This warrantydoesnot coverequipmentthathasbeenalteredor repairedby otherthan
manufacturerapprovedprocedures,subjectedto negligence,misuseor accident,damagedby excessive
currentor otherwise,hasits serialnumberaltered,defaced,or removed,or hasbeenusedcontraryto written
instructions.
AudioSourceneitherassumesnorauthorizesanyrepresentativeor otherpersonto assumefor it any
obligationof liability otherthansuchasisexpresslysetforth herein.This warrantygivesyou specificlegal
rights,andyou mayhaveotherrightswhich vary from stateto state.
This warrantyreplacesanywarrantyor guaranteecontainedin themanualwhich accompaniesthe
equipment.
AudioSource- 1327N. CarolanAve. Burlingame,Ca.94010(650)348-8114FAX (650)348-8083
0 1998AudioSource,Inc.

Audi~ti~
Warranty Registration Card
ThankYou for choosingafine AudioSourceproduct.While returningthiswarrantyregistration
card,wewouldbegratefulif youwould takea few momentsto answerthequestionsbelow,
which will assistusin planningfutureinnovativeproducts.
STREET
CITY STATE ZIP
a.DATE OFPURCHASE
NAME OFSTORE
ADDRESS
MODEL NUMBER
3.Wheredid youfirst hearaboutthisAudioSourceproduct?
Magazinead- reviewor article- friend dealer- other
4.Why did youbuythisproduct?
5.What otherhi-l?equipmentdoyouplanto purchasein thenext6 to 12months?
6.Your Underage: 17- 17-24-
25-34-w 3544- 45
& over
7.Would youlike usto sendyouinformationonotherAudioSourceproducts?
8.Comments:
2
Pleasefold asindicatedandtape

fold here foldhere
Place
SWP
Here
AudioSource@:
1327N. Carolan Ave.
Burlingame, CA 94010
U.S.A.
Other manuals for EQ 200
3
Table of contents
Other AudioSource Stereo Equalizer manuals

AudioSource
AudioSource EQ 100 User manual

AudioSource
AudioSource EQ TEN User manual

AudioSource
AudioSource EQ 10 User manual

AudioSource
AudioSource EQ 2 User manual

AudioSource
AudioSource EQ 7 User manual

AudioSource
AudioSource EQ 25.1 User manual

AudioSource
AudioSource EQ 200 User manual

AudioSource
AudioSource EQ 200 User manual

AudioSource
AudioSource EQ 12 User manual

AudioSource
AudioSource EQ 10.1 User manual