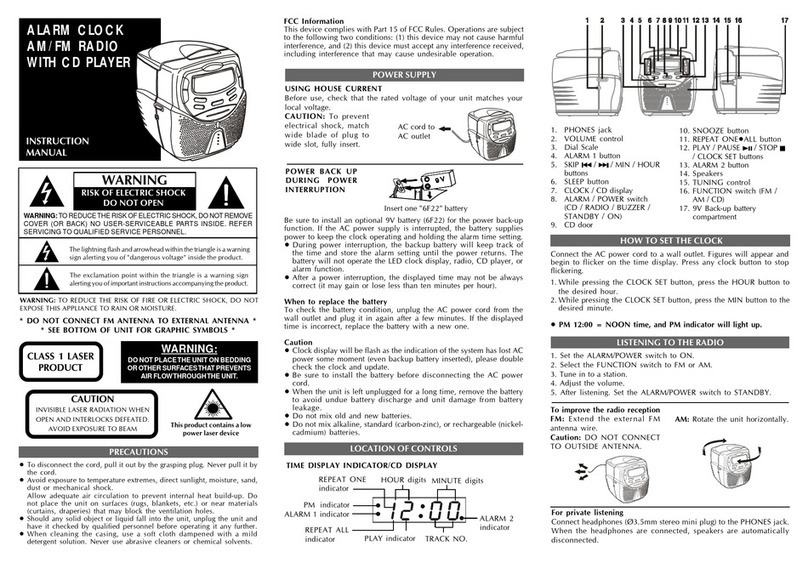
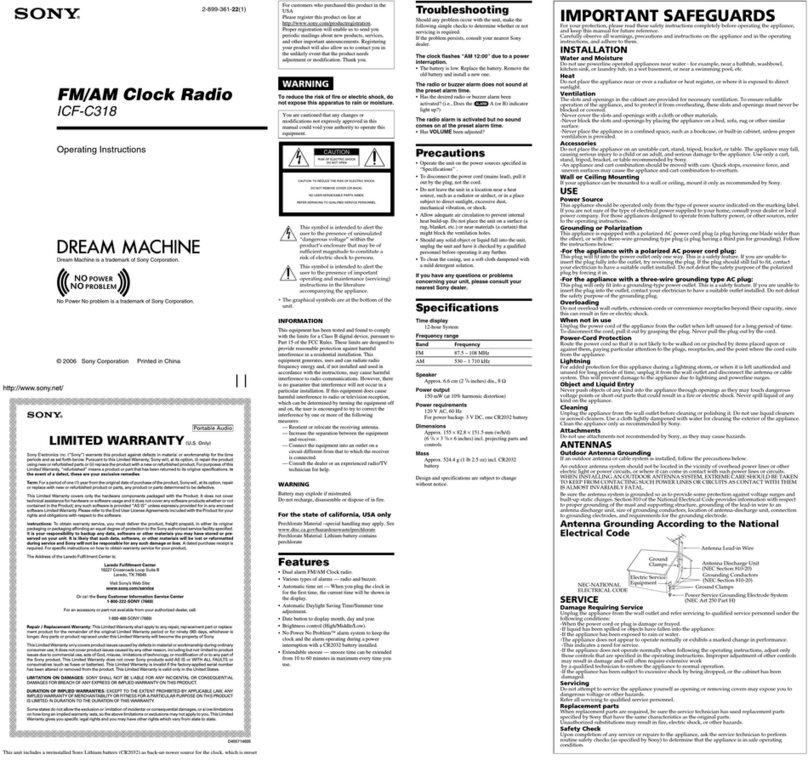
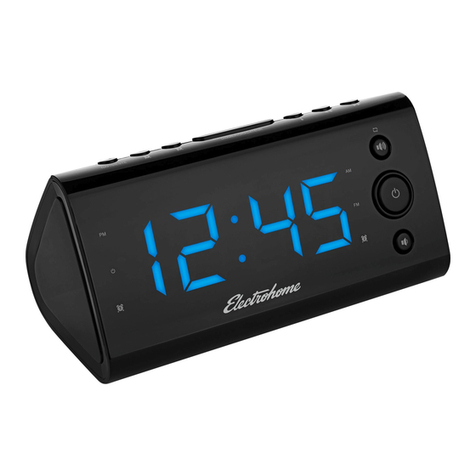
Audiovox CE90 User manual

1
ALARM CLOCK RADIO
OPERATION INSTRUCTIONS
RISK OF ELECTRIC SHOCK
DO NOT OPEN
The lightning flash
and arrowhead
within the triangle is
a warning sign
alerting you of
"dangerousvoltage"
inside the product.
CAUTION: TO REDUCE THE RISK
OF ELECTRIC SHOCK, DO NOT
REMOVE COVER (OR BACK) NO
USER-SERVICEABLE PARTS
INSIDE. REFER SERVICING TO
QUALIFIEDSERVICEPERSONNEL.
The exclamation point
within the triangle is a
warning sign alerting
you of important
instructions
accompanying the
product.
WARNING
WARNING: TO REDUCE THE RISK OF FIRE OR ELECTRIC SHOCK, DO NOT
EXPOSE THIS APPLIANCE TO RAIN OR MOISTURE.
*SEE BOTTOM OF UNIT FOR GRAPHIC SYMBOLS *
* DO NOT CONNECT FM ANTENNA TO EXTERNAL ANTENNA *
WARNING:
DO NOT PLACE THE UNIT ON BEDDING OR OTHER SURFACES
THAT PREVENTS AIR FLOW THROUGH THE UNIT.

2
•To disconnect the cord, pull it out by the
plug, not by the cord.
•Avoid exposure to temperature extremes,
direct sunlight, moisture, sand, dust or
mechanical shock.
Allow adequate air circulation to prevent
internal heat build-up. Do not place the unit
on surfaces (rugs, blankets, etc.) or near
materials (curtains, draperies) that may
block the ventilation holes.
•Should any solid object or liquid fall into the
unit, unplug the unit and have it checked by
qualified personnel before operating it any
further.
•When cleaning the casing, use a soft cloth
dampened with a mild detergent solution.
Never use abrasive cleansers or chemical
solvents.
WARNING
FEATURES
PRECAUTIONS
• To prevent fire or shock hazard do not
expose the unit to rain or moisture. • To avoid electrical shock, do not open the
cabinet. Refer servicing to qualified per-
sonnel only.
•Electronic digital alarm clock and sleep
timer are combined.
•Two wake-up modes available: radio or
buzzer alarm.
•Power back-up function to keep the clock
operating during a power interruption, us-
ing an optional 6F22 battery.
This device complies with Part 15 of FCC Rules. Operations is subject to the following two
conditions: (1) this device may not cause harmful interference, and (2) this device must accept
any interference received, including interference that may cause undesirable operation.
WARNING:
DO NOT PLACE THE UNIT ON BEDDING OR OTHER
SURFACES THAT PREVENTS AIR FLOW THROUGH THE
UNIT.

3
LOCATION OF CONTROLS
1. Function selector [ON/OFF/
RADIO BUZZER]
2. CLOCK set button
3. HOUR set button [HR]
4. MINUTE set button [MIN]
5. ALARM set button
6. SLEEP set button
7. SNOOZE/SLEEP OFF button
8. Time display
9. Power back-up battery
compartment [bottom]
10. Radio dial scale
11. TUNING control
12. BAND selector
13. VOLUME control
14. AC power cord
15. Antenna wire
TIME DISPLAY INDICATOR
PM indicator
ALARM
indicator
MINUTE
digits
HOUR
digits

4
POWER SUPPLY
POWER BACK UP DURING POWER INTERRUPTION
When to replace the battery
To check the battery condition, unplug the AC
power cord from the wall outlet and plug it in
again after a few minutes. If the displayed
time is incorrect, replace the battery with a
new one.
Caution
•Be sure to install the battery before discon-
necting the AC power cord.
•When the unit is left unplugged for a long
time, remove the battery to avoid undue
battery discharge and unit damage from
battery leakage.
Besuretoinstallanoptional9Vbatteryforthe
power back-up function. If the AC power
supply is interrupted, the battery supplies
powertokeeptheclockoperatingandholding
the alarm time setting.
•During power interruption, the clock func-
tion is maintained although illumination of
the indicator goes off, but the alarm sound
does not come on.
•After a power interruption, the displayed
time may not be always correct (it may
gain or lose less than ten minutes per
hour).
This battery is only for clock operation and
alarm memory during power interruption.
You cannot listen to the radio with the
battery.
USING HOUSE CURRENT
Before use, check that the rated voltage of
your unit matches your local voltage.
Caution: To prevent electrical shock,
match wide blade of plug to wide slot,
fully insert.
To AC outlet
Insert one "6F22" battery

5
HOW TO SET THE CLOCK
1. While pressing the CLOCK set button, press the HR button to the desired hour.
LISTENING TO THE RADIO
2.While pressing the CLOCK set button, press the MIN button to the desired minute.
• PM 12:00 = NOON time , and PM indicator will light up.
1.Set to ON. 2. Select a band 3. Tune in to a station
4. Adjust the volume. 5.After listening
Set to OFF.
AM: Rotate the unit horizontally
To improve the radio reception
FM: Extend the external antenna wire

6
WAKE UP TO ALARM [RADIO OR BUZZER]
HOW TO TURN OFF THE ALARM
1.If you want to snooze a few more
minute.
Press the SNOOZE button will deactivate
the sound for 9 minute. You can repeat
this function as many times as you like
within 119 minutes from the preset alarm
time.
2.To complete cancel the alarm mode.
Press the ALARM button, and it will
resume after 24 hours.
1. While pressing the ALARM button, press the HR button to the desired hour.
2. While pressing the ALARM button, press the MIN button to the desired minute.
3.For radio alarm
Firsttune inthe desiredstation andadjust
the volume.
Set to RADIO
For buzzer alarm
Set to BUZZER
4. The AL [Alarm] indicator will lights up
•Set to RADIO or BUZZER will come on at the preset time, and shut off automatically after
119 minutes.

7
Frequency range FM: 88-108 MHz
AM: 530-1700 kHz
Antennas FM: 1 meter antenna wire
AM: Built-in ferrite bar antenna
Speaker 8 Ohm
Power output 240mW [at 10% total harmonic distortion]
Powerrequirements 120V AC, 60 Hz
For the power backup function: 9V DC, one 6F22 battery
Dimensions Approx. 179x132.2x54.8mm [W/D/H]
Weight Approx. 560g [not inculed battery]
Design and specifications subject to change without notice.
HOW TO SET THE SLEEP TIMER
1.While listening to the radio,
Set to OFF.
2.Press SLEEP.
The radio turns on, and will turn off
after 59 minutes. maximum to 119 minutes.
Press SLEEP and HOUR.
OR
SPECIFICATION
maximum to 119 minutes.
Press SLEEP and MINUTE button, will
be counted down automatically.
3.Turn off the SLEEP before 59 minutes.
Press the SNOOZE button.

8
1. Read Instructions - Allthesafetyandoperatinginstructionsshould beread beforethe
applianceisoperated.
2. Retain Instructions -The safety and operatinginstructionsshouldberetained forfuture
reference.
3. HeedWarnings-Allwarnings onthe applianceand inthe operatinginstructionsshould be
adheredto.
4. Follow Instructions - All operating and useinstructionsshouldbe followed.
5. Water and Moisture -Theappliance should notbeused near water- forexample,near a
bathtub,washbowl,kitchensink,laundrytub,inawet basement,or nearaswimmingpool,
andthelike.
6. Carts and Stands -The appliance should be used only
with a cart or stand that is recommended by the
manufacturer.
6A. Anapplianceandcart combination should bemovedwith
care. Quick stops, excessive force, and uneven surfaces
maycause theappliance andcart combinationto overturn.
7. Wall or Ceiling Mounting - The appliance should be
mounted to a wall or ceiling only as recommended by the
manufacturer.
8. Ventilation -The appliance should be situated so that its location or position does not
interferewithitsproperventilation. Forexample, theapplianceshouldnotbe situatedon a
bed, sofa, rug, or similar surface that may block the ventilation openings;or, placed in a
built-ininstallation,suchasabookcaseorcabinet, thatmay impedetheflowofairthrough
theventilationopenings.
9. Heat -The appliance should be situated away from heat sources such as radiators, heat
registers, stoves, or other appliances (including amplifiers) that produce heat.
10. Power Sources -The appliance should be connected to a power supply only of the type
described in the operating instructions or as marked on the appliance.
11. Grounding or Polarization - Precautions should be taken so that the grounding or
polarizationmeansof anappliancearenot defeated.
12. Power-Cord Protection -Power-supplycordsshould beroutedso thattheyare notlikely
to be walked on or pinched by items placed upon or against them, paying particular
attention to cords at plugs, convenience receptacles, and the point where they exit from
theappliance.
13. Cleaning -Theappliance should becleanedonly as recommendedbythemanufacturer.
14. Power Lines - An outdoorantennashouldbe located awayfrompowerlines.
IMPORTANT SAFETY INSTRUCTIONS

9
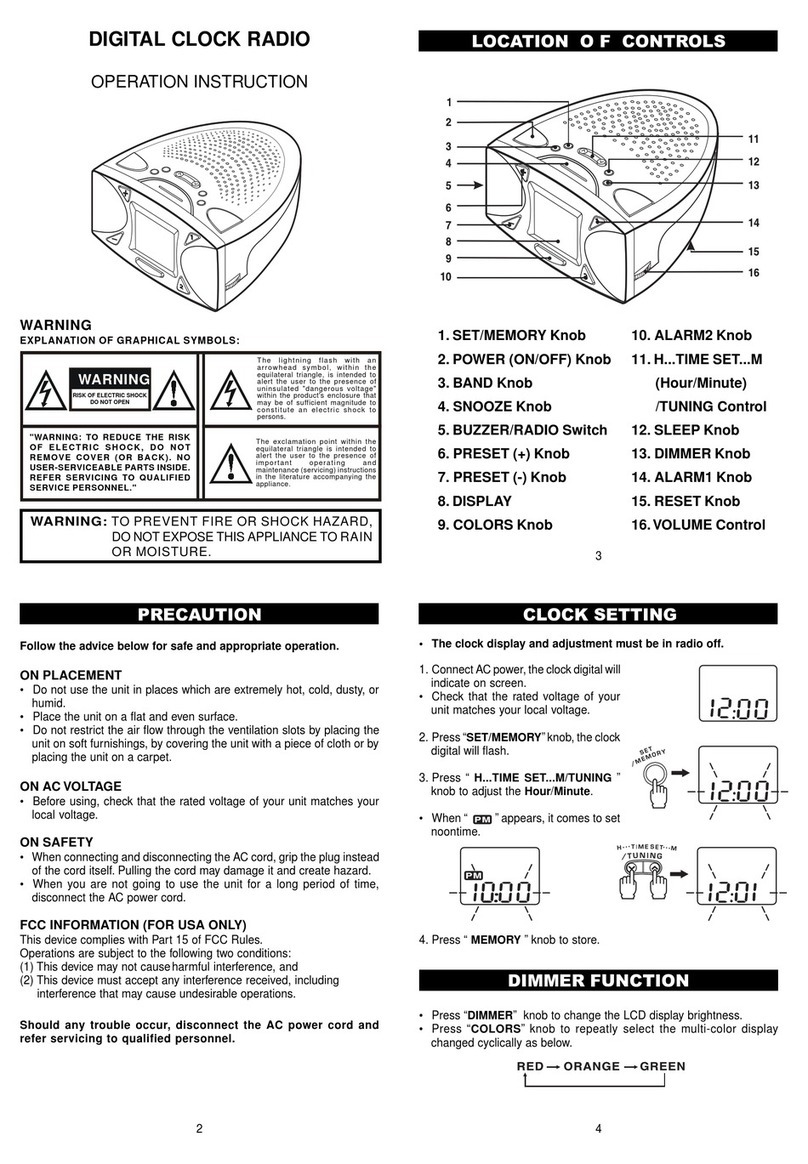
15. Outdoor Antenna Grounding - If an outside antenna is connected to the receiver, be
sure the antenna system is grounded so as to provide some protection against voltage
surges and built up static charges. Section 810 of the National Electrical Code, ANSI/
NFPA No. 70, provides information with respect to proper grounding of the mast and
supporting structure, grounding of the lead-in wire to an antenna discharge unit, size of
grounding conductors, location of antenna-discharge unit, connection to grounding
electrodes, and requirements for the grounding electrode. See Figure 1.
16. Nonuse Periods - The power cord of the appliance should be unplugged from the outlet
when left unused for a long period of time.
17. Object and Liquid Entry - Care should be taken so that objects do not fall, and liquids
are not spilled, into the enclosure through openings.
18. Damage Requiring Service - The appliance should be serviced by qualified service
personnel when:
A. The power-supply cord or the plug has been damaged; or
B. Objects have fallen, or liquid has been spilled, into the appliance; or
C. The appliance has been exposed to rain; or
D. The appliance does not appear to operate normally or exhibits a marked change in
performance, or
E. The appliance has been dropped, or the enclosure damaged.
19. Servicing - The user should not attempt to service the appliance beyond that described
in the operating instructions. All other servicing should be referred to qualified service
personnel.

10 811-0R9691-011

1
RADIO-RÉVEIL
MANUEL D’UTILISATION
RISQUE D’ÉLECTROCUTION
NE PAS OUVRIR
AVERTISSEMENT: POUR ÉVITER LES RISQUES DE FEU OU DE CHOC
ÉLECTRIQUE, NE PAS EXPOSER CET APPAREIL À LA PLUIE OU À L’HUMIDITÉ.
MISE EN GARDE: POUR ÉVITER LES
RISQUESDECHOCSÉLECTRIQUES,NEPAS
RETIRER LE COUVERCLE (OU LE DOS).
AUCUNEPIÈCENÉCESSITANT L’ENTRETIEN
PARL’UTILISATREURÀL’INTÉRIEUR.POUR
RÉPARATION S’ADRESSER À UN
RÉPARATEURQUALIFIÉ.
Le point d’exclamation à
l’intérieur d’un triangle a
pour but d’attirer votre
attention sur des instruc-
tions importantes
concernant ce produit.
AVERTISSEMENT
Le symbole de l’éclair
à l’intérieur d’un tri-
angle a pour but
d’avertirl’utilisateur de
“voltage dangereux” à
l’intérieurdel’appareil.
AVERTISSEMENT:AVERTISSEMENT:
AVERTISSEMENT:
NE PAS POSER CET APPAREIL SUR UN LIT OU AUTRES
ENDROITS POUVANT EMPÊCHER L'AIR DE CIRCULER
DANS L'SPPAREIL.

2
•Pour débrancher le cordon d’alimentation
CA,tirersur laficheet nonsurle cordonlui-
même.
•Éviter d’exposer l’appareil à des
températures extrêmes, au plein soleil, à
l’humidité, au sable, à la poussière et aux
chocs.
Ne pas réduire la circulation de l’air autour
de l’appareil afin d’éviter la surchauffe. Ne
pas placer l’appareil sur tapis, couverture,
etc. ou près de rideaux et tentures qui
pourraient bloquer les orifices de ventila-
tion.
•Au cas où un objet ou un liquide tomberait
à l’intérieur de l’appareil, le débrancher et
le faire vérifier par un réparateur qualifié
avant de recommencer à s’en servir.
•Pour nettoyer le boîtier, n’utiliser qu’un
chiffon doux humecté d’une solution de
détergent léger. Ne jamais utiliser de
nettoyeur abrasif ou de dissolvant
chimique.
AVERTISSEMENT
CARACTÉRISTIQUES
• Pour éviter tout risque de feu ou de choc
électrique, ne pas exposer cet appareil à la
pluie ou à l’humidité.
• Pour éviter tout risque de choc électrique,
ne pas ouvrir le coffret. Pour toute
réparation s’adresser seulement à
un réparateur qualifié.
•Réveil électronique numérique et
interrupteur de sommeil combinés.
•Choix de réveil par la radio ou par
l’avertisseur.
•Alimentation de secours par pile pour que
l’horloge fonctionne même pendant les in-
terruptionsdecourant.Utiliseunepile6F22
optionnelle.
PRÉCAUTIONS
Cet appareil est en conformité avec le chapitre 15 des règles de la FCC. Son fonctionnment
est soumis aux deux conditions suivantes: (1) l'appareil ne doit pas causer d'interférences
gênantes et, (2) l'appareil doit supporter toute interférence reçue, y compris celle qui pourrait
causer son mauvais fonctionnement.
AVERTISSEMENT:AVERTISSEMENT:
AVERTISSEMENT:
NE PAS POSER CET APPAREIL SUR UN LIT OU AUTRES ENDROITS POUVANT EMPÊCHER
L'AIR DE CIRCULER DANS L'SPPAREIL.

3
1. Sélecteur de fonction [Marche/
Arrêt/RADIO AVERTISSEUR]
2. Touche de réglage de l’HORLOGE
[CLOCK]
3. Touche de réglage de l’HEURE [HR]
4. Touche de réglage des MINUTES
[MIN]
5. Touche de réglage du RÉVEIL
[ALARM]
6. Touche de réglage SOMMEIL
[SLEEP]
7. Touche répétition réveil/interrupteur
sommeil
8. Affichage de l’heure9. Logement de
la pile de secours [fond]
10. Échelle de syntonisation de la radio
11. Molette de syntonisation [TUNING]
12. Sélecteur de BANDE
13. Molette de réglage du VOLUME
14. Cordon d’alimentation CA
15. Fil d’antenne
AFFICHAGE ÀTÉMOINS LUMINEUX
TémoinPM
(après midi)
Témoin de
RÉVEIL
Chiffres des
MINUTES
Chiffres des
HEURES
EMPLACEMENT DES ÉLÉMENTS

4
ALIMENTATION
ALIMENTATION AUXILIAIRE EN CAS DE PANNE DE
COURANT
Remplacement de la pile
Pour vérifier l’état de la pile, débrancher le
cordon CA de la prise de courant et le
rebrancher après quelques minutes. Si
l’heure affichée est incorrecte, il faut alors
remplacer la pile par une neuve.
Mise en garde
•Biens’assurerquelapilesoitinstalléeavant
de débrancher le cordon d’alimentation CA
de la prise de courant.
•Lorsque l’appareil ne doit pas être utilisé
pendantunelonguepériodedetemps,ilfaut
retirer la pile de son logement afin d’éviter
son déchargement et la fuite d’électrolyte
qui endommagerait l’appareil.
Bien s’assurer d’installer une pile de 9 V
comme alimentation de secours. En cas de
panne du courant, la pile assurera
l’alimentation de l’horloge et maintiendra le
réglage de l’heure de réveil.
•Encasd’interruptiondecourant,lafonction
d’horloge est maintenue bien que le témoin
soitéteintetquel’avertisseurnefonctionne
pas.
•Après une interruption de courant, l’heure
affichée peut ne pas être absolument
exacte (elle peut avancer ou retarder de
moins de 10 minutes par heure).
La pile ne fait qu’assurer le fonctionnement
de l’horloge et de la mémoire de l’heure du
réveillorsqu’ily aunepanne decourant. La
radio ne peut pas fonctionner avec la pile.
COURANT DOMESTIQUE
Avant de brancher la radio-réveil s’assurer
que le voltage du courant correspond bien
aux spécification de l’appareil.
Mise en garde: Pour éviter tout risque
de choc électrique, veiller à brancher
la fiche de façon que sa lame la plus
large pénètre dans la fente la plus large
de la prise de courant. Bien enfoncer
la fiche.
Vers prise CA
Introduire une pile de type “6F22”

5
RÉGLAGE DE L’HORLOGE
1. Tout en appuyant sur la touche de réglage de l’horloge (CLOCK), appuyer sur la
touche des heures (HR) pour inscrire l’heure.
ÉCOUTE DE LA RADIO
2. Tout en appuyant sur la touche de réglage de l’horloge (CLOCK), appuyer sur
la touche des minutes (MIN) pour effectuer le réglage approprié.
• PM 12:00 = MIDI, le témoin de PM s’allume.
1.Régler le sélecteur de
fonction à la position de
marche (ON).
2.Choisirlabandedésirée
FM ou AM. 3.Syntoniser une station.
4. Régler le nivau du volume. 5.Après l’écoute mettre le sélecteur à la
position d’arrêt (OFF).
En AM: faire pivoter l’appareil pour
trouver la meilleure réception.
Pour améliorer la réception
En FM, étendre le fil d’antenne.

6
RÉGLAGE DU RÉVEIL [PAR RADIO OU AVERTISSEUR]
COMMENT ARRÊTER LE RÉVEIL
1.Pour dormir quelques minutes de plus:
Appuyer sur la touche de répétition
(SNOOZE) qui arrête le son du réveil pour
une durée de 9 minutes avant de se
remettre en marche. Vous pouvez répéter
cette fonction plusieurs fois jusqu’à un
maximum de 119 minutes après l’heure
de réglage du réveil.
2.Pour annuler la fonction de réveil:
Appuyersurlatouchederéveil(ALARM).
La fonction ne se réactivera qu’après 24
heures.
1. Tout en appuyant sur la touche de réglage du réveil (ALARM), appuyer sur la
touche des heures (HR) pour inscrire l’heure du réveil.
2. Tout en appuyant sur la touche de réglage du réveil (ALARM), appuyer sur la
touche des minutes (MIN) pour effectuer le réglage désiré.
3.Réveil par la radio:
Syntoniser la station désirée et régler le
niveau du volume.
Régler le sélecteur
sur RADIO.
4. L’indicateur de réveil AL (ALARM) s’allume.
•Réglé sur RADIO ou sur l’avertisseur (BUZZER), le réveil se mettra en marche à l’heure
préréglée et s’arrêtera automatiquement après 119 minutes.
Réveil par l’avertrisseur:
Régler le sélecteur de fonction sur
l’avertisseur (BUZZER).

7
Bandes de fréquences FM: 88-108 MHz
AM: 530-1700 kHz
Antennes FM: Fil d’antenne de 1 m de long
AM: Barre ferrite incorporée
Haut-parleur 8 Ohm
Puissance de sortie 240 mW [distorsion harmonique totale 10%]
Alimentation CA 60 Hz 120 V
Auxiliaire: CC, une pile de 9V (6F22)
Dimensions 179x132.2x54.8 mm (LxPxH )
Poids Environ 560g (sans la pile)
Les caractéristiques techniques et l’apparence extérieure peuvent changer sans préavis.
MINUTEUR POUR S’ENDORMIR AVEC LA RADIO
HOW TO SET THE SLEEP TIMER
1.Pendant l’écoute de la radio, régler le
sélecteur de fonction sur arrêt (OFF).
2.Appuyer sur la touche de sommeil
(SLEEP).
La radio se met en marche et
s’éteindra après 59 minutes.
Appuyer sur la touche de sommeil
(SLEEP) et la touche de l’heure (HR) pour
que la radio s’éteigne après 119 minutes.
OU
CARACTÉRISTIQUES
Appuyer sur la touche de sommeil
(SLEEP) et la touche des minutes (MIN)
pour régler le nombre de minutes désiré
automatiquement décomptées à partir du
maximum de 119 minutes.
3.Pourannulerleréglagedesommeil(SLEEP)
avant les 59 minutes, appuyer sur la touche
de répétition (SNOOZE).

8811-0R9691-020

1
RADIO RELOJ CON ALARMA
MANUAL DE INSTRUCCIONES
RIESGO DE GOLPE
ELECTRICO NO ABRIR
El símbolo del rayo
relampagueandocon
puntadeflechadentro
deuntriángulo,esun
signo de advertencia
alertándolo de la
presencia de un
"voltajepeligroso"en
elinteriordelaparato.
PRECAUCION:PARA REDUCIREL
RIESGODEGOLPEELECTRICO,NO
SAQUELACUBIERTA(OTAPA).NO
HAYREPUESTOSUTILESPARAEL
USUARIO EN SU INTERIOR.
SOLICITE MANTENCION AL
PERSONALDELSERVICIOTECNICO
CALIFICADO.
El punto de ex-
clamación dentro de un
triángulo, es un
sígno de advertencia
alertándolo sobre la
presencia de im-
portantes in-
strucciones que
acompañan al producto.
PRECAUCION
ADVERTENCIA:PARAREDUCIRELRIESGODEFUEGOODEGOLPEELECTRICO,
NO EXPONGA ESTE APARATO A LA LLUVIA NI A LA HUMEDAD.
*VEA LA PARTE INFERIOR DEL APARATO, PARA LOS SIMBOLOS GRAFICOS. *
* NO CONECTE LA ANTENA FM A UNA ANTENA EXTERNA. *

2
•Para desconectar el cable tirelo por el
enchufe, no por el cordón.
•Permita una adecuada circulación de aire
con el fin de prevenir la formación de calor
interno. No ponga el aparato sobre
superficies(alfombrillas, frazadas, etc.), ni
cerca de materiales (cortinas, ropajes)
que puedan bloquear los agujaros de
ventilación.
•Evite la exposición a temperaturas
extremas, luz directa del sol, humedad,
arena, polvo o golpes mecánicos.
•Si cayera cualquier objeto sólido o liquido
dentro de la Radio Reloj, desenchfe el
aparato y hagalo revisar por personal
calificado antes de hacerlo funcionar
nuevamente.
ADVERTENCIS
CARACTERISTICAS
PRECAUCIONES
• Para evitar un incendio o un golpe de
corriente, no exponga este aparato a la
lluvia ni a la humedad.
• Para evitar golpes eléctricos, no abra el
gabinete. Solicite mantención sólo al per-
sonal del Servicio Técnico calificado.
•Unacombinaciónderelojconalarmadigital
electrónicayapagadodesueñoautomático
(sleep timer).
•Dos modos disponibles para despertar:
radio o alarma zunbadora.
•Función de respaldo de la energía para
mantenerelfuncionamientodelrelojdurante
una interrupción de corriente, utilizando
una batería opcional 6F22.
Other manuals for CE90
1
Table of contents
Languages:
Other Audiovox Clock Radio manuals

Audiovox
Audiovox CE90 User manual

Audiovox
Audiovox KCD3180 User manual

Audiovox
Audiovox CE255 User manual

Audiovox
Audiovox CR8030iE5 User manual

Audiovox
Audiovox CE609CR User manual

Audiovox
Audiovox RC105 User manual

Audiovox
Audiovox RP5640 User manual

Audiovox
Audiovox CR-308 Technical manual

Audiovox
Audiovox Portable MP3 CD Player User manual

Audiovox
Audiovox CD1120 User manual