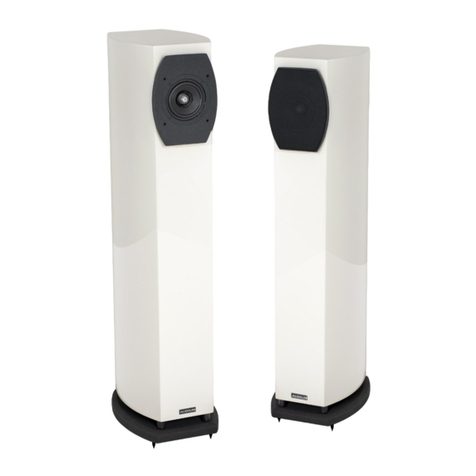
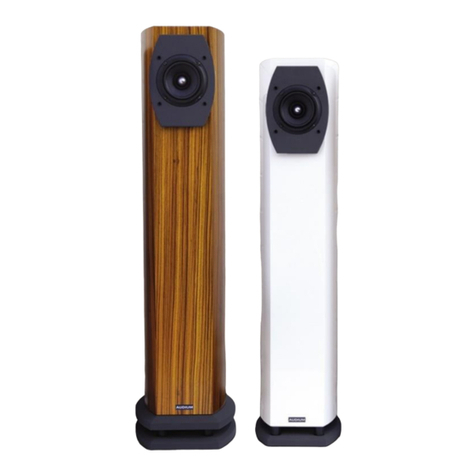
audium Comp 3.2 Drive User manual

Comp Active / Drive
User Manual

- 2 -

- 3 -
Thank you very much for your trust in AUDIUM products!
This AUDIUM speakers are the key to a realistic, three-dimensional
music reproduction with outstanding dynamics and detail.
The Active Version lets you connect to devices with built-in preamp and or sources with
regulated audio output. If you are using a computer as a source, we recommend to use a
high-quality sound card or use an external DA converter.
The Drive Version works with a classical integrated amplifier or a tube amplifier. The
active subwoofer inside relieves the burden of bass-amplification of the amplifier.
Thus, even with low power (such as Triode tube amplifiers or class-A amplifiers), you can
operate the speakers with maximum fidelity.
Please read this manual before installing your loudspeakers.
It provides all the necessary information and hints to set up, and to achieve the best music
reproduction with your AUDIUM loudspeakers.
Thank you very much,
Your AUDIUM team!
Contents:
2x AUDIUM Loudspeakers
2x Power Supply
2x Power Cable
8x Spikes (M8 thread)
1x User Manual
1x Warranty Card

- 4 -
General information
Warranty
By registering your product, you extend the legal warranty on speakers to 5 years and
electronics to 3 years. This is independent of your dealer / distributor.
Visit www.audium.com/registration or fill out the enclosed warranty card within 2 weeks
after purchase these speakers.
Warning - Safety instructions
1. Read this manual and follow the instructions provided.
Keep this manual as a reference for future questions.
2. Do not operate the speakers in damp places or near water.
3. These speakers are intended for use inside buildings.
Do not operate them outdoors.
4. Do not use the speakers near heat sources such. Eg. Radiant heaters, stoves,
fireplaces, amplifiers, ... or other devices that produce heat.
5. Disconnect the loudspeakers from the power supply if you do not use them
for a long time and during lightning storms to avoid lightning damage.
Do not try to repair the speakers in case of damage or malfunction.
Always contact your dealer or authorized service personnel.
WARNING - RISK OF ELECTRIC SHOCK!
To avoid the risk of electric shock, never open the power supplies or speakers.
Put the device e not to rain or moisture.
There are no parts inside that require service or care.
Burn-ln of the Loudspeakers:
Loudspeakers are equipped with moveable parts. Thus they require a specific "Burn-In
time“ until these parts can move in their required tolerance range. After this period, the
loudspeakers can develop their full acoustic potentials.
For the burn-in of your new AUDIUM loudspeakers, you should play back music signals
with a very broad frequency spectrum for min. 2 days. Preferably you can use a special
Burn-In CD (containing pink noise signal) or you radio receiver after tuning it to an
unassigned frequency so you can just hear noise.
Please note that after a long period of inactivity of your Speakers moveable parts get back
to their initial rigid state. So give them a few hours time for “warm-up” again through
playing music, and you will notice the distinct increase of fidelity within this time.
Handling, Cleaning and Care
For cleaning, use a soft dry or slightly damp cloth.
Please avoid aggressive cleaning agents as well as special furniture polishes or any other
cleaning fluids. Dust from the chassis can be removed gently by using a tiny furniture
brush.
Warning: Avoid touching the chassis and membranes!
They are very sensitive and can be easily damaged!

- 5 -
Terminology
Instructions only for the Active Variant will be red Font, the only for the Drive Variant
apply in green letters (arrows / headings / text).
Unpacking the speakers
The AUDIUM speakers are delivered in separate cartons. Alter opening them, remove the
polyfoam protection elements and the textile bag. Do not dispose the packaging - you can
carry the speakers in a save way only when using the original packaging.
Spikes:
AUDIUM floor speakers radiate sound best when the front battle is inclined for a
fewdegrees. Therefor screw the front spikes for 5mm, the rear spikes totally into the
designated winding-drills. Take care that the speaker has a steady position.
Finally, tighten the spikes with the appropriate screw nuts.
Further information on the installation below in the chapter "Installation".
Note: To protect wooden floors, we recommend the use of washers, which you can get
from your dealer. Alternatively, you can also use any metal discs for bridging.
Dust-Caps:
The loudspeakers are equipped with dust-caps per default. These are simply attached
to the speaker front and can be removed with low force through pulling them oft, it you
desire.
Even though these dust-caps have been designed according to acoustic aspects, the best
sound performance can be achieved when they are removed from the loudspeakers.
Plugs in the bass reflex tube:
The bass reflex tubes are sealed with a semi-permeable foam
stopper. DO NOT remove this to change the bass response.
The tuning of the speakers is chosen so that you achieve the
maximum tonal performance WITH these plugs. If you want to
boost bass, you can do so by using the Bass setting in the
Speaker Setup.

- 6 -
Speaker Placement
Listening Position:
As shown in the illustration, the two speakers and your
listening position ideally form an isosceles triangle with
the edge lengths A and B. The distance A between the
Speakers should be smaller than the distance B between
the speakers and yours Listening position. Distance A
should be min. 2 meters (6.5 feet).
Position in your listening room:
Because of physical laws, a positioning of the speaker closer as 80 cm to a wall causes an
increase of the bass reproduction. So you should try to keep this as the minimum distance.
By changing this distance you can adjust the bass intensity.
If this is not possible due to your room situation, you can correct this with the "Position"
setting in the setup (see below). If the speaker is closer to a wall than 80 cm, select the
setting "Near the wall". If the speaker is in a corner, select the “Corner”setting.
You can also configure the speakers differently.
For example, if one speaker is placed near a wall, the second in a corner.
Angling:
Depending on the orientation and angle of your speakers you can change the brilliance,
the depth of the stage and the room reproduction.
The installation of the speakers is authoritative for the resulting sound.
Experiment with different settings and let your hearing to judge!
An alignment of the speakers in parallel
heading to your listening position ensures gentler heights.
An angling of the speakers towards the listening position
provides present heights / more brilliance.
In many rooms, it is good to tilt the speakers backwards, ie turn the
front spikes far out and the back far into it. This may result in a
larger sound image with higher image.
In contrast, straight alignment of the speakers will cause that the
stage is more compact and more come to the forefront.

- 7 -
Controls and Connectors on the Speakers
1. Display: OLED graphic display shows the current speaker status.
2. Knob / push-button for navigation in the menu and setting of the parameters.
3. Power LED: lights red when speaker is active, dimmed red when in standby
4. Line - Input: Connect this input with the Pre - Out of your audio source
5. Speaker Input: Connect these jacks to the speaker cable.
Note: Note the polarity + (red) and - (white).
6. Power socket: Insert here the end of the power supply cable.
Power Supply:
The AUDIUM Active and drive Speakers have an external power supply.
The outsourcing of the power supply from the speaker prevents mutual unwanted
influencing the Amplifier electronics, the chassis and the power supply.
Furthermore, this allows a simple upgrade of the power supply to a higher- performance
type.
The power supplies of Comp7 Active, Comp8 and Comp9 Active and drive have
additionally a power switch. Switch on the power supply with it when all connections have
been made.
2
1
4
5
5
Drive
1
Netzschalter
Netzbuchse
Power-LED
6
Active
Stromversorgungs-Stecker
3

- 8 -
Connecting the speakers:
After placing the speakers in the desired location, connect them to your music source.
Depending on whether Active or Drive Speaker, this is done as follows:
Active Speaker:
Connect the speakers with high-quality RCA cables with the line-out of your preamp or the
audio output of your computer. Lead the left line out of the preamp to the left speaker and
the right line out to the right speaker.
Since the integrated sound card of computers / laptops often do not meet the sound level
of AUDIUM speakers it is recommended to use an external DAC which you connect to
your computer via USB or TosLink.
Connecting to a Preamp or a Streamer with volume control:
Connecting to a Computer:
If your computer has an optical digital output, it is advisable to connect it to an external
converter as the non-electrical, galvanically isolated connection prevents interference from
the computer to the loudspeakers.

- 9 -
Drive Loudspeakers:
Through the active subwoofer in the AUDIUM
Drive
Speakers, most of the work (for
playing the bass signals) is transferred from the amplifier the speakers. The (tube) amplifier
can thus concentrate fully on the reproduction of the detailed information which is
reproduced via the fullrange-drivers.
Note:
Again, the basic principle applies: a chain is never stronger than its weakest link. Therefore
do not try to think too cost-effective when choosing the speaker cables. save you They
need to transfer all the music information from the amplifier to the speakers.
Note:
probably also use a multiple socket outlet. Insert the two power supplies of the speakers in
the first two outlets near the connection cable. Do not use extra filtered power outlet
outputs. The power supplies have already integrated line filters.
Too much network filtering has a bad effect on the sound quality.
Activating the system:
1. Set the speakers to the desired position
2. Connect the music source with a cinch (4) or speaker cable (6) with the speakers as
described above.
3. Connect the plug of the power supplies with power socket of the loudspeakers (6)
4. Plug the power cord into the power adapter, and LAST the mains plug into the
mains socket
5. For Comp7, 8 and 9, turn the power switch to the "on" position.
6. The speakers then "boot".
They show the AUDIUM logo, followed by the status indicator (as shown below).

- 10 -
Operation:
The display shows the current status, settings and the setup menu.
Use the rotary knob to adjust the settings on the speaker: Turn clockwise or anticlockwise
to navigate through the menu / change values. You can also use it to lock or mute the
speaker (see below "Mute and Lock of the loudspeakers").
During normal operation, the display shows the following display (here from a Comp8.2
Active):
Muting and locking the speaker:
Mute the speaker:
If you press the rotary knob briefly while the status is displayed, the loudspeaker is muted.
So you can simply stop the playback to plug or unplug the RCA cable without causing loud
hum or drone noises.
Press again to unmute the speakers. This also happens automatically after 10 seconds
(this value can be changed in the Setting menu).
Locking the speaker:
To prevent unwanted changes to the parameters, you can lock the speaker. Press and hold
the knob while the display shows the speaker status. The Operation is then disabled (and
thus prevent the creation of settings by your children!). To unlock, press and hold the knob
again.
If the speaker is disconnected from the mains, the lock is released.
Muted
Unmuted
Locked
Unlocked
Automatic switching on and off.
The speakers have integrated music signal detection. If no music is played back,
the Speaker goes to standby after 15 minutes (this value can be changed in the Settings
menu). If music signal is detected, then the Speaker switch back on automatically.
Note:
If you are the Disconnecting speakers from the mains you have nothing to note. Restarting
/ plugging brings your speakers back to their last state. All parameters (except the lock -
see above) are stored in a long-term memory that does not lose its contents.

- 11 -
The Settings
Navigation through the menu is easy: turn the knob while the status is displayed to open
the settings menu.
Navigate through the menu by turning the knob. When you have found the setting you
want to change, press the knob, and then change the value.
Press again the button to save the value.
You enter submenus by pushing the knob, and exit them by selecting:
The menu is automatically exited after a certain time
Settings-Menü:
Symbol
Menu
Description
Comment
Bass
The speaker adjusts the
bass accordingly
Values of -1, 0, +1 or +2 are
possible
.
Speaker
Position
Set the speaker position.
.
Choose between Free (in the
room), Near the Wall or Shelf
(for Comp 3) or Set up in a
corner
Room
Properties
Here you can set the
property of your listening
room. Depending wether
you little or much furniture.
Strongly reverb or reverb,
(Room with little equipment)
dampened or strongly
dampened (in a room with
much furniture equipment)
Gain
Select the sensitivity of the
line-in here.
Possible values are -3dB, 0dB,
+ 3dB, + 6dB
EQ Submenu
You can configure an EQ
here
More Settings
Other speakers -
Parameters as Auto-Off, the
display parameters ...
See below.
Exit Menu

- 12 -
EQ menu:
At AUDIUM
Active
and
Drive
loudspeakers you can configure two or one EQ (aka
parametric equalizer) to lower or raise frequencies.
This makes it possible to increase or decrease a frequency band.
It can be used to correct drone frequencies or room resonances.
Symbol
Menu
Description
Comment
EQ On/Off
Turn the EQ on or off.
Frequency
Set the center frequency
here.
Values between 20 Hz
and 200 Hz are possible
Gain
Set the height of the EQ here
Values between -24 and
+6 dB are possible
.
Quallity
Set the quality of the EQ
here.
Values between 1 and 10
are possible
The frequency determines the position
of the filter, the gain of the filter and
the quality the width of the EQ.
The graphic on the right shows different
settings of the EQ.

- 13 -
Setup Menu:
Here you can adjust further speaker parameters:
Symbol
Menu
Description
Comment
Auto Off
Time after which the
loudspeaker goes into
standby without a music
signal
Default value 15 minutes
Mute
duration
Duration after which the
muting is automatically
canceled.
Default value 10 seconds
Display
brightness
Changes the display
brightness.
Default is 5 (maximum
brightness)
Display
darkening
duration
Period after which the display
is automatically faded to
black.
Default: display is never
darkened (the horizontal 8
stands for infinite)
Language
Display Language.
Factory Reset
Reset the speaker to factory
settings.
Attention! All your settings will
be deleted.
Info
Information about the device

- 14 -
Impressum:
This User Manual © 2019:
AUDIUM - Siegesleitner & Urban GbR
Grossbeerenstr. 146
12277 Berlin
Deutschland
Version 1.0.0 –vom Dienstag, 6. Oktober 2020
Questions and suggestions to:
ist a registered Trademark
This manual suits for next models
5
Table of contents
Other audium Speakers manuals
