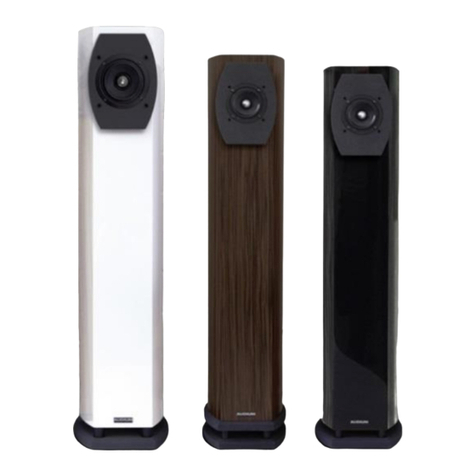
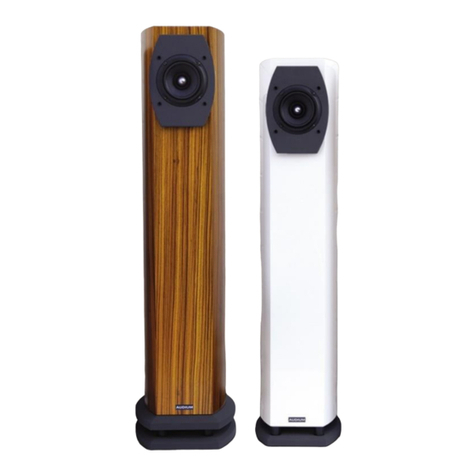
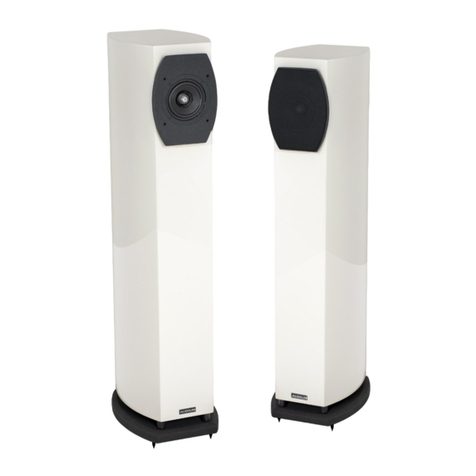
audium Air Wireless User manual

Air Wireless
User Manual

- 2 -

- 3 -
Thank you very much for your trust in AUDIUM products.
This AUDIUM Air Wireless system is the next step into modern music reproduction. It is not just a
pair of wireless speakers, you have a complete audiophile stereo system capable of wireless
audio playback and connectivity to many kind of digital audio sources.
Please read this manual in advance before setting up your loudspeakers.
It will give you all necessary information and tips to achieve the best
setup and thus, the maximum fidelity in audio reproduction with your
AUDIUM Air speakers.
Thank you very much,
Your AUDIUM Team!
You will find enclosed:
1x Air Master Speaker
1x Air Slave Speaker
2x WiFi Antennas
1x Coaxial Digital Cable (Comp 7, 8 and 9)
2x Power Supply incl. Power Cord
1x User manual
8x Spikes (M8 winding thread)

- 4 -
Contents
Contents
................................................................................................................................................................... 4
General Information
................................................................................................................................................. 6
Warranty ....................................................................................................................................................................... 6
Warning - Safety Instructions ........................................................................................................................................ 6
Burn-ln of the Loudspeakers: ........................................................................................................................................ 6
Handling, Cleaning and Care ...................................................................................................................................... 6
Terminology .................................................................................................................................................................. 6
Unpacking the speakers
............................................................................................................................................ 7
Spikes: ........................................................................................................................................................................... 7
Dust-Caps: .................................................................................................................................................................... 7
Foam-Plugs in the bass reflex tube: ............................................................................................................................. 7
Speaker Placement
................................................................................................................................................... 8
Listening Position .......................................................................................................................................................... 8
Position in your listening room ..................................................................................................................................... 8
Angling .......................................................................................................................................................................... 8
Controls and Connectors
.......................................................................................................................................... 9
Power Supply (PSU) ...................................................................................................................................................... 9
Display showing current speaker Status ..................................................................................................................... 10
Muting and Locking the Loudspeaker ........................................................................................................................ 10
Muting the speakers ............................................................................................................................................... 10
Locking the speakers ............................................................................................................................................. 10
Auto Power On and Off ............................................................................................................................................. 11
The Setup Menu .......................................................................................................................................................... 11
Air Wireless Speaker Pairs .......................................................................................................................................... 11
Basic Setup and connecting the Loudspeakers
........................................................................................................ 12
Master and Slave: ....................................................................................................................................................... 12
Wireless Link or CableLink? ....................................................................................................................................... 12
Powering Up and Booting the Speakers
.................................................................................................................. 12
Operating Scenarios of your Air's
............................................................................................................................ 13
Scenario 1: As Wifi Loudspeaker in your Home WLAN ............................................................................................ 13
Connecting the Speakers to your WLAN via the App .......................................................................................... 13
Connecting the Speaker to your WLAN via WPS ................................................................................................. 14
Scenario 2: As WiFi Loudspeaker to play back music through the Digital Inputs ..................................................... 15
Volume Adjustment: ............................................................................................................................................... 15
Scenario 3: As Bluetooth Loudspeaker for your Smart TV ......................................................................................... 16
Active Inputs + Input Monitor:
................................................................................................................................ 17
Changing the Input Priority ......................................................................................................................................... 17

- 5 -
Advanced Speaker Setup and Adjustments
............................................................................................................. 18
Speaker Position: ........................................................................................................................................................ 18
Room Properties: ........................................................................................................................................................ 18
Bass Setting: ................................................................................................................................................................ 18
Appendix 1: Main Setup Menu
............................................................................................................................... 19
Air Setup Menu (at Master Loudspeaker) .................................................................................................................. 20
Air Setup Menu (at Slave Loudspeaker) ..................................................................................................................... 21
Gain Menu (only at Master Loudspeaker) ................................................................................................................. 21
EQ menu ..................................................................................................................................................................... 22
Appendix 2: Hints for setting up your WiFi
.............................................................................................................. 23
Appendix 3: Glossary
............................................................................................................................................. 24
Appendix 4: Questions and Answers
....................................................................................................................... 25
Appendix 5: Technical Data
.................................................................................................................................... 26
Appendix 6: Disclaimer
........................................................................................................................................... 27
E.C. MARKING: .......................................................................................................................................................... 27
Proper Disposal of Products ....................................................................................................................................... 27

- 6 -
General Information
Warranty
For being independent of your regional dealer/distributor we strictly recommend to use our
international warranty registration. So please visit www.audium.com/registration to register your
Loudspeakers. Within your registration we are offering you an international worldwide warranty
under the regulations of AUDIUM.
Warning - Safety Instructions
1. Read and follow all instructions in this manual. Keep this manual for later reference.
2. Do not use this products on humid places or near water.
3. They are intended for indoor-use. Do not use outside of buildings!
4. Do not use this products near heat sources. E.g. radiators, stoves, amplifiers or any other
device that produces heat. Do not block any heat sinks or ventilation openings.
5. Unplug the speakers from the main outlets during lightning storms or when unused for
long periods of time.
6. In case of damage or malfunction do not try to repair the speakers on your own.
Always contact your dealer, or authorized service personal to service the products.
WARNING RISK OF ELECTRIC SHOCK! DO NOT OPEN!
To reduce the risk of electric shock, do not open the power supplies and do not expose the
apparatus to rain or moisture. There are no user serviceable parts inside.
Burn-ln of the Loudspeakers:
Loudspeakers are equipped with moveable parts. Thus they require a specific "burn-in time“until
these parts can move in their required tolerance range. After this period, the loudspeakers can
develop their full acoustic potentials.
For the burn-in of your new AUDIUM loudspeakers, you should play back music signals with a
very broad frequency spectrum for min. 2 days. Preferably you can use a special Burn-In CD
(containing pink noise signal.
Please note that after a long period of inactivity of your speakers the moveable parts get back to
their initial rigid state. So please give them a few hours time for “warm-up” again through
playing music, and you will notice the distinct increase of fidelity within this time.
Handling, Cleaning and Care
For cleaning, use a soft dry or slightly damp cloth.
Please avoid aggressive cleaning agents as well as special furniture polishes or any other
cleaning fluids. Dust from the chassis can be removed gently by using a tiny furniture brush.
Warning:
Avoid touching the chassis and membranes!
They are very sensitive and can be easily damaged!
Terminology
Your Mobile device (iPhone, iPad, Android phone or Android tablet) or your Laptop or PC (with
WiFi card) will be called „Audio Source“. Your AUDIUM Air loudspeakers will be called „Airs“.
„Master“ is the speaker with the WiFi receiver and the digital inputs showing AirM in the Display,
„Slave“ is the other speaker showing AirS in the Display.
Functions only available at Comp 7-9 are printed in blue colour.

- 7 -
Unpacking the speakers
Your AUDIUM speakers are delivered in separate cartons. Alter opening them, remove the
polyfoam protection elements and the textile bag. Do not dispose the packaging - you can carry
the speakers in a save way only when using the original packaging.
Spikes:
AUDIUM floor speakers radiate sound best when the front baffle is inclined for a few degrees.
Therefor screw the front spikes for 5mm, the rear spikes completely into the designated winding-
drills. Take care that the speaker has a steady position.
Finally, tighten the spikes with the appropriate screw nuts.
You find further information on the setup below in the chapter "Installation".
Note:
To protect wooden floors, we recommend the use of washers, which you can get from
your dealer. Alternatively, you can also use any metal discs for bridging.
Dust-Caps:
The loudspeakers are equipped with dust-caps per default. These are simply attached
to the speaker front and can be removed with low force through pulling them off, as we
recommend. Even though these dust-caps have been designed according to acoustic aspects,
the best sound performance can be achieved when they are removed from the loudspeakers.
Foam-Plugs in the bass reflex tube:
The bass reflex tubes are sealed with a semi-permeable foam
stopper.
DO NOT
remove this to change the bass response.
The tuning of the speakers is chosen by us in a way that you
achieve the maximum tonal performance
WITH
these plugs. If
you want to boost bass, you can do so by using the Bass
setting in the Speaker Setup.

- 8 -
Speaker Placement
Listening Position
As shown in the illustration to the right, the two speakers
and your listening position ideally form an equal-sided
triangle with the edge lengths A and B. The distance A
between the Speakers should be smaller than the
distance B between the speakers and yours listening
position. Distance A should be min. 2 meters.
Position in your listening room
Because of physical laws, a positioning of the speaker
closer as 80 cm to a wall causes an increase of the bass
reproduction. So you should try to keep this as the
minimum distance. By changing this distance you can
adjust the bass intensity.
If this is not possible due to your room situation, you can correct this with the "Position" setting in
the setup (see below). If the speaker is closer to a wall than 50 cm, select the setting "Near a
wall". If the speaker is in a corner, select the “Corner” setting.
You can also configure the speakers differently.
E.g., if one speaker is placed near a wall, the second in a corner.
Angling
Depending on the orientation and angle of your speakers you can change the brilliance, the
depth of the stage and the room reproduction.
The installation of the speakers is significant for the resulting sound.
Experiment
with different settings and let your hearing
judge!
An alignment of the speakers in parallel
heading to your listening position ensures gentler heights.
An angling of the speakers towards the listening position
provides present heights / more brilliance.
In many rooms, it is good to tilt the speakers backwards, ie turn the
front spikes far out and the back far into it. This may result in a
larger sound image with higher image.
In contrast, straight alignment of the speakers will cause that the
stage is more compact and more come to the forefront.

- 9 -
Controls and Connectors
1. OLED Display: Graphics display showing
the current speaker status
2. Rotary Encoder / Push Button
3. Power LED: bright red when the speaker is on,
dimmed red in standby
4. Digital Input (1) coax SPDIF
5. Digital Input (2) optical mini SPDIF / TosLink – only
at Master loudspeaker)
6. Digital Output (Comp7-9): connect this to the Slave
Digital Input for CableLink
7. Antenna Connector – mount the Antenna here!
8. IR-Connector for optional IR receiver
9. DC Input (not shown, at lower end)
Connect the PSU plug to this socket
The Display shows the current speaker status, Settings and the Setup Menu.
The Rotary Encoder is used to make adjustments: Turning it navigates through the menu /
changes values. It is also used to mute/lock the speakers.
Please see section Muting and Locking below.
Power Supply (PSU)
1. DC Connector
2. AC Socket
3. Power Switch (Comp 7, 8 and 9)
4. Power LED – lights green
when PSU is on
Plug the DC connector into the DC socket of the loudspeaker.
Then take the Power cord, plug one end into the AC socket of the PSU, and the AC connector
into a wall outlet. The PSU can handle all voltages in the range of 110-230V and 50-60 Hz.
Some PSU models also have an additional power switch.
Turn on this switch after all connections have been made.
When the PSU is on, the green power LED is lightened.
1
7
4
5
2
8
3
6

- 10 -
Display showing current speaker Status
It displays the Loudspeaker Model and the current playback status of the speakers.
Examples:
Comp 8.2 Air Master.
Left Channel assigned.
WiFi Mode with active WiFi
playback.
Comp 8.2 Air Master.
Left Channel assigned.
Coax SPDIF active.
Playback with 24 Bit / 192kHz
Comp 8.2 Air Wireless Slave.
Right Channel assigned.
Playback (Master) active.
Muting and Locking the Loudspeaker
Muting the speakers
Pushing the encoder while the status is shown mutes both loudspeakers (so you can turn off
music quickly without the need of your Audio Source).
Pushing again will unmute the speakers immediately.
They will also be unmuted after 10 seconds (this value can be changed in the setup menu).
Locking the speakers
To lock the speakers and prevent unintended changes of the parameters, push and hold the
encoder while in status view. Both speakers will be locked then (do this to prevent
misconfiguration from your children!)
To unlock, push and hold the knob again.
Un-powering the loudspeakers will remove the lock.
WiFi (AP-Mode)
WiFi (WLAN Mode)
Coax SPDIF Input
Optical SPDIF Input (TosLink)
Bluetooth Input
Pairing Symbol
Speaker Model
Assigned Channel (L or R)
Playback Status:
Speaker Type
Playback in progress
Playback stopped
Bits and Sampling Rate
of active SPDIF input
Automatic Source selection
Active Source/Wifi Status:
A
M…Master or
S…Slave

- 11 -
Loudspeaker is muted
Mute is released
Speaker is locked
Lock is released
Auto Power On and Off
The Speakers have an integrated audio-detection circuit. If there is no playback, the
loudspeaker go to standby mode after 15 minutes (you can change this in the setup
menu). When music signal is detected they wake up automatically.
If you disconnect / turn off the PSUs you do not have to take care of anything. Re-powering the
speakers will bring them back into the last state. All parameters (except the speaker lock and
mute – see above) are stored in a non-volatile memory.
The Setup Menu
Navigation through the menu is very simple:
When you turn the encoder while the status is displayed, you will enter the setup menu.
You can navigate through the menu with the encoder. If you found the setting you want to
change, push it and adjust the value. Push again to confirm the value.
Sub-menus are also entered through pushing the encoder and exited through
selecting “Back”.
Parameters like Auto-Off Time, Display Brightness, Language, … will be adjusted directly on the
speaker. Perform the setting always on the Master speaker.
Except the
Room properties, speaker position and bass setting
(which may be adjusted differing
on both speakers), all parameter changes will be transmitted automatically from the master to
the slave speaker. So you have to adjust them only once.
For sure you can disable this function (Menu->Air Setup->DigiLink) or adjust the parameters on
the Slave to another value after setting the value on the Master.
The menu will be automatically exited after a timeout.
All Setup menu entries and their usage is shown below.
Air Wireless Speaker Pairs
The Air Wireless Speakers have a wireless digital audio link which transfers the audio being
received at the master to the slave. The display shows the status of this audio-link through the
Double-Ring symbol. If both are connected, is blinks at a very slow rate (every 7-8sec).
Otherwise it blinks each second (e.g. when one speaker is not connected to power). In
Association Mode it blinks at a high rate.

- 12 -
Basic Setup and connecting the Loudspeakers
If you want to connect audio sources through the digital inputs, place the Master close to the
audio devices. Otherwise place the Master as close as possible to your WiFi Access-Point.
Master and Slave
The Master plays back the left channel by default, the Slave the right channel. This can be easily
changed in the setup menu. The currently selected playback channel is shown by the letter L or R
in the top right corner of the display.
Wireless Link or CableLink?
The Air Wireless Models do not need a cable between the Master and the Slave. Audio Data is
transferred wirelessly and lossless between both speakers.
For maximum audio quality and HiRes audio playback we recommend to connect Master and
Slave with the supplied SPDIF Cable (Comp 7-9). After this, you have to activate CableLink in
the Setup Menu: Menu -> Air Setup -> CableLink->On
Note:
The latency time reduces fom 25 ms to 0 ms when using CableLink
Powering Up and Booting the Speakers
After setting up the speakers, plug the DC connector into the DC socket, at last plug the AC-
plug into your wall outlet. Depending on the model of the PSU (Comp 7-9) it is equipped with a
main switch, close to the AC socket. You have to turn on the PSU with this switch resulting in a
green lit power LED.
The Setup should now look like this:
After powering up, the Slave is available immediately, the Master will take ca. 30 seconds time
to boot and start the speaker and then shows the status screen.
Master:
Slave:

- 13 -
Operating Scenarios of your Air's
There are many scenarios how to operate your Air speakers – depending on your particular
demand and audio/video equipment. We want to show you three basic setups mostly found in
people’s living rooms:
1. As WiFi Loudspeaker in your Home with WLAN
2. As WiFi Loudspeaker to play back music through the digital inputs
3. As Bluetooth Loudspeaker connected to your Smart-TV via Bluetooth
Scenario 1: As Wifi Loudspeaker in your Home WLAN
If you want to integrate your speakers into your Home-WLAN you have to set up this scenario. It
allows access to your Airs from all your home-computers, access to your NAS if you have one
and use of online-streaming services.
Set up your speakers and connect them to the PSUs.
Connecting the Speakers to your WLAN via the App
1. Then download and install the AUDIUMv2 App on your PC or Mac (from the
www.audium.com webpage) or on your iPhone/iPad (from the App Store) or Android
Phone/Tablet (from the play store).
2. Then go to network settings and select the AUDIUM-AIR-WLAN-xxxx as WLAN network.
3. Start the AUIDUMv2 App, select the Airs, get back to the first Tab, push the “WiFi >”
button, select your WiFi Network, and then enter the password of your WLAN network.
You can also enter a Name for your speakers as you wish.
After confirming these settings, the master speaker will reboot.
The AUDIUM-AIR-WLAN will disappear, and the Airs will join your home-WLAN.

- 14 -
The Antenna symbol will change from AP Mode to WiFi Mode
When you enter the wrong password, the speakers will fall back to AP Mode after ca 1min.
Connect your Smartphone/tablet again to the AUDIUM-AIR-WLAN and start the procedure
again.
Select WLAN
Start App
Select Speaker,
switch back to the
first Tab and tap
on “WiFi >”
Select WLAN
Enter Password
If you succeeded, you can select the Airs now as AirPlay output device and as Media Renderer
from every UPnP/DLNA Application.
You can use the AUDIUM App for setting all speaker parameter!
Try, it is intuitive!
Connecting the Speaker to your WLAN via WPS
You can connect your speakers to your home WLAN network through WPS, too.
Therefore, at the master navigate in the menu to the WPS entry which is in the Air Setup
submenu.
Enter Setup
WAIT! Now push the WPS button of your router / WLAN access point to switch it into WPS
mode, then push the encoder to activate WPS setup on the Air Master.
After a short time both devices will connect, and your Air Speakers are in your home WLAN.
NOTE: Modern Routers have both 2.4G and 5G WLANs. If you perform WLAN access through
this method, it is not clear wether the Air Speakers will select the 2.4G or 5G WiFi Network. This
can lead to “confusions” in the data transfer between your Audio Source and the Speakers, or
the AUDIUMv2 App and the speakers. To be sure which WLAN network will be selected you
should use the manual method via the App.

- 15 -
Scenario 2: As WiFi Loudspeaker to play back music through the Digital Inputs
The Master is equipped with two digital input which allow connections of additional audio
sources. Both inputs can receive digital Audio (PCM Stereo) in the range of 44.1k-192kHz and
16-24 Bit.
Input 1 is a coaxial SPDIF input with RCA/Cinch socket
Input 2 is an optical Mini TosLink socket
NOTE:Always use high quality cables for digital audio transmission.
Especially when you intend to play back HiRes Audio with 24 Bit /192k!
Optical SPDIF cables are often of bad quality and cause problems in audio transmission.
For easy understanding we have this possible setup:
Master is in WiFi Mode.
It has a CD-Player as audio source connected via SPDIF
And is connected to Flat TV via the TosLink input.
The Setup will then look like this:
The Master has a detection circuit built inside which is constantly sensing the inputs (and the
WiFi receiver as well) for audio data. If audio is detected, the inputs are selected automatically
according to a priority scheme (which can be changed in the Air Setup Menu).
The default order is: Priority 1 (highest): AirPlay, Priority 2: SPDIF Input, Priority 3 (lowest):
TosLink Input In our Example: If all devices are turned off, no input is selected. If you turn on
your Flat-TV, its audio data is played back. If you want to play a CD, simply turn on the CD-
Player. It has a higher priority then the Flat-TV. And if you start AirPlay/DLNA playback, the
Master will switch from the SPDIF input to WiFi.
You can also select the Inputs manually via the AUDIUMv2 App.
Volume Adjustment:
To adjust the volume, install the AUDIUM v2 App. You will then use this App to adjust the
volume of the Airs. To use IR-Remote controls we recommend the optional IR receiver.

- 16 -
Scenario 3: As Bluetooth Loudspeaker for your Smart TV
The Master has a Bluetooth receiver which allows high quality audio transmission (A2DP).
You can connect any device with a Bluetooth transmitter to play back audio.
One application case is to connect your Smart TV if it is equipped with a Bluetooth Sender.
For first use you need to associate the Master and the TV.
Therefor select the Bluetooth input with the AUDIUMv2 App.
When doing this, the Bluetooth receiver in the Master is waiting for new connections for 1
minute. Within this time, activate the Bluetooth association on your TV to link both devices.
Then, audio from your Smart TV is sent to the AUDIUM Airs for playback.
If you set back the Input to “Automatic”, the detection circuit in the Air Master will automatically
switch to the Bluetooth receiver as soon as the SmartTV connects again.
NOTE ON TIME-DELAY:
The Audio-Link of Air Wireless has a latency time of 25ms for stable audio transmission.
This delay will occur between the visual content on the screen and the playback through the
speakers. To get rid of this effect adjust the “Lip-Sync” Time Delay of your SmartTV to this value.
When using Comp 7, 8 or 9, activating CableLink reduces the delay to 0ms.

- 17 -
Active Inputs + Input Monitor:
„Active Input“ means, that there is signal on the input. Some devices produce signal (also
silence is a signal when transferring data through SPDIF) even in Standby. So, you have to turn
the device off completely through the main switch, or assign it a lower priority (see below)
You can check whether a device is detected as ON with the „Input Monitor“ in the Setup menu.
O indicates an active Input, - indicates an inactive input.
In our example setup this would mean:
Only device which is on is the Flat-TV
CD-Player is off
No AirPlay playback
Changing the Input Priority
If you wish a different input priority scheme you can change this in the setup menu.
Enter the setup menu, then the select Air Setup, then Input Prio:
The Display shows the current Priority 1-3 setting.
Turning the encoder will cycle through all possible priority combinations. Turn it until you found
the one you deserve, then push the encoder and the new order will be saved.
NOTE! If a device causes an active input at the Master, it may not go to standby as long as you
leave this device on / in standby. Turn it off through the main switch, and the Airs will go to
standby also.

- 18 -
Advanced Speaker Setup and Adjustments
Perfect speaker placement in a perfect listening room is often very far away from what can be
achieved in reality. Not only that a „normal“ listening room is not perfect in terms of its size,
shape and reverb behaviour – it often happens that the conditions for the left speaker are
differing to the conditions of the right speaker! E.g. the left one is placed in a corner, whereas
the right one is close to a wall. Physics that stands behind our environment, being a major
concern for the quality of reproduction of music cannot be turned off unfortunately. Nor can it
be completely compensated by modern computing algorithms or technology.
But at least we can reduce it's impact and compensate it to some amount!
AUDIUM Air speakers are constructed in a way that makes them less depending on the
environment where they are placed. And they allow a exact prediction of the audio reproduction
in the contexts of different listening rooms. This allows us a compensation of these physical
effects through the DSP (digital signal processor) which is built into each speaker.
Three Parameters allow an adaptation of the Airs to the listening room: Speaker Position, Room
Properties and Bass decrease / increase.
Speaker Position
Placement of a loudspeaker in a rooms corner results in an increased level of bass reproduction,
compared to placement free in a room with least bass level (distance to walls > 0.5m).
At your AUDIUM Air Speakers you can choose between 3 speaker positions:
Free Placement, Close to a wall (or on a sideboard at Comp3), or in a corner.
Adjust this setting according to the placement of your speaker and you will have optimum bass
reproduction. You can choose different settings for both speakers!
Room Properties
Each room sounds different. One is very „dumb“, the other one is very clear, or harsh. It
depends mostly on the room furniture. Since you unfortunately would not change your living
room's interieur because you bought new AUDIUM loudspeakers, we do it the other way round.
We adjust the speakers to your room! 5 Steps are possible:
1. Strongly Dampened Room: Lots of furniture, heavy rugs and thick curtains
2. Dampened Room: A bit less..
3. Normal Room: „Normal“ furniture
4. Reverb Room: A bit more then…
5. Strong Reverb Room: Few furniture, Stone floor, big glass windows, no curtains
If it is hard for you to select the appropriate setting, simply start listening music in the
„Normal“ setting. If you think music is not bright/clear enough, select „Dampened Room“.
If music is too harsh, select „Room with reverb“.
Bass Setting
With this parameter you can decrease or increase deep bass reproduction. Changes here will
apply to a frequency spectrum that is less audible, but more “feelable”. So you can make music
playback more a body experience. Take care to not increase this setting too much since it may
also cause an increase of room resonances which cause an undefined and spongy bass
reproduction.

- 19 -
Appendix 1: Main Setup Menu
The following Table shows all menu entries available in the main menu of Master and Slave.
The “Link Column” indicates whether a change of this parameter at the Master is automatically
transferred to the Slave speaker. The letter in the last column (M / S) indicates whether this menu
entry is available at the Master or at the Slave, or both.
Icon
Menu
Description
Comment
Link
M / S
Bass
Sets Bass Parameter
-1 reduces, +1 and +2
increase deep bass
reproduction
N
MS
Position
Sets Loudspeaker Position
Adjust between free
placement, placement
near a wall, or
placement in a corner
N
MS
Room
Sets properties of your
listening room.
Set to reverb when your
room is empty, set to
dampened when you
have much
furniture/curtains
N
MS
Setup Gains
Goto Sub-menu for setting
the gain of the inputs
M
EQ 1
Parametric EQ for bass
-
MS
EQ 2
Parametric EQ for treble
-
MS
Setup
Go to Sub-menu of advanced
speaker parameters
-
MS
Setup Air
Go to Sub-menu of Air
parameters
-
MS
Exit
Exit the menu.
-
MS
Advanced Setup Menu (identical at Master and Servant)
More settings concerning the speaker.
Icon
Menu
Description
Comment
Link
Auto Off
Set time after which speakers
will go to standby if no input is
active
Default value 15 minutes.
Y
Mute Time
Set the time the speaker will
remain muted when you push
the knob during status display.
Default value 10sec
Y
Display
Brightness
Sets the brightness of the
display
Default is 5 (maximum)
Y

- 20 -
Display Dim
Time
Set time after which the display
will be dimmed to darkness.
Default: display will be
never dimmed (the lying 8
stands for infinite)
Y
Language
Change the language of the
display messages
Y
Factory Reset
Bring back the speaker to
factory defaults.
WiFi Settings will not be
chage
-
Info
Show Information about this
speaker
-
Exit
Exit the Submenu
-
Air Setup Menu (at Master Loudspeaker)
Settings concerning the WiFi Link of the Master loudspeaker.
Icon
Menu
Description
Comment
Link
WPS Setup
Enable WPS Setup Mode
Also press WPS on your
Router to connect WiFi
-
Pairing
Enable Pairing Mode
For Pairing Master and
Slave
-
Cable Link
Turn on SPDIF output for
master and slave link via cable
Only necessary when using
the SPDIF cable for HiRes
Playback.
-
Channel
Assigns left or right channel to
the speaker
The Slave Speaker will be
automatically assigned to
the opposite channel.
Y
Input Monitor
Shows which Input is detected
as active
Input Priority
Change the priority for
automatically selecting the
inputs
-
Reset
Reset the WiFi receiver
Speaker Settings (Bass,
Position, …) remain
unchanged
-
Exit
Exit the Sub-menu
-
This manual suits for next models
10
Table of contents
Other audium Speakers manuals
