AVer CP3 Series User manual

©2018 AVer Information Inc. All rights reserved.
Package Contents
AVer CP3 series
(65”, 75”, 86”) Wall mountStylus pens Antennas
Power cable USB cable HDMI cable RS232 convert cable
Remote controller
Wall Mount Kit Specification (VESA)
Size VESA Spec. Standard screw Quantity
65” 500 x 400mm M6 x 16 mm 4
75” 600 x 400mm M8 x 20 mm 4
86” 700 x 400mm M8 x 20 mm 4
MINI PC Mount Specification (VESA)
Size VESA Spec. Allowable PC installation space
after wall mounting
65” 75 x 75mm 100 x 100mm 59mm
75” 75 x 75mm 100 x 100mm 67mm
86” 75 x 75mm 100 x 100mm 75mm
[Note] Screws are included on panel.
65” 86”75”
59mm
67mm
75mm
Terminal Interface Overview
12 3
AVer CP3 Series
Quick Start Guide
Please read this guide fully before using the IFP
Thank you for purchasing the AVer CP3 series IFP. This guide will help you to quickly setup
your IFP devices and ready for use.
Item Description
1 HDMI IN port
2 TOUCH-USB port
3 USB 3.0 port

Terminal Interface Overview (Continue)
12 34 5
Side
*Bypass internal Android system
12 345 6 78 910
12131415 1116
OPS I/O
Item Description Item Description
1 Reset button* 9 USB 3.0 port
2 LAN port 10 Status LED
3 Touch-USB port 11 Port for Antenna
4 HDMI 1 Input port 12 Micro SD slot
5 Touch-USB port 13 RS232 port**
6 VGA Input port 14 MIC IN port
7 Type C AV-IN/Touch port*** 15 Audio IN ort
8 USB 2.0 port 16 Port for Antenna
**Use RS232 convert cable for RS232 connection
***Please use USB 3.1 Gen 2 Type-C (10Gps) cable. Ex. Thunderbolt 3 Type-C to Type-C cable
Pen Tray
Pen tray for stylus pens
Power Plug and Power Switch
65”
1
2
86”
1
2
75”
1
2
Control Panel Overview
123 4 5
Item Description
1 HDMI2-IN port*
2 TOUCH-USB port
3 Audio Out port
4 SPDIF OUT port
5 Port for Engineer using
Item Description
1 Mute
2 Volume down
3 Volume up
4 Power on/off
5 Ambient Sensor
Item Description
1 Power plug
2 Power switch

Connection to the Laptop/PC
HDMI cable
Laptop
USB cable
Laptop
USB cable
HDMI cable
Front panelSide
OR
Audio cable
Laptop
USB cable
HDMI cable
USB cable
VGA cable
or
Type-C to
Type-C cable
or
OPS
LAN Connection
RJ-45 cable
RJ-45 Wall jack Router/Switch
or
OPS
HDMI and USB Connection
Front Panel
Media Player
OPS

Remote Controller
(1) (17)
(18)
(19)
(21)
(20)
(22)
(23)
(24)
(26)
(2)
(3)
(4)
(6)
(7)
(8)
(10)
(12)
(14)
(15)
(5)
(29)(28)(27)
(25)
(13)
(11)
(16)
(9)
Name Function
(1) Call out power menu. Use▼and ▲
button to select “SCREEN LOCK”,
“RESTART or “POWER DOWN”. After
selecting, press button to
confirm.
(2) Numeric Pad Use to enter numeric.
(3) Call out Screen Share application.
(4) Back to previous page or selection.
(5) Confirm the selection.
(6) ▲▼ Use these buttons to navigate through
the selections.
(7) Adjust the brightness of the screen.
(8) Volume +/- Adjust volume of the system.
(9) HDMI Switch to the screen of the HDMI
connection.
(10) SOURCE Call out the input source menu.
(11) TYPE-C Switch to input screen of the Type-C
connection.
(12) VGA Switch to input screen of the VGA
connection.
(13) INFO Call out information screen of the
system.
(14) Call out the Time application.
(15) Play video in the system.
(16) Lock screen immediately.
(17) Switch to mute mode.
(18) Freeze the screen temporary. While
the screen is freeze, the system
functions are not available. Press
button again to un-freeze.
(19) Return to main screen.
Name Function
(20) Adjust the brightness of the screen.
(21) Page /Page Can be used when operating the whiteboard or playing PPT files,
return to the previous page or to the next page.
(22) HDMI1/HDMI2 Switch to the input screen of the HDMI1/HDMI2 connection.
(23) SCREEN SHOT Snapshot the screen and save on the system.
(24) F1 No function.
(25) Play PPT file.
(26) Call out APP list and use▲,▼,, button to select the APP
application, press to confirm the selection.
(27) Call out setting page.
(28) Stop play video in playback application.
(29) Temporary stop to play video in playback application.
WiFi Setup
When the IFP device first boot up, you can either plug in an RJ45 Ethernet cable to the wall outlet or
enable WiFi accessing. Using the Ethernet typically enhances the user experience due to less
complication from WiFi congestions.
1. Tab the “Settings” icon to bring out the
Settings page.
2. In Settings page, tab “Network”.

WiFi Setup (Continue)
3. Set WiFi to “On”.
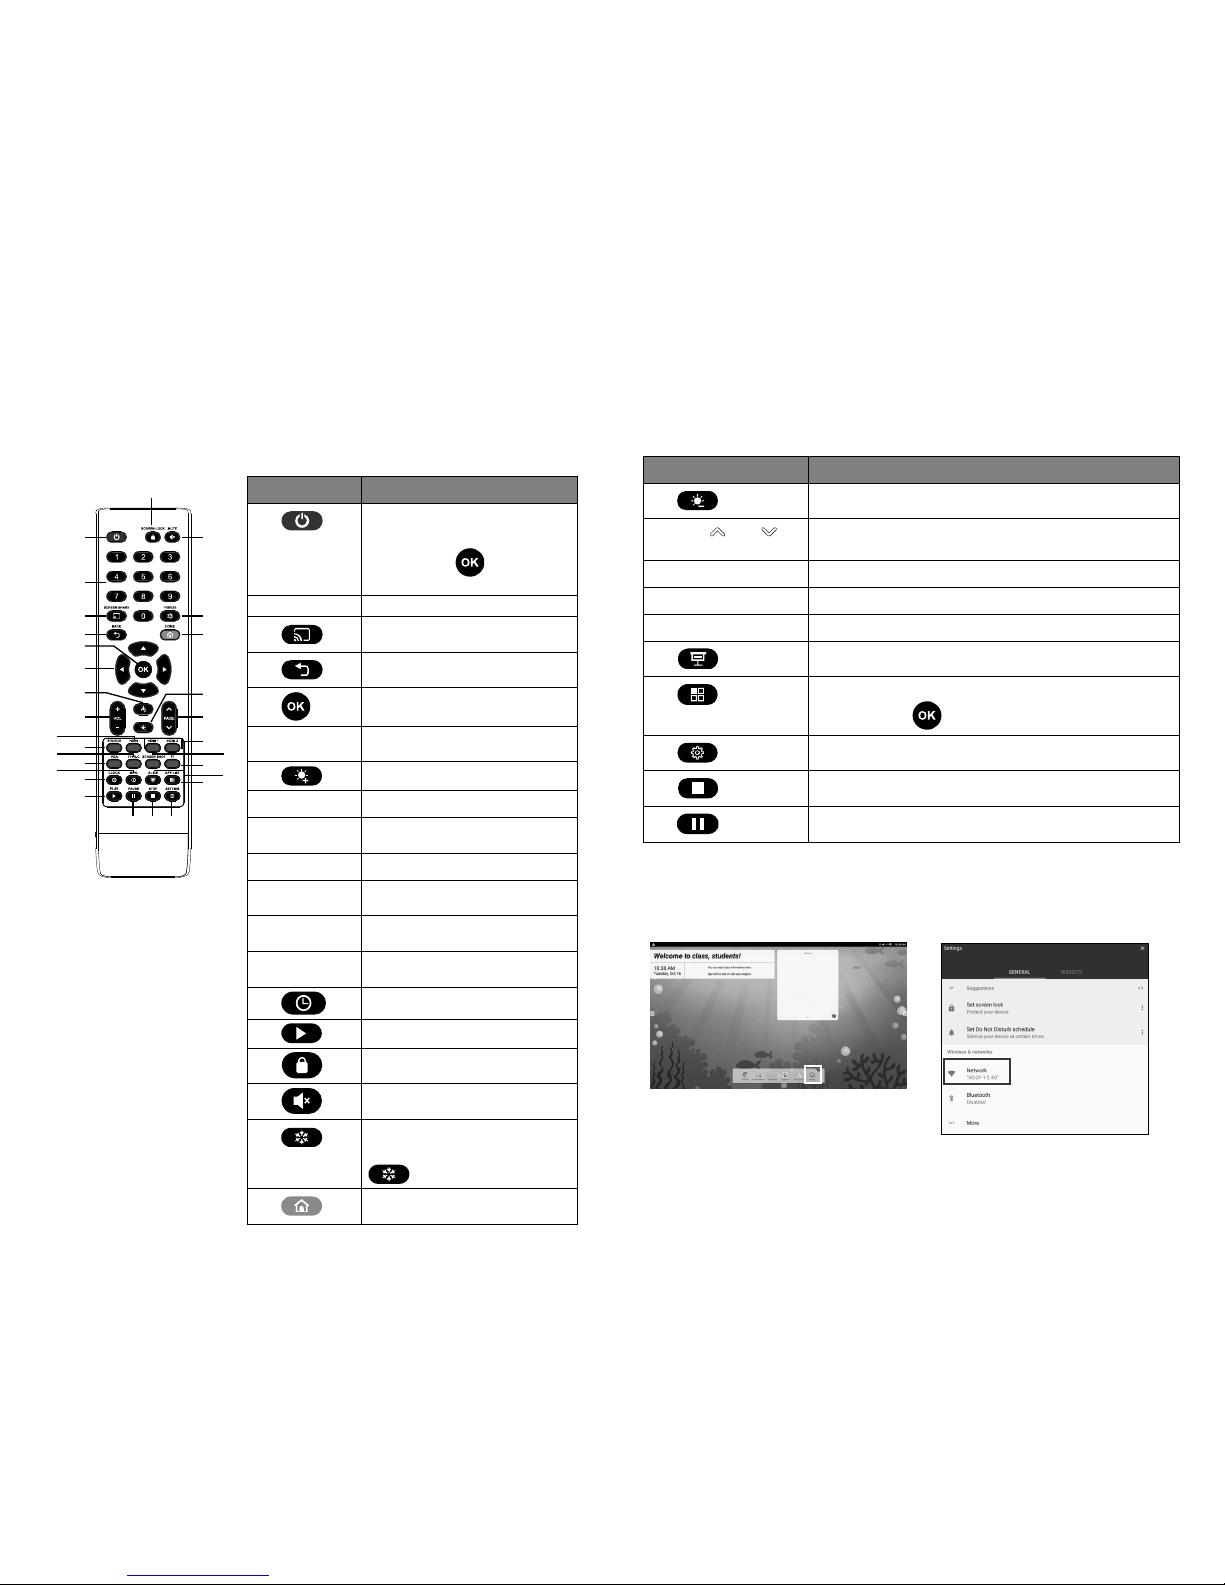
4. Select available Wi-Fi networks to connect to.
Date and Time Setup
1. Tab the “Settings” icon to bring out the
Settings page.
2. In Settings page, tab “Date & Time”.
3. You can select “date”, “Time”, “time zone”
and “time format” to setup.
4. Also, you can select “Automatic date & time”
to adjust date and time through the network
time server.
Power Off
While in power on status, press power button on the AVer CP3 unit and the power off message is displayed
on screen; select “Power Down” to turn off the AVer CP3 system.
User Manual, FAQ, Training videos, Warranty
For more product information, please visit:
US:http://www.averusa.com/classroom-technology/support/cp-b
Global:http://presentation.aver.com/download-center/07
For more support, please call AVer below:
For US: Tel: 1-877-528-7824 | Email: support.usa@aver.com
For Global: Tel: +886-2-2269-8535 | http://www.aver.com/Technical-Support
Federal Communication Commission Interference Statement
NOTE: This equipment has been tested and found to comply with the limits for a Class A digital device, pursuant to part 15
of the FCC Rules. These limits are designed to pro-vide reasonable protection against harmful interference when the
equipment is operated in a commercial environment. This equipment generates, uses, and can radiate radiofrequency
energy and, if not installed and used in accordance with the instruction manual, may cause harmful interference to radio
communications. Operation of this equipment in a residential area is likely to cause harmful interference in which case the
user will be required to correct the interference at his own expense.
FCC Caution: Any changes or modifications not expressly approved by the party responsible for compliance could void the
user's authority to operate this equipment.
This device complies with part 15 of the FCC Rules.
Operation is subject to the following two conditions:
(1) This device may not cause harmful interference, and
(2) this device must accept any interference received, including interference that may cause undesired operation.
Warning: This is a class A product. In a domestic environment this product may cause radio interference in which case the
user may be required to take adequate measures.
©2018 AVer Information Inc. All rights reserved.
All rights of this object belong to AVer Information Inc. Reproduced or transmitted in any form or by any means without the
prior written permission of AVer Information Inc. is prohibited. All information or specifications are subject to change without
prior notice.
IC: 6100A-CM389NF CCAI14LP1670T2
FCC ID: TLZ-CM389NF
Table of contents
Other AVer Monitor manuals